Category: Appetizers & Sauces

  • Aperol Recipe

    Aperol Recipe

    This bright, citrusy Aperol drizzle loaf is my favourite way to bring that Aperol Spritz flavour into a bake that feels effortless but tastes special. The crumb is soft and buttery with a gentle orange bitterness, then it gets soaked with a quick Aperol syrup so every slice stays moist. It’s an easy, beginner-friendly recipe with simple mixing and no fancy equipment. Total time is about 1 hour 15 minutes, including a short cool before glazing.

    Ingredients

    For the orange Aperol loaf

    • 180g unsalted butter, softened
    • 180g caster sugar
    • 3 large eggs, room temperature
    • 1 tsp vanilla extract
    • Zest of 2 oranges
    • 180g self-raising flour
    • 1 tsp baking powder
    • Pinch of fine salt
    • 60ml Aperol
    • 60ml whole milk

    For the Aperol soak syrup

    • 60g caster sugar
    • 60ml Aperol
    • 2 tbsp fresh orange juice

    For the glaze and topping

    • 120g icing sugar
    • 2–3 tbsp fresh orange juice
    • 1 tbsp Aperol
    • Optional: thin orange slices, chopped pistachios, or candied peel

    How to Make This Aperol Drizzle Loaf

    • Prepare the oven: Preheat the oven to 180°C (160°C fan) or 350°F. Grease and line a 900g (2lb) loaf tin with baking parchment, leaving a little overhang so you can lift the cake out easily.
    • Cream butter and sugar: In a large bowl, beat the softened butter and caster sugar for 2 to 3 minutes until pale and fluffy. This is what gives the loaf a light, even crumb.
    • Add eggs, flavourings, and zest: Beat in the eggs one at a time, mixing well after each addition. Stir in the vanilla extract and orange zest. If the mixture looks a little split, add 1 tablespoon of the flour and carry on.
    • Mix the batter: Add the self-raising flour, baking powder, and salt. Fold gently until you can only just see a few streaks of flour, then pour in the Aperol and milk and fold again until smooth. Stop as soon as it’s combined to avoid a dense loaf.
    • Bake: Scrape the batter into the tin and level the top. Bake for 45 to 55 minutes, or until golden and a skewer inserted into the centre comes out clean. If it’s browning too quickly, loosely cover the top with foil for the last 10 minutes.
    • Cool briefly: Let the cake cool in the tin for 10 minutes, then lift it onto a wire rack (keep the parchment under it to catch syrup drips).
    • Make and add the syrup: Add the caster sugar, Aperol, and orange juice to a small saucepan. Warm over medium heat, stirring until the sugar dissolves, then simmer for 1 to 2 minutes. Poke the warm cake all over with a skewer, then slowly brush (or spoon) the syrup across the top, letting it soak in.
    • Glaze and assemble: Once the cake is completely cool, whisk the icing sugar with 2 tablespoons orange juice and 1 tablespoon Aperol until thick but pourable. Add a tiny splash more juice if needed. Drizzle over the loaf, then finish with orange slices, pistachios, or candied peel if you like.

    How to Make This Aperol Drizzle Loaf

    Tips

    Why did my batter curdle after adding the eggs?

    Cold eggs are usually the culprit. Use room-temperature eggs, and add them one at a time. If it starts to split, beat in 1 tablespoon of the measured flour and it will come back together once the dry ingredients are added.

    How do I stop the loaf from turning out dry?

    Measure carefully, avoid overbaking, and don’t overmix once the flour goes in. The warm Aperol syrup is also your insurance policy here, it sinks in and keeps the crumb moist for days.

    Can I make it less bitter or more “Spritz-like”?

    For less bitterness, reduce the orange zest to 1 orange and swap half the Aperol in the syrup for orange juice. For a stronger Spritz vibe, keep the zest at 2 oranges and add a pinch of salt to the glaze to sharpen the citrus flavour.

    What’s the easiest way to get neat slices?

    Let the glaze set for about 20 minutes, then slice with a sharp serrated knife. Wipe the blade between cuts for clean edges.

    Serving Suggestions

    • With lightly whipped cream or crème fraîche
    • Alongside fresh berries or macerated strawberries
    • As a simple dessert with vanilla ice cream
    • With espresso, cappuccino, or an iced coffee

    Storage

    Room temperature

    Store in an airtight container for up to 3 days. If your kitchen is warm, keep it in the coolest spot and slice as needed to prevent it drying out.

    Refrigerator

    Refrigerate for up to 5 days in a sealed container. Bring slices to room temperature before serving for the softest texture.

    Freezing

    Freeze the unglazed loaf (or individual slices) for up to 2 months. Wrap well in cling film, then foil. Defrost overnight at room temperature, then glaze fresh for the best finish.

    Nutrition

    • Calories: 285 kcal
    • Carbohydrates: 38g
    • Protein: 4g
    • Fat: 13g
    • Saturated fat: 8g
    • Sodium: 180mg

    Nutrition values are estimates and will vary depending on ingredients and portion size.

    FAQs

    Can I make this loaf alcohol-free?

    Yes. Replace the Aperol in the cake with the same amount of orange juice, and make the syrup with orange juice plus a splash of water instead of Aperol. You’ll still get the bright orange flavour, just without the bittersweet Aperol note.

    Does the alcohol bake out of the cake?

    Not completely. Some alcohol will evaporate during baking, but the syrup and glaze are added after baking, so they will still contain alcohol. If you need it alcohol-free, use the swaps in the first FAQ.

    Can I bake this as a traybake instead of a loaf?

    Yes. Bake in a lined 20cm square tin (or similar) and start checking at 25 minutes. Once a skewer comes out clean, add the syrup while warm and glaze when cool.

    What can I use instead of self-raising flour?

    Use 180g plain flour plus 2 tsp baking powder. Whisk the dry ingredients together before adding so the raising agent is evenly distributed.

    Why did my loaf sink in the middle?

    This is usually underbaking or opening the oven door too early. Bake until a skewer comes out clean, and try not to open the door in the first 35 minutes. Also make sure your baking powder is fresh.

    Can I make the glaze thicker or thinner?

    Absolutely. For a thicker, more opaque glaze, add a bit more icing sugar. For a thinner drizzle, add orange juice a teaspoon at a time until it flows easily off the whisk.


  • Espresso Martini Recipe

    Espresso Martini Recipe

    This espresso martini is a chilled, silky cocktail with a glossy coffee foam and a balanced mix of bold espresso, smooth vodka, and sweet coffee liqueur. The flavour is deep and roasty with just enough sweetness to round everything out, and the texture is creamy on top thanks to a proper shake. It’s an easy, beginner-friendly drink that feels special enough for dinner parties. Total time is about 10 minutes, including chilling the glass and cooling the espresso.

    Ingredients

    For the espresso base

    • 30ml (1 fl oz) freshly brewed espresso (1 shot), cooled for 3 to 5 minutes
    • Ice, for shaking

    For the cocktail

    • 50ml (1 2/3 fl oz) vodka
    • 25ml (3/4 fl oz) coffee liqueur (such as Kahlúa)
    • 10ml (2 tsp) simple syrup (adjust to taste)
    • Pinch of fine salt (optional, helps the coffee flavour pop)

    For garnish

    • 3 coffee beans

    How to Make Espresso Martini

    • Prepare the oven: No oven needed for this recipe. Instead, chill your martini glass in the freezer for 5 to 10 minutes so the drink stays icy cold and the foam sits neatly on top.
    • Baking: This is your “heat step.” Pull 1 fresh shot of espresso (about 30ml), then let it cool for a few minutes. Using espresso that’s piping hot will melt the ice too fast and thin the cocktail.
    • Mixing: Fill a cocktail shaker about halfway with ice. Add the cooled espresso, vodka, coffee liqueur, simple syrup, and a tiny pinch of salt if using.
    • Cooling: Shake hard for 15 to 20 seconds. You’re not just chilling the drink, you’re building that signature creamy coffee foam. The shaker should feel very cold in your hands.
    • Assembling: Double strain into your chilled martini glass (pour through the shaker strainer and a fine mesh strainer). Garnish with 3 coffee beans and serve straight away while the foam is thick and glossy.
    How to Make Espresso Martini

    Tips for the Best Espresso Martini

    Why is my espresso martini not foamy?

    Foam comes from a strong shake and fresh espresso (or strong coffee) that still has some natural oils. Shake longer, use plenty of ice, and avoid weak, watery coffee. If your coffee is very cold and flat, the foam can be thinner, so chilling the espresso briefly rather than refrigerating it for hours often helps.

    How do I stop it tasting watery?

    Watery espresso martinis usually come from espresso that’s too hot (melts ice fast) or shaking too long with small, already-melting ice. Cool the espresso for a few minutes first, and use fresh, solid ice cubes.

    How can I make it less sweet (or sweeter)?

    For less sweetness, reduce the simple syrup or skip it entirely, especially if your coffee liqueur is on the sweet side. For a sweeter drink, add an extra 5ml (1 tsp) syrup, shake again, and taste.

    What vodka works best?

    A smooth, neutral vodka lets the espresso shine. You do not need anything fancy, but avoid strongly flavoured vodkas unless you want a twist (vanilla vodka can be lovely with coffee).

    Can I make this without a cocktail shaker?

    You can use a large jar with a tight lid in a pinch, but a shaker is easier and safer. The key is a vigorous shake to build foam, so choose something sturdy and leak-proof.

    Serving Suggestions

    • Serve alongside tiramisu, chocolate mousse, or biscotti.
    • Pair with salty snacks like toasted nuts or parmesan crisps to balance the sweetness.
    • Make a mini “espresso martini flight” with classic, vanilla, and salted caramel versions.

    Storage

    Room temperature

    Not recommended. This cocktail is best served ice-cold, and coffee flavours taste flat and harsh once warm.

    Refrigerator

    You can pre-batch the vodka, coffee liqueur, and simple syrup in a sealed bottle and refrigerate for up to 3 days. For the best foam, add freshly brewed espresso (cooled for a few minutes) right before shaking and serving. Once shaken, serve immediately because the foam will start to fade within minutes.

    Freezing

    Freezing isn’t ideal for a finished espresso martini because the texture changes and the foam won’t hold. If you want it extra cold, chill your glass and place the mixed (unshaken) ingredients in the freezer for 15 minutes, then shake with ice and serve.

    Nutrition

    • Calories: 220 kcal
    • Carbohydrates: 13 g
    • Protein: 1 g
    • Fat: 0 g
    • Saturated fat: 0 g
    • Sodium: 15 mg

    Disclaimer: Nutrition values are estimates and will vary depending on the brands used and how much syrup you add.

    FAQs

    Can I make an espresso martini without coffee liqueur?

    Yes. Replace the coffee liqueur with 20ml simple syrup plus 5ml (1 tsp) coffee extract, or use a coffee syrup you like. The flavour will be less complex than a classic version, but it still works well.

    How do I make an espresso martini less sweet?

    Skip the simple syrup and use a slightly larger espresso shot (up to 40ml) for a more bitter, coffee-forward drink. You can also choose a less-sweet coffee liqueur if available.

    Can I use cold brew instead of espresso?

    Yes. Use 30ml cold brew concentrate (not ready-to-drink cold brew) for a similar strength. The foam may be a little lighter than with fresh espresso, so shake hard and strain into a well-chilled glass.

    Why do you double strain an espresso martini?

    Double straining catches tiny ice shards so the drink stays smooth and the foam looks clean and velvety on top. It also helps the cocktail stay cold without extra dilution.

    How much caffeine is in an espresso martini?

    It depends on your espresso and how it’s pulled, but a single shot typically contains around 60–80mg caffeine. If you’re sensitive to caffeine, use decaf espresso.

    Can I batch espresso martinis for a party?

    You can batch the spirits and syrup ahead, then brew and cool espresso close to serving time. Shake each drink with ice to create foam, or shake a larger batch in two rounds so the shaker isn’t overcrowded.

    Recipe Card

  • Tartar Sauce Recipe

    Tartar Sauce Recipe

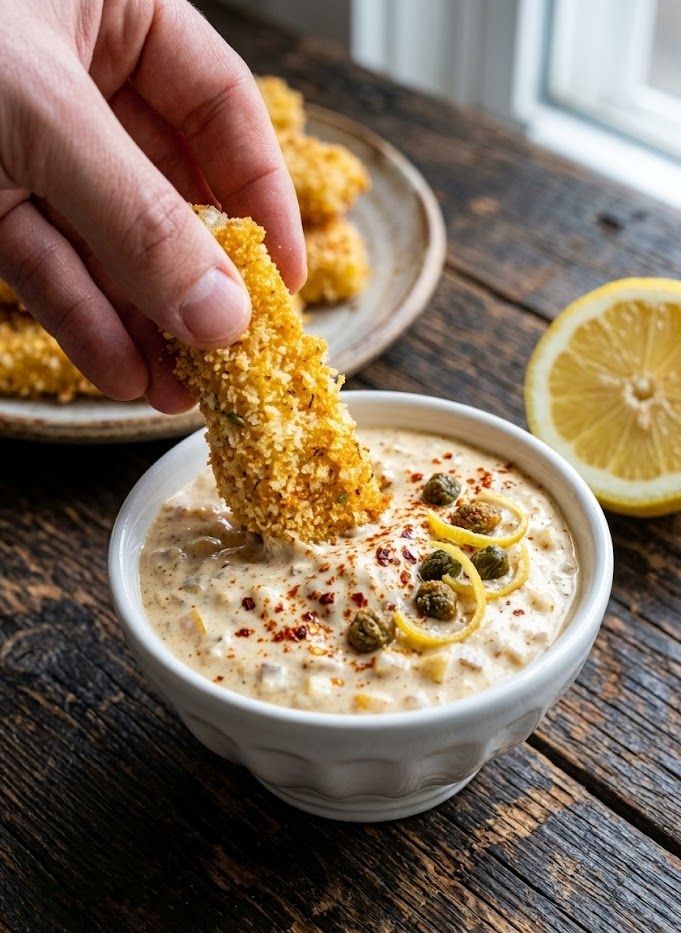
    This tartar sauce recipe is creamy, tangy, and packed with fresh flavor, making it the perfect companion for fish, seafood, chips, and sandwiches. Made with mayonnaise, pickles, capers, lemon juice, and herbs, this homemade sauce tastes far fresher than any store-bought version. It has a smooth, rich texture with little bursts of crunch and brightness in every spoonful. Best of all, this easy tartar sauce comes together in just 10 minutes with no cooking required.

    Ingredients

    For the Tartar Sauce

    • 1 cup mayonnaise
    • 2 tablespoons finely chopped dill pickles or gherkins
    • 1 tablespoon capers, drained and finely chopped
    • 1 tablespoon finely chopped fresh parsley
    • 1 teaspoon Dijon mustard
    • 1 tablespoon fresh lemon juice
    • 1 teaspoon pickle juice
    • 1 small garlic clove, finely grated
    • ¼ teaspoon salt
    • ¼ teaspoon freshly ground black pepper

    Optional Add-Ins

    • 1 teaspoon finely chopped fresh dill
    • 1 teaspoon finely chopped chives
    • A small pinch of paprika
    • A dash of hot sauce for heat

    Preparation Time

    • Prep Time: 10 minutes
    • Total Time: 10 minutes
    • Servings: 6 servings

    How to Make tartar sauce recipe

    • Prepare the ingredients: Finely chop the pickles, capers, parsley, dill, and chives if using. Keeping the pieces small helps the sauce stay smooth and balanced.
    • Add the mayonnaise: Place the mayonnaise into a medium mixing bowl. Use full-fat mayonnaise for the richest texture and flavor.
    • Mix in the flavorings: Add the chopped pickles, capers, parsley, Dijon mustard, lemon juice, pickle juice, and grated garlic to the bowl.
    • Season the sauce: Sprinkle in the salt and black pepper. Add optional dill, chives, paprika, or hot sauce if desired.
    • Stir until combined: Mix everything together thoroughly with a spoon until the tartar sauce is creamy and evenly blended.
    • Chill before serving: Cover the bowl and refrigerate the sauce for at least 20 minutes before serving. This helps the flavors develop and taste even better.
    • Serve and enjoy: Spoon the tartar sauce into a serving bowl and enjoy with fish, chips, crab cakes, fried shrimp, sandwiches, or roasted vegetables.
    How to Make tartar sauce recipe

    Tips for the Best tartar sauce recipe

    How do I make tartar sauce taste fresher?

    Fresh lemon juice and freshly chopped herbs make a huge difference. Avoid bottled lemon juice if possible, as it can taste overly sharp.

    Can I make tartar sauce smoother?

    Yes, chop the pickles and capers very finely. Smaller pieces create a creamier texture that spreads easily.

    Why should I chill tartar sauce before serving?

    Resting the sauce in the refrigerator allows the flavors to blend together properly, creating a more balanced and flavorful result.

    What mayonnaise works best?

    Use a thick, full-fat mayonnaise for the richest and creamiest tartar sauce. Homemade mayonnaise also works beautifully.

    Can I make this sauce healthier?

    You can replace part of the mayonnaise with Greek yogurt for a lighter version while still keeping a creamy texture.

    Serving Suggestions

    • Serve with battered fish and chips
    • Spread onto fish sandwiches and burgers
    • Pair with crab cakes or fried shrimp
    • Use as a dip for roasted potatoes
    • Spoon over grilled salmon or cod
    • Serve alongside seafood platters

    Storage

    Room Temperature

    Because tartar sauce contains mayonnaise, it should not sit at room temperature for more than 2 hours.

    Refrigerator

    Store the sauce in an airtight container in the refrigerator for up to 5 days. Stir before serving for the best texture.

    Freezing

    Freezing is not recommended because mayonnaise-based sauces can separate and become watery after thawing.

    Nutrition

    • Calories: 140 kcal
    • Carbohydrates: 2g
    • Protein: 1g
    • Fat: 15g
    • Saturated Fat: 2g
    • Sodium: 310mg

    Nutrition values are estimates and may vary depending on the exact ingredients used.

    FAQs

    Can I make tartar sauce ahead of time?

    Yes, tartar sauce can be made up to 2 days in advance. In fact, chilling it overnight improves the flavor.

    What can I use instead of capers?

    You can replace capers with extra chopped pickles or a small amount of green olives for a similar salty flavor.

    Can I use dried herbs instead of fresh herbs?

    Yes, but use smaller amounts since dried herbs are more concentrated in flavor.

    Is homemade tartar sauce better than store-bought?

    Homemade tartar sauce tastes fresher, creamier, and more flavorful because you can adjust the ingredients to your preference.

    tartar sauce recipe

    Recipe by Milli RoseCourse: SauceCuisine: AmericanDifficulty: Easy
    Servings

    6

    servings
    Prep time

    10

    minutes
    Cooking timeminutes
    Total time

    10

    minutes
    Calories

    140

    kcal

    Creamy homemade tartar sauce made with mayonnaise, pickles, capers, lemon juice, and fresh herbs. Perfect for seafood, fish and chips, sandwiches, and dipping.

    Ingredients

    • 1 cup mayonnaise

    • 2 tablespoons finely chopped dill pickles or gherkins

    • 1 tablespoon capers, drained and finely chopped

    • 1 tablespoon finely chopped fresh parsley

    • 1 teaspoon Dijon mustard

    • 1 tablespoon fresh lemon juice

    • 1 teaspoon pickle juice

    • 1 small garlic clove, finely grated

    • ¼ teaspoon salt

    • ¼ teaspoon freshly ground black pepper

    Directions

    • Finely chop the pickles, capers, parsley, and any optional herbs.
    • Place the mayonnaise into a medium mixing bowl.
    • Add the chopped pickles, capers, parsley, Dijon mustard, lemon juice, pickle juice, and garlic.
    • Season with salt and black pepper.
    • Stir everything together until smooth and creamy.
    • Cover and refrigerate for at least 20 minutes before serving.
    • Serve chilled with fish, seafood, chips, or sandwiches.

    Notes

    • Use full-fat mayonnaise for the creamiest texture.
    • Fresh lemon juice gives the best flavor.
    • Store in the refrigerator for up to 5 days.
  • Shawarma Sauce Recipe

    Shawarma Sauce Recipe

    If you love the rich, creamy flavor that makes shawarma wraps so irresistible, this homemade shawarma sauce recipe is exactly what you need. Smooth, garlicky, tangy, and packed with Middle Eastern-inspired flavor, this easy sauce transforms grilled chicken, beef, lamb, or vegetables into something truly special. The texture is silky and creamy with a bold savory finish that works beautifully as a dip, drizzle, or sandwich spread. Best of all, this beginner-friendly recipe comes together in just 10 minutes using simple pantry ingredients.

    Shawarma Sauce Recipe Ingredients

    For the Creamy Sauce Base

    • 1 cup mayonnaise
    • 1/2 cup plain Greek yogurt
    • 4 garlic cloves, finely grated
    • 2 tablespoons fresh lemon juice
    • 1 tablespoon white vinegar

    For the Seasoning

    • 1 teaspoon ground cumin
    • 1/2 teaspoon paprika
    • 1/2 teaspoon salt
    • 1/4 teaspoon black pepper

    For Adjusting the Texture

    • 1 to 2 tablespoons cold water, as needed

    How to Make Shawarma Sauce Recipe

    • Prepare the ingredients: Finely grate the garlic cloves and squeeze fresh lemon juice. Using fresh garlic and lemon gives the sauce its authentic bold flavor.
    • Mix the creamy base: Add the mayonnaise and Greek yogurt to a medium bowl. Stir until smooth and fully blended.
    • Add the flavorings: Stir in the grated garlic, lemon juice, and white vinegar. Mix well so the garlic distributes evenly throughout the sauce.
    • Season the sauce: Add cumin, paprika, salt, and black pepper. Whisk thoroughly until the sauce becomes creamy and smooth with no lumps remaining.
    • Adjust the consistency: If you want a thinner shawarma sauce for drizzling over wraps or salads, add cold water one tablespoon at a time until you reach your preferred texture.
    • Chill before serving: Cover the bowl and refrigerate the sauce for at least 30 minutes. This resting time allows the garlic and spices to blend beautifully into the sauce.
    • Serve and enjoy: Spoon the sauce over shawarma wraps, grilled meats, fries, burgers, or roasted vegetables.
    How to Make Shawarma Sauce Recipe

    Tips for the Best Shawarma Sauce

    How do I make the sauce more garlicky?

    Add an extra clove of garlic or let the sauce chill longer before serving. The garlic flavor becomes stronger as it rests.

    Can I make shawarma sauce without mayonnaise?

    Yes, you can replace the mayonnaise with extra Greek yogurt for a lighter version. The sauce will be tangier and slightly less creamy.

    Why is my sauce too thick?

    Simply whisk in a little cold water or extra lemon juice until the sauce reaches your preferred consistency.

    How can I make the sauce spicy?

    Add a pinch of cayenne pepper, chili flakes, or a small amount of hot sauce for extra heat.

    What type of yogurt works best?

    Plain full-fat Greek yogurt gives the richest texture and prevents the sauce from becoming watery.

    Serving Suggestions

    • Drizzle over chicken shawarma wraps
    • Serve alongside grilled kebabs
    • Use as a dip for fries or roasted potatoes
    • Spread inside pita sandwiches
    • Spoon over rice bowls and salads
    • Pair with grilled vegetables

    Storage Instructions

    Room Temperature

    Because the sauce contains mayonnaise and yogurt, it should not sit at room temperature for more than 2 hours.

    Refrigerator

    Store the sauce in an airtight container in the refrigerator for up to 5 days. Stir before serving if any separation occurs.

    Freezing

    Freezing is not recommended because the mayonnaise and yogurt can separate after thawing, affecting the texture.

    Nutrition

    • Calories: 95 kcal
    • Carbohydrates: 2g
    • Protein: 1g
    • Fat: 10g
    • Saturated Fat: 2g
    • Sodium: 210mg

    Nutrition values are estimates and may vary depending on the exact ingredients used.

    FAQs

    What is shawarma sauce made of?

    Traditional shawarma sauce is usually made with mayonnaise, yogurt, garlic, lemon juice, and warm spices such as cumin and paprika.

    Can I make shawarma sauce ahead of time?

    Yes, shawarma sauce actually tastes better after a few hours in the refrigerator because the flavors have time to blend together.

    How long does homemade shawarma sauce last?

    Stored in an airtight container in the refrigerator, homemade shawarma sauce stays fresh for up to 5 days.

    Is shawarma sauce spicy?

    This version is mild and creamy, but you can easily make it spicy by adding cayenne pepper or chili sauce.

    Shawarma Sauce Recipe

    Recipe by Milli RoseCourse: SauceCuisine: Middle EasternDifficulty: Easy
    Servings

    8

    servings
    Prep time

    10

    minutes
    Cooking timeminutes
    Total time

    10

    minutes
    Calories

    95

    kcal

    Creamy homemade shawarma sauce made with garlic, yogurt, mayonnaise, and lemon juice. Perfect for wraps, grilled meats, fries, and kebabs.

    Ingredients

    • 1 cup mayonnaise

    • 1/2 cup plain Greek yogurt

    • 4 garlic cloves, finely grated

    • 2 tablespoons fresh lemon juice

    • 1 tablespoon white vinegar

    • 1 teaspoon ground cumin

    • 1/2 teaspoon paprika

    • 1/2 teaspoon salt

    • 1/4 teaspoon black pepper

    • 2 tablespoons cold water, if needed

    Directions

    • Add mayonnaise and Greek yogurt to a medium mixing bowl.
    • Grate the garlic finely and stir it into the bowl along with lemon juice and white vinegar.
    • Season with cumin, paprika, salt, and black pepper.
    • Whisk thoroughly until smooth, creamy, and evenly combined.
    • Add cold water a little at a time if you prefer a thinner consistency for drizzling.
    • Cover and refrigerate for at least 30 minutes before serving for the best flavor.

    Notes

    • Fresh garlic gives the strongest flavor.
    • Refrigerating the sauce improves the taste and texture.
    • Add extra lemon juice for a brighter, tangier finish.
  • Crab Cake Sauce Recipe

    Crab Cake Sauce Recipe

    This crab cake sauce recipe is the perfect creamy, tangy companion for crispy homemade crab cakes. Made with simple pantry ingredients, this smooth and flavorful sauce has just the right balance of richness, acidity, and gentle spice to complement delicate seafood beautifully. It takes only minutes to prepare, making it an easy finishing touch for weeknight dinners, seafood platters, or party appetizers. Whether you prefer classic Maryland-style crab cakes or lighter baked versions, this versatile sauce instantly elevates every bite.

    What Is Crab Cake Sauce and How Does It Taste?

    Crab cake sauce is a creamy seafood dipping sauce traditionally served alongside crispy crab cakes. It combines mayonnaise with mustard, lemon juice, and seasonings to create a smooth, velvety texture that perfectly balances the sweet richness of crab meat.

    The flavor is creamy and tangy with a subtle sharpness from Dijon mustard and a bright citrus finish from fresh lemon juice. Worcestershire sauce adds savory depth while paprika and hot sauce bring gentle warmth without overpowering the seafood. The result is a silky, flavorful sauce that tastes fresh, rich, and restaurant-quality while remaining incredibly easy to make at home.

    Crab Cake Sauce Recipe Ingredients

    Main Sauce Ingredients

    • 1 cup mayonnaise
    • 1 tablespoon Dijon mustard
    • 1 tablespoon lemon juice
    • 1 teaspoon Worcestershire sauce
    • 1 teaspoon Old Bay seasoning
    • ½ teaspoon smoked paprika
    • 1 teaspoon hot sauce
    • 1 tablespoon finely chopped parsley
    • 1 small garlic clove, finely grated
    • ¼ teaspoon sea salt
    • ¼ teaspoon black pepper

    Optional Garnishes

    • Lemon wedges
    • Extra parsley
    • Additional paprika for sprinkling

    Preparation and Mixing Time

    • Prep Time: 5 minutes
    • Mixing Time: 2 minutes
    • Total Time: 7 minutes
    • Servings: 8 servings

    How to Make Crab Cake Sauce Recipe

    • Prepare the ingredients: Measure all the ingredients before starting so the sauce comes together quickly and evenly. Finely chop the parsley and grate the garlic for the smoothest texture.
    • Combine the base: Add the mayonnaise, Dijon mustard, lemon juice, and Worcestershire sauce to a medium mixing bowl. Stir until completely smooth and creamy.
    • Add the seasonings: Sprinkle in the Old Bay seasoning, smoked paprika, salt, black pepper, and hot sauce. Mix thoroughly so the flavors are evenly distributed throughout the sauce.
    • Finish with fresh ingredients: Add the grated garlic and chopped parsley. Stir gently until fully combined and the herbs are evenly mixed into the sauce.
    • Chill before serving: Cover the bowl and refrigerate the sauce for at least 20 minutes before serving. This resting time allows the flavors to blend together and develop a richer taste.
    • Serve and enjoy: Spoon the chilled crab cake sauce into a serving bowl and serve alongside warm crab cakes, shrimp, or seafood appetizers.
    How to Make Crab Cake Sauce Recipe

    Helpful Tips for the Best Sauce

    How do I make the sauce extra creamy?

    Use full-fat mayonnaise for the richest texture and smoothest consistency. Reduced-fat mayonnaise can make the sauce thinner and less flavorful.

    Can I make the sauce spicier?

    Yes, simply add extra hot sauce or a pinch of cayenne pepper for more heat without changing the creamy texture.

    Why should the sauce be chilled before serving?

    Resting the sauce in the refrigerator allows the flavors to meld together properly, giving the finished sauce a fuller and more balanced taste.

    What is the best lemon juice to use?

    Fresh lemon juice provides the brightest flavor and prevents the sauce from tasting overly sharp or artificial.

    Can I use this sauce for other seafood?

    Absolutely. This sauce pairs beautifully with shrimp, salmon cakes, fried fish, calamari, and grilled seafood platters.

    Serving Suggestions

    • Serve with crispy crab cakes
    • Use as a dipping sauce for shrimp
    • Spread onto seafood sandwiches or burgers
    • Pair with fried fish or salmon patties
    • Serve alongside roasted potatoes or fries

    Storage Instructions

    Room Temperature

    This sauce should not sit at room temperature for more than 2 hours because it contains mayonnaise.

    Refrigerator

    Store the sauce in an airtight container in the refrigerator for up to 5 days. Stir well before serving.

    Freezing

    Freezing is not recommended because mayonnaise-based sauces can separate and become grainy after thawing.

    Nutrition Information

    • Calories: 120 kcal
    • Carbohydrates: 2g
    • Protein: 1g
    • Fat: 12g
    • Saturated Fat: 2g
    • Sodium: 310mg

    Nutrition values are estimates and may vary depending on ingredients used.

    FAQs

    Can I make crab cake sauce ahead of time?

    Yes, this sauce can be made up to 3 days ahead and stored in the refrigerator. The flavor actually improves as it chills.

    What sauce goes best with crab cakes?

    Creamy sauces with lemon, mustard, and seafood seasoning pair best with crab cakes because they balance the sweetness of the crab meat.

    Can I use Greek yogurt instead of mayonnaise?

    Yes, plain Greek yogurt can replace part or all of the mayonnaise for a lighter version with a tangier flavor.

    How long does homemade crab cake sauce last?

    When stored in an airtight container in the refrigerator, homemade crab cake sauce stays fresh for up to 5 days.

    Crab Cake Sauce Recipe

    Recipe by Milli RoseCourse: SauceCuisine: AmericanDifficulty: Easy
    Servings

    4

    servings
    Prep time

    30

    minutes
    Cooking time

    40

    minutes
    Calories

    300

    kcal
    Total time

    1

    hour 

    10

    minutes

    Creamy, tangy crab cake sauce made with mayonnaise, Dijon mustard, lemon juice, and seafood seasoning. Perfect for crab cakes, shrimp, and seafood platters.

    Ingredients

    • 1 cup mayonnaise

    • 1 tablespoon Dijon mustard

    • 1 tablespoon lemon juice

    • 1 teaspoon Worcestershire sauce

    • 1 teaspoon Old Bay seasoning

    • ½ teaspoon smoked paprika

    • 1 teaspoon hot sauce

    • 1 tablespoon finely chopped parsley

    • 1 small garlic clove, finely grated

    • ¼ teaspoon sea salt

    • ¼ teaspoon black pepper

    Directions

    • Measure and prepare all ingredients before mixing.
    • Add mayonnaise, Dijon mustard, lemon juice, and Worcestershire sauce to a mixing bowl.
    • Stir in Old Bay seasoning, smoked paprika, salt, black pepper, and hot sauce until smooth.
    • Mix in the grated garlic and chopped parsley evenly throughout the sauce.
    • Cover and chill the sauce in the refrigerator for at least 20 minutes before serving.
    • Serve cold alongside crab cakes, shrimp, or seafood appetizers.

    Notes

    • Use fresh lemon juice for the brightest flavor.
    • Adjust the hot sauce to your preferred spice level.
    • Store refrigerated in an airtight container for up to 5 days.
  • Alfredo Sauce Recipe

    Alfredo Sauce Recipe

    If you love rich, creamy pasta sauces, this Alfredo Sauce Recipe is one you’ll make again and again. Made with butter, cream, garlic, and freshly grated Parmesan cheese, this classic Italian-style sauce is smooth, silky, and packed with comforting flavour. It comes together in just minutes, making it perfect for busy weeknights or relaxed family dinners. Easy enough for beginners yet impressive enough for guests, this homemade Alfredo sauce tastes far better than anything from a jar.

    Table of Contents

    • What Is Alfredo Sauce?
    • Alfredo Sauce Recipe Ingredients
    • How to Make Alfredo Sauce Recipe
    • Helpful Tips for the Best Alfredo Sauce
    • Serving Suggestions
    • Storage Instructions
    • Nutrition Information
    • FAQs

    What Is Alfredo Sauce?

    Alfredo sauce is a rich and creamy white pasta sauce traditionally made with butter, Parmesan cheese, and pasta water. Modern homemade versions often include heavy cream and garlic for extra flavour and a silky texture. This sauce coats pasta beautifully and creates a luxurious, restaurant-style dish with minimal effort.

    The flavour is buttery, savoury, cheesy, and slightly nutty from the Parmesan. The texture should be smooth and velvety without feeling too heavy or greasy. It pairs perfectly with fettuccine, chicken, shrimp, mushrooms, or roasted vegetables.

    Alfredo Sauce Recipe Ingredients

    For the Alfredo Sauce

    • 4 tablespoons unsalted butter
    • 3 garlic cloves, finely minced
    • 2 cups heavy cream
    • 1¼ cups freshly grated Parmesan cheese
    • ½ teaspoon salt
    • ¼ teaspoon freshly ground black pepper
    • ¼ teaspoon nutmeg (optional)
    • 2 tablespoons chopped fresh parsley

    For Serving

    • 400g cooked fettuccine pasta
    • Extra Parmesan cheese
    • Fresh parsley for garnish

    Preparation and Cooking Time

    • Prep Time: 5 minutes
    • Cook Time: 15 minutes
    • Total Time: 20 minutes
    • Servings: 4 servings

    How to Make Alfredo Sauce Recipe

    • Prepare the pasta: Bring a large pot of salted water to the boil and cook the fettuccine according to the package instructions until al dente. Reserve about ½ cup of pasta water before draining.
    • Melt the butter: Place a large frying pan or saucepan over medium-low heat. Add the butter and allow it to melt gently without browning.
    • Cook the garlic: Stir in the minced garlic and cook for about 30 seconds until fragrant. Avoid letting the garlic burn as this can make the sauce bitter.
    • Add the cream: Pour in the heavy cream and stir continuously. Allow the mixture to gently simmer for 3 to 4 minutes until slightly thickened.
    • Mix in the cheese: Reduce the heat to low and gradually add the freshly grated Parmesan cheese while stirring constantly. This helps the cheese melt smoothly into the sauce.
    • Season the sauce: Add salt, black pepper, and nutmeg if using. Stir until the sauce becomes smooth, creamy, and fully combined.
    • Toss with pasta: Add the drained fettuccine to the sauce and toss gently until every strand is coated. If the sauce feels too thick, add a splash of reserved pasta water until the consistency is silky.
    • Finish and serve: Sprinkle with chopped parsley and extra Parmesan cheese. Serve immediately while hot and creamy.
    How to Make Alfredo Sauce Recipe

    Helpful Tips for the Best Alfredo Sauce

    Why is my Alfredo sauce grainy?

    Grainy Alfredo sauce usually happens when the cheese is added over high heat. Always lower the heat before stirring in Parmesan and use freshly grated cheese for the smoothest texture.

    Can I make Alfredo sauce without heavy cream?

    Yes, you can use half-and-half or whole milk, although the sauce will be lighter and less rich. Adding a little cream cheese can help maintain a creamy consistency.

    How do I keep Alfredo sauce from becoming too thick?

    Reserve some pasta water before draining the pasta. Stirring in a few tablespoons helps loosen the sauce while keeping it silky and glossy.

    What pasta works best with Alfredo sauce?

    Fettuccine is the classic choice because the wide noodles hold the sauce beautifully, but linguine, spaghetti, penne, or tagliatelle also work well.

    Can I add protein to Alfredo sauce?

    Absolutely. Grilled chicken, shrimp, salmon, or crispy bacon all pair wonderfully with homemade Alfredo sauce.

    Serving Suggestions

    • Serve with warm garlic bread
    • Pair with grilled chicken breast
    • Add sautéed mushrooms or spinach
    • Enjoy with roasted vegetables
    • Serve alongside a crisp green salad

    Storage Instructions

    Room Temperature

    Alfredo sauce should not sit at room temperature for more than 2 hours because of the dairy content.

    Refrigerator

    Store leftover Alfredo sauce in an airtight container in the refrigerator for up to 3 days. Reheat gently over low heat while stirring frequently.

    Freezing

    You can freeze Alfredo sauce for up to 2 months, although the texture may slightly change after thawing. Defrost overnight in the refrigerator before reheating slowly.

    Nutrition Information

    • Calories: 520 kcal
    • Carbohydrates: 36g
    • Protein: 15g
    • Fat: 35g
    • Saturated Fat: 21g
    • Sodium: 620mg

    Nutrition values are estimates and may vary depending on ingredients used.

    FAQs

    Can I make Alfredo sauce ahead of time?

    Yes, Alfredo sauce can be made up to 2 days ahead and stored in the refrigerator. Reheat gently over low heat while stirring to keep it smooth.

    What cheese is best for Alfredo sauce?

    Freshly grated Parmesan cheese is the traditional and best choice for Alfredo sauce because it melts smoothly and provides rich flavour.

    Can I use milk instead of cream?

    Yes, but the sauce will be thinner and less rich. Whole milk works best if substituting for cream.

    Why did my Alfredo sauce separate?

    The sauce can separate if cooked over high heat. Always use low heat when adding cheese and stir constantly for a smooth finish.

    Alfredo Sauce Recipe

    Recipe by Milli RoseCourse: DinnerCuisine: ItalianDifficulty: Easy
    Servings

    4

    servings
    Prep time

    30

    minutes
    Cooking time

    40

    minutes
    Calories

    300

    kcal
    Total time

    1

    hour 

    10

    minutes

    Creamy homemade Alfredo Sauce made with butter, garlic, cream, and Parmesan cheese. Perfect for pasta, chicken, or vegetables.

    Ingredients

    • 4 tablespoons unsalted butter

    • 3 garlic cloves, minced

    • 2 cups heavy cream

    • 1¼ cups freshly grated Parmesan cheese

    • ½ teaspoon salt

    • ¼ teaspoon black pepper

    • ¼ teaspoon nutmeg

    • 2 tablespoons chopped parsley

    • 400g cooked fettuccine pasta

    • Extra Parmesan cheese for serving

    Directions

    • Cook the fettuccine in salted boiling water until al dente. Reserve some pasta water before draining.
    • Melt butter in a large pan over medium-low heat.
    • Add minced garlic and cook for 30 seconds until fragrant.
    • Pour in the heavy cream and simmer gently for 3 to 4 minutes.
    • Reduce heat and stir in Parmesan cheese until melted and smooth.
    • Season with salt, pepper, and nutmeg.
    • Add cooked pasta and toss until fully coated.
    • Adjust consistency with reserved pasta water if needed.
    • Serve hot with parsley and extra Parmesan cheese.

    Notes

    • Use freshly grated Parmesan cheese for the smoothest texture.
    • Keep the heat low when adding cheese to prevent splitting.
    • Add reserved pasta water gradually to loosen the sauce.
  • Chili Seasoning Mix Recipe

    Chili Seasoning Mix Recipe

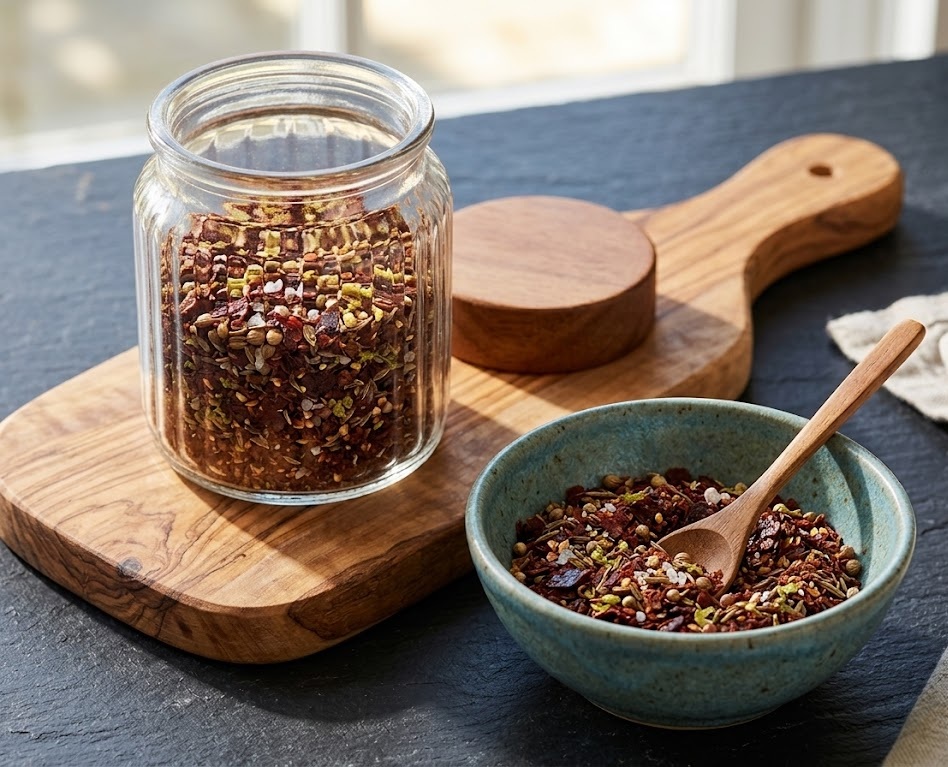
    If you love bold, smoky flavors in your cooking, this chili seasoning mix recipe is a must-have in your kitchen. It delivers a rich, well-balanced blend of spices with a warm, slightly spicy kick and a deep, earthy aroma. This homemade mix is quick and easy to prepare in just minutes, making it perfect for busy cooks. With a fine, slightly coarse texture, it blends beautifully into chili, soups, and marinades for consistent flavor every time.

    Ingredients

    For the Chili Seasoning Mix

    • 2 tablespoons chili powder
    • 1 tablespoon ground cumin
    • 1 tablespoon smoked paprika
    • 1 teaspoon garlic powder
    • 1 teaspoon onion powder
    • 1 teaspoon dried oregano
    • 1 teaspoon salt
    • ½ teaspoon black pepper
    • ½ teaspoon cayenne pepper (adjust to taste)
    • ½ teaspoon crushed red pepper flakes (optional)

    How to Make Chili Seasoning Mix Recipe

    • Prepare your tools: Gather a small mixing bowl, measuring spoons, and an airtight jar. Ensure everything is clean and dry so the seasoning stays fresh.
    • Measure the spices: Carefully measure all the spices using level spoons to maintain a balanced flavor profile.
    • Mix thoroughly: Add all ingredients to the bowl and stir well until evenly combined. Make sure there are no clumps.
    • Taste and adjust: If you prefer more heat, add extra cayenne or red pepper flakes. For a milder mix, reduce the spicy elements slightly.
    • Store properly: Transfer the seasoning mix into an airtight container or spice jar. Label it with the date for freshness.
    How to Make Chili Seasoning Mix Recipe

    Tips for the Best Chili Seasoning Mix

    How do I get a deeper flavor?

    Use smoked paprika instead of regular paprika. It adds a subtle smoky depth that enhances chili dishes beautifully.

    Can I control the spice level?

    Yes, adjust the cayenne pepper and red pepper flakes to suit your heat preference.

    Why does my mix taste dull?

    Old spices lose potency over time. Always use fresh spices for the best flavor.

    Can I make a larger batch?

    Absolutely. Simply double or triple the ingredients and store in a sealed container.

    Serving Suggestions

    • Stir into classic beef or vegetarian chili
    • Use as a rub for grilled chicken or beef
    • Add to soups, stews, or taco fillings
    • Sprinkle over roasted vegetables

    Storage

    Room Temperature

    Store in an airtight container in a cool, dry place for up to 6 months.

    Refrigerator

    Not necessary, but you can refrigerate to extend freshness slightly.

    Freezing

    Freezing is not required, but the mix can be frozen in airtight containers for up to 1 year.

    Nutrition

    • Calories: 20 per tablespoon
    • Carbohydrates: 3g
    • Protein: 1g
    • Fat: 1g
    • Saturated Fat: 0.2g
    • Sodium: 200mg

    Note: Nutritional values are approximate and may vary based on ingredient brands.

    FAQs

    How much seasoning mix should I use for chili?

    Use about 2 to 3 tablespoons of this mix for a standard pot of chili serving 4 to 6 people.

    Can I make this seasoning salt-free?

    Yes, simply omit the salt and add it separately when cooking to control sodium levels.

    Is this seasoning mix spicy?

    It has a mild to moderate heat level. You can adjust the cayenne pepper to make it milder or spicier.

    Can I use this for tacos or other dishes?

    Yes, this seasoning works well for tacos, burritos, grilled meats, and roasted vegetables.

    Chili Seasoning Mix Recipe

    Recipe by Home ChefCourse: CondimentCuisine: AmericanDifficulty: Easy
    Servings

    6

    tablespoons
    Prep time

    5

    minutes
    Cooking timeminutes
    Total time

    5

    minutes
    Calories

    20

    kcal

    A bold, smoky homemade chili seasoning mix made with simple pantry spices. Perfect for chili, tacos, and grilled dishes.

    Ingredients

    • 2 tablespoons chili powder

    • 1 tablespoon ground cumin

    • 1 tablespoon smoked paprika

    • 1 teaspoon garlic powder

    • 1 teaspoon onion powder

    • 1 teaspoon dried oregano

    • 1 teaspoon salt

    • ½ teaspoon black pepper

    • ½ teaspoon cayenne pepper

    • ½ teaspoon red pepper flakes (optional)

    Directions

    • Gather all spices and a mixing bowl.
    • Measure each spice carefully.
    • Combine all ingredients in the bowl.
    • Stir until evenly blended with no clumps.
    • Transfer to an airtight jar for storage.

    Notes

    • Adjust spice level to taste.
    • Store in a cool, dry place.
    • Use fresh spices for best flavor.
  • Ricotta Cheese Recipe

    Ricotta Cheese Recipe

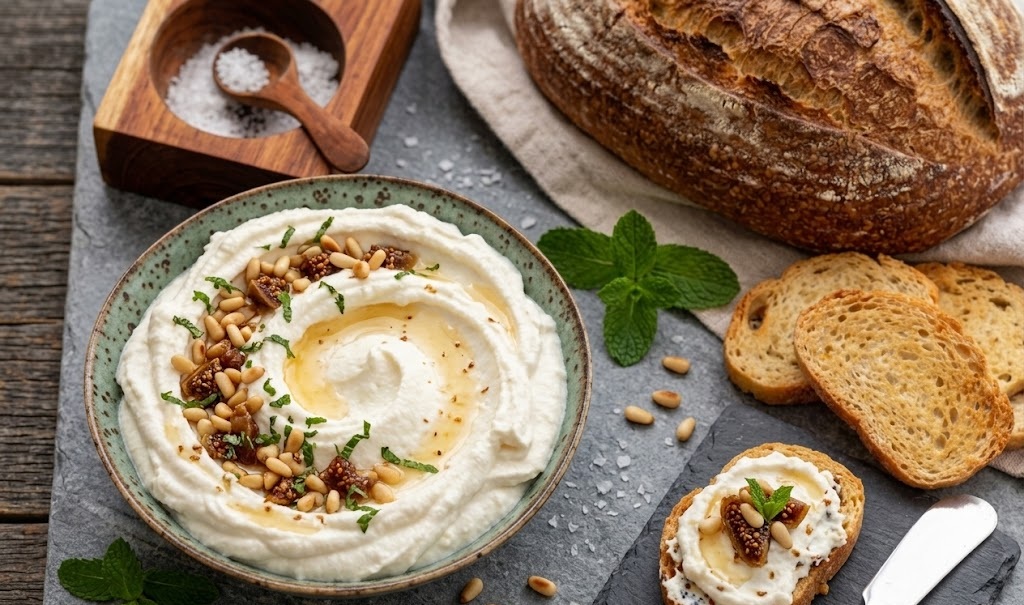
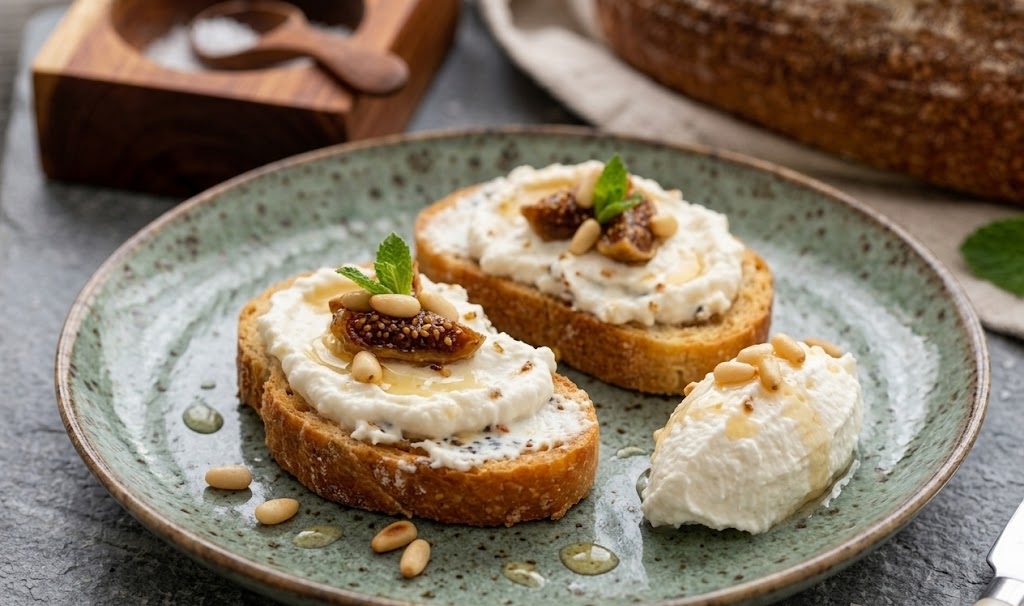
    This homemade ricotta cheese is fresh, creamy, and beautifully light with a delicate, slightly sweet flavour. It has a soft, fluffy texture that works perfectly in both savoury and sweet dishes. The process is simple and surprisingly quick, making it ideal even for beginners. From start to finish, this recipe takes around 30 minutes with minimal effort.

    Ingredients

    For the Ricotta Cheese

    • 2 litres whole milk
    • 300ml double cream
    • 3 tbsp white vinegar or lemon juice
    • 1 tsp fine salt

    How to Make Ricotta Cheese

    • Prepare the equipment: Line a sieve with muslin or cheesecloth and place it over a large bowl to catch the whey.
    • Heat the milk: Pour the milk and cream into a large saucepan. Heat gently over medium heat until it reaches a gentle simmer, stirring occasionally to prevent sticking.
    • Add the acid: Remove the pan from the heat and stir in the vinegar or lemon juice along with the salt. Leave undisturbed for 5 to 10 minutes until curds form and separate from the whey.
    • Strain the curds: Carefully pour the mixture into the prepared sieve. Let it drain naturally for 10 to 20 minutes depending on how firm you want the ricotta.
    • Cool the cheese: Once drained to your liking, transfer the ricotta to a bowl and allow it to cool completely.
    • Serve or store: Use immediately for best flavour or refrigerate for later use.
    How to Make Ricotta Cheese

    Tips

    Why didn’t my milk curdle properly?

    Ensure the milk is hot enough before adding the acid. If needed, add an extra teaspoon of vinegar or lemon juice and stir gently.

    How do I make the ricotta creamier?

    Do not over-drain the curds. Leaving a little moisture gives a softer, creamier texture.

    Can I use low-fat milk?

    Whole milk is best for richness. Low-fat milk will produce less curd and a drier texture.

    How can I make it firmer?

    Let the ricotta drain for longer, up to 30 minutes, for a thicker consistency suitable for baking.

    Serving Suggestions

    • Spread on warm toast with honey or fresh fruit
    • Use in pasta dishes like lasagne or stuffed shells
    • Add to salads with herbs and olive oil
    • Serve alongside roasted vegetables

    Storage

    Room Temperature

    Not suitable for keeping at room temperature. Always refrigerate promptly after making.

    Refrigerator

    Store in an airtight container for up to 3 days. Stir gently before using.

    Freezing

    Ricotta can be frozen for up to 1 month, though the texture may become slightly grainy once thawed.

    Nutrition

    • Calories: 180 kcal
    • Carbohydrates: 5g
    • Protein: 9g
    • Fat: 14g
    • Saturated Fat: 9g
    • Sodium: 120mg

    These values are approximate and may vary depending on ingredients used.

    FAQs

    Can I make ricotta without cream?

    Yes, you can use only whole milk, but adding cream gives a richer and softer texture.

    What can I do with leftover whey?

    Whey can be used in baking, soups, or smoothies instead of water for added nutrients.

    Can I use lemon juice instead of vinegar?

    Yes, lemon juice works perfectly and adds a slightly fresher flavour.

    How do I know when the ricotta is ready?

    The curds should be clearly separated from the liquid whey, forming soft white clusters.

    Ricotta Cheese Recipe

    Recipe by Milli RoseCourse: SideCuisine: ItalianDifficulty: Easy
    Servings

    4

    servings
    Prep time

    30

    minutes
    Cooking time

    40

    minutes
    Calories

    300

    kcal
    Total time

    1

    hour 

    10

    minutes

    Fresh homemade ricotta cheese with a soft, creamy texture and delicate flavour. Perfect for both sweet and savoury dishes.

    Ingredients

    • 2 litres whole milk

    • 300ml double cream

    • 3 tbsp white vinegar or lemon juice

    • 1 tsp fine salt

    Directions

    • Line a sieve with cheesecloth and place over a bowl.
    • Heat milk and cream in a saucepan until just simmering.
    • Remove from heat and stir in vinegar or lemon juice and salt.
    • Leave for 5–10 minutes until curds form.
    • Pour into sieve and allow to drain for 10–20 minutes.
    • Transfer to a bowl and cool before serving.

    Notes

    • Use whole milk for best results.
    • Do not boil the milk.
    • Adjust draining time for desired texture.
  • Rice Paper Recipe

    Rice Paper Recipe

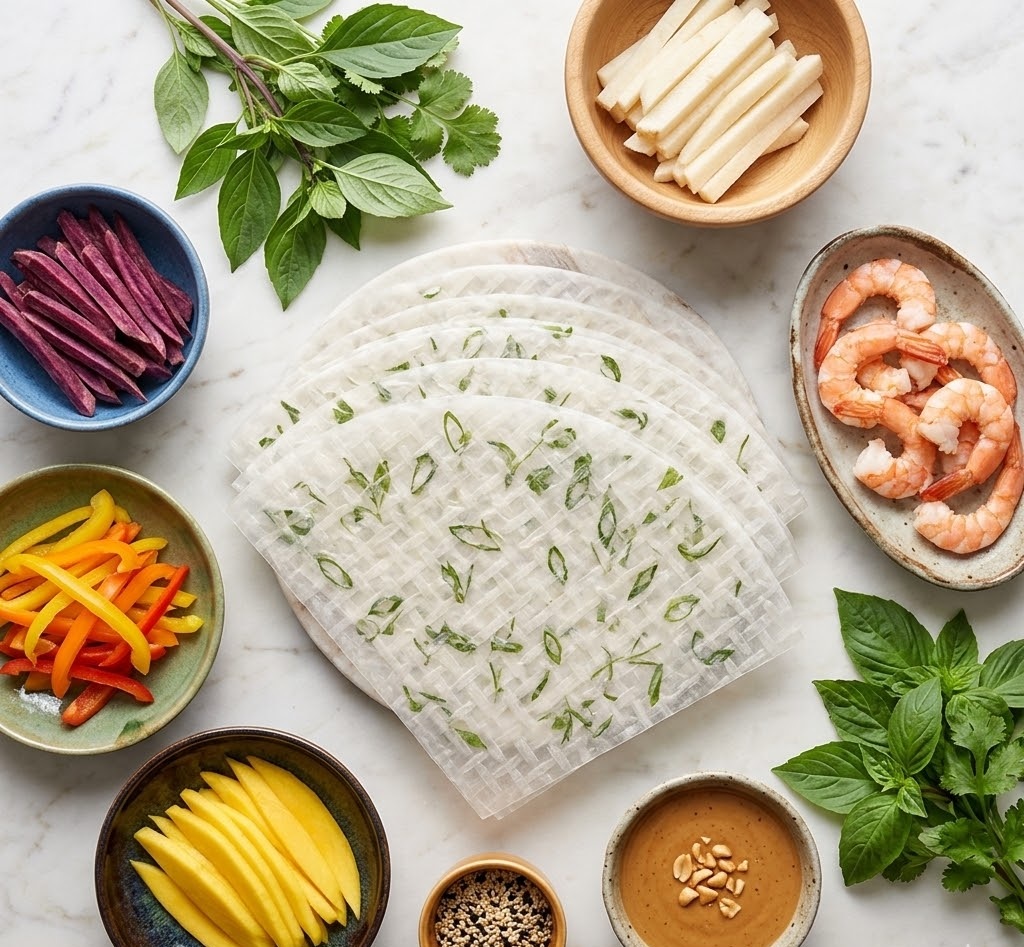
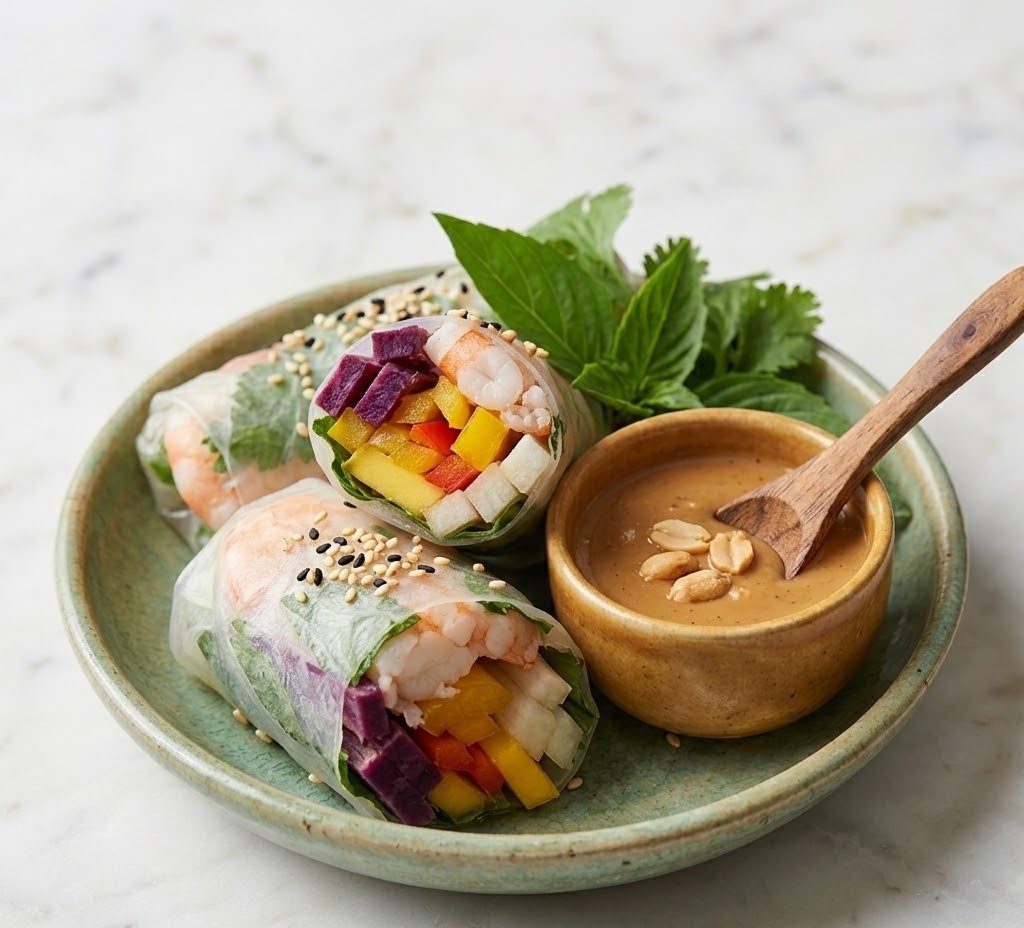
    Rice paper is a wonderfully light and versatile ingredient used to make fresh rolls, crispy snacks, and delicate wraps. Once softened in warm water, the sheets become smooth, flexible, and easy to fill with vegetables, herbs, noodles, or cooked meat. This recipe shows you how to make classic fresh rice paper rolls at home with crisp vegetables and a simple dipping sauce. It is beginner-friendly, refreshing, and ready in around 30 minutes.

    Ingredients

    For the Rice Paper Rolls

    • 8 rice paper sheets
    • 100g rice noodles, cooked and cooled
    • 1 carrot, peeled and cut into matchsticks
    • 1 cucumber, cut into thin strips
    • 1 red pepper, thinly sliced
    • 1 avocado, sliced
    • Small handful fresh mint leaves
    • Small handful fresh coriander leaves

    For the Dipping Sauce

    • 2 tablespoons soy sauce
    • 1 tablespoon lime juice
    • 1 teaspoon honey
    • 1 teaspoon sesame oil

    How to Make Rice Paper Recipe

    • Prepare the filling: Cook the rice noodles according to the packet instructions. Drain well, rinse under cold water, and set aside. Slice the vegetables into thin strips and gather the herbs.
    • Make the dipping sauce: In a small bowl, stir together the soy sauce, lime juice, honey, and sesame oil until blended.
    • Soften the rice paper: Fill a shallow dish with warm water. Dip one rice paper sheet into the water for about 10 seconds until just soft.
    • Add the filling: Place the softened sheet on a clean damp surface. Add a small amount of noodles, vegetables, avocado, mint, and coriander in the centre.
    • Roll neatly: Fold in both sides, then roll from the bottom upward into a firm cylinder. Keep the filling compact so the roll stays tight.
    • Repeat and serve: Continue with the remaining sheets. Arrange on a plate and serve straight away with the dipping sauce.
    How to Make Rice Paper Recipe

    Tips

    Why is my rice paper tearing?

    It has likely been soaked too long. Dip it briefly, as it continues softening after removal from the water.

    How do I stop rolls sticking together?

    Leave a little space between each roll on the plate or line the plate with lettuce leaves.

    Can I make them tighter?

    Use less filling and tuck the first fold in firmly before rolling forward.

    How do I keep them fresh?

    Cover with a lightly damp cloth until serving so the wrappers stay soft.

    Serving Suggestions

    • Serve with peanut dipping sauce or sweet chilli sauce
    • Pair with miso soup for a light lunch
    • Add grilled chicken or prawns for a fuller meal
    • Enjoy with iced green tea

    Storage

    Room Temperature

    Best eaten within 2 hours of making for the freshest texture.

    Refrigerator

    Store in an airtight container for up to 1 day. Separate rolls with damp parchment paper.

    Freezing

    Not recommended, as rice paper becomes tough and watery once thawed.

    Nutrition

    • Calories: 120 kcal
    • Carbohydrates: 21g
    • Protein: 3g
    • Fat: 3g
    • Saturated Fat: 0.5g
    • Sodium: 310mg

    Nutrition values are approximate and may vary depending on ingredients used.

    FAQs

    How long do rice paper rolls last?

    They are best eaten fresh but can be stored in the refrigerator for up to 1 day in an airtight container.

    Can I make rice paper rolls ahead of time?

    Yes, make them a few hours ahead and keep covered with a damp cloth in the fridge.

    What can I use as filling?

    Vegetables, noodles, herbs, tofu, prawns, chicken, or avocado all work beautifully.

    Do I need to cook rice paper sheets?

    No, they only need a brief soak in warm water to soften before rolling.

    Rice Paper Recipe

    Recipe by Milli RoseCourse: LunchCuisine: AsianDifficulty: Easy
    Servings

    8

    rolls
    Prep time

    25

    minutes
    Cooking time

    5

    minutes
    Total time

    30

    minutes
    Calories

    120

    kcal

    30

    minutes

    Fresh rice paper rolls filled with crisp vegetables, noodles, herbs, and served with a flavourful dipping sauce. Light, healthy, and easy to prepare.

    Ingredients

    • 8 rice paper sheets

    • 100g rice noodles, cooked

    • 1 carrot, julienned

    • 1 cucumber, julienned

    • 1 red pepper, sliced thinly

    • 1 avocado, sliced

    • Fresh mint leaves

    • Fresh coriander leaves

    • 2 tbsp soy sauce

    • 1 tbsp lime juice

    • 1 tsp honey

    • 1 tsp sesame oil

    Directions

    • Cook the rice noodles according to the packet instructions, then drain and cool.
    • Slice all vegetables into thin strips and arrange on a plate with herbs.
    • Mix soy sauce, lime juice, honey and sesame oil in a small bowl.
    • Fill a shallow dish with warm water. Dip one rice paper sheet for 10 seconds until soft.
    • Lay the sheet on a damp board and add noodles, vegetables and herbs in the centre.
    • Fold the sides inward, then roll tightly from the bottom upward.
    • Repeat with remaining sheets and filling.
    • Serve fresh with the dipping sauce.

    Notes

    • Do not soak the rice paper too long or it may tear.
    • Keep finished rolls covered with a damp cloth so they stay soft.
    • Add cooked prawns or chicken for extra protein.
  • How to Make vegan Cheese

    How to Make vegan Cheese

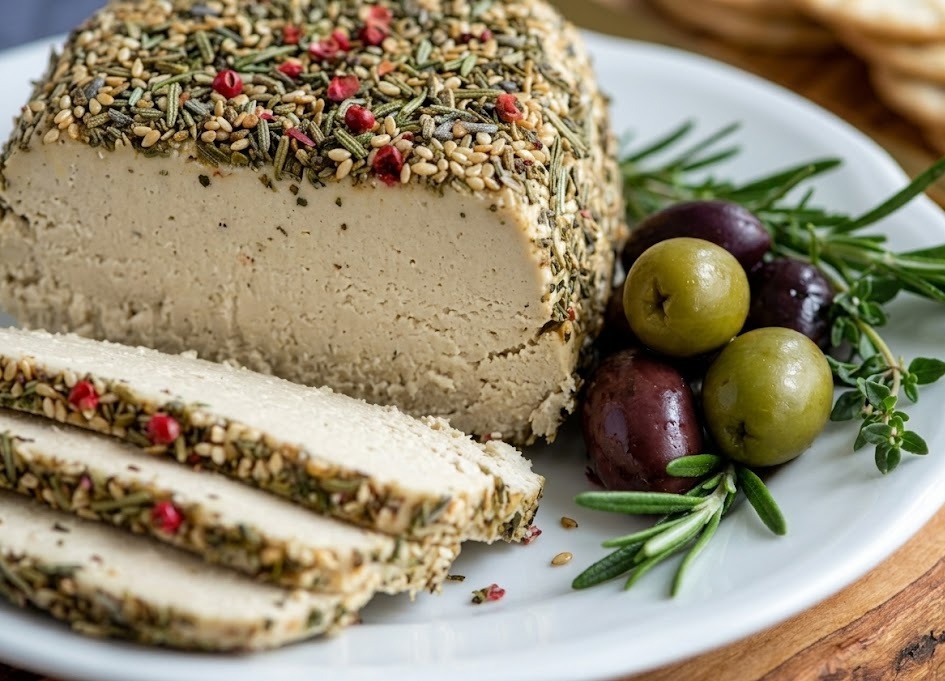
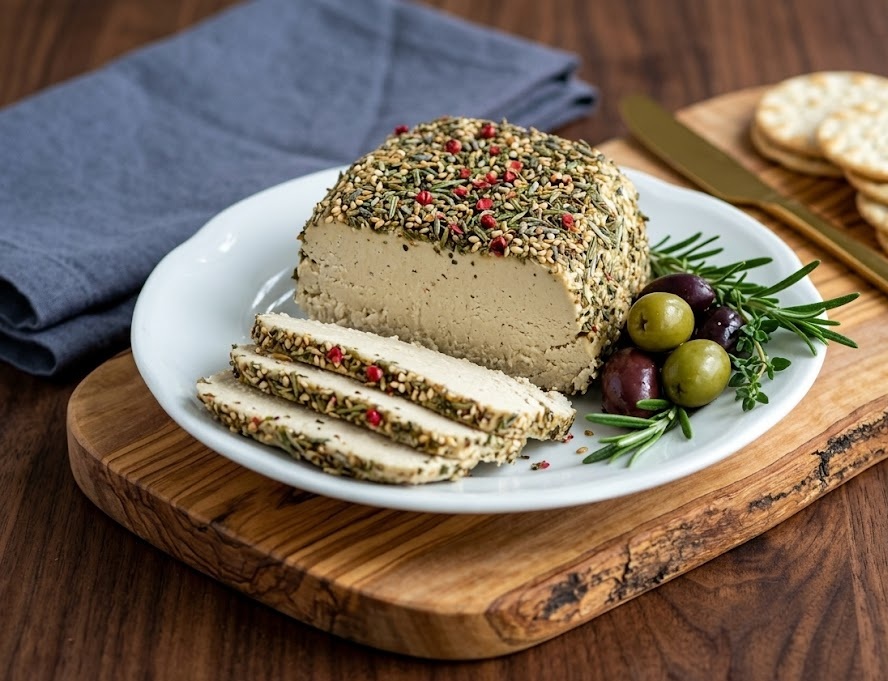
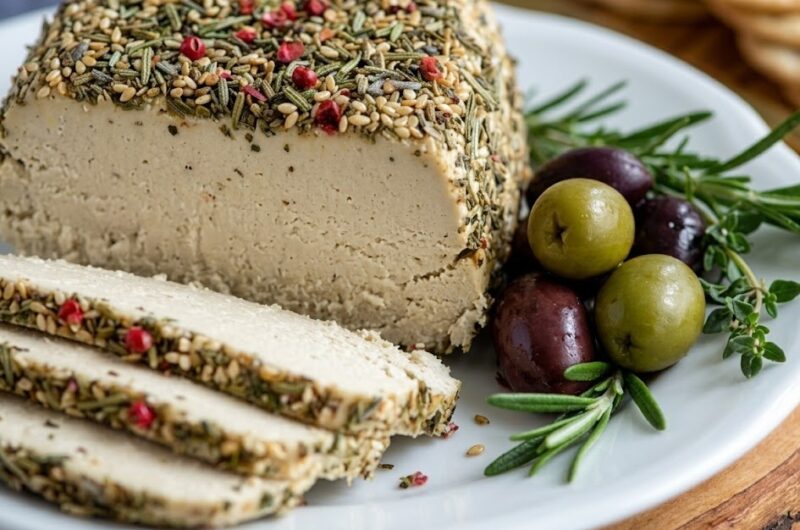
    Vegan cheese is a smooth, creamy dairy-free alternative made with wholesome ingredients and full savoury flavour. This version sets beautifully, slices well, and melts gently when warmed. It has a mild cheesy taste with a rich texture that works for sandwiches, crackers, pasta, and sauces. Easy to make at home, this recipe takes around 20 minutes to prepare plus chilling time.

    Ingredients

    For the Cheese Base

    • 150g raw cashews, soaked in hot water for 30 minutes
    • 250ml water
    • 60ml unsweetened plant milk
    • 3 tbsp nutritional yeast
    • 2 tbsp lemon juice
    • 1 tbsp apple cider vinegar
    • 1 tsp garlic powder
    • 1 tsp onion powder
    • 1 tsp fine salt
    • 1/2 tsp turmeric (optional, for colour)

    For Setting

    • 2 tbsp agar agar powder
    • 120ml water

    For Finishing

    • 1 tsp olive oil for greasing mould
    • Fresh herbs or cracked pepper, optional

    How to Make vegan Cheese

    • Prepare the mould: Lightly grease a small loaf tin, ramekin, or round bowl with olive oil. This helps the cheese release neatly once chilled.
    • Blend the base: Drain the soaked cashews and place them in a blender with water, plant milk, nutritional yeast, lemon juice, vinegar, garlic powder, onion powder, salt, and turmeric. Blend until completely smooth and silky.
    • Prepare the setting mixture: Add the agar agar powder and 120ml water to a saucepan. Whisk well and place over medium heat.
    • Cook gently: Bring to a gentle simmer and cook for 2 to 3 minutes, whisking constantly until fully dissolved.
    • Combine mixtures: Pour the blended cashew mixture into the saucepan and stir continuously for 4 to 5 minutes until thickened and glossy.
    • Fill the mould: Quickly pour the hot mixture into the prepared mould. Smooth the top with a spatula.
    • Cool and chill: Leave at room temperature for 20 minutes, then refrigerate for at least 3 hours until firm.
    • Unmould and serve: Turn the cheese out carefully onto a plate. Sprinkle with herbs or cracked pepper if liked, then slice and enjoy.
    How to Make vegan Cheese

    Tips

    Why is my vegan cheese too soft?

    It may need longer chilling time or the agar agar may not have simmered long enough. Agar needs heat to activate properly.

    How do I make it sharper in flavour?

    Add extra lemon juice, a little mustard powder, or another spoonful of nutritional yeast.

    Can I make it creamier?

    Use a little more plant milk and blend for longer until completely smooth.

    Why is it grainy?

    Cashews need to be soaked well and blended thoroughly. A high-speed blender gives the best finish.

    Serving Suggestions

    • Slice onto crackers or toasted bread
    • Cube for salads or lunch platters
    • Grate over warm pasta dishes
    • Melt into sandwiches or wraps
    • Serve with olives and chutney

    Storage

    Room Temperature

    Keep out for no longer than 2 hours when serving.

    Refrigerator

    Store in an airtight container for up to 5 days. Keep chilled between uses.

    Freezing

    Freeze tightly wrapped for up to 2 months. Defrost overnight in the fridge before serving.

    Nutrition

    • Calories: 165 kcal
    • Carbohydrates: 8g
    • Protein: 5g
    • Fat: 12g
    • Saturated Fat: 2g
    • Sodium: 310mg

    Nutrition values are approximate and may vary depending on ingredients used.

    FAQs

    What is vegan cheese made from?

    Vegan cheese is commonly made from nuts, seeds, soy, coconut, or starch-based ingredients. This version uses cashews for a rich creamy texture.

    Does vegan cheese melt?

    Yes, many homemade vegan cheeses soften and melt gently when heated, especially when used in sauces or toasties.

    Can I make vegan cheese without cashews?

    Yes, sunflower seeds or blanched almonds can be used instead, though the flavour and texture will change slightly.

    How long does homemade vegan cheese last?

    Stored in the refrigerator in an airtight container, it keeps well for up to 5 days.

    How to Make vegan Cheese

    Recipe by Milli RoseCourse: SnackCuisine: Plant-BasedDifficulty: Easy
    Servings

    4

    servings
    Prep time

    30

    minutes
    Cooking time

    40

    minutes
    Calories

    300

    kcal
    Total time

    1

    hour 

    10

    minutes

    Creamy homemade vegan cheese made with cashews, nutritional yeast and agar agar. A simple dairy-free recipe that slices beautifully and tastes rich and savoury.

    Ingredients

    • 150g raw cashews, soaked

    • 250ml water

    • 60ml unsweetened plant milk

    • 3 tbsp nutritional yeast

    • 2 tbsp lemon juice

    • 1 tbsp apple cider vinegar

    • 1 tsp garlic powder

    • 1 tsp onion powder

    • 1 tsp salt

    • 2 tbsp agar agar powder

    • 120ml water

    • Olive oil for greasing

    Directions

    • Grease a mould or small loaf tin lightly with oil.
    • Blend cashews, water, plant milk, nutritional yeast, lemon juice, vinegar and seasonings until smooth.
    • Whisk agar agar with water in a saucepan.
    • Simmer for 2 to 3 minutes until dissolved.
    • Add blended mixture and cook, stirring, until thickened.
    • Pour into mould and smooth the top.
    • Cool, then chill for at least 3 hours until firm.
    • Turn out, slice and serve.

    Notes

    • Blend thoroughly for the smoothest texture.
    • Do not skip simmering the agar agar.
    • Store chilled and use within 5 days.

slot depo

sicbo online