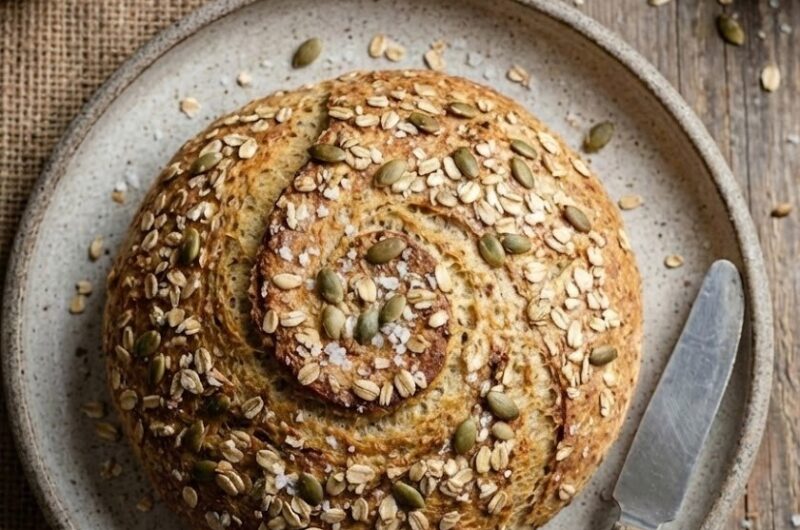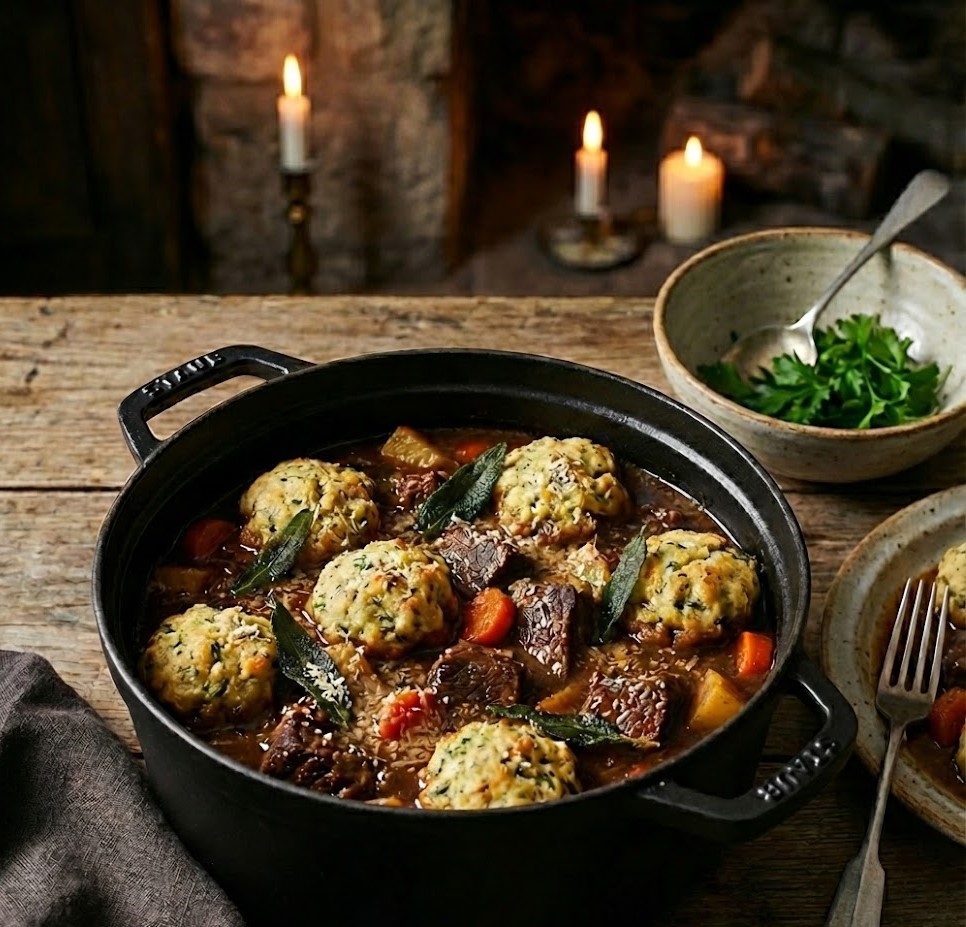
Blog

  • James Martin Beef Casserole

    James Martin Beef Casserole

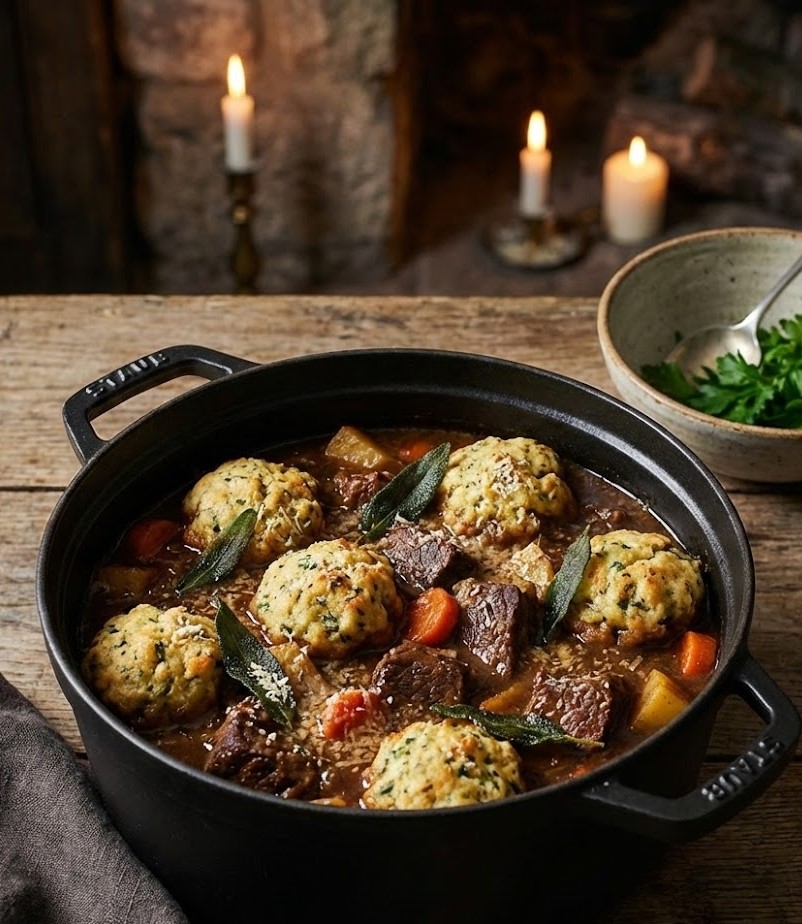
    This James Martin beef casserole is a classic, slow-cooked comfort dish with deep, rich flavour and melt-in-the-mouth beef. The sauce turns glossy and full-bodied as it cooks, with tender vegetables soaking up every bit of goodness. It is a straightforward, unfussy recipe that suits confident beginners and experienced home cooks alike. Total time is around 2 hours 30 minutes, most of it hands-off in the oven.

    Ingredients

    For the beef casserole

    • 900 g stewing beef, cut into large chunks
    • 2 tbsp plain flour
    • Salt, to taste
    • Black pepper, to taste
    • 2 tbsp olive oil
    • 2 onions, sliced
    • 3 cloves garlic, finely chopped
    • 2 tbsp tomato purée
    • 300 ml beef stock
    • 300 ml red wine
    • 2 tsp Worcestershire sauce
    • 2 bay leaves
    • 2 sprigs fresh thyme

    For the vegetables

    • 3 carrots, thickly sliced
    • 2 celery sticks, chopped
    • 200 g mushrooms, halved
    James Martin Beef Casserole

    How to Make James Martin Beef Casserole

    • Prepare the oven:Preheat the oven to 160°C. Take out a large, ovenproof casserole dish with a lid and set it on the hob over medium heat.
    • Brown the beef:Season the flour with salt and pepper, then toss the beef until lightly coated. Heat the olive oil in the casserole dish and brown the beef in batches. Remove and set aside once nicely coloured.
    • Build the base:In the same dish, add the onions and cook gently for 5 to 7 minutes until softened. Stir in the garlic and tomato purée, cooking for 1 minute until fragrant.
    • Assemble the casserole:Return the beef to the dish. Pour in the red wine and let it bubble for 2 minutes. Add the stock, Worcestershire sauce, bay leaves, thyme, carrots, celery, and mushrooms. Stir well and bring to a gentle simmer.
    • Slow cook:Cover with the lid and transfer to the oven. Cook for 2 hours, stirring once halfway through, until the beef is very tender and the sauce has thickened.
    • Rest and serve:Remove from the oven and let the casserole rest for 10 minutes before serving. Taste and adjust seasoning if needed.

    Tips for the Best Beef Casserole

    Why is my beef still tough?

    The beef needs time. If it is still firm, return the casserole to the oven and cook for another 20 to 30 minutes until tender.

    Can I make this without wine?

    Yes. Replace the wine with extra beef stock and add a splash of balsamic vinegar for depth.

    How do I thicken the sauce?

    Remove the lid for the last 20 minutes of cooking, or stir in a small knob of butter mixed with flour.

    What cut of beef works best?

    Chuck or braising steak gives the best balance of flavour and tenderness for slow cooking.

    Serving Suggestions

    • Creamy mashed potatoes
    • Buttered egg noodles
    • Steamed green beans or peas
    • Crusty bread to soak up the sauce

    Storage

    Room temperature

    Let the casserole cool, then store for up to 4 hours before refrigerating.

    Refrigerator

    Keep in an airtight container for up to 3 days. Reheat gently on the hob or in the oven.

    Freezing

    Freeze for up to 3 months in a sealed container. Defrost overnight in the fridge before reheating.

    Nutrition

    • Calories: 520 kcal
    • Carbohydrates: 18 g
    • Protein: 45 g
    • Fat: 28 g
    • Saturated fat: 9 g
    • Sodium: 720 mg

    Nutritional values are estimates and may vary depending on ingredients used.

    FAQs

    Can I cook this in a slow cooker?

    Yes. Brown the beef and onions first, then cook on low for 7 to 8 hours.

    Is this casserole better the next day?

    Absolutely. The flavours deepen overnight, making it even richer when reheated.

    Can I add potatoes to the casserole?

    You can add diced potatoes for the final hour of cooking, though it is traditionally served alongside mash.

    What herbs can I use instead of thyme?

    Rosemary or a small pinch of dried mixed herbs work well.

    Mary Berry 3-Layer Victoria Sponge Recipe

    Recipe by Rose MeltonCourse: DessertCuisine: BritishDifficulty: Easy
    Servings

    4

    servings
    Prep time

    30

    minutes
    Cooking time

    40

    minutes
    Calories

    300

    kcal
    Total time

    1

    hour 

    10

    minutes

    Light, fluffy Mary Berry 3-Layer Victoria Sponge filled with strawberry jam and freshly whipped cream. A classic British cake perfect for any occasion.

    Ingredients

    • 225g unsalted butter, softened

    • 225g caster sugar

    • 4 large eggs

    • 225g self-raising flour

    • 1 tsp baking powder

    • 2 tbsp milk

    • 150ml double cream

    • 2 tbsp icing sugar

    • 4–5 tbsp strawberry jam

    • Fresh strawberries, sliced

    • Icing sugar, for dusting

    • Butter, for greasing tins

    • Baking parchment

    Directions

    • Preheat oven to 180°C (160°C Fan). Grease and line three 8-inch round cake tins.
    • Place butter, caster sugar, eggs, flour, baking powder and milk into a large bowl.
    • Beat with an electric mixer for about 2 minutes until pale, smooth and fully combined.
    • Divide evenly between tins and level the tops.
    • Bake for 20–25 minutes until golden, springy and cooked through.
    • Cool in tins for 5 minutes, then turn out onto a wire rack to cool completely.
    • Whip double cream with icing sugar until soft peaks form.
    • Sandwich the sponges with strawberry jam and whipped cream.
    • Dust with icing sugar and decorate with fresh strawberries before serving.

    Notes

    • Ensure butter is fully softened for best rise.
    • Do not open the oven door early to prevent sinking.
    • Sponge layers can be frozen unfilled for up to 3 months.
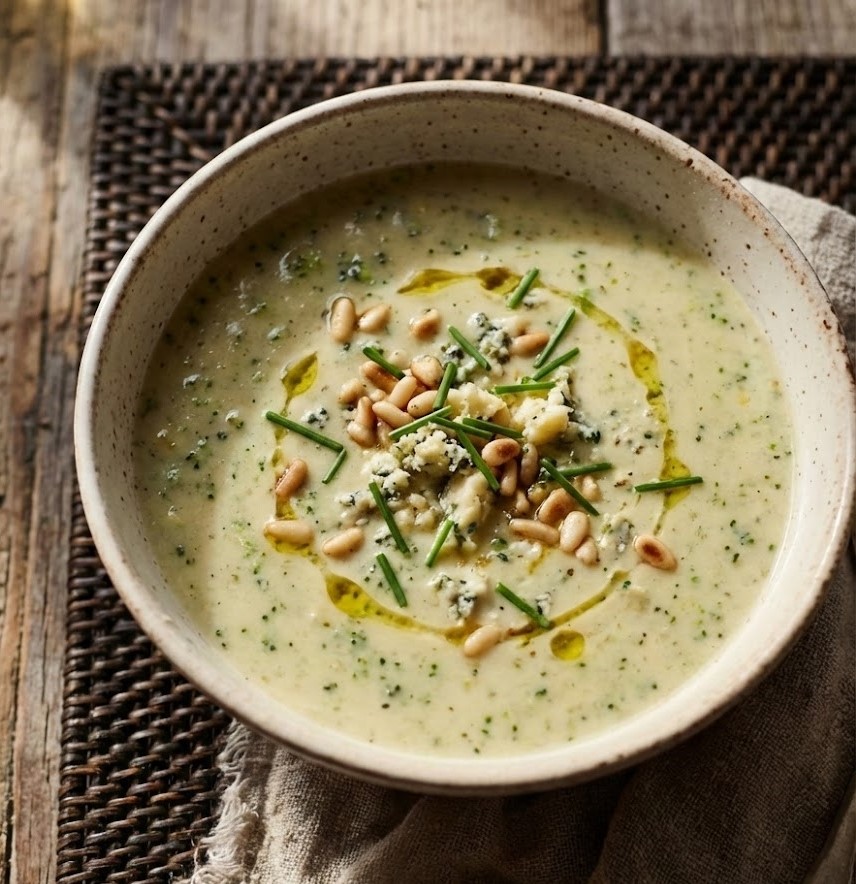
  • James Martin Broccoli and Stilton Soup

    James Martin Broccoli and Stilton Soup

    This James Martin Broccoli and Stilton Soup is a classic British comfort dish with a smooth, velvety texture and a rich, savoury flavour. The sweetness of broccoli balances beautifully with the bold, creamy tang of Stilton cheese. It is an easy, fuss free soup that feels indulgent while staying simple to make. From start to finish, it comes together in about 40 minutes, making it ideal for a relaxed lunch or light supper.

    Ingredients

    For the Soup Base

    • 1 tbsp unsalted butter
    • 1 tbsp olive oil
    • 1 medium onion, finely chopped
    • 1 garlic clove, crushed
    • 500g broccoli, chopped into small florets
    • 1 medium potato, peeled and diced

    For the Liquid and Seasoning

    • 750ml vegetable stock
    • Sea salt, to taste
    • Freshly ground black pepper, to taste

    For the Finish

    • 150g Stilton cheese, crumbled
    • 100ml double cream
    James Martin Broccoli and Stilton Soup

    How to Make James Martin Broccoli and Stilton Soup

    • Prepare the Base:Heat the butter and olive oil together in a large saucepan over medium heat. Add the chopped onion and cook gently for 5 minutes until soft and translucent. Stir in the garlic and cook for another minute until fragrant.
    • Cook the Vegetables:Add the broccoli florets and diced potato to the pan. Stir well so everything is lightly coated in the butter and oil. Pour in the vegetable stock and bring to a gentle boil.
    • Simmer the Soup:Reduce the heat and let the soup simmer for 15 to 20 minutes, until the broccoli and potato are completely tender. Season lightly with salt and pepper at this stage.
    • Blend Until Smooth:Remove the pan from the heat. Use a stick blender to blend the soup until smooth and creamy. If using a jug blender, work in batches and return the soup to the pan.
    • Add the Stilton and Cream:Stir in the crumbled Stilton cheese and double cream. Place the pan back over low heat and stir gently until the cheese has melted and the soup is smooth. Taste and adjust seasoning if needed.

    Tips for the Best Broccoli and Stilton Soup

    How do I stop the soup tasting bitter?

    Avoid overcooking the broccoli. Simmer just until tender, then blend straight away to keep the flavour fresh and sweet.

    Can I make the soup thicker?

    Yes. Add an extra half potato or reduce the stock slightly for a thicker, more hearty texture.

    What if my soup is too thick?

    Simply stir in a little extra hot stock or warm water until you reach your preferred consistency.

    Can I reduce the strong Stilton flavour?

    Use slightly less Stilton and add it gradually, tasting as you go. You can also balance it with a little extra cream.

    Serving Suggestions

    • Serve with crusty bread or warm baguette slices
    • Add a swirl of cream and cracked black pepper on top
    • Garnish with small broccoli florets or extra Stilton crumbles

    Storage

    Room Temperature

    This soup should not be left at room temperature for more than 2 hours.

    Refrigerator

    Store in an airtight container in the fridge for up to 3 days. Reheat gently on the hob, stirring often.

    Freezing

    Freeze without the cream for best results. Keep for up to 3 months. Defrost fully, reheat, then stir in the cream before serving.

    Nutrition

    • Calories: 320 kcal
    • Carbohydrates: 18g
    • Protein: 11g
    • Fat: 24g
    • Saturated Fat: 13g
    • Sodium: 680mg

    Nutritional values are estimates and may vary depending on ingredients used.

    FAQs

    Can I use frozen broccoli instead of fresh?

    Yes, frozen broccoli works well. Add it straight to the pan and reduce simmering time slightly.

    Is this soup suitable for vegetarians?

    Yes, as long as the Stilton is made with vegetarian rennet and you use vegetable stock.

    Can I make this soup without cream?

    You can leave out the cream for a lighter version. The soup will still be smooth and flavourful from the Stilton.

    What cheese can I use instead of Stilton?

    Blue cheese, Danish blue, or even mature cheddar can be used, though the flavour will be different.

    Mary Berry 3-Layer Victoria Sponge Recipe

    Recipe by Rose MeltonCourse: DessertCuisine: BritishDifficulty: Easy
    Servings

    4

    servings
    Prep time

    30

    minutes
    Cooking time

    40

    minutes
    Calories

    300

    kcal
    Total time

    1

    hour 

    10

    minutes

    Light, fluffy Mary Berry 3-Layer Victoria Sponge filled with strawberry jam and freshly whipped cream. A classic British cake perfect for any occasion.

    Ingredients

    • 225g unsalted butter, softened

    • 225g caster sugar

    • 4 large eggs

    • 225g self-raising flour

    • 1 tsp baking powder

    • 2 tbsp milk

    • 150ml double cream

    • 2 tbsp icing sugar

    • 4–5 tbsp strawberry jam

    • Fresh strawberries, sliced

    • Icing sugar, for dusting

    • Butter, for greasing tins

    • Baking parchment

    Directions

    • Preheat oven to 180°C (160°C Fan). Grease and line three 8-inch round cake tins.
    • Place butter, caster sugar, eggs, flour, baking powder and milk into a large bowl.
    • Beat with an electric mixer for about 2 minutes until pale, smooth and fully combined.
    • Divide evenly between tins and level the tops.
    • Bake for 20–25 minutes until golden, springy and cooked through.
    • Cool in tins for 5 minutes, then turn out onto a wire rack to cool completely.
    • Whip double cream with icing sugar until soft peaks form.
    • Sandwich the sponges with strawberry jam and whipped cream.
    • Dust with icing sugar and decorate with fresh strawberries before serving.

    Notes

    • Ensure butter is fully softened for best rise.
    • Do not open the oven door early to prevent sinking.
    • Sponge layers can be frozen unfilled for up to 3 months.
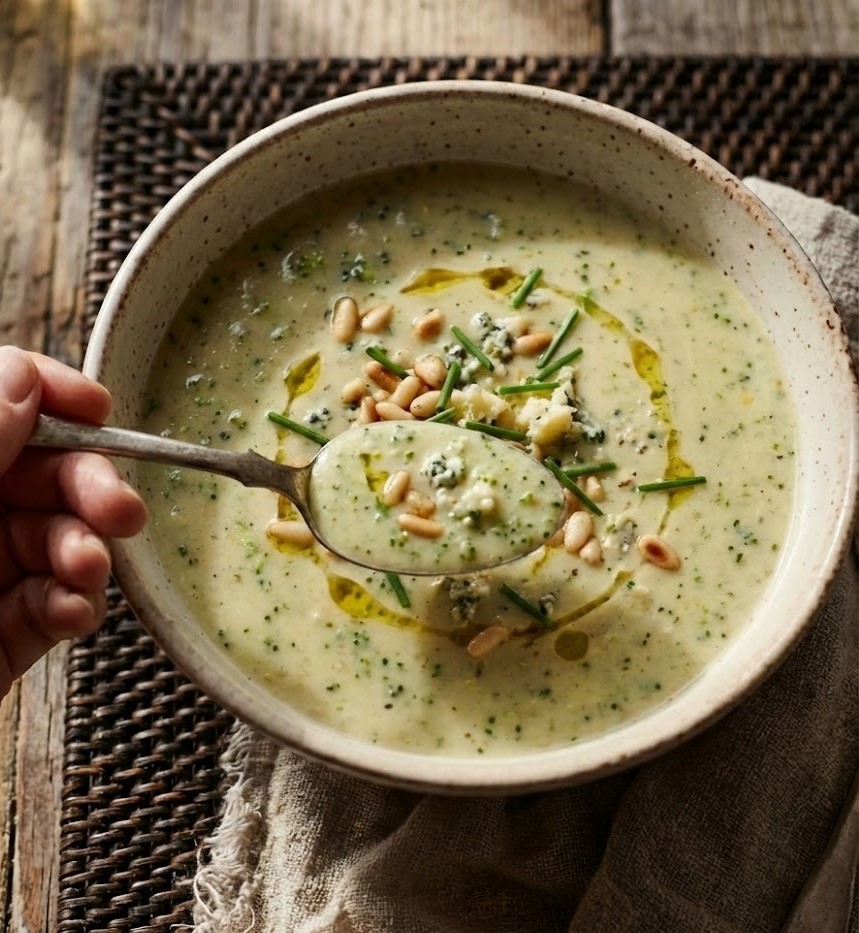
  • James Martin Fruit Scones

    James Martin Fruit Scones

    These classic fruit scones are soft, light, and gently sweet, with a tender crumb and bursts of juicy dried fruit throughout. They are simple to make, very forgiving for beginners, and come together quickly without fuss. Expect a buttery flavour, a delicate rise, and that traditional bakery texture everyone loves. Total time is about 35 minutes from start to finish.

    Ingredients

    For the scones

    • 450g self-raising flour
    • 2 tsp baking powder
    • 75g caster sugar
    • 100g unsalted butter, cold and cubed
    • 150g sultanas or raisins
    • 2 large eggs
    • 200ml full-fat milk
    • 1 tsp vanilla extract

    For finishing

    • A little milk, for glazing
    • Extra flour, for dusting
    James Martin Fruit Scones
    James Martin Fruit Scones

    How to Make James Martin Fruit Scones

    • Prepare the oven and tray:Preheat the oven to 220°C, or 200°C fan. Line a large baking tray with baking parchment and set it aside.
    • Mix the dry ingredients:Sift the flour and baking powder into a large bowl. Stir in the caster sugar, then add the cold butter. Rub it in with your fingertips until the mixture looks like fine breadcrumbs.
    • Add the fruit and wet ingredients:Stir the sultanas into the flour mixture. In a jug, whisk the eggs with the milk and vanilla extract. Pour most of this into the bowl, keeping a little back for glazing.
    • Bring the dough together:Use a knife to mix everything into a soft dough. If it looks dry, add a splash more milk. Turn the dough out onto a lightly floured surface and gently bring it together. Do not knead.
    • Shape and cut:Pat the dough out to about 2.5cm thick. Use a floured round cutter to stamp out scones, pressing straight down without twisting. Place them onto the prepared tray.
    • Bake:Brush the tops lightly with milk. Bake for 12 to 15 minutes, until well risen and lightly golden on top.
    • Cool and serve:Transfer the scones to a wire rack and allow them to cool slightly before serving warm.

    Tips for Perfect Fruit Scones

    Why are my scones flat?

    Make sure the butter is cold and avoid overworking the dough. A hot oven also helps create a good rise.

    How do I keep scones soft?

    Handle the dough gently and do not add too much flour when shaping. Overmixing leads to dense scones.

    Can I make them sweeter?

    You can increase the sugar slightly or add a handful of chopped dried apricots or dates for extra sweetness.

    How do I get even baking?

    Cut the scones to the same thickness and size, and space them evenly on the tray.

    Serving Suggestions

    • Serve warm with clotted cream and strawberry jam
    • Enjoy with butter and honey
    • Pair with a cup of strong English tea
    • Add fresh berries on the side for a lighter touch

    Storage

    Room temperature

    Keep cooled scones in an airtight container for up to 2 days.

    Refrigerator

    Refrigeration is not recommended as it dries them out, but they can be stored for up to 3 days if needed.

    Freezing

    Freeze baked and cooled scones for up to 3 months. Defrost at room temperature and warm gently before serving.

    Nutrition

    • Calories: 290 kcal
    • Carbohydrates: 45g
    • Protein: 7g
    • Fat: 9g
    • Saturated fat: 5g
    • Sodium: 210mg

    Nutritional values are estimates and may vary depending on ingredients used.

    FAQs

    What fruit works best in scones?

    Sultanas and raisins are traditional, but cranberries or mixed dried fruit also work well.

    Can I make the dough ahead of time?

    It is best baked fresh, but you can cut the scones and chill them for up to 2 hours before baking.

    Why should I not twist the cutter?

    Twisting seals the edges and prevents the scones from rising evenly.

    Mary Berry 3-Layer Victoria Sponge Recipe

    Recipe by Rose MeltonCourse: DessertCuisine: BritishDifficulty: Easy
    Servings

    4

    servings
    Prep time

    30

    minutes
    Cooking time

    40

    minutes
    Calories

    300

    kcal
    Total time

    1

    hour 

    10

    minutes

    Light, fluffy Mary Berry 3-Layer Victoria Sponge filled with strawberry jam and freshly whipped cream. A classic British cake perfect for any occasion.

    Ingredients

    • 225g unsalted butter, softened

    • 225g caster sugar

    • 4 large eggs

    • 225g self-raising flour

    • 1 tsp baking powder

    • 2 tbsp milk

    • 150ml double cream

    • 2 tbsp icing sugar

    • 4–5 tbsp strawberry jam

    • Fresh strawberries, sliced

    • Icing sugar, for dusting

    • Butter, for greasing tins

    • Baking parchment

    Directions

    • Preheat oven to 180°C (160°C Fan). Grease and line three 8-inch round cake tins.
    • Place butter, caster sugar, eggs, flour, baking powder and milk into a large bowl.
    • Beat with an electric mixer for about 2 minutes until pale, smooth and fully combined.
    • Divide evenly between tins and level the tops.
    • Bake for 20–25 minutes until golden, springy and cooked through.
    • Cool in tins for 5 minutes, then turn out onto a wire rack to cool completely.
    • Whip double cream with icing sugar until soft peaks form.
    • Sandwich the sponges with strawberry jam and whipped cream.
    • Dust with icing sugar and decorate with fresh strawberries before serving.

    Notes

    • Ensure butter is fully softened for best rise.
    • Do not open the oven door early to prevent sinking.
    • Sponge layers can be frozen unfilled for up to 3 months.

  • James Martin Toffee Pudding

    James Martin Toffee Pudding

    This classic James Martin toffee pudding is a rich, comforting British dessert with a soft sponge soaked in warm, buttery toffee sauce. The texture is light yet moist, with deep caramel notes balanced by gentle sweetness. It is an easy, reassuring bake that suits both beginners and confident home cooks. From start to finish, it takes about 1 hour and 10 minutes, including baking and resting time.

    Ingredients

    For the sponge pudding

    • 175 g dried dates, finely chopped
    • 250 ml boiling water
    • 1 tsp bicarbonate of soda
    • 75 g unsalted butter, softened
    • 150 g soft light brown sugar
    • 2 large eggs
    • 175 g self-raising flour
    • 1 tsp vanilla extract

    For the toffee sauce

    • 150 g unsalted butter
    • 200 g soft light brown sugar
    • 300 ml double cream
    • 1 tsp vanilla extract
    James Martin Toffee Pudding

    How to Make James Martin Toffee Pudding

    • Prepare the oven and dish:Preheat the oven to 180°C, or 160°C fan. Lightly grease a deep baking dish or individual pudding basins and set aside.
    • Soften the dates:Place the chopped dates in a bowl and pour over the boiling water. Stir in the bicarbonate of soda and leave for 10 minutes. The mixture will soften and thicken, which gives the pudding its signature moist texture.
    • Mix the sponge batter:Cream the butter and brown sugar together in a large bowl until pale and fluffy. Beat in the eggs one at a time, followed by the vanilla extract. Fold in the flour gently, then stir through the softened date mixture until evenly combined.
    • Bake the pudding:Pour the batter into the prepared dish and level the top. Bake for 35 to 40 minutes, until the pudding is risen, set, and a skewer inserted into the centre comes out clean.
    • Make the toffee sauce:While the pudding bakes, add the butter, brown sugar, and cream to a saucepan. Heat gently, stirring often, until the butter has melted and the sauce is smooth. Simmer for 3 to 5 minutes until slightly thickened, then stir in the vanilla extract.
    • Assemble and finish:Remove the pudding from the oven and allow it to rest for 5 minutes. Spoon some of the warm toffee sauce over the top, letting it soak in before serving.

    Tips for Perfect Toffee Pudding

    Why is my toffee pudding dry?

    Overbaking is the most common cause. Check the pudding early and remove it as soon as it is just set.

    How do I keep the pudding extra moist?

    Pour a little warm toffee sauce over the pudding as soon as it comes out of the oven and let it soak before serving.

    Can I make this in advance?

    Yes. Bake the pudding, cool it completely, then reheat gently with extra sauce before serving.

    Serving Suggestions

    • Serve warm with vanilla custard
    • Pair with pouring cream or clotted cream
    • Add a scoop of vanilla ice cream for contrast

    Storage

    Room temperature

    Store covered for up to 24 hours if the weather is cool.

    Refrigerator

    Keep in an airtight container for up to 3 days. Reheat gently before serving.

    Freezing

    Freeze the unserved pudding, well wrapped, for up to 3 months. Defrost overnight in the fridge and reheat until hot.

    Nutrition

    • Calories: 430 kcal
    • Carbohydrates: 58 g
    • Protein: 5 g
    • Fat: 20 g
    • Saturated fat: 12 g
    • Sodium: 320 mg

    Nutritional values are estimates and may vary depending on ingredients used.

    FAQs

    Can I use fresh dates instead of dried?

    Dried dates work best as they soften beautifully and give a deeper flavour.

    What tin size is best for this pudding?

    A medium, deep baking dish works well. Individual ramekins can also be used with a shorter baking time.

    Can I replace dates with another fruit?

    Dates are traditional and recommended, but prunes can be used for a similar texture.

    Is this pudding suitable for reheating?

    Yes. It reheats very well and often tastes even better the next day.

    Mary Berry 3-Layer Victoria Sponge Recipe

    Recipe by Rose MeltonCourse: DessertCuisine: BritishDifficulty: Easy
    Servings

    4

    servings
    Prep time

    30

    minutes
    Cooking time

    40

    minutes
    Calories

    300

    kcal
    Total time

    1

    hour 

    10

    minutes

    Light, fluffy Mary Berry 3-Layer Victoria Sponge filled with strawberry jam and freshly whipped cream. A classic British cake perfect for any occasion.

    Ingredients

    • 225g unsalted butter, softened

    • 225g caster sugar

    • 4 large eggs

    • 225g self-raising flour

    • 1 tsp baking powder

    • 2 tbsp milk

    • 150ml double cream

    • 2 tbsp icing sugar

    • 4–5 tbsp strawberry jam

    • Fresh strawberries, sliced

    • Icing sugar, for dusting

    • Butter, for greasing tins

    • Baking parchment

    Directions

    • Preheat oven to 180°C (160°C Fan). Grease and line three 8-inch round cake tins.
    • Place butter, caster sugar, eggs, flour, baking powder and milk into a large bowl.
    • Beat with an electric mixer for about 2 minutes until pale, smooth and fully combined.
    • Divide evenly between tins and level the tops.
    • Bake for 20–25 minutes until golden, springy and cooked through.
    • Cool in tins for 5 minutes, then turn out onto a wire rack to cool completely.
    • Whip double cream with icing sugar until soft peaks form.
    • Sandwich the sponges with strawberry jam and whipped cream.
    • Dust with icing sugar and decorate with fresh strawberries before serving.

    Notes

    • Ensure butter is fully softened for best rise.
    • Do not open the oven door early to prevent sinking.
    • Sponge layers can be frozen unfilled for up to 3 months.
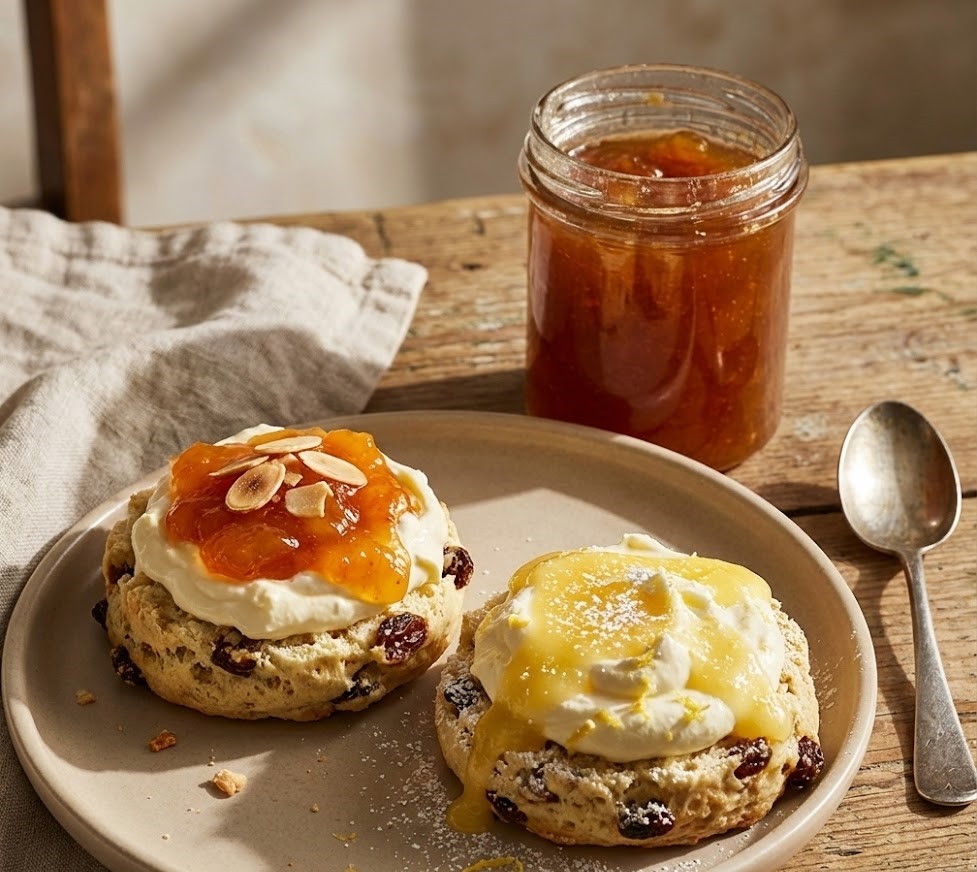
  • James Martin Tomato And Red Pepper Soup

    James Martin Tomato And Red Pepper Soup

    This James Martin tomato and red pepper soup is a smooth, comforting bowl of warmth with a gentle sweetness from roasted peppers and a rich tomato base. The texture is velvety and light, with a deep, savoury flavour that feels both homely and a little special. It is an easy recipe, ideal for beginners, and perfect for a simple lunch or starter. From start to finish, it takes about 45 minutes.

    Ingredients

    For the soup base

    • 2 red peppers, deseeded and roughly chopped
    • 1 large onion, peeled and chopped
    • 2 cloves garlic, peeled
    • 2 tbsp olive oil
    • 400 g tin chopped tomatoes
    • 1 tbsp tomato purée
    • 750 ml vegetable stock
    • Salt, to taste
    • Freshly ground black pepper, to taste

    To finish

    • 2 tbsp double cream, optional
    • Fresh basil leaves, finely chopped
    James Martin Tomato And Red Pepper Soup

    How to Make James Martin Tomato And Red Pepper Soup

    • Prepare the vegetables:Preheat the oven to 200°C. Place the chopped red peppers, onion, and garlic into a roasting tin. Drizzle with olive oil, season lightly with salt and pepper, and toss well to coat everything evenly.
    • Roast for flavour:Roast the vegetables for 25 minutes until soft and lightly caramelised around the edges. This step brings out the natural sweetness and gives the soup its depth.
    • Build the soup:Tip the roasted vegetables into a large saucepan. Add the chopped tomatoes, tomato purée, and vegetable stock. Stir well and bring the mixture to a gentle simmer.
    • Blend until smooth:Simmer for 10 minutes, then remove from the heat. Use a stick blender to blend the soup until completely smooth. Taste and adjust the seasoning as needed.
    • Finish and serve:Stir in the double cream if using. Warm the soup gently, then ladle into bowls and sprinkle with fresh basil before serving.

    Tips for the Best Tomato and Red Pepper Soup

    How do I make the soup extra smooth?

    Blend the soup for a little longer and pass it through a sieve if you want an ultra silky finish.

    Can I make it dairy free?

    Yes. Simply leave out the cream or replace it with a swirl of olive oil or plant based cream.

    How do I balance acidity?

    If the tomatoes taste sharp, add a small pinch of sugar while simmering to round out the flavour.

    Serving Suggestions

    • Serve with warm crusty bread or a buttered roll
    • Add a grilled cheese toastie on the side
    • Finish with a drizzle of olive oil and cracked pepper

    Storage

    Room temperature

    Let the soup cool completely, then store within two hours. Do not keep at room temperature for more than a short serving period.

    Refrigerator

    Store in an airtight container in the fridge for up to 3 days. Reheat gently on the hob or in the microwave.

    Freezing

    Freeze in portions for up to 3 months. Defrost overnight in the fridge and reheat thoroughly before serving.

    Nutrition

    • Calories: 180 kcal
    • Carbohydrates: 18 g
    • Protein: 4 g
    • Fat: 10 g
    • Saturated fat: 3 g
    • Sodium: 520 mg

    Nutritional values are estimates and may vary depending on ingredients used.

    FAQs

    Can I use fresh tomatoes instead of tinned?

    Yes, but roast them with the peppers first. You may need to add a little extra stock as fresh tomatoes contain less liquid.

    Is this soup suitable for batch cooking?

    Absolutely. It keeps well in the fridge and freezer, making it ideal for meal prep.

    Can I add herbs or spices?

    A pinch of smoked paprika or a sprig of thyme works beautifully without overpowering the soup.

    How do I thicken the soup?

    Simmer it uncovered for a few extra minutes or add a small diced potato with the vegetables before blending.

    Mary Berry 3-Layer Victoria Sponge Recipe

    Recipe by Rose MeltonCourse: DessertCuisine: BritishDifficulty: Easy
    Servings

    4

    servings
    Prep time

    30

    minutes
    Cooking time

    40

    minutes
    Calories

    300

    kcal
    Total time

    1

    hour 

    10

    minutes

    Light, fluffy Mary Berry 3-Layer Victoria Sponge filled with strawberry jam and freshly whipped cream. A classic British cake perfect for any occasion.

    Ingredients

    • 225g unsalted butter, softened

    • 225g caster sugar

    • 4 large eggs

    • 225g self-raising flour

    • 1 tsp baking powder

    • 2 tbsp milk

    • 150ml double cream

    • 2 tbsp icing sugar

    • 4–5 tbsp strawberry jam

    • Fresh strawberries, sliced

    • Icing sugar, for dusting

    • Butter, for greasing tins

    • Baking parchment

    Directions

    • Preheat oven to 180°C (160°C Fan). Grease and line three 8-inch round cake tins.
    • Place butter, caster sugar, eggs, flour, baking powder and milk into a large bowl.
    • Beat with an electric mixer for about 2 minutes until pale, smooth and fully combined.
    • Divide evenly between tins and level the tops.
    • Bake for 20–25 minutes until golden, springy and cooked through.
    • Cool in tins for 5 minutes, then turn out onto a wire rack to cool completely.
    • Whip double cream with icing sugar until soft peaks form.
    • Sandwich the sponges with strawberry jam and whipped cream.
    • Dust with icing sugar and decorate with fresh strawberries before serving.

    Notes

    • Ensure butter is fully softened for best rise.
    • Do not open the oven door early to prevent sinking.
    • Sponge layers can be frozen unfilled for up to 3 months.
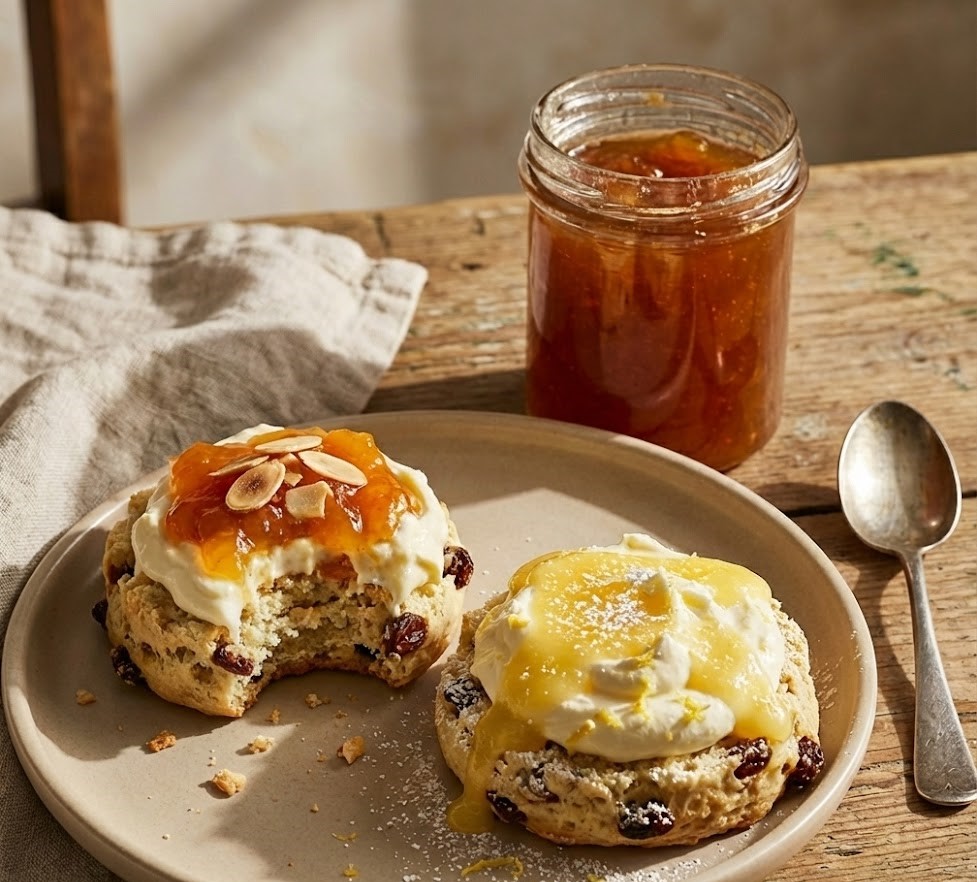
  • James Martin Scones recipe

    James Martin Scones recipe

    These classic British scones are light, tender, and beautifully risen, with a soft crumb and a lightly crisp top. They have a rich buttery flavor that pairs perfectly with jam and clotted cream. The recipe is straightforward and ideal for beginners, with no special equipment needed. From start to finish, you can have warm scones on the table in about 35 minutes.

    Ingredients

    For the scone dough

    • 450g self-raising flour, plus extra for dusting
    • 2 tsp baking powder
    • 75g caster sugar
    • 100g unsalted butter, cold and cubed
    • 2 large eggs
    • 200ml whole milk
    • 1 tsp vanilla extract

    For glazing

    • 1 egg, beaten
    James Martin Scones recipe

    How to Make James Martin Scones

    • Prepare the oven:Preheat the oven to 200°C. Line a large baking tray with baking parchment and set it aside. Make sure the oven is fully hot before baking to help the scones rise well.
    • Mix the dry ingredients:Sift the self-raising flour and baking powder into a large bowl. Add the caster sugar and stir to combine. This helps distribute the raising agents evenly.
    • Rub in the butter:Add the cold cubed butter to the bowl. Using your fingertips, rub it into the flour until the mixture looks like fine breadcrumbs. Work quickly so the butter stays cold.
    • Add the wet ingredients:In a jug, whisk together the eggs, milk, and vanilla extract. Pour most of this into the flour mixture, keeping a little back in case you do not need it all. Mix gently with a knife until a soft dough forms.
    • Shape and cut:Turn the dough out onto a lightly floured surface. Bring it together gently and pat it out to about 2.5cm thick. Use a round cutter to stamp out the scones, pressing straight down without twisting.
    • Bake the scones:Place the scones onto the prepared tray. Brush the tops lightly with beaten egg, taking care not to let it drip down the sides. Bake for 12 to 15 minutes until well risen and golden.
    • Cool slightly:Transfer the baked scones to a wire rack and allow them to cool for a few minutes before serving. They are best enjoyed warm.

    Tips for Perfect Scones

    Why did my scones not rise well?

    Check that your baking powder is fresh and that the oven was fully preheated. Pressing the cutter straight down also helps create an even rise.

    How do I keep scones light and fluffy?

    Handle the dough as little as possible. Overworking it will develop gluten and make the scones dense.

    Can I add fruit to this recipe?

    Yes, you can fold in about 100g of sultanas or raisins after rubbing in the butter. Add them before the wet ingredients.

    Serving Suggestions

    • Serve warm with clotted cream and strawberry jam
    • Enjoy with butter and honey
    • Pair with fresh berries and whipped cream
    • Serve alongside afternoon tea or brunch

    Storage

    Room temperature

    Keep cooled scones in an airtight container for up to 2 days.

    Refrigerator

    Scones can be stored in the fridge for up to 4 days, though they are best reheated before serving.

    Freezing

    Freeze unfilled scones for up to 3 months. Defrost at room temperature and warm gently in the oven.

    Nutrition

    • Calories: 280 kcal
    • Carbohydrates: 42g
    • Protein: 7g
    • Fat: 9g
    • Saturated fat: 5g
    • Sodium: 220mg

    Nutrition values are estimates and may vary depending on ingredients used.

    FAQs

    Can I make scones without eggs?

    Yes, you can replace the eggs with extra milk, adding it gradually until a soft dough forms.

    What flour is best for scones?

    Self-raising flour is ideal as it gives the best rise and light texture.

    Can I make the dough ahead of time?

    It is best to bake scones straight away, but you can cut them and chill for up to 1 hour before baking.

    How do I reheat scones?

    Warm them in a low oven at 160°C for about 5 minutes to refresh their texture.

    Mary Berry 3-Layer Victoria Sponge Recipe

    Recipe by Rose MeltonCourse: DessertCuisine: BritishDifficulty: Easy
    Servings

    4

    servings
    Prep time

    30

    minutes
    Cooking time

    40

    minutes
    Calories

    300

    kcal
    Total time

    1

    hour 

    10

    minutes

    Light, fluffy Mary Berry 3-Layer Victoria Sponge filled with strawberry jam and freshly whipped cream. A classic British cake perfect for any occasion.

    Ingredients

    • 225g unsalted butter, softened

    • 225g caster sugar

    • 4 large eggs

    • 225g self-raising flour

    • 1 tsp baking powder

    • 2 tbsp milk

    • 150ml double cream

    • 2 tbsp icing sugar

    • 4–5 tbsp strawberry jam

    • Fresh strawberries, sliced

    • Icing sugar, for dusting

    • Butter, for greasing tins

    • Baking parchment

    Directions

    • Preheat oven to 180°C (160°C Fan). Grease and line three 8-inch round cake tins.
    • Place butter, caster sugar, eggs, flour, baking powder and milk into a large bowl.
    • Beat with an electric mixer for about 2 minutes until pale, smooth and fully combined.
    • Divide evenly between tins and level the tops.
    • Bake for 20–25 minutes until golden, springy and cooked through.
    • Cool in tins for 5 minutes, then turn out onto a wire rack to cool completely.
    • Whip double cream with icing sugar until soft peaks form.
    • Sandwich the sponges with strawberry jam and whipped cream.
    • Dust with icing sugar and decorate with fresh strawberries before serving.

    Notes

    • Ensure butter is fully softened for best rise.
    • Do not open the oven door early to prevent sinking.
    • Sponge layers can be frozen unfilled for up to 3 months.
  • James Martin Apple Crumble

    James Martin Apple Crumble

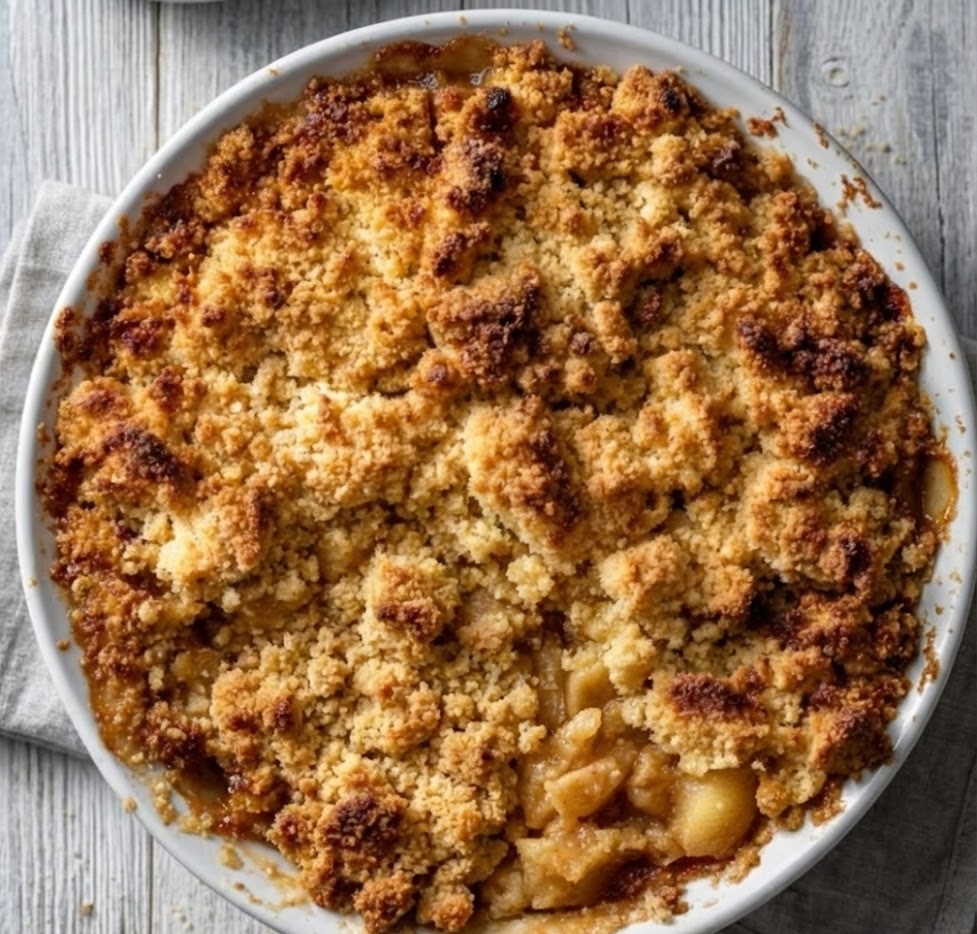
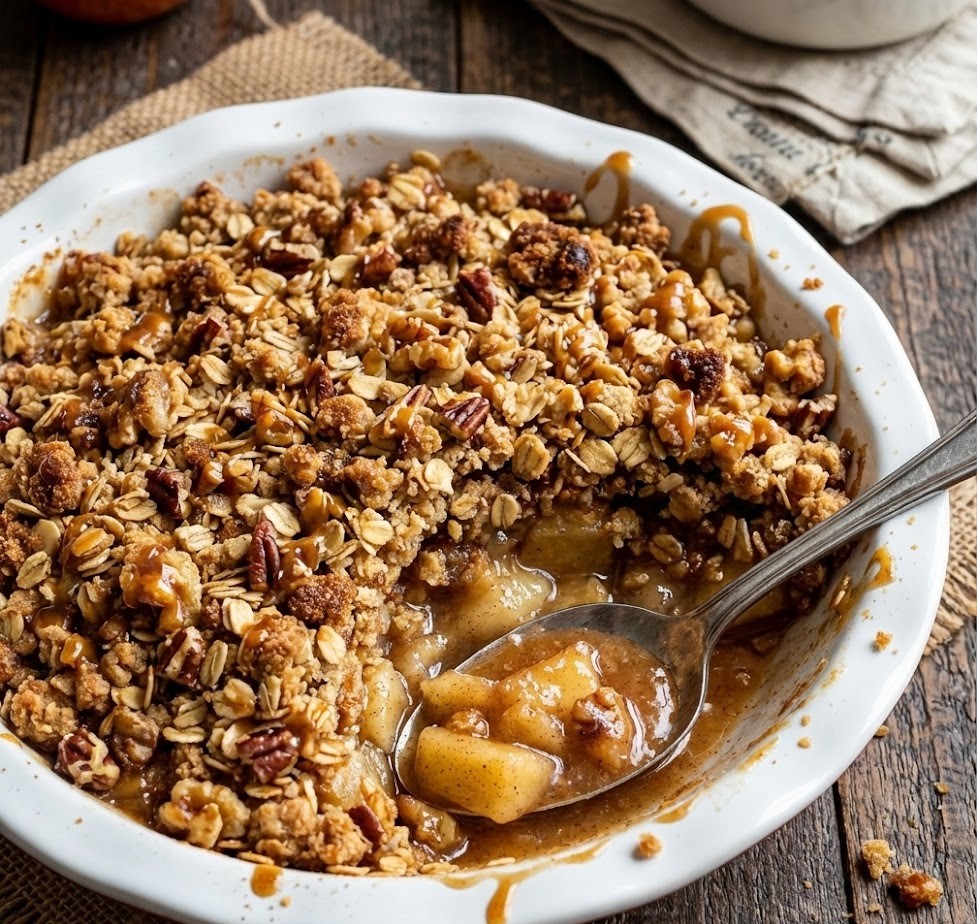
    This James Martin apple crumble is a classic British pudding with soft, gently spiced apples tucked beneath a crisp, buttery topping. The contrast between the tender fruit and golden crumble makes every spoonful comforting and satisfying. It is an easy recipe that suits beginners yet delivers bakery quality results. From start to finish, it comes together in about 50 minutes, making it perfect for a relaxed family dessert.

    Ingredients

    For the Apple Filling

    • 800 g Bramley apples, peeled, cored, and sliced
    • 75 g caster sugar
    • 1 tsp ground cinnamon
    • 1 tbsp lemon juice
    • 2 tbsp water

    For the Crumble Topping

    • 200 g plain flour
    • 100 g cold unsalted butter, cubed
    • 100 g demerara sugar
    • A pinch of salt
    James Martin Apple Crumble

    How to Make James Martin Apple Crumble

    • Prepare the Oven and Dish:Preheat the oven to 190°C or 170°C fan. Lightly butter a medium ovenproof dish and set it aside.
    • Cook the Apple Filling:Place the sliced apples, caster sugar, cinnamon, lemon juice, and water into a saucepan. Cook gently over medium heat for about 5 minutes until the apples start to soften but still hold their shape. Spoon the apples into the prepared dish and spread them evenly.
    • Make the Crumble Topping:Add the flour, cold butter, and salt to a bowl. Rub the butter into the flour using your fingertips until the mixture resembles coarse breadcrumbs. Stir in the demerara sugar without overworking the mixture.
    • Assemble and Bake:Sprinkle the crumble topping evenly over the apples, keeping it loose for a crisp finish. Bake for 30 to 35 minutes until the top is golden and the filling is bubbling around the edges.
    • Cool Slightly Before Serving:Remove from the oven and allow the crumble to rest for 5 minutes before serving. This helps the juices settle and makes serving easier.

    Tips for the Best Apple Crumble

    How do I stop the crumble from becoming soggy?

    Always cook the apples briefly before baking and keep the topping loose rather than packed down.

    Which apples work best?

    Bramley apples are ideal because they soften beautifully and balance the sweetness of the topping.

    Can I make the topping extra crunchy?

    Add a tablespoon of oats or chopped nuts to the crumble mixture for more texture.

    Why is my crumble pale?

    Use demerara sugar and make sure the oven is fully preheated for a deeper golden colour.

    Serving Suggestions

    • Serve warm with custard for a traditional finish
    • Pair with vanilla ice cream for contrast
    • Enjoy with lightly whipped cream

    Storage

    Room Temperature

    Cover and keep for up to 24 hours in a cool place.

    Refrigerator

    Store in an airtight container for up to 3 days. Reheat gently before serving.

    Freezing

    Freeze baked and cooled crumble for up to 3 months. Thaw overnight in the fridge and reheat in the oven.

    Nutrition

    • Calories: 380 kcal
    • Carbohydrates: 55 g
    • Protein: 5 g
    • Fat: 16 g
    • Saturated Fat: 9 g
    • Sodium: 120 mg

    Nutrition values are estimates and may vary depending on ingredients used.

    FAQs

    Can I make apple crumble ahead of time?

    Yes, you can prepare the filling and topping separately and assemble just before baking.

    Can I use eating apples instead of Bramley?

    You can, but reduce the sugar slightly as eating apples are sweeter.

    How do I reheat apple crumble?

    Reheat in the oven at 170°C until warmed through to keep the topping crisp.

    Can I add spices other than cinnamon?

    Nutmeg or mixedspice works well in small amounts.

    Mary Berry 3-Layer Victoria Sponge Recipe

    Recipe by Rose MeltonCourse: DessertCuisine: BritishDifficulty: Easy
    Servings

    4

    servings
    Prep time

    30

    minutes
    Cooking time

    40

    minutes
    Calories

    300

    kcal
    Total time

    1

    hour 

    10

    minutes

    Light, fluffy Mary Berry 3-Layer Victoria Sponge filled with strawberry jam and freshly whipped cream. A classic British cake perfect for any occasion.

    Ingredients

    • 225g unsalted butter, softened

    • 225g caster sugar

    • 4 large eggs

    • 225g self-raising flour

    • 1 tsp baking powder

    • 2 tbsp milk

    • 150ml double cream

    • 2 tbsp icing sugar

    • 4–5 tbsp strawberry jam

    • Fresh strawberries, sliced

    • Icing sugar, for dusting

    • Butter, for greasing tins

    • Baking parchment

    Directions

    • Preheat oven to 180°C (160°C Fan). Grease and line three 8-inch round cake tins.
    • Place butter, caster sugar, eggs, flour, baking powder and milk into a large bowl.
    • Beat with an electric mixer for about 2 minutes until pale, smooth and fully combined.
    • Divide evenly between tins and level the tops.
    • Bake for 20–25 minutes until golden, springy and cooked through.
    • Cool in tins for 5 minutes, then turn out onto a wire rack to cool completely.
    • Whip double cream with icing sugar until soft peaks form.
    • Sandwich the sponges with strawberry jam and whipped cream.
    • Dust with icing sugar and decorate with fresh strawberries before serving.

    Notes

    • Ensure butter is fully softened for best rise.
    • Do not open the oven door early to prevent sinking.
    • Sponge layers can be frozen unfilled for up to 3 months.
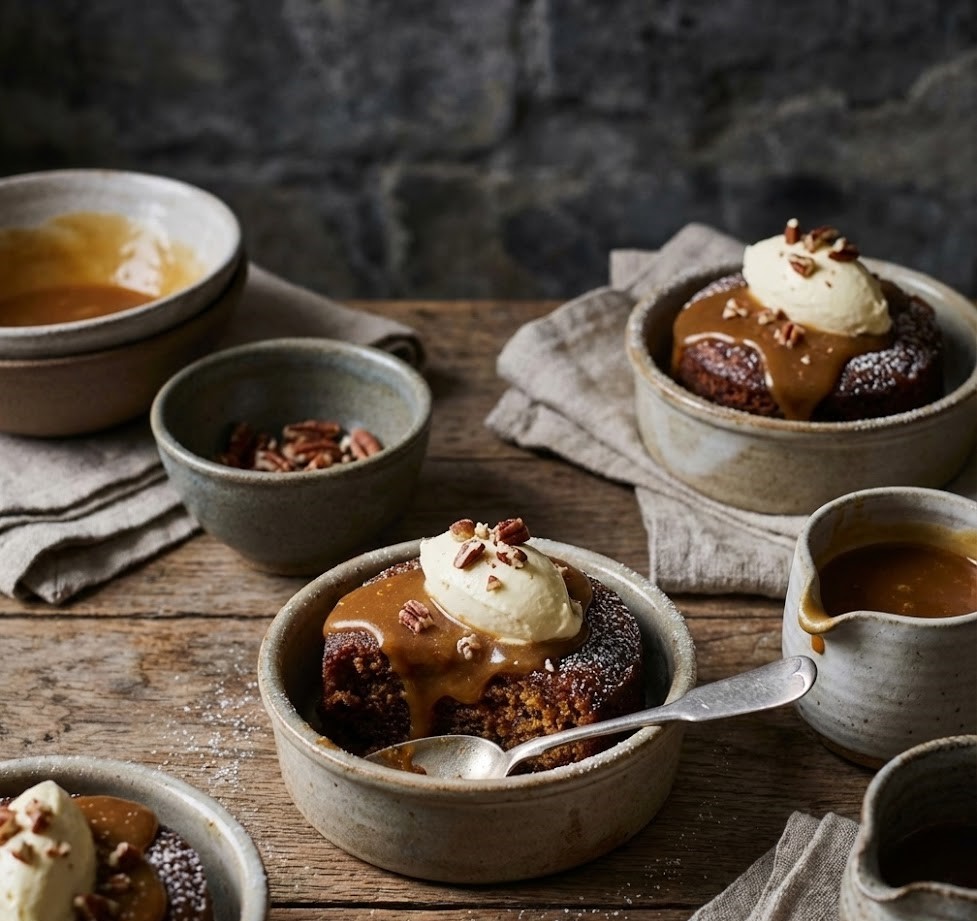
  • James Martin Asparagus Quiche

    James Martin Asparagus Quiche

    This James Martin asparagus quiche is a classic savoury bake with a crisp pastry base and a rich, creamy filling studded with tender asparagus. The texture is light yet satisfying, with a delicate balance of buttery pastry and soft custard. It is a straightforward recipe that suits confident beginners and experienced home bakers alike. From start to finish, allow around 1 hour and 20 minutes, including baking and cooling time.

    Ingredients

    For the pastry

    • 200g plain flour
    • 100g unsalted butter, cold and cubed
    • 1 large egg yolk
    • 2 to 3 tbsp cold water
    • A pinch of salt

    For the filling

    • 200g asparagus spears, trimmed
    • 4 large eggs
    • 300ml double cream
    • 100g mature Cheddar cheese, grated
    • 25g Parmesan cheese, finely grated
    • Salt, to taste
    • Freshly ground black pepper, to taste
    • A pinch of freshly grated nutmeg
    James Martin Asparagus Quiche

    How to Make James Martin Asparagus Quiche

    • Prepare the oven and tin:Preheat the oven to 190°C or 170°C fan. Lightly grease a 23cm loose-bottomed tart tin and set it aside.
    • Make the pastry:Put the flour, salt, and butter into a large bowl. Rub the butter into the flour with your fingertips until the mixture resembles fine breadcrumbs. Stir in the egg yolk, then add enough cold water to bring the dough together. Shape into a disc, wrap, and chill for 20 minutes.
    • Blind bake the pastry:Roll out the chilled pastry on a lightly floured surface and line the prepared tin. Prick the base with a fork, line with baking parchment, and fill with baking beans. Bake for 15 minutes, then remove the beans and parchment and return to the oven for 5 minutes until the base looks dry and lightly golden.
    • Prepare the filling:Bring a pan of lightly salted water to the boil. Add the asparagus and cook for 2 to 3 minutes until just tender. Drain well and cut into bite-sized pieces. In a bowl, whisk the eggs and cream together, then stir in both cheeses, seasoning, and nutmeg.
    • Assemble and bake:Spread the asparagus evenly over the pastry base. Pour the egg mixture on top, allowing it to settle around the asparagus. Bake for 30 to 35 minutes until the quiche is set with a gentle wobble in the centre and lightly golden on top.
    • Cool before serving:Remove from the oven and leave to cool in the tin for at least 15 minutes before slicing. This helps the filling firm up and makes serving easier.

    Tips for the Best Asparagus Quiche

    How do I stop the pastry from going soggy?

    Always blind bake the pastry fully before adding the filling. This creates a sealed base that stays crisp.

    Can I use ready-made pastry?

    Yes, good-quality ready-rolled shortcrust pastry works well and saves time. Chill it briefly before lining the tin for best results.

    How do I know when the quiche is cooked?

    The centre should be just set with a slight wobble. If it looks liquid, give it another 5 minutes and check again.

    Should I trim the asparagus?

    Yes, snap off the woody ends so only the tender part goes into the quiche.

    Serving Suggestions

    • Serve warm with a simple green salad
    • Pair with new potatoes and butter
    • Add a spoon of chutney or relish on the side

    Storage

    Room temperature

    The quiche can sit at room temperature for up to 4 hours, making it ideal for lunches or picnics.

    Refrigerator

    Store leftovers in an airtight container in the fridge for up to 3 days. Reheat gently in the oven or enjoy cold.

    Freezing

    Wrap individual slices tightly and freeze for up to 2 months. Defrost overnight in the fridge and reheat before serving.

    Nutrition

    • Calories: 420 kcal
    • Carbohydrates: 28 g
    • Protein: 13 g
    • Fat: 29 g
    • Saturated fat: 16 g
    • Sodium: 380 mg

    Nutritional values are estimates and may vary depending on ingredients used.

    FAQs

    Can I make this quiche ahead of time?

    Yes, it can be baked a day in advance and stored in the fridge. Reheat gently before serving or enjoy it cold.

    Can I add other vegetables?

    Leeks, peas, or spinach all work well with asparagus. Cook and drain them well before adding.

    What cheese works best?

    A strong Cheddar adds flavour, while Parmesan gives depth. Gruyère is also an excellent alternative.

    Can I make this without cream?

    You can replace some or all of the cream with whole milk, but the filling will be lighter and less rich.

    Mary Berry 3-Layer Victoria Sponge Recipe

    Recipe by Rose MeltonCourse: DessertCuisine: BritishDifficulty: Easy
    Servings

    12

    slices
    Prep time

    25

    minutes
    Cooking time

    25

    minutes
    Total time

    90

    minutes
    Calories

    410

    kcal

    50

    minutes

    Light, fluffy Mary Berry 3-Layer Victoria Sponge filled with strawberry jam and freshly whipped cream. A classic British cake perfect for any occasion.

    Ingredients

    • 225g unsalted butter, softened

    • 225g caster sugar

    • 4 large eggs

    • 225g self-raising flour

    • 1 tsp baking powder

    • 2 tbsp milk

    • 150ml double cream

    • 2 tbsp icing sugar

    • 4–5 tbsp strawberry jam

    • Fresh strawberries, sliced

    • Icing sugar, for dusting

    • Butter, for greasing tins

    • Baking parchment

    Directions

    • Preheat oven to 180°C (160°C Fan). Grease and line three 8-inch round cake tins.
    • Place butter, caster sugar, eggs, flour, baking powder and milk into a large bowl.
    • Beat with an electric mixer for about 2 minutes until pale, smooth and fully combined.
    • Divide evenly between tins and level the tops.
    • Bake for 20–25 minutes until golden, springy and cooked through.
    • Cool in tins for 5 minutes, then turn out onto a wire rack to cool completely.
    • Whip double cream with icing sugar until soft peaks form.
    • Sandwich the sponges with strawberry jam and whipped cream.
    • Dust with icing sugar and decorate with fresh strawberries before serving.

    Notes

    • Ensure butter is fully softened for best rise.
    • Do not open the oven door early to prevent sinking.
    • Sponge layers can be frozen unfilled for up to 3 months.
  • James Martin Cherry Scones

    James Martin Cherry Scones

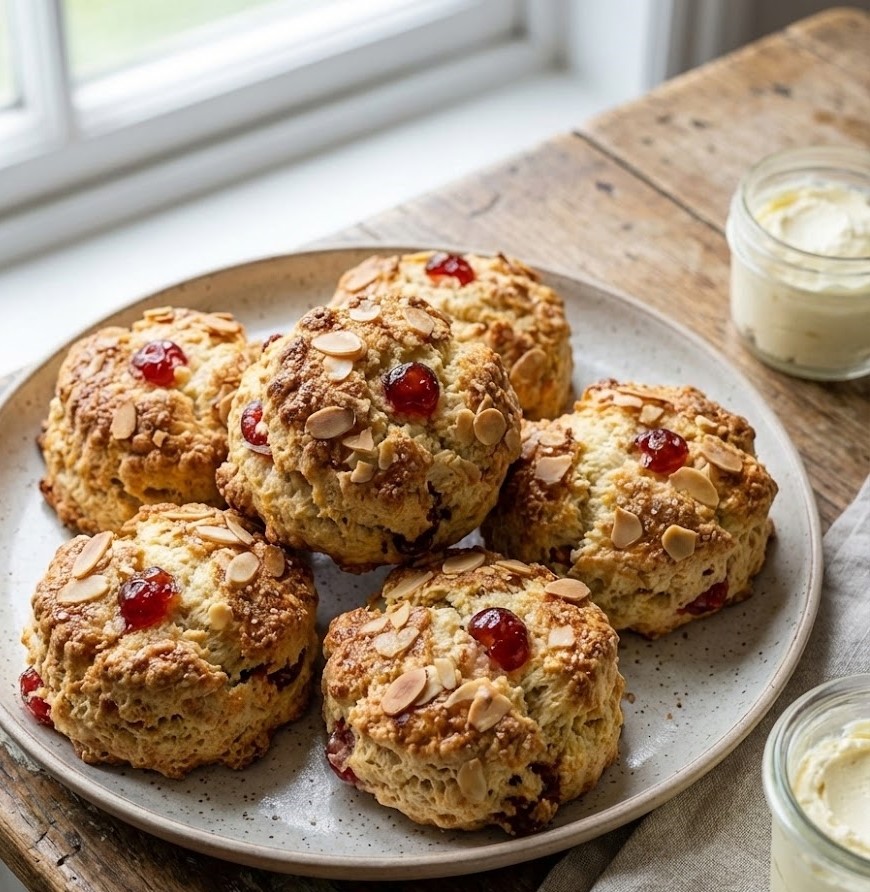
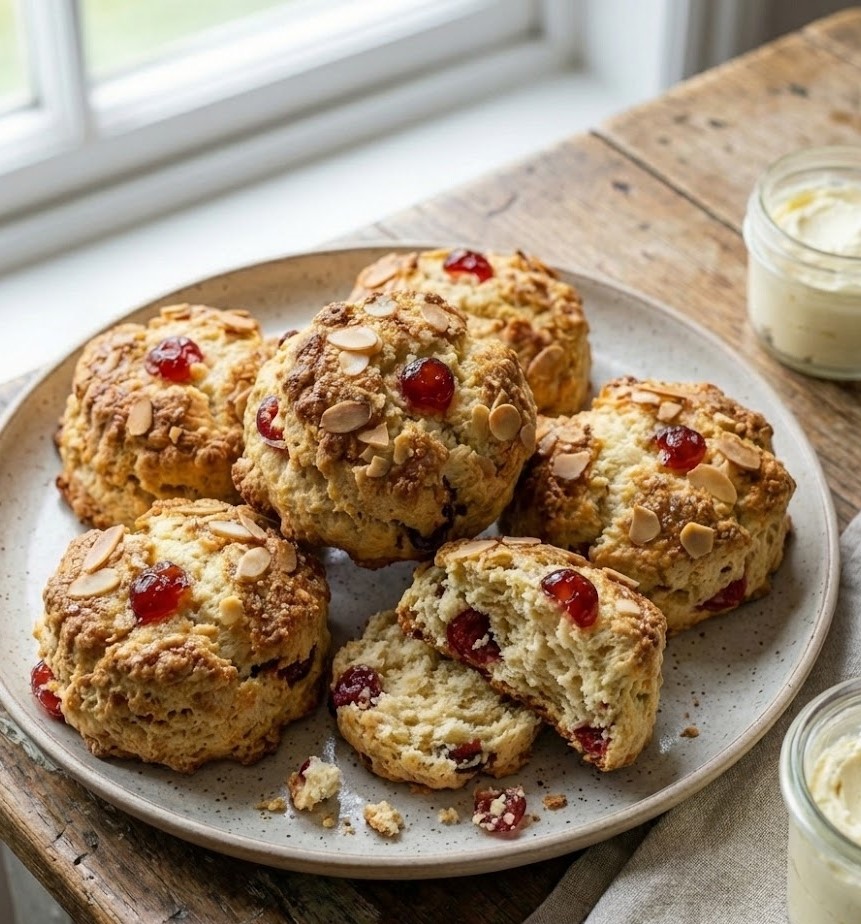
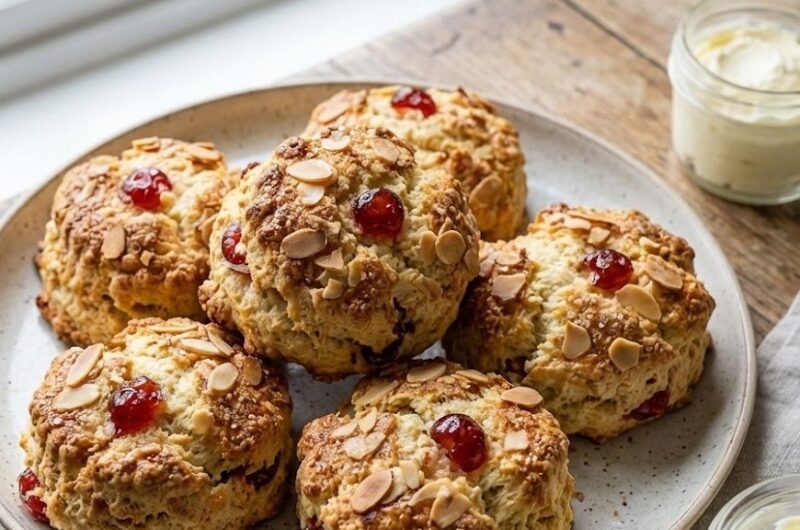
    These James Martin cherry scones are soft, lightly crumbly, and studded with sweet bursts of cherry in every bite. They have a tender interior with a gentle crust, rich with buttery flavour and just enough sweetness to feel special without being heavy. This is an easy, classic bake that suits confident beginners and seasoned bakers alike. From start to finish, you are looking at around 35 minutes, making them perfect for a relaxed afternoon bake.

    Ingredients

    For the scone dough

    • 350g self-raising flour
    • 1 tsp baking powder
    • 85g unsalted butter, cold and diced
    • 3 tbsp caster sugar
    • 175ml whole milk, plus extra for glazing
    • 1 tsp vanilla extract

    For the cherries

    • 100g glacé cherries, rinsed, dried, and finely chopped
    • 1 tbsp flour, for coating the cherries
    James Martin Cherry Scones

    How to Make James Martin Cherry Scones

    • Prepare the oven:Preheat the oven to 220°C or 200°C fan. Line a baking tray with baking parchment and set it aside. This high heat helps the scones rise quickly and evenly.
    • Mix the dry ingredients:Sift the self-raising flour and baking powder into a large bowl. Add the cold butter and rub it in with your fingertips until the mixture looks like fine breadcrumbs. Stir in the caster sugar.
    • Add the cherries and liquid:Toss the chopped cherries in the tablespoon of flour, then gently fold them into the bowl. Make a well in the centre and pour in the milk and vanilla extract. Use a knife to bring everything together into a soft dough.
    • Shape and cut:Turn the dough out onto a lightly floured surface. Bring it together gently, then pat it out to about 2.5cm thick. Cut out rounds using a 5cm cutter, pressing straight down without twisting.
    • Bake the scones:Place the scones onto the prepared tray, brush the tops lightly with milk, and bake for 12 to 15 minutes. They should be well risen and lightly golden on top.
    • Cool and serve:Transfer the scones to a wire rack and allow them to cool slightly before serving. They are best enjoyed warm.

    Tips for Perfect Cherry Scones

    Why did my scones spread instead of rising?

    This usually happens if the butter was too soft or the dough was overworked. Keep the butter cold and handle the dough as little as possible.

    How do I stop cherries sinking to the bottom?

    Always coat the chopped cherries in a little flour before adding them. This helps distribute them evenly through the dough.

    Can I make these scones lighter?

    Yes. Use a light touch when bringing the dough together and avoid kneading. A gentle hand makes all the difference.

    Serving Suggestions

    • Serve warm with clotted cream and cherry or strawberry jam
    • Enjoy with a cup of strong tea or fresh coffee
    • Split and butter lightly for a simple treat

    Storage

    Room temperature

    Keep the scones in an airtight container for up to 2 days. Reheat briefly before serving for the best texture.

    Refrigerator

    Refrigeration is not ideal as it can dry them out, but they will keep for up to 4 days if well wrapped.

    Freezing

    Freeze baked scones once fully cooled for up to 3 months. Defrost at room temperature and warm gently in the oven.

    Nutrition

    • Calories: 285 kcal
    • Carbohydrates: 42g
    • Protein: 6g
    • Fat: 10g
    • Saturated fat: 6g
    • Sodium: 220mg

    Nutritional values are approximate and provided as a general guide.

    FAQs

    Can I use fresh cherries instead of glacé cherries?

    Yes, but they must be pitted, finely chopped, and very well dried. Fresh cherries add more moisture, so the texture may be slightly softer.

    Can I make these cherry scones without sugar?

    You can reduce the sugar, but removing it completely will affect both flavour and browning. A small amount is recommended.

    What flour works best for scones?

    Self-raising flour gives the best rise and texture. If using plain flour, add extra baking powder.

    Can I prepare the dough in advance?

    It is best baked fresh, but you can cut the scones and chill them for up to 12 hours before baking. Bake straight from the fridge.

    Mary Berry 3-Layer Victoria Sponge Recipe

    Recipe by Rose MeltonCourse: DessertCuisine: BritishDifficulty: Easy
    Servings

    4

    servings
    Prep time

    30

    minutes
    Cooking time

    40

    minutes
    Calories

    300

    kcal
    Total time

    1

    hour 

    10

    minutes

    Light, fluffy Mary Berry 3-Layer Victoria Sponge filled with strawberry jam and freshly whipped cream. A classic British cake perfect for any occasion.

    Ingredients

    • 225g unsalted butter, softened

    • 225g caster sugar

    • 4 large eggs

    • 225g self-raising flour

    • 1 tsp baking powder

    • 2 tbsp milk

    • 150ml double cream

    • 2 tbsp icing sugar

    • 4–5 tbsp strawberry jam

    • Fresh strawberries, sliced

    • Icing sugar, for dusting

    • Butter, for greasing tins

    • Baking parchment

    Directions

    • Preheat oven to 180°C (160°C Fan). Grease and line three 8-inch round cake tins.
    • Place butter, caster sugar, eggs, flour, baking powder and milk into a large bowl.
    • Beat with an electric mixer for about 2 minutes until pale, smooth and fully combined.
    • Divide evenly between tins and level the tops.
    • Bake for 20–25 minutes until golden, springy and cooked through.
    • Cool in tins for 5 minutes, then turn out onto a wire rack to cool completely.
    • Whip double cream with icing sugar until soft peaks form.
    • Sandwich the sponges with strawberry jam and whipped cream.
    • Dust with icing sugar and decorate with fresh strawberries before serving.

    Notes

    • Ensure butter is fully softened for best rise.
    • Do not open the oven door early to prevent sinking.
    • Sponge layers can be frozen unfilled for up to 3 months.
  • James Martin Soda Bread

    James Martin Soda Bread

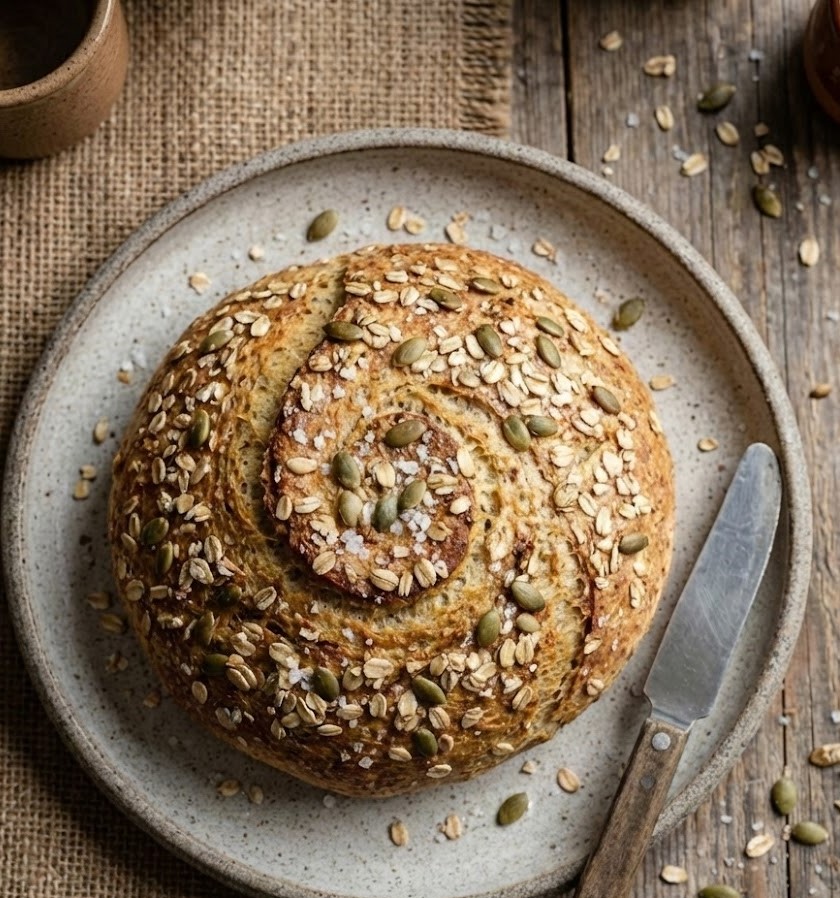
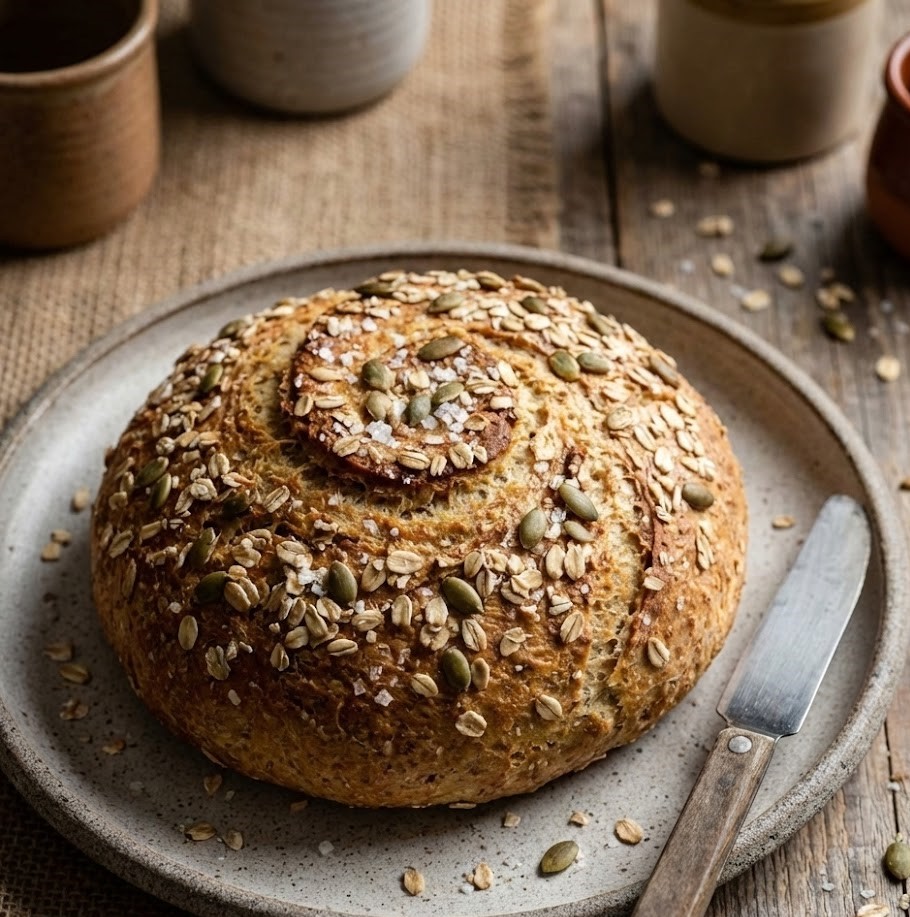
    James Martin soda bread is a classic, no-fuss loaf that comes together quickly using simple pantry ingredients. It has a crisp, golden crust with a soft, slightly dense crumb and a mild, wheaty flavor that pairs beautifully with butter. This is an easy recipe suitable for beginners, with no yeast or long rising time required. From start to finish, it takes about 45 minutes.

    Ingredients

    For the Soda Bread

    • 450g plain flour
    • 1 tsp salt
    • 1 tsp sugar
    • 1 tsp bicarbonate of soda
    • 350 ml buttermilk, plus a little extra if needed
    James Martin Soda Bread

    How to Make James Martin Soda Bread

    • Prepare the Oven:Preheat your oven to 200°C. Lightly dust a baking tray with flour or line it with baking parchment.
    • Mix the Dry Ingredients:Sift the flour into a large mixing bowl. Add the salt, sugar, and bicarbonate of soda, then stir well so everything is evenly combined.
    • Add the Buttermilk:Make a well in the center and pour in most of the buttermilk. Use your hand or a wooden spoon to bring the dough together gently. Add the remaining buttermilk only if the dough feels too dry. It should be soft but not sticky.
    • Shape and Bake:Turn the dough out onto a lightly floured surface and shape it into a round loaf. Place it on the prepared tray and cut a deep cross on top. Bake for 30 to 35 minutes until the bread is golden and sounds hollow when tapped underneath.
    • Cool:Transfer the loaf to a wire rack and allow it to cool for at least 15 minutes before slicing.

    Tips for the Best Soda Bread

    Why is my soda bread dense?

    This usually happens if the dough is overworked. Mix gently and stop as soon as the dough comes together.

    Can I use milk instead of buttermilk?

    Yes, but add 1 tablespoon of lemon juice or vinegar to the milk and let it stand for 5 minutes before using.

    How do I know when it is fully baked?

    Tap the bottom of the loaf. If it sounds hollow, it is done.

    Should I let it rest before slicing?

    Yes, resting allows the crumb to set and makes slicing easier.

    Serving Suggestions

    • Serve warm with salted butter
    • Pair with soups and stews
    • Enjoy with cheese and chutney
    • Toast slices for breakfast

    Storage

    Room Temperature

    Keep wrapped in a clean tea towel for up to 2 days.

    Refrigerator

    Not recommended, as it can dry out the bread.

    Freezing

    Freeze sliced soda bread for up to 3 months. Defrost at room temperature and toast if desired.

    Nutrition

    • Calories: 180 kcal
    • Carbohydrates: 36 g
    • Protein: 6 g
    • Fat: 1 g
    • Saturated Fat: 0.2 g
    • Sodium: 320 mg

    Nutrition values are estimates and may vary based on ingredients used.

    FAQs

    Is soda bread the same as Irish bread?

    Yes, traditional soda bread is an Irish staple made without yeast.

    Can I add seeds or grains?

    Yes, you can add oats, sunflower seeds, or caraway seeds for extra texture.

    Why do you cut a cross on top?

    It helps the bread cook evenly and allows heat to reach the center.

    Can I make this gluten free?

    You can use a gluten free plain flour blend, but the texture will be slightly different.

    Mary Berry 3-Layer Victoria Sponge Recipe

    Recipe by Rose MeltonCourse: DessertCuisine: BritishDifficulty: Easy
    Servings

    4

    servings
    Prep time

    30

    minutes
    Cooking time

    40

    minutes
    Calories

    300

    kcal
    Total time

    1

    hour 

    10

    minutes

    Light, fluffy Mary Berry 3-Layer Victoria Sponge filled with strawberry jam and freshly whipped cream. A classic British cake perfect for any occasion.

    Ingredients

    • 225g unsalted butter, softened

    • 225g caster sugar

    • 4 large eggs

    • 225g self-raising flour

    • 1 tsp baking powder

    • 2 tbsp milk

    • 150ml double cream

    • 2 tbsp icing sugar

    • 4–5 tbsp strawberry jam

    • Fresh strawberries, sliced

    • Icing sugar, for dusting

    • Butter, for greasing tins

    • Baking parchment

    Directions

    • Preheat oven to 180°C (160°C Fan). Grease and line three 8-inch round cake tins.
    • Place butter, caster sugar, eggs, flour, baking powder and milk into a large bowl.
    • Beat with an electric mixer for about 2 minutes until pale, smooth and fully combined.
    • Divide evenly between tins and level the tops.
    • Bake for 20–25 minutes until golden, springy and cooked through.
    • Cool in tins for 5 minutes, then turn out onto a wire rack to cool completely.
    • Whip double cream with icing sugar until soft peaks form.
    • Sandwich the sponges with strawberry jam and whipped cream.
    • Dust with icing sugar and decorate with fresh strawberries before serving.

    Notes

    • Ensure butter is fully softened for best rise.
    • Do not open the oven door early to prevent sinking.
    • Sponge layers can be frozen unfilled for up to 3 months.

slot depo

sicbo online