Blog

  • Leek and Potato Soup Recipe

    Leek and Potato Soup Recipe

    This leek and potato soup is smooth, velvety, and gently sweet from the leeks, with a satisfying, creamy body from the potatoes. It is an easy, reliable soup that tastes like it simmered all afternoon, but it comes together quickly on a weeknight. I finish it with a small splash of cream (optional) and a handful of crisp oven croutons for contrast. Total time is about 55 minutes, and it is very beginner-friendly.

    Ingredients

    For the soup

    • 3 large leeks (about 600g), white and light green parts only
    • 1 medium onion, finely chopped
    • 2 tbsp unsalted butter
    • 1 tbsp olive oil
    • 2 garlic cloves, finely chopped (optional)
    • 650g potatoes (Maris Piper, Yukon Gold, or King Edward), peeled and diced
    • 1 litre vegetable or chicken stock, preferably hot
    • 2 sprigs fresh thyme (or 1/2 tsp dried thyme)
    • 1 bay leaf
    • 150ml double cream or whole milk (optional, to finish)
    • 1 1/2 tsp fine salt, plus more to taste
    • Black pepper, to taste

    For crunchy croutons (optional)

    • 2 thick slices crusty bread (sourdough is great), cut into 1.5cm cubes
    • 1 tbsp olive oil
    • 1/4 tsp fine salt
    • 1/4 tsp dried thyme (or a pinch of fresh thyme leaves)

    To serve (optional)

    • Chives, finely sliced
    • Extra black pepper
    • A swirl of cream or a drizzle of olive oil

    How to Make Leek and Potato Soup

    • Prepare the oven: Preheat the oven to 200°C or 180°C fan. Line a small tray with baking paper so the croutons crisp evenly and do not stick.
    • Prep the leeks properly: Slice the leeks, then place them in a large bowl of cold water and swish well to release any grit. Lift the leeks out (do not pour the sandy water back over them) and drain thoroughly.
    • Mix and bake the croutons: Toss the bread cubes with olive oil, salt, and thyme. Spread on the tray in a single layer and bake for 10 to 12 minutes, turning once, until crisp and golden. Set aside.
    • Start the soup base: In a large saucepan or Dutch oven, melt the butter with the olive oil over medium-low heat. Add the leeks and onion, then cook gently for 10 to 12 minutes until soft and sweet. Stir often and keep the heat low so they do not brown.
    • Add the potatoes and stock: Stir in the garlic (if using) for 1 minute. Add the diced potatoes, hot stock, thyme, bay leaf, and salt. Bring to a gentle simmer.
    • Cook until tender: Simmer uncovered for 15 to 20 minutes, or until the potatoes are very soft when pierced with a knife. Remove the bay leaf and thyme sprigs.
    • Blend (mix) until smooth: Use a stick blender to blend the soup directly in the pot until silky. If using a countertop blender, cool the soup for 10 minutes first, blend in batches, and vent the lid so steam can escape.
    • Finish, cool slightly, and assemble to serve: Stir in the cream or milk (if using) and warm gently over low heat. Taste and adjust salt and pepper. Ladle into bowls, then top with chives, black pepper, and a handful of crunchy croutons.

    How to Make Leek and Potato Soup

    Tips

    How do I clean leeks so the soup is not gritty?

    Slice first, then wash. Leeks trap sand between their layers, so soaking the sliced leeks in cold water and lifting them out is far more effective than rinsing under the tap.

    How do I keep leek and potato soup from tasting bitter?

    Bitter notes usually come from browning the leeks or using very dark stock. Cook the leeks over medium-low heat until soft, not golden, and use a mild stock. A small splash of cream also rounds out any sharp edges.

    Why did my soup turn gluey after blending?

    Over-blending can make potatoes gummy, especially with a high-speed blender. Blend only until smooth, and avoid blending for several minutes straight. A stick blender is very forgiving here.

    How can I make it thicker or thinner?

    For a thicker soup, simmer a few minutes longer before blending, or add an extra 100g of potato. For a thinner soup, add a splash of hot stock or milk until it is exactly the consistency you like.

    Can I make this without cream?

    Yes. The potatoes make it naturally creamy. Finish with whole milk, a drizzle of olive oil, or simply leave it as is and season well.

    Serving Suggestions

    • Serve with buttered crusty bread or a toasted cheese sandwich.
    • Add a simple green salad with a sharp vinaigrette to balance the richness.
    • Top with crispy bacon bits or pan-fried mushrooms for a heartier bowl.
    • Make it dinner-worthy with roasted chicken, salmon, or sausages on the side.

    Storage

    Room temperature

    Cool the soup quickly and do not leave it out for more than 2 hours (1 hour if your kitchen is warm). Transfer to containers once it stops steaming.

    Refrigerator

    Store in an airtight container for up to 4 days. Reheat gently on the hob over low heat, stirring often. If the soup thickens in the fridge, loosen with a splash of stock or water.

    Freezing

    Freeze for up to 3 months. For best texture, freeze before adding cream, then stir cream in after reheating. Defrost overnight in the fridge, or thaw in a saucepan over low heat, stirring regularly.

    Nutrition

    • Calories: 240 kcal
    • Carbohydrates: 26 g
    • Protein: 4 g
    • Fat: 14 g
    • Saturated fat: 8 g
    • Sodium: 650 mg

    Disclaimer: Nutrition values are estimates and will vary based on stock, dairy, and portion size.

    FAQs

    Do I need to use only the white part of the leek?

    The white and light green parts are ideal because they are tender and sweet. The dark green tops can be tougher, but you can save them for stock if you like.

    Can I make leek and potato soup without cream?

    Yes. The potatoes naturally thicken the soup, so it still tastes creamy. Finish with a little whole milk, a drizzle of olive oil, or leave it dairy-free and adjust seasoning.

    What potatoes are best for leek and potato soup?

    Floury potatoes (like Maris Piper, King Edward, or Yukon Gold) blend up smoothly and give the soup its classic velvety texture. Waxy potatoes work, but the soup can be slightly thinner.

    How do I blend hot soup safely?

    A stick blender is the easiest option. If using a countertop blender, let the soup cool for 10 minutes, blend in batches, and vent the lid (cover with a folded tea towel) so steam can escape.

    Why is my leek and potato soup watery?

    It may need a little longer simmering so the potatoes fully soften and release starch. You can also add an extra potato, or simmer the blended soup for a few minutes to reduce and thicken.

    Leek and Potato Soup Recipe

    Recipe by Milli RoseCourse: Soup, Lunch, DinnerCuisine: British, French-inspiredDifficulty: Easy
    Servings

    6

    bowls
    Prep time

    15

    minutes
    Cooking time

    40

    minutes
    Total time

    55

    minutes
    Calories

    240

    kcal

    55

    minutes

    A smooth, creamy leek and potato soup with buttery leeks, tender potatoes, and optional crisp oven croutons. Easy, cozy, and perfect for lunch or dinner.

    Ingredients

    • 3 large leeks (about 600g), white and light green parts only, well washed and thinly sliced

    • 1 medium onion, finely chopped

    • 2 tbsp unsalted butter

    • 1 tbsp olive oil

    • 2 garlic cloves, finely chopped (optional)

    • 650g potatoes (Maris Piper, Yukon Gold, or King Edward), peeled and diced

    • 1 litre vegetable or chicken stock, hot

    • 2 sprigs fresh thyme (or 1/2 tsp dried thyme)

    • 1 bay leaf

    • 150ml double cream or whole milk (optional, to finish)

    • 1 1/2 tsp fine salt, plus more to taste

    • Black pepper, to taste

    Directions

    • Wash and slice the leeks, then prep the onion, garlic, and potatoes.
    • Melt butter with olive oil in a large pot. Add leeks and onion and cook gently until soft, 10 to 12 minutes.
    • Stir in garlic (if using) for 1 minute, then add potatoes, thyme, bay leaf, salt, and stock.
    • Simmer uncovered until potatoes are very tender, 15 to 20 minutes.
    • Remove bay leaf and thyme sprigs. Blend until smooth using a stick blender or countertop blender.
    • Stir in cream or milk (if using). Warm gently, then adjust salt and pepper.
    • Serve hot with chopped chives and croutons if you like.

    Notes

    • Cook the leeks gently without browning to keep the flavour sweet and the soup pale.
    • For the smoothest soup, blend while warm, then pass through a sieve (optional).
    • Cool slightly before blending in a countertop blender, and never fill it more than halfway.

  • Bubble and Squeak Recipe

    Bubble and Squeak Recipe

    Bubble and squeak is a classic British way to turn leftover potatoes and vegetables into crisp-edged, golden cakes with a soft, savoury middle. It’s full of comforting flavours, lightly peppery from cabbage, and rich from butter and a little frying oil. This is an easy, beginner-friendly recipe that’s hard to mess up and very forgiving with leftovers. Total time is about 35 minutes, depending on how cold your mash is to start.

    Ingredients

    For the bubble and squeak mix

    • 500g cold leftover mashed potatoes (or cooked potatoes, mashed and fully chilled)
    • 250g cooked cabbage (savoy/green), squeezed dry and finely chopped
    • 75g leftover cooked vegetables (sprouts, carrots, peas), finely chopped (optional)
    • 2 spring onions, finely sliced (optional)
    • 1 large egg, beaten (optional, helps binding)
    • 2 tbsp plain flour (plus extra if needed)
    • 1 tsp Dijon or English mustard (optional)
    • 3/4 tsp fine salt (adjust depending on how seasoned your leftovers are)
    • 1/2 tsp black pepper

    For crisping

    • 2 tbsp vegetable oil
    • 25g butter, melted

    To serve (optional)

    • Fried or poached eggs
    • Bacon, sausages, or leftover roast meat
    • Brown sauce or ketchup

    How to Make Bubble and Squeak

    Oven preparation

    • Prepare the oven: Preheat the oven to 220°C or 200°C fan. Place a shelf in the middle of the oven so the cakes crisp evenly.
    • Line the tray: Line a large baking tray with baking parchment, then brush the parchment lightly with a little oil to stop sticking and encourage browning.

    Mixing

    • Dry the cabbage: If your cabbage is at all wet, squeeze it well in clean kitchen paper or a tea towel. This keeps the mixture from turning soft and steamy in the oven.
    • Combine the mix: In a large bowl, mix the cold mashed potatoes, chopped cabbage, and any extra vegetables. Add spring onions, flour, mustard, salt, and pepper, then mix until evenly combined.
    • Bind if needed: If your leftovers are crumbly or the cakes don’t hold together when you squeeze a spoonful, mix in the beaten egg.

    Baking

    • Shape the cakes: With lightly floured hands, shape the mixture into 8 patties (about 2cm thick). If it feels sticky, sprinkle in 1–2 extra tablespoons of flour.
    • Brush for crisp edges: Place the patties on the tray. Brush the tops with melted butter and a little oil for a deeper golden crust.
    • Bake and flip: Bake for 15 minutes, then carefully flip each cake with a spatula. Bake for another 8–10 minutes, until golden and crisp at the edges.

    Cooling

    • Rest before serving: Let the cakes sit on the tray for 5 minutes. This helps them firm up so they don’t break when you lift them.

    Assembling

    • Plate up: Serve two cakes per person for a light meal, or one as a side.
    • Add toppings: Top with a fried egg, or serve alongside bacon or sausages. A little brown sauce is very traditional.
    How to Make Bubble and Squeak

    Tips

    Why are my cakes turning out soft instead of crispy?

    This usually comes down to moisture and heat. Make sure the cabbage is squeezed dry, use cold mash, and bake hot (220°C/200°C fan). Brushing with butter and oil helps the surface crisp rather than dry out.

    How do I stop bubble and squeak from falling apart?

    Use cold potatoes, don’t skip the resting time after baking, and add the egg if your leftovers are crumbly. If the mixture still feels loose, add a little more flour a teaspoon at a time.

    Can I make it more flavourful if my leftovers are bland?

    Mustard, spring onions, a pinch of garlic powder, or a small handful of grated cheddar all work well. Taste the mixture before shaping and adjust salt and pepper carefully.

    What’s the best way to get an extra-crisp finish?

    Bake as written, then pan-fry the cakes in a hot frying pan with a thin slick of oil for 1–2 minutes per side. It’s a small extra step that gives you that classic crackly crust.

    Serving Suggestions

    • Top with a fried egg and a grind of black pepper
    • Serve with bacon or sausages for a hearty breakfast
    • Pair with baked beans and grilled tomatoes
    • Add a spoonful of chutney or brown sauce on the side
    • Serve with a simple green salad for lunch

    Storage

    Room temperature

    Best eaten fresh. If you need to hold them briefly, keep them out for up to 2 hours, then refrigerate.

    Refrigerator

    Cool completely, then store in an airtight container for up to 3 days. Reheat on a baking tray at 200°C/180°C fan for 8–12 minutes until hot and crisp again (microwaving works, but softens the crust).

    Freezing

    Freeze baked cakes in a single layer on a tray until solid, then transfer to a freezer bag or container. Freeze for up to 2 months. Reheat from frozen at 200°C/180°C fan for 15–20 minutes, flipping once, until piping hot.

    Nutrition

    • Calories: 250 kcal
    • Carbohydrates: 34 g
    • Protein: 6 g
    • Fat: 10 g
    • Saturated fat: 3 g
    • Sodium: 420 mg

    Disclaimer: Nutrition values are estimates and will vary depending on your leftovers and exact ingredients used.

    FAQs

    Can I make bubble and squeak without cabbage?

    Yes. Cabbage is traditional, but you can swap it for chopped Brussels sprouts, kale, spinach (squeezed very dry), or extra mixed veg. Aim for similar volume and keep the veg as dry as possible so the cakes crisp up.

    Can I pan-fry instead of baking?

    Absolutely. Heat a thin layer of oil in a frying pan over medium heat and cook the patties for 4–5 minutes per side until deeply golden. Work in batches and don’t move them too early or they can break.

    Why is my bubble and squeak mixture sticky?

    Sticky mixture usually means the mash is warm or the vegetables are wet. Chill the mash, squeeze the cabbage dry, and add a little extra flour if needed. A beaten egg can also help the patties hold their shape.

    Can I make it ahead for breakfast?

    Yes. Shape the patties, cover, and refrigerate for up to 24 hours before baking. You can also bake them in advance and reheat in a hot oven to bring back the crisp edges.

    What potatoes work best for bubble and squeak?

    Floury potatoes (like Maris Piper or King Edward) make a drier mash that crisps beautifully. If your mash is very buttery or creamy, add a bit more flour and make sure the oven is hot.

    Crispy Bubble and Squeak Cakes

    Recipe by Milli RoseCourse: Breakfast, Brunch, SideCuisine: BritishDifficulty: Easy
    Servings

    8

    cakes (approx.)
    Prep time

    10

    minutes
    Cooking time

    25

    minutes
    Total time

    35

    minutes
    Calories

    250

    kcal

    35

    minutes

    Crisp on the outside, soft in the middle, these bubble and squeak cakes are the perfect way to use up leftover mashed potatoes and cabbage. Bake them for an easy, hands-off crisp, then serve with fried eggs or bacon.

    Ingredients

    • 500g cold leftover mashed potatoes (or cooked, mashed potatoes), well chilled

    • 250g cooked cabbage (savoy/green), squeezed dry and finely chopped

    • 75g leftover cooked veg (carrot, sprouts, peas), finely chopped (optional)

    • 2 spring onions, finely sliced (optional)

    • 1 large egg, beaten (optional, helps binding)

    • 2 tbsp plain flour (plus extra for shaping if needed)

    • 1 tsp Dijon or English mustard (optional)

    • 3/4 tsp fine salt (adjust to taste, depending on leftovers)

    • 1/2 tsp black pepper

    • 2 tbsp vegetable oil

    • 25g butter, melted

    Directions

    • Preheat the oven to 220°C (200°C fan) and line a large tray with baking parchment. Brush the parchment lightly with a little of the oil.
    • In a large bowl, mix the cold mashed potatoes, chopped cabbage, any extra veg, and spring onions. Add the egg (if using), flour, mustard, salt, and pepper, then mix until evenly combined.
    • With lightly floured hands, shape into 8 patties (about 2cm thick). If the mixture feels sticky, add 1–2 more tablespoons of flour.
    • Place on the tray. Brush the tops with melted butter and a little oil for extra crisping.
    • Bake for 15 minutes, then carefully flip and bake for 8–10 minutes more until deep golden and crisp at the edges.
    • Rest for 5 minutes before serving so the cakes firm up. Serve as-is, or top with fried eggs, bacon, or sausages.

    Notes

    • Cold mash works best. Warm potatoes make the mixture soft and harder to crisp.
    • Squeeze cooked cabbage dry to avoid soggy cakes.
    • For an extra-crisp finish, pan-fry the baked cakes for 1–2 minutes per side in a hot frying pan.
    • Freeze baked cakes on a tray, then bag up for quick breakfasts.
  • Sisal App Casino Benvenuto E Meccaniche Promozionali Dritto Al Punto

    Sisal app casino online: come funziona il benvenuto e cosa aspettarti

    Il valore pratico del benvenuto in Sisal app casino online non dipende solo dal numero di bonus, ma da come vengono calcolati i requisiti e da quanto è semplice attivare l’offerta. In questa guida ci concentriamo sulle meccaniche: struttura, contributo dei giochi, limiti e regole che possono cambiare il modo in cui giochi durante le prime sessioni. L’obiettivo è farti decidere in modo consapevole prima di puntare tempo e saldo.

    Per iniziare, è utile avere l’app installata e pronta: trovi app Sisal casinò online e puoi controllare subito la sezione promo dal profilo. Così eviti di scoprire tardi vincoli o scadenze. Ora vediamo come si muove concretamente il pacchetto welcome.

    Benvenuto Sisal: struttura, attivazione e regole chiave

    In Sisal app casino online l’offerta di benvenuto è pensata per accompagnare il primo mese di gioco: in genere combina un bonus sul primo deposito e una componente promozionale collegata all’attività in sala. Il punto centrale è che l’attivazione avviene tramite condizioni presenti nell’area “Promozioni” del tuo account: se non rispetti l’eleggibilità al momento del deposito, il pacchetto può non essere applicato o applicarsi in modo parziale.

    Il requisito più determinante è il wagering (contributo del bonus), cioè quante volte l’importo promozionale deve “girare” tramite puntate idonee prima di poter trasformare il bonus in vincite prelevabili. Nella pratica, il wagering viene calcolato in base a regole di contribuzione: alcuni giochi contano di più, altri meno o non contano. Per questo, anche con un bonus “generoso” sulla carta, la velocità con cui avanzi dipende da cosa giochi.

    Un altro elemento da controllare è la scadenza dell’offerta: in molti casi hai una finestra temporale entro cui completare il requisito. Se giochi in modo sporadico, rischi di arrivare a fine periodo con una parte del wagering ancora incompleta. Prima di iniziare a puntare, verifica sempre in app l’importo residuo e le scadenze, così da non legare la strategia a un tempo che non ti appartiene.

    Come scegliere i giochi per far rendere il bonus senza sorprese

    La meccanica del benvenuto in Sisal app casino online è costruita attorno alla contribuzione: slot e giochi da tavolo possono avere percentuali diverse di avanzamento del wagering. Il consiglio operativo è semplice: usa l’app per filtrare i titoli che risultano idonei o che mostrano un contributo più favorevole nel contesto della promo. In questo modo trasformi il bonus in un piano di gioco, non in un test casuale.

    Per capire cosa conviene, pensa alla tua sessione tipica. Se giochi soprattutto slot, spesso trovi una buona compatibilità con il contributo del bonus, ma non tutte le macchine vengono trattate allo stesso modo. Se preferisci il live casino, controlla che il tuo gioco selezionato sia incluso tra quelli che contribuiscono: in alcune promo i tavoli possono contare a percentuali inferiori o richiedere puntate minime specifiche.

    Un’attenzione pratica riguarda i limiti: possono esserci soglie minime o massime per singola puntata e regole su come vengono conteggiati i giri. Anche la volatilità conta: se giochi titoli “veloci” con puntate piccole, potresti completare il wagering più lentamente in termini di tempo; se invece alzi la puntata, completi prima ma aumenti l’esposizione. L’obiettivo non è “spingere”, ma allineare il ritmo del wagering al tuo comfort.

    Promozioni collegate: cosa cambia nella tua prima esperienza

    Oltre al benvenuto principale, Sisal app casino online tende a collegare l’offerta a promozioni successive o a meccaniche ricorrenti che mantengono l’account attivo. Questo significa che la tua prima esperienza non si gioca solo nel giorno del deposito, ma anche nelle sessioni successive, quando la promo iniziale si avvicina alla scadenza e l’app ti propone incentivi per continuare a giocare.

    In ottica pratica, il modo migliore per sfruttare queste meccaniche è rimanere dentro lo stesso perimetro di giochi idonei e controllare periodicamente la sezione promo. Se cambi radicalmente tipologia di gioco verso titoli non idonei, potresti rallentare l’avanzamento del wagering o non ottenere il massimo dal pacchetto. Allo stesso tempo, non serve irrigidirsi: l’app ti permette di verificare rapidamente cosa sta contribuendo in quel momento.

    Quando il bonus si conclude, la “sensazione” di valore dipende da quanto l’offerta ti ha permesso di costruire una routine: ad esempio, se hai trovato una slot adatta al tuo stile e con contributo coerente, la transizione verso le promozioni successive è più naturale. Se invece finisci la promo con giochi scelti senza verificare idoneità e limiti, potresti percepire il pacchetto come meno utile di quanto speravi.

    Per chi ha senso Sisal app casino online con il benvenuto

    Sisal app casino online è particolarmente adatto a chi vuole un pacchetto di benvenuto “gestibile”: non solo un incentivo iniziale, ma una serie di regole che puoi leggere e usare per impostare la prima strategia di gioco. Funziona bene per giocatori che controllano la sezione promozioni prima di puntare e che hanno una preferenza chiara tra slot e live, così da restare dentro i giochi idonei.

    Se invece cerchi un’esperienza promozionale totalmente lineare, senza bisogno di controllare contributi, limiti e scadenze, potresti sentirti più vincolato. Il verdetto è quindi pragmatico: Sisal app casino online premia chi gioca con criterio durante il periodo welcome, mentre richiede più attenzione a chi improvvisa o cambia gioco continuamente.

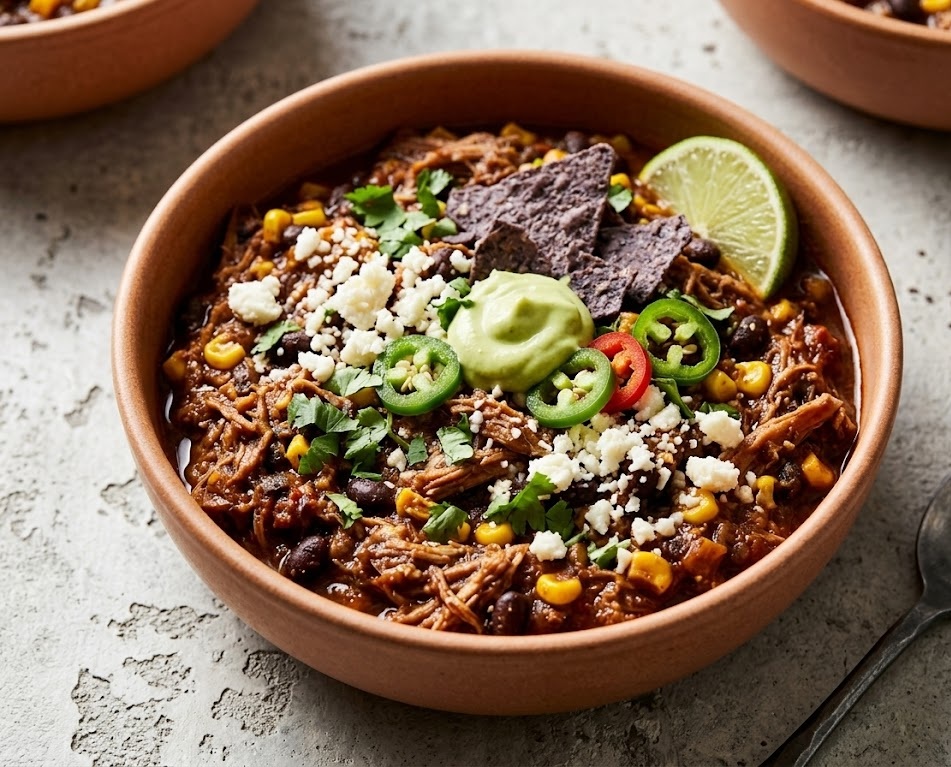
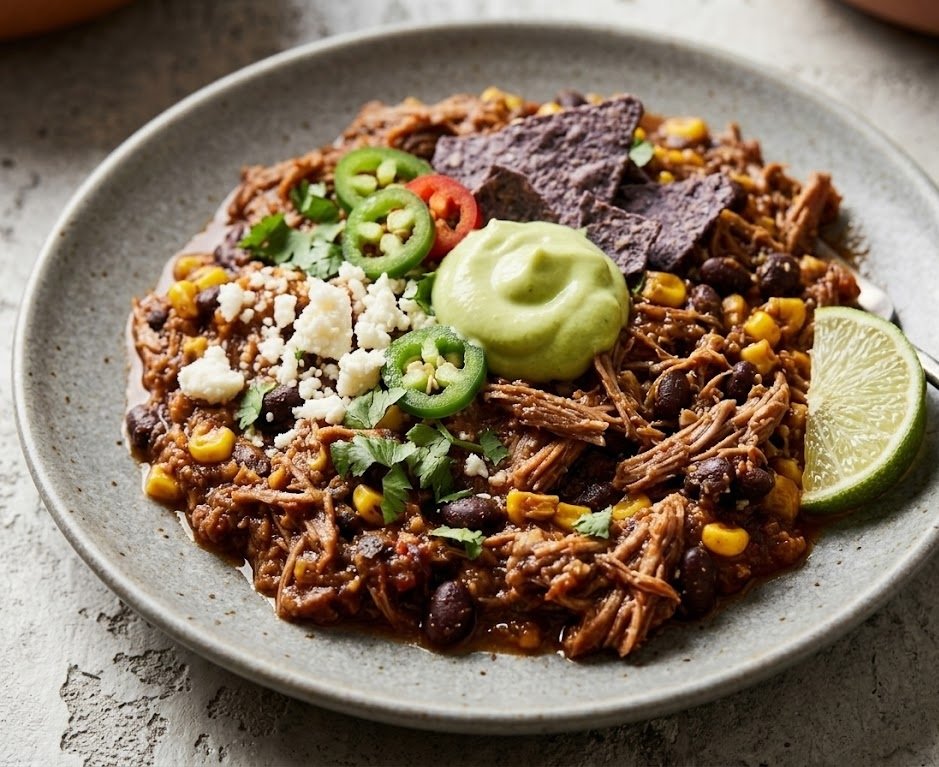
  • chili con carne recipe

    chili con carne recipe

    This chili con carne is a rich, hearty bowl of slow-cooked comfort made with beef, beans, tomatoes, and warm spices. It’s thick and spoonable with a deep, smoky flavour and a gentle heat you can easily adjust. The method is straightforward and beginner-friendly, with most of the time being hands-off while it simmers. Total time is about 1 hour 45 minutes, and it tastes even better the next day.

    Ingredients

    For the chili base

    • 1 tbsp olive oil
    • 1 large onion, finely diced
    • 1 red pepper, diced
    • 2 carrots, finely diced (optional, but great for sweetness)
    • 4 garlic cloves, minced
    • 500g beef mince (10–15% fat gives the best flavour)

    Spices and seasoning

    • 2 tsp ground cumin
    • 2 tsp smoked paprika
    • 1 tsp chilli powder (plus more to taste)
    • 1 tsp dried oregano
    • 1/2 tsp ground coriander (optional)
    • 1/2 tsp fine salt, plus more to taste
    • 1/2 tsp black pepper

    Liquids and beans

    • 2 tbsp tomato purée
    • 1 x 400g tin chopped tomatoes
    • 250ml beef stock
    • 1 x 400g tin kidney beans, drained and rinsed
    • 1 x 400g tin black beans, drained and rinsed (or use another tin of kidney beans)
    • 1 tsp unsweetened cocoa powder (optional, adds a subtle richness)
    • 1 tbsp lime juice (to finish)

    Optional toppings (for serving)

    • Sour cream or Greek yoghurt
    • Grated cheddar
    • Sliced jalapeños
    • Fresh coriander
    • Diced avocado

    How to Make Chili Con Carne

    • Prepare the oven: Preheat the oven to 160°C or 140°C fan. Place a shelf in the middle of the oven so the pot cooks evenly and the chilli gently thickens without catching.
    • Soften the vegetables: Heat the olive oil in a large oven-safe pot (a Dutch oven is ideal) over medium heat. Add the onion, pepper, and carrots. Cook for 8 to 10 minutes, stirring now and then, until softened. Stir in the garlic and cook for 1 minute.
    • Brown the beef: Add the mince and cook for 6 to 8 minutes, breaking it up with a spoon, until well browned. Browning properly here gives you a deeper, meatier chilli.
    • Mix in the flavour base: Stir in the tomato purée, cumin, smoked paprika, chilli powder, oregano, coriander (if using), salt, and pepper. Cook for 1 to 2 minutes, stirring constantly, so the spices toast and become fragrant.
    • Bake (oven simmer) to develop flavour: Add the chopped tomatoes, beef stock, and cocoa powder (if using). Bring to a gentle simmer on the hob, then cover with a lid and transfer to the oven for 1 hour 15 minutes.
    • Thicken and add the beans: Carefully remove the pot from the oven and place it back on the hob over low heat. Stir in the kidney beans and black beans. Simmer uncovered for 10 to 15 minutes, stirring occasionally, until thick and glossy.
    • Cool and rest: Turn off the heat and let the chilli stand for 10 minutes. This short rest makes it thicker and helps the flavours settle.
    • Assemble and serve: Stir in the lime juice, then taste and adjust seasoning. Serve hot with your favourite sides and toppings.
    How to Make Chili Con Carne

    Tips

    Why is my chili con carne watery?

    It usually just needs a bit more uncovered simmering. Remove the lid and simmer on low for 10 to 20 minutes, stirring occasionally. If you want it thicker still, mash a small spoonful of beans against the side of the pot and stir them back in.

    How do I stop chili from tasting bitter or harsh?

    Burnt garlic or over-toasted spices are the common culprits. Keep the heat moderate, add garlic after the onions have softened, and toast the spices for only 1 to 2 minutes. If it still tastes sharp, a squeeze of lime at the end and a small pinch of sugar can balance it.

    What’s the best beef for chili con carne?

    Beef mince with a little fat (around 10 to 15%) gives the best flavour and texture. Very lean mince can taste dry, so you may need a touch more oil and a little extra simmering time to get it rich.

    How can I make it hotter or milder without ruining the flavour?

    For hotter chilli, add extra chilli powder a little at a time, or finish with sliced jalapeños or hot sauce at the table. For milder chilli, reduce the chilli powder and lean into smoked paprika and cumin for warmth without heat. Sour cream on top also softens spice nicely.

    Serving Suggestions

    • Steamed rice with grated cheddar and coriander
    • Nachos with melted cheese, jalapeños, and sour cream
    • Jacket potatoes with chilli and a spoon of Greek yoghurt
    • Soft tortillas with avocado and a squeeze of lime
    • Mac and cheese topped with a ladle of chilli

    Storage

    Room temperature

    Cool the chilli quickly, then do not leave it out for more than 2 hours (or 1 hour in very warm weather). Transfer to containers once it has stopped steaming heavily.

    Refrigerator

    Store in an airtight container for up to 4 days. Reheat in a saucepan over medium-low heat until piping hot, stirring often. Add a splash of water or stock if it has thickened too much.

    Freezing

    Chili con carne freezes beautifully for up to 3 months. Cool completely, portion into freezer-safe tubs, and label with the date. Defrost overnight in the fridge, then reheat thoroughly on the hob until bubbling hot all the way through.

    Nutrition

    • Calories: 520 kcal
    • Carbohydrates: 38 g
    • Protein: 36 g
    • Fat: 24 g
    • Saturated fat: 8 g
    • Sodium: 980 mg

    Disclaimer: Nutrition values are estimates and will vary depending on the mince, stock, and toppings you use.

    FAQs

    What is the secret to really good chili con carne?

    Brown the mince properly, toast the spices briefly, and give it time to simmer. That combination builds layers of flavour and takes the chilli from flat to rich and rounded.

    Can I make chili con carne without beans?

    Yes. Simply leave the beans out and simmer a little longer uncovered to thicken. You can also add extra peppers or a diced courgette for bulk.

    How do I thicken chili con carne quickly?

    Simmer it uncovered until it reduces, or mash a few spoonfuls of beans and stir them back in. If you are in a hurry, mix 1 tsp cornflour with 1 tbsp cold water and stir it in, then simmer for 2 to 3 minutes.

    Can I make chili con carne in a slow cooker?

    Yes. Brown the onion and mince first for best flavour, then add everything except the beans and cook on LOW for 6 to 8 hours (or HIGH for 3 to 4). Stir in the beans for the final 30 minutes.

    Is chili con carne better the next day?

    It often is. Resting overnight lets the spices mellow and the sauce thicken. Cool it quickly, refrigerate, then reheat gently with a splash of stock if needed.

    Chili Con Carne Recipe

    Recipe by Milli RoseCourse: DinnerCuisine: Tex-MexDifficulty: Easy
    Servings

    6

    bowls
    Prep time

    15

    minutes
    Cooking time

    1

    hour 

    30

    minutes
    Total time

    105

    minutes
    Calories

    520

    kcal

    1

    hour 

    45

    minutes

    A thick, hearty chili con carne made with beef mince, beans, tomatoes, and warm spices. Easy to make, freezer-friendly, and perfect for rice, nachos, or jacket potatoes.

    Ingredients

    • 1 tbsp olive oil

    • 1 large onion, finely diced

    • 1 red pepper, diced

    • 2 carrots, finely diced (optional)

    • 4 garlic cloves, minced

    • 500g beef mince (10–15% fat works well)

    • 2 tbsp tomato purée

    • 2 tsp ground cumin

    • 2 tsp smoked paprika

    • 1 tsp chilli powder (plus more to taste)

    • 1 tsp dried oregano

    • 1/2 tsp ground coriander (optional)

    • 1/2 tsp fine salt, plus more to taste

    • 1/2 tsp black pepper

    • 1 x 400g tin chopped tomatoes

    • 250ml beef stock

    • 1 x 400g tin kidney beans, drained and rinsed

    • 1 x 400g tin black beans, drained and rinsed (or use another tin of kidney beans)

    • 1 tsp unsweetened cocoa powder (optional, for depth)

    • 1 tbsp lime juice (to finish)

    Directions

    • Preheat the oven to 160°C (140°C fan). Place a shelf in the middle of the oven.
    • Soften the onion and pepper in olive oil, then add garlic.
    • Brown the beef mince well, then stir in tomato purée and spices.
    • Add tomatoes and stock, bring to a simmer, then cover and cook in the oven for 75 minutes.
    • Stir in beans and cook uncovered for 10–15 minutes to thicken.
    • Rest for 10 minutes, then finish with lime juice and adjust seasoning.

    Notes

    • For a thicker chili, simmer uncovered for the final 10–15 minutes.
    • For a milder chili, use less chilli powder and add a spoon of sour cream when serving.
    • Chili tastes even better the next day and freezes beautifully.
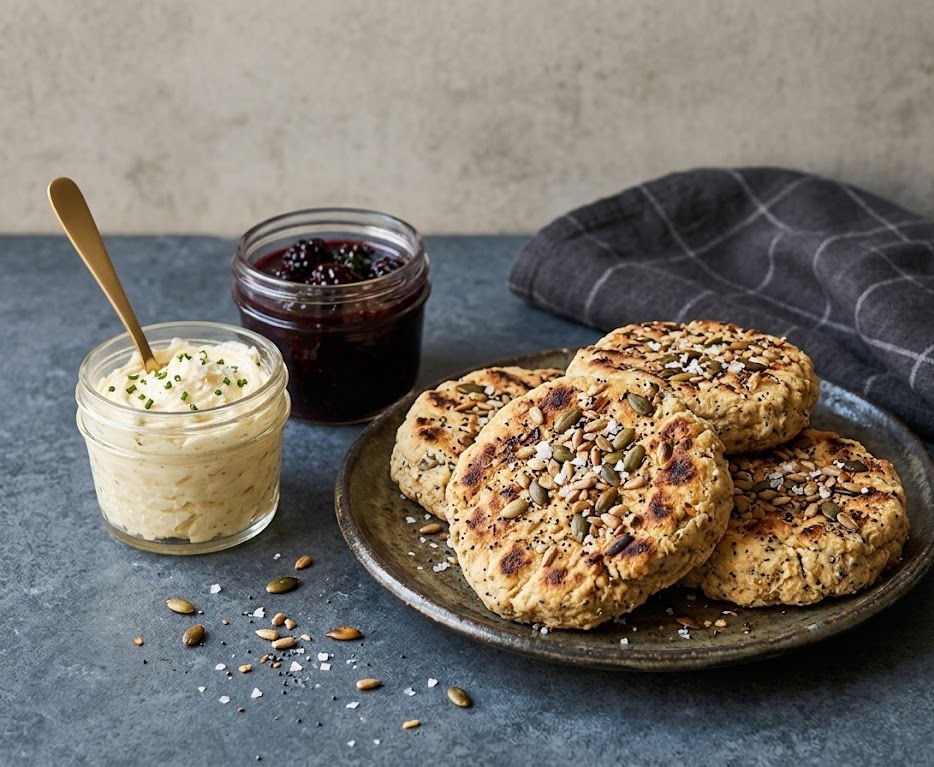
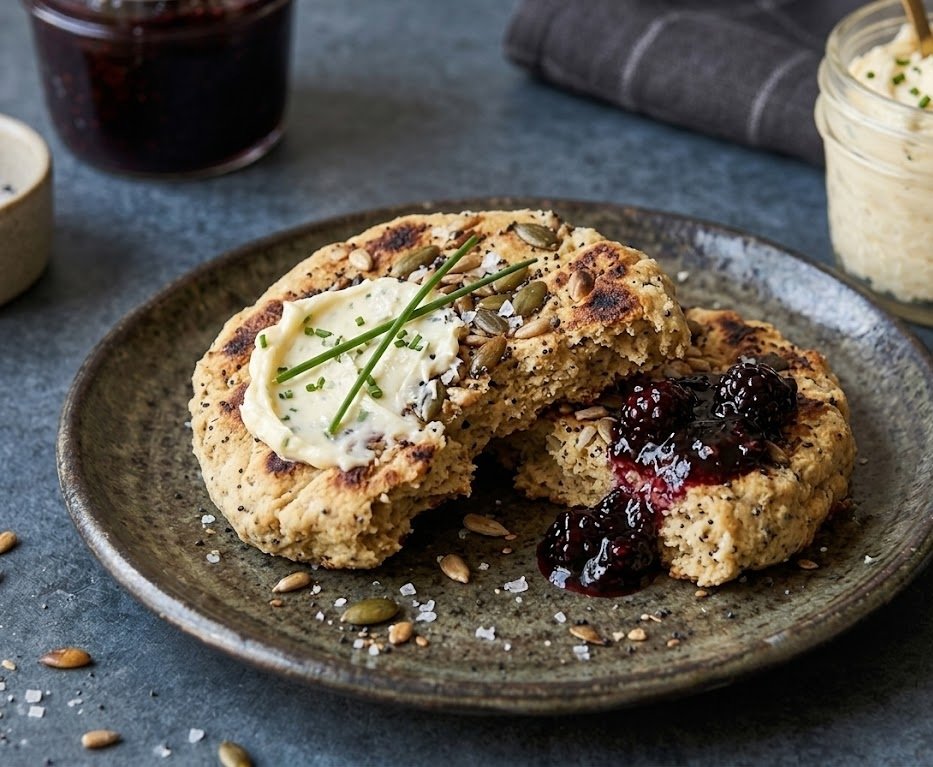
  • Soda Farls Recipe

    Soda Farls Recipe

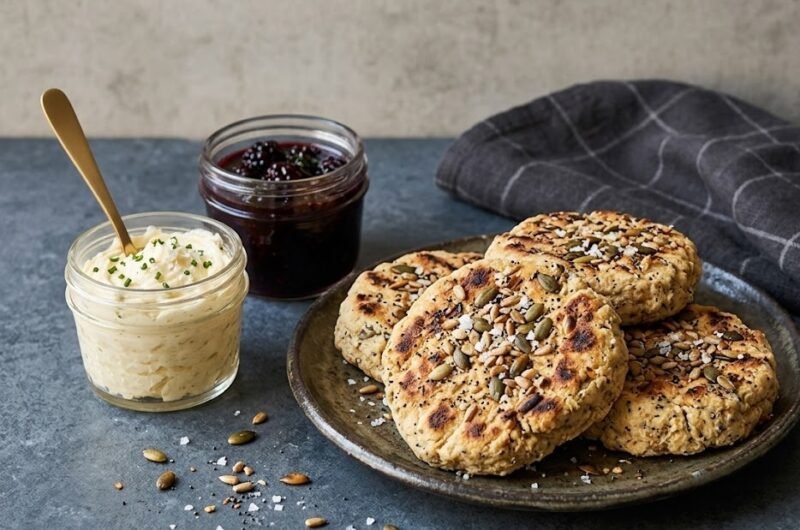
    Soda farls are a traditional Northern Irish quick bread, cooked on a hot griddle and cut into quarters (farls) before cooking. They are tender and soft in the centre with a lightly crisp, flour-dusted crust, and they taste gently tangy thanks to buttermilk. This is an easy, beginner-friendly bread with no yeast, no proving, and very little kneading. From start to finish, you can have warm soda farls on the table in about 25 minutes.

    Ingredients

    For the soda farls

    • 450g plain flour, plus extra for dusting
    • 1 tsp bicarbonate of soda (baking soda)
    • 1 tsp fine salt
    • 40g cold unsalted butter, diced (optional, but adds tenderness)
    • 360–420ml buttermilk, as needed

    For cooking and serving

    • A little extra flour, for the work surface
    • Butter, for serving
    • Jam or honey (optional)

    How to Make Soda Farls

    • Prepare the oven: Preheat the oven to 200°C or 180°C fan. Place a shelf in the middle of the oven. Line a small baking tray with baking parchment, ready for finishing the farls after griddling.
    • Prepare the pan: Set a cast-iron skillet, griddle pan, or heavy frying pan over medium-low heat. Keep it dry with no oil. Soda farls cook best gently, so the centre cooks through before the outside gets too dark.
    • Mix the dry ingredients: In a large bowl, whisk together the flour, bicarbonate of soda, and salt. This quick whisk matters because it spreads the raising agent evenly, so you do not get bitter pockets of baking soda.
    • Rub in the butter (optional): Add the cold diced butter and rub it into the flour with your fingertips until it looks like fine breadcrumbs. This step gives a softer, more tender farl, especially if you like them split and buttered.
    • Add the buttermilk: Make a well in the centre and pour in most of the buttermilk. Stir with a fork until a shaggy dough forms. If it looks dry or floury, add a splash more buttermilk. You want a soft dough that holds together but is not sticky and wet.
    • Shape and cut: Tip the dough onto a lightly floured surface. Bring it together with just a few gentle turns. Divide into 2 equal pieces, pat each into a round about 2cm thick, then cut each round into 4 wedges to make 8 farls.
    • Griddle: Place the farls onto the hot pan with a little space between them. Cook for 5–7 minutes per side, until nicely browned and easy to flip. If they are colouring too fast, turn the heat down.
    • Bake to finish: Transfer the griddled farls to the lined baking tray and bake for 5–8 minutes, until set in the centre. A good sign is a hollow-ish sound when you tap the thickest part.
    • Cool and assemble: Cool on a wire rack for 10 minutes so the crumb finishes setting. Split each farl, add plenty of butter, and serve warm.
    How to Make Soda Farls

    Tips

    Why are my soda farls tough?

    Tough farls usually come from overworking the dough or adding too much flour while shaping. Mix just until the dough comes together, then handle it lightly. If the dough feels sticky, dust your hands and the surface lightly rather than kneading in lots of extra flour.

    How do I stop the outside browning before the middle is cooked?

    Keep the heat at medium-low and be patient. If your pan runs hot, move it slightly off the heat for a moment between flips. Finishing the farls in the oven for a few minutes is the easiest way to guarantee a cooked centre without scorching.

    What is the best pan for soda farls?

    A cast-iron skillet or flat griddle gives the most even browning and steady heat. A heavy-based frying pan also works well. Thin pans tend to create hot spots, which can burn the surface.

    Can I make buttermilk at home?

    Yes. Mix 400ml milk with 1 tablespoon lemon juice or white vinegar, then leave it for 5 minutes. It will thicken slightly and work well here, although real buttermilk usually gives the best flavour.

    Serving Suggestions

    • Split and spread with salted butter and strawberry jam.
    • Serve alongside a full Irish breakfast with eggs and bacon.
    • Toast leftovers and top with cheddar and chutney.
    • Use as a quick bread with soup, especially potato or leek.

    Storage

    Room temperature

    Cool completely, then store in an airtight container for up to 2 days. If your kitchen is warm, wrap them well to prevent drying.

    Refrigerator

    I do not recommend refrigerating soda farls because it can make them stale faster. If you must, keep them tightly wrapped and toast before serving.

    Freezing

    Freeze cooled farls in a freezer bag for up to 2 months. For best results, slip a small piece of baking parchment between farls so you can take out what you need. Defrost at room temperature, then toast or warm in a low oven until heated through.

    Nutrition

    • Calories: 240 kcal
    • Carbohydrates: 45 g
    • Protein: 7 g
    • Fat: 4 g
    • Saturated Fat: 2 g
    • Sodium: 430 mg

    Disclaimer: Nutrition values are estimates and will vary based on brands, exact measurements, and serving size.

    FAQs

    What are soda farls made of?

    Soda farls are made from plain flour, bicarbonate of soda (baking soda), salt, and buttermilk. Some versions also include a little butter for tenderness. The dough is shaped into a round, cut into quarters (farls), then cooked on a griddle.

    What is the difference between soda farls and soda bread?

    They use similar ingredients, but soda farls are typically cooked on a griddle and cut into wedges before cooking, while soda bread is usually baked as a loaf in the oven. Farls cook faster and have a more evenly browned, pan-cooked crust.

    Can I make soda farls without buttermilk?

    Yes. You can make a quick substitute by mixing 400ml milk with 1 tablespoon lemon juice or white vinegar and letting it stand for 5 minutes. You may need slightly less or more liquid depending on your flour.

    Why do my soda farls taste bitter?

    Bitterness usually comes from too much bicarbonate of soda or uneven mixing. Measure the baking soda carefully and whisk it through the flour well before adding the buttermilk so it distributes evenly.

    Can I cook soda farls only on the griddle without finishing in the oven?

    Yes, as long as you keep the heat low enough and cook them long enough for the centre to set. The oven finish is a helpful extra step if your farls are browning quickly or you prefer a guaranteed cooked-through centre.

    Soda Farls Recipe

    Recipe by Milli RoseCourse: Breakfast, SideCuisine: IrishDifficulty: Easy
    Servings

    8

    farls
    Prep time

    10

    minutes
    Cooking time

    15

    minutes
    Total time

    25

    minutes
    Calories

    240

    kcal

    25

    minutes

    Soft, tender Irish soda farls cooked on a griddle and finished briefly in the oven for perfect doneness. A quick, no-yeast bread that’s ideal with butter and jam or alongside a full breakfast.

    Ingredients

    • 450g plain flour, plus extra for dusting

    • 1 tsp bicarbonate of soda (baking soda)

    • 1 tsp fine salt

    • 40g cold unsalted butter, diced (optional but recommended)

    • 360–420ml buttermilk, as needed

    • Butter, for serving

    Directions

    • Preheat the oven to 200°C (180°C fan) and line a small tray. Heat a dry cast-iron pan or griddle over medium-low heat.
    • Mix flour, bicarbonate of soda, and salt in a large bowl. Rub in the cold butter (if using) until it looks like fine crumbs.
    • Stir in most of the buttermilk to make a soft, shaggy dough. Add more buttermilk a splash at a time if it looks dry.
    • Tip onto a floured surface and bring together with a few gentle turns. Divide into 2 pieces, shape each into a round about 2cm thick, then cut each round into 4 farls.
    • Cook on the hot, dry griddle for 5–7 minutes per side until well browned and lifting easily. Adjust heat as needed so they do not scorch.
    • Transfer to the oven for 5–8 minutes to finish cooking through. They should sound hollow when tapped and feel set in the centre.
    • Cool for 10 minutes on a rack, then split and serve warm with butter.

    Notes

    • Handle the dough as little as possible. Overworking makes farls tough.
    • Keep the heat medium-low. Too hot and they brown before the centre cooks.
    • No buttermilk? Use 400ml milk mixed with 1 tbsp lemon juice or white vinegar. Rest 5 minutes before using.
  • Aperol Recipe

    Aperol Recipe

    This bright, citrusy Aperol drizzle loaf is my favourite way to bring that Aperol Spritz flavour into a bake that feels effortless but tastes special. The crumb is soft and buttery with a gentle orange bitterness, then it gets soaked with a quick Aperol syrup so every slice stays moist. It’s an easy, beginner-friendly recipe with simple mixing and no fancy equipment. Total time is about 1 hour 15 minutes, including a short cool before glazing.

    Ingredients

    For the orange Aperol loaf

    • 180g unsalted butter, softened
    • 180g caster sugar
    • 3 large eggs, room temperature
    • 1 tsp vanilla extract
    • Zest of 2 oranges
    • 180g self-raising flour
    • 1 tsp baking powder
    • Pinch of fine salt
    • 60ml Aperol
    • 60ml whole milk

    For the Aperol soak syrup

    • 60g caster sugar
    • 60ml Aperol
    • 2 tbsp fresh orange juice

    For the glaze and topping

    • 120g icing sugar
    • 2–3 tbsp fresh orange juice
    • 1 tbsp Aperol
    • Optional: thin orange slices, chopped pistachios, or candied peel

    How to Make This Aperol Drizzle Loaf

    • Prepare the oven: Preheat the oven to 180°C (160°C fan) or 350°F. Grease and line a 900g (2lb) loaf tin with baking parchment, leaving a little overhang so you can lift the cake out easily.
    • Cream butter and sugar: In a large bowl, beat the softened butter and caster sugar for 2 to 3 minutes until pale and fluffy. This is what gives the loaf a light, even crumb.
    • Add eggs, flavourings, and zest: Beat in the eggs one at a time, mixing well after each addition. Stir in the vanilla extract and orange zest. If the mixture looks a little split, add 1 tablespoon of the flour and carry on.
    • Mix the batter: Add the self-raising flour, baking powder, and salt. Fold gently until you can only just see a few streaks of flour, then pour in the Aperol and milk and fold again until smooth. Stop as soon as it’s combined to avoid a dense loaf.
    • Bake: Scrape the batter into the tin and level the top. Bake for 45 to 55 minutes, or until golden and a skewer inserted into the centre comes out clean. If it’s browning too quickly, loosely cover the top with foil for the last 10 minutes.
    • Cool briefly: Let the cake cool in the tin for 10 minutes, then lift it onto a wire rack (keep the parchment under it to catch syrup drips).
    • Make and add the syrup: Add the caster sugar, Aperol, and orange juice to a small saucepan. Warm over medium heat, stirring until the sugar dissolves, then simmer for 1 to 2 minutes. Poke the warm cake all over with a skewer, then slowly brush (or spoon) the syrup across the top, letting it soak in.
    • Glaze and assemble: Once the cake is completely cool, whisk the icing sugar with 2 tablespoons orange juice and 1 tablespoon Aperol until thick but pourable. Add a tiny splash more juice if needed. Drizzle over the loaf, then finish with orange slices, pistachios, or candied peel if you like.
    How to Make This Aperol Drizzle Loaf

    Tips

    Why did my batter curdle after adding the eggs?

    Cold eggs are usually the culprit. Use room-temperature eggs, and add them one at a time. If it starts to split, beat in 1 tablespoon of the measured flour and it will come back together once the dry ingredients are added.

    How do I stop the loaf from turning out dry?

    Measure carefully, avoid overbaking, and don’t overmix once the flour goes in. The warm Aperol syrup is also your insurance policy here, it sinks in and keeps the crumb moist for days.

    Can I make it less bitter or more “Spritz-like”?

    For less bitterness, reduce the orange zest to 1 orange and swap half the Aperol in the syrup for orange juice. For a stronger Spritz vibe, keep the zest at 2 oranges and add a pinch of salt to the glaze to sharpen the citrus flavour.

    What’s the easiest way to get neat slices?

    Let the glaze set for about 20 minutes, then slice with a sharp serrated knife. Wipe the blade between cuts for clean edges.

    Serving Suggestions

    • With lightly whipped cream or crème fraîche
    • Alongside fresh berries or macerated strawberries
    • As a simple dessert with vanilla ice cream
    • With espresso, cappuccino, or an iced coffee

    Storage

    Room temperature

    Store in an airtight container for up to 3 days. If your kitchen is warm, keep it in the coolest spot and slice as needed to prevent it drying out.

    Refrigerator

    Refrigerate for up to 5 days in a sealed container. Bring slices to room temperature before serving for the softest texture.

    Freezing

    Freeze the unglazed loaf (or individual slices) for up to 2 months. Wrap well in cling film, then foil. Defrost overnight at room temperature, then glaze fresh for the best finish.

    Nutrition

    • Calories: 285 kcal
    • Carbohydrates: 38g
    • Protein: 4g
    • Fat: 13g
    • Saturated fat: 8g
    • Sodium: 180mg

    Nutrition values are estimates and will vary depending on ingredients and portion size.

    FAQs

    Can I make this loaf alcohol-free?

    Yes. Replace the Aperol in the cake with the same amount of orange juice, and make the syrup with orange juice plus a splash of water instead of Aperol. You’ll still get the bright orange flavour, just without the bittersweet Aperol note.

    Does the alcohol bake out of the cake?

    Not completely. Some alcohol will evaporate during baking, but the syrup and glaze are added after baking, so they will still contain alcohol. If you need it alcohol-free, use the swaps in the first FAQ.

    Can I bake this as a traybake instead of a loaf?

    Yes. Bake in a lined 20cm square tin (or similar) and start checking at 25 minutes. Once a skewer comes out clean, add the syrup while warm and glaze when cool.

    What can I use instead of self-raising flour?

    Use 180g plain flour plus 2 tsp baking powder. Whisk the dry ingredients together before adding so the raising agent is evenly distributed.

    Why did my loaf sink in the middle?

    This is usually underbaking or opening the oven door too early. Bake until a skewer comes out clean, and try not to open the door in the first 35 minutes. Also make sure your baking powder is fresh.

    Can I make the glaze thicker or thinner?

    Absolutely. For a thicker, more opaque glaze, add a bit more icing sugar. For a thinner drizzle, add orange juice a teaspoon at a time until it flows easily off the whisk.

  • Cullen Skink Recipe

    Cullen Skink Recipe

    Cullen skink is a traditional Scottish soup that brings warmth and comfort to any table with its rich, creamy character. This iconic dish combines smoked haddock, potatoes, and onions in a luxurious broth that’s both humble and elegant. Simple enough for a weeknight supper yet impressive enough for entertaining, cullen skink requires no advanced cooking skills and comes together in about forty-five minutes. With its silky texture, bold smoky flavor, and satisfying depth, this classic soup tastes like it took hours to perfect, yet delivers restaurant-quality results with minimal effort.

    Ingredients

    For the Soup Base

    • 450g smoked haddock fillets, skin removed
    • 1 litre whole milk
    • 600ml fish or vegetable stock
    • 2 large onions, peeled and quartered
    • 5 medium potatoes (about 750g), peeled and diced into small cubes
    • 100g butter
    • 1 teaspoon sea salt
    • ½ teaspoon freshly ground black pepper

    For Serving and Finishing

    • 150ml double cream or single cream
    • 2 tablespoons fresh parsley, finely chopped
    • 1 tablespoon fresh chives, finely snipped
    • Crusty bread, for serving

    How to Make Cullen Skink

    Step 1: Prepare the Smoked Haddock

    • Check the haddock: Place the smoked haddock fillets on a chopping board and run your fingers over them carefully to check for any small bones. Remove any you find using clean tweezers or a small knife. This simple step prevents unpleasant surprises in your finished soup.

    Step 2: Make the Poaching Liquid

    • Combine milk and stock: Pour the whole milk and fish or vegetable stock into a large, heavy-bottomed saucepan. Stir together gently and place over a medium heat. You’re creating the flavourful base that will define your soup.
    • Heat gently: Bring the mixture to a gentle simmer. Do not allow it to boil vigorously, as this can cause the milk to scorch on the bottom of the pan and create an unpleasant flavour.

    Step 3: Poach the Haddock

    • Add the fish: Once the milk mixture is simmering gently, carefully place the smoked haddock fillets into the pan. They will float initially, which is normal. The fish needs to poach in this creamy liquid to infuse it with its distinctive smoky character.
    • Poach for 5 minutes: Let the haddock poach for about 5 minutes. You’ll notice the flesh will begin to change from translucent to opaque and will flake easily with a fork when ready. The haddock should be just cooked through but still tender.
    • Remove the fish: Using a slotted spoon, carefully lift the cooked haddock fillets from the liquid and set them aside on a clean plate. Let them cool slightly until you can handle them comfortably.

    Step 4: Prepare the Vegetables

    • Add onions: Quarter the peeled onions and add them to the simmering milk mixture. The onions will soften and become sweet as they cook, adding essential flavour and body to your soup.
    • Add potatoes: Peel and cut your potatoes into small, even cubes about 1 centimetre in size. This uniform sizing ensures they cook at the same rate and break down at the right moment to thicken the soup naturally.
    • Simmer vegetables: Add the diced potatoes to the milk mixture along with the onions. Continue simmering gently for about 15 to 20 minutes until both the potatoes and onions are completely soft and beginning to fall apart.

    Step 5: Flake the Haddock

    • Break the fish into flakes: Once the poached haddock has cooled enough to handle, use two forks or your fingers to break it into large, bite-sized flakes. Try to remove any remaining small bones. Set the flaked haddock aside until you need it.

    Step 6: Thicken the Soup

    • Mash the vegetables: Once the potatoes and onions are very soft, use a potato masher to gently crush them in the pan. You’re not making a purée, but rather breaking down the potatoes to naturally thicken the soup with their starch. Leave some small chunks for texture.
    • Add butter: Cut the butter into small cubes and stir them into the soup. The butter will melt into the liquid, adding richness and helping to create that characteristic silky, creamy texture that defines authentic cullen skink.

    Step 7: Return the Haddock and Season

    • Add the flaked fish: Carefully stir the flaked haddock back into the soup. Fold it in gently so the pieces remain as large as possible. The fish will warm through in the hot broth.
    • Season to taste: Add the sea salt and freshly ground black pepper. Taste the soup and adjust the seasoning if needed. Remember that smoked haddock is already quite salty, so taste before adding more salt.

    Step 8: Add Cream and Finish

    • Stir in the cream: Pour the double cream or single cream into the soup and stir gently to combine. Do not allow the soup to boil after adding the cream, as this can cause it to split or separate.
    • Final garnish: Ladle the soup into warm bowls. Sprinkle each portion generously with chopped fresh parsley and snipped chives. Serve immediately with crusty bread for dunking.
    How to Make Cullen Skink

    Tips for Perfect Cullen Skink

    Why does my soup look curdled or separated?

    This usually happens when the temperature becomes too high after adding the cream. Always add cream to soup that is simmering gently, not boiling vigorously. Once the cream is added, keep the heat low and avoid bringing it back to a rolling boil. If separation occurs, whisk in a teaspoon of flour mixed with a little cold milk to help stabilise the soup.

    How can I make the soup creamier without extra cream?

    Let the potatoes cook a bit longer until they’re very soft, then mash them more thoroughly. This releases the potato starch, which naturally thickens and enriches the soup. You can also add an extra 100g of butter for additional richness, or use whole milk instead of a mixture of stock and milk for a naturally creamier result.

    What if I can’t find smoked haddock?

    Smoked cod, smoked whiting, or smoked mackerel can be used as alternatives. Each will give a slightly different flavour profile, but the soup will still be delicious. Avoid using very oily fish like smoked salmon, as the extra fat can overpower the delicate balance of flavours. If using a different fish, taste and adjust the seasoning accordingly, as some smoked varieties are saltier than others.

    Can I make cullen skink ahead of time?

    Yes, you can make the soup up to step 6 and store it in the refrigerator for up to two days. Add the flaked haddock and cream just before serving to preserve the fish’s delicate texture and flavour. This makes cullen skink perfect for advance preparation when entertaining, as the hardest work is already done when guests arrive.

    Is there a way to make this soup less heavy?

    Use a combination of milk and stock rather than all milk, which naturally lightens the soup. Replace some or all of the double cream with single cream or crème fraîche. You can also reduce the amount of butter slightly, though this will diminish the richness that makes cullen skink so satisfying. Using more potatoes and fewer cream and butter creates a heartier, less decadent version that’s still authentic.

    Serving Suggestions

    • Serve in warm bowls with crusty sourdough or wholemeal bread for dunking
    • Pair with a simple green salad dressed with lemon vinaigrette for a lighter meal
    • Accompany with smoked salmon canapés or fish cakes for a more substantial starter course
    • Offer oatcakes or Scottish shortbread on the side for a traditionally Scottish meal
    • Top with crispy bacon bits and a drizzle of truffle oil for an elevated dinner party version

    Storage

    Room Temperature

    Cullen skink should not be left at room temperature for longer than two hours. If you’ve finished eating, transfer any leftover soup to the refrigerator promptly. This soup contains dairy and fish, which are both perishable ingredients that require careful storage to prevent foodborne illness.

    Refrigerator

    Store cooled cullen skink in an airtight container in the refrigerator for up to three days. The soup actually improves slightly as the flavours meld together. To reheat, gently warm it in a saucepan over a low to medium heat, stirring occasionally. Do not allow it to boil, as high heat can cause the cream to separate. If you prefer, make the soup without the cream and final fish, then add these elements when reheating for the freshest result.

    Freezing

    Cullen skink can be frozen, though the texture will change slightly after thawing. Freeze the soup without the cream and final haddock flakes for the best results. Allow the soup to cool completely, then transfer it to freezer bags or airtight containers, leaving a little headspace for expansion. Freeze for up to one month. To serve, thaw overnight in the refrigerator and reheat gently on the stove top. Add the cream and fresh haddock flakes after reheating for the closest approximation to freshly made soup.

    Nutrition Information

    Per serving (based on 4 servings): Calories 580kcal | Carbohydrates 28g | Protein 35g | Fat 36g | Saturated Fat 22g | Sodium 1200mg

    Please note that these nutritional values are estimates and may vary depending on specific ingredients used and portion sizes. They are intended as a general guide only.

    What exactly is cullen skink?

    Cullen skink is a traditional Scottish soup made with smoked haddock, potatoes, and onions in a creamy broth. It originated in the coastal town of Cullen in Aberdeenshire and has been a Scottish staple for generations. The name u0022skinku0022 refers to a type of soup or stew.

    Can I use regular haddock instead of smoked haddock?

    Regular fresh haddock will not produce authentic cullen skink, as the distinctive smoky flavour is essential to the dish. However, you could use other smoked fish varieties such as smoked cod or smoked whiting. The soup will taste quite different without the smokiness that defines this classic recipe.

    How long does cullen skink take to make?

    From start to finish, cullen skink takes approximately 40 to 45 minutes. Most of this time is spent allowing the potatoes and onions to soften in the milk mixture. Once you have your ingredients prepared and the liquid simmering, the active cooking time is minimal.

    Is cullen skink suitable for a special occasion dinner?

    Absolutely. Despite its humble origins, cullen skink is elegant enough for entertaining. Serve it in beautiful bowls with a garnish of fresh herbs and crusty bread. Its rich, creamy character and distinctive flavour make it an impressive starter course that guests will remember.

    What can I serve alongside cullen skink?

    Cullen skink works beautifully as a starter followed by a light fish or vegetable main course. It also makes a substantial lunch when served with crusty bread and a side salad. Pair it with Scottish oatcakes or traditional Scottish shortbread for an authentically Scottish meal.

    Cullen Skink Recipe

    Recipe by Home ChefCourse: SoupCuisine: ScottishDifficulty: Easy
    Servings

    4

    servings
    Prep time

    30

    minutes
    Cooking time

    40

    minutes
    Calories

    300

    kcal
    Total time

    1

    hour 

    10

    minutes

    Traditional Scottish smoked haddock soup with creamy potatoes and onions. Silky, satisfying, and ready in under 45 minutes.

    Ingredients

    • 450g smoked haddock fillets, skin removed

    • 1 litre whole milk

    • 600ml fish or vegetable stock

    • 2 large onions, peeled and quartered

    • 5 medium potatoes, about 750g, peeled and diced

    • 100g butter

    • 1 teaspoon sea salt

    • ½ teaspoon freshly ground black pepper

    • 150ml double cream or single cream

    • 2 tablespoons fresh parsley, finely chopped

    • 1 tablespoon fresh chives, finely snipped

    • Crusty bread, for serving

    • Fish or vegetable stock

    Directions

    • Check the smoked haddock fillets carefully for small bones using tweezers or the tip of a knife. Place milk and stock in a large saucepan over medium heat and bring to a gentle simmer.
    • Carefully place the smoked haddock fillets into the simmering milk mixture. Poach for about 5 minutes until the flesh is opaque and flakes easily. Remove with a slotted spoon and set aside to cool.
    • Quarter the peeled onions and add to the simmering milk. Peel and dice the potatoes into small cubes and add them to the pan. Continue simmering for 15 to 20 minutes until vegetables are very soft.
    • Use a potato masher to gently crush the potatoes and onions in the pan, breaking them down to thicken the soup naturally. Do not make a purée, leave some texture.
    • Cut the butter into small cubes and stir into the soup until melted and fully combined. This creates the characteristic silky texture.
    • Once the cooled haddock has cooled enough to handle, break it into large, bite-sized flakes using two forks. Remove any remaining small bones.
    • Carefully fold the flaked haddock back into the soup. Season with sea salt and freshly ground black pepper to taste.
    • Pour the double cream or single cream into the soup and stir gently. Do not allow the soup to boil after adding cream.
    • Ladle soup into warm bowls. Garnish generously with fresh parsley and snipped chives. Serve immediately with crusty bread for dunking.

    Notes

    • Always keep the heat low after adding cream to prevent separation.
    • The soup can be made ahead without the cream and final fish, then finished when ready to serve.
    • Smoked haddock is already quite salty, so taste before adding more salt.
    • Use a slotted spoon when handling the delicate fish to keep it intact.
  • Espresso Martini Recipe

    Espresso Martini Recipe

    This espresso martini is a chilled, silky cocktail with a glossy coffee foam and a balanced mix of bold espresso, smooth vodka, and sweet coffee liqueur. The flavour is deep and roasty with just enough sweetness to round everything out, and the texture is creamy on top thanks to a proper shake. It’s an easy, beginner-friendly drink that feels special enough for dinner parties. Total time is about 10 minutes, including chilling the glass and cooling the espresso.

    Ingredients

    For the espresso base

    • 30ml (1 fl oz) freshly brewed espresso (1 shot), cooled for 3 to 5 minutes
    • Ice, for shaking

    For the cocktail

    • 50ml (1 2/3 fl oz) vodka
    • 25ml (3/4 fl oz) coffee liqueur (such as Kahlúa)
    • 10ml (2 tsp) simple syrup (adjust to taste)
    • Pinch of fine salt (optional, helps the coffee flavour pop)

    For garnish

    • 3 coffee beans

    How to Make Espresso Martini

    • Prepare the oven: No oven needed for this recipe. Instead, chill your martini glass in the freezer for 5 to 10 minutes so the drink stays icy cold and the foam sits neatly on top.
    • Baking: This is your “heat step.” Pull 1 fresh shot of espresso (about 30ml), then let it cool for a few minutes. Using espresso that’s piping hot will melt the ice too fast and thin the cocktail.
    • Mixing: Fill a cocktail shaker about halfway with ice. Add the cooled espresso, vodka, coffee liqueur, simple syrup, and a tiny pinch of salt if using.
    • Cooling: Shake hard for 15 to 20 seconds. You’re not just chilling the drink, you’re building that signature creamy coffee foam. The shaker should feel very cold in your hands.
    • Assembling: Double strain into your chilled martini glass (pour through the shaker strainer and a fine mesh strainer). Garnish with 3 coffee beans and serve straight away while the foam is thick and glossy.
    How to Make Espresso Martini

    Tips for the Best Espresso Martini

    Why is my espresso martini not foamy?

    Foam comes from a strong shake and fresh espresso (or strong coffee) that still has some natural oils. Shake longer, use plenty of ice, and avoid weak, watery coffee. If your coffee is very cold and flat, the foam can be thinner, so chilling the espresso briefly rather than refrigerating it for hours often helps.

    How do I stop it tasting watery?

    Watery espresso martinis usually come from espresso that’s too hot (melts ice fast) or shaking too long with small, already-melting ice. Cool the espresso for a few minutes first, and use fresh, solid ice cubes.

    How can I make it less sweet (or sweeter)?

    For less sweetness, reduce the simple syrup or skip it entirely, especially if your coffee liqueur is on the sweet side. For a sweeter drink, add an extra 5ml (1 tsp) syrup, shake again, and taste.

    What vodka works best?

    A smooth, neutral vodka lets the espresso shine. You do not need anything fancy, but avoid strongly flavoured vodkas unless you want a twist (vanilla vodka can be lovely with coffee).

    Can I make this without a cocktail shaker?

    You can use a large jar with a tight lid in a pinch, but a shaker is easier and safer. The key is a vigorous shake to build foam, so choose something sturdy and leak-proof.

    Serving Suggestions

    • Serve alongside tiramisu, chocolate mousse, or biscotti.
    • Pair with salty snacks like toasted nuts or parmesan crisps to balance the sweetness.
    • Make a mini “espresso martini flight” with classic, vanilla, and salted caramel versions.

    Storage

    Room temperature

    Not recommended. This cocktail is best served ice-cold, and coffee flavours taste flat and harsh once warm.

    Refrigerator

    You can pre-batch the vodka, coffee liqueur, and simple syrup in a sealed bottle and refrigerate for up to 3 days. For the best foam, add freshly brewed espresso (cooled for a few minutes) right before shaking and serving. Once shaken, serve immediately because the foam will start to fade within minutes.

    Freezing

    Freezing isn’t ideal for a finished espresso martini because the texture changes and the foam won’t hold. If you want it extra cold, chill your glass and place the mixed (unshaken) ingredients in the freezer for 15 minutes, then shake with ice and serve.

    Nutrition

    • Calories: 220 kcal
    • Carbohydrates: 13 g
    • Protein: 1 g
    • Fat: 0 g
    • Saturated fat: 0 g
    • Sodium: 15 mg

    Disclaimer: Nutrition values are estimates and will vary depending on the brands used and how much syrup you add.

    FAQs

    Can I make an espresso martini without coffee liqueur?

    Yes. Replace the coffee liqueur with 20ml simple syrup plus 5ml (1 tsp) coffee extract, or use a coffee syrup you like. The flavour will be less complex than a classic version, but it still works well.

    How do I make an espresso martini less sweet?

    Skip the simple syrup and use a slightly larger espresso shot (up to 40ml) for a more bitter, coffee-forward drink. You can also choose a less-sweet coffee liqueur if available.

    Can I use cold brew instead of espresso?

    Yes. Use 30ml cold brew concentrate (not ready-to-drink cold brew) for a similar strength. The foam may be a little lighter than with fresh espresso, so shake hard and strain into a well-chilled glass.

    Why do you double strain an espresso martini?

    Double straining catches tiny ice shards so the drink stays smooth and the foam looks clean and velvety on top. It also helps the cocktail stay cold without extra dilution.

    How much caffeine is in an espresso martini?

    It depends on your espresso and how it’s pulled, but a single shot typically contains around 60–80mg caffeine. If you’re sensitive to caffeine, use decaf espresso.

    Can I batch espresso martinis for a party?

    You can batch the spirits and syrup ahead, then brew and cool espresso close to serving time. Shake each drink with ice to create foam, or shake a larger batch in two rounds so the shaker isn’t overcrowded.

    Recipe Card

  • American Pancake Recipe

    American Pancake Recipe

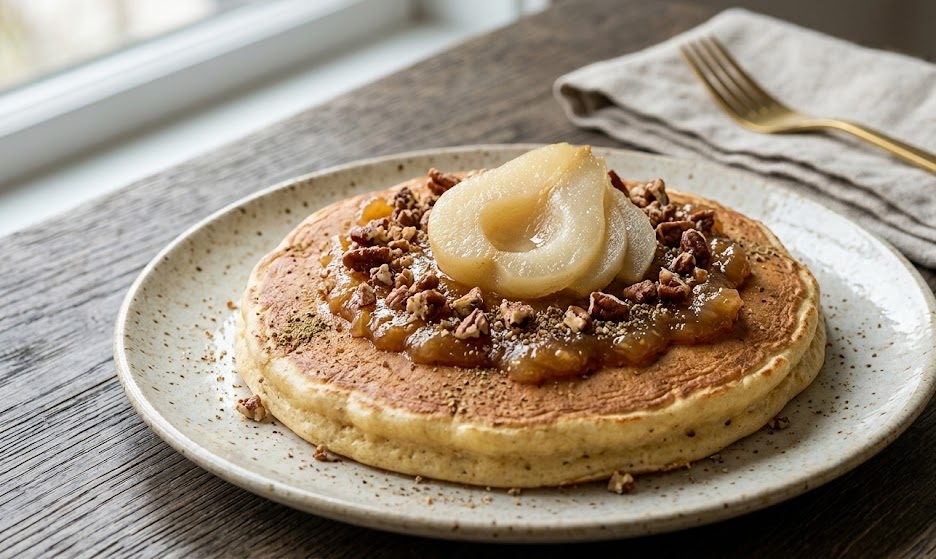
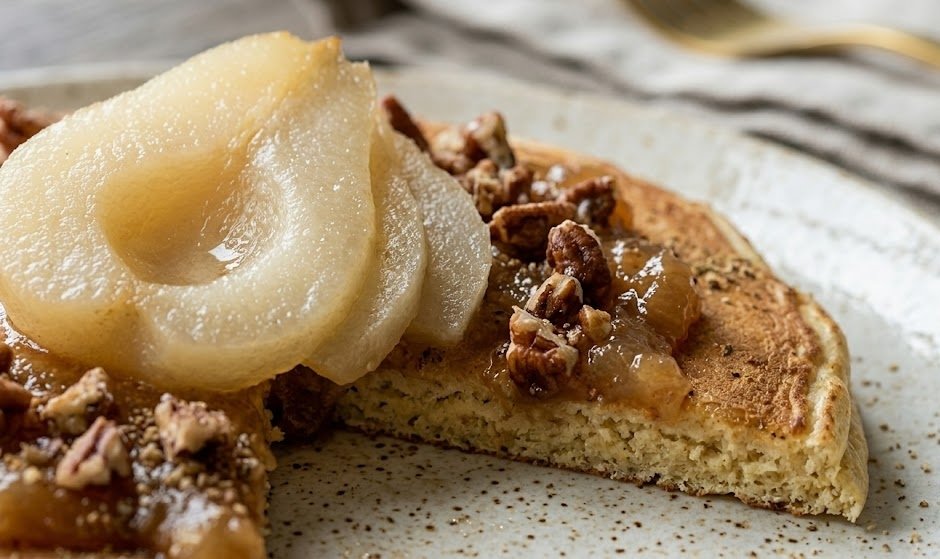
    If you love thick, fluffy pancakes with golden edges and a soft, tender middle, this is the American-style pancake recipe you will come back to again and again. They taste lightly sweet and buttery, with that classic vanilla warmth that pairs perfectly with maple syrup. The method is simple and beginner-friendly, with just one bowl for dry ingredients and one for wet. Total time is about 25 minutes, including a short rest for the batter.

    Ingredients

    For the pancake batter

    • 200g plain flour (all-purpose) (about 1 2/3 cups)
    • 25g caster sugar or granulated sugar (2 tbsp)
    • 2 tsp baking powder
    • 1/2 tsp bicarbonate of soda (baking soda)
    • 1/2 tsp fine salt
    • 300ml buttermilk (1 1/4 cups)
    • 1 large egg
    • 45g unsalted butter, melted and cooled slightly (3 tbsp)
    • 1 tsp vanilla extract

    For cooking

    • Butter or neutral oil (such as sunflower or canola), for greasing the pan

    For serving (optional, but highly recommended)

    • Butter
    • Maple syrup
    • Fresh berries or sliced banana
    • Greek yogurt or whipped cream

    How to Make American Pancake Recipe

    Prepare the oven

    • Prepare the oven: Preheat the oven to 120°C or 100°C fan. Slide a baking tray onto the middle shelf. This is just to keep the cooked pancakes warm while you finish the batch.
    • Heat the pan: Place a large non-stick frying pan or griddle over medium heat. Give it 2 to 3 minutes to heat up properly before you start cooking.

    Mix the batter

    • Mix the dry ingredients: In a large bowl, whisk together the flour, sugar, baking powder, bicarbonate of soda, and salt so everything is evenly distributed.
    • Mix the wet ingredients: In a jug or medium bowl, whisk the buttermilk, egg, melted butter, and vanilla until smooth.
    • Combine gently: Pour the wet ingredients into the bowl of dry ingredients. Stir with a spatula or wooden spoon until just combined. Stop as soon as you no longer see dry flour. The batter should look slightly lumpy.
    • Rest the batter: Leave the batter to rest for 5 minutes. This helps the flour hydrate and gives you a fluffier pancake.

    Cook the pancakes

    • Grease lightly: Add a small knob of butter (or a wipe of oil) to the pan and spread it around with kitchen paper. You want a thin coating, not a frying layer.
    • Scoop and portion: Spoon the batter into the hot pan, using about 2 to 3 tablespoons per pancake for medium pancakes. Leave a little space between each one so they are easy to flip.
    • Cook the first side: Cook for 2 to 3 minutes, or until you see bubbles rising to the surface and the edges look set and slightly dry.
    • Flip and finish: Flip and cook for another 1 to 2 minutes until golden and cooked through. Transfer to the warm oven tray while you cook the remaining batter.

    Cool and assemble

    • Brief cool (optional): If you like very neat stacks, let the pancakes sit for 1 minute so the steam settles. They will still be warm, just easier to top.
    • Assemble and serve: Stack the pancakes, add a small pat of butter, and pour over maple syrup. Add fruit or yogurt if you like.
    How to Make American Pancake Recipe

    Tips

    Why are my pancakes flat?

    Most often it is old raising agents or batter that was overmixed. Check that your baking powder and bicarbonate of soda are in date, and stir only until the flour disappears. A 5-minute rest also helps the batter thicken slightly so the pancakes rise better.

    How do I stop pancakes from turning tough?

    Do not beat the batter smooth. Lumps are a good sign here. Overmixing develops gluten, which makes pancakes chewy instead of soft.

    Why are my pancakes burning before they cook through?

    Your pan is too hot. Medium heat is ideal. If the butter browns instantly, take the pan off the heat for a minute, wipe it clean, and start again with lower heat.

    How do I keep pancakes warm for a crowd?

    The low oven trick makes a big difference. Keep pancakes in a single layer on a tray at 120°C (100°C fan) while you cook, then stack just before serving. Avoid covering tightly with foil, which can soften the edges.

    Serving Suggestions

    • Classic: butter and warm maple syrup
    • Fruity: berries, sliced banana, and a spoonful of Greek yogurt
    • Dessert-style: whipped cream and chocolate chips
    • Brunch plate: pancakes with crispy bacon and scrambled eggs

    Storage

    Room temperature

    Pancakes are best fresh, but you can keep them at room temperature for up to 6 hours if they are completely cooled and loosely covered. For food safety, do not leave them out longer than that.

    Refrigerator

    Cool completely, then store in an airtight container with baking parchment between layers. Keep refrigerated for up to 3 days. Reheat in a dry frying pan over low heat, in a toaster, or in the microwave in short bursts.

    Freezing

    Freeze pancakes in a single layer on a tray until firm, then transfer to a freezer bag with parchment between layers. Freeze for up to 2 months. Reheat from frozen in a toaster or warm oven until piping hot.

    Nutrition

    • Calories: 170 kcal
    • Carbohydrates: 24 g
    • Protein: 4 g
    • Fat: 6 g
    • Saturated fat: 3 g
    • Sodium: 320 mg

    Disclaimer: Nutrition values are estimates and will vary depending on the ingredients and portion size used.

    FAQs

    Can I make this pancake batter without buttermilk?

    Yes. Mix 300ml milk with 1 tbsp lemon juice or white vinegar, then let it stand for 5 minutes before using. The pancakes will still be fluffy and tender.

    Can I make the batter ahead of time?

    You can mix the dry ingredients ahead, but I recommend mixing the full batter just before cooking for the best rise. If you need to prep ahead, make the batter and cook within 30–60 minutes, and avoid stirring again too much.

    Why are my pancakes not fluffy?

    Usually it is overmixing, batter that has sat too long, or raising agents that are not fresh. Mix gently, rest for 5 minutes, cook on medium heat, and replace baking powder and bicarbonate of soda if they are old.

    Can I freeze American pancakes?

    Yes, pancakes freeze very well. Cool completely, freeze in layers with parchment between, and store for up to 2 months. Reheat from frozen in a toaster or a low oven until hot all the way through.

    What is the best pan for pancakes?

    A good non-stick frying pan or a flat griddle works best. You want even heat and a surface that releases easily so you can flip without tearing the pancakes.

  • Millionaire Shortbread Recipe

    Millionaire Shortbread Recipe

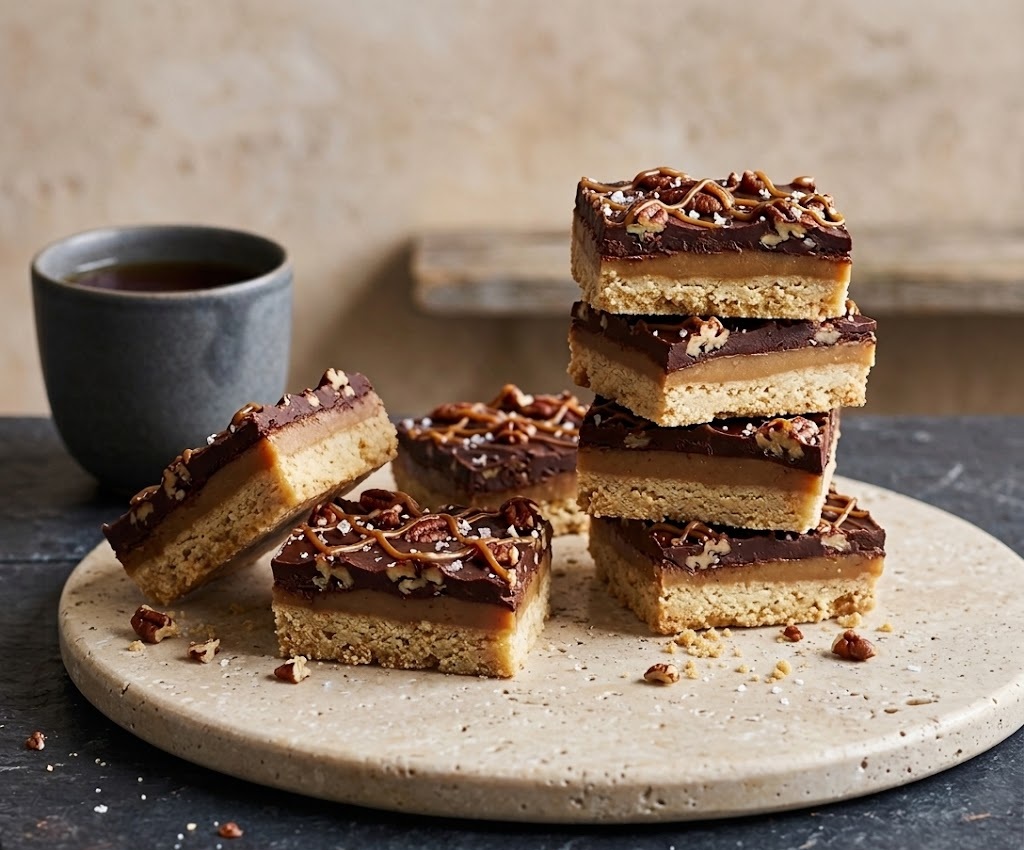
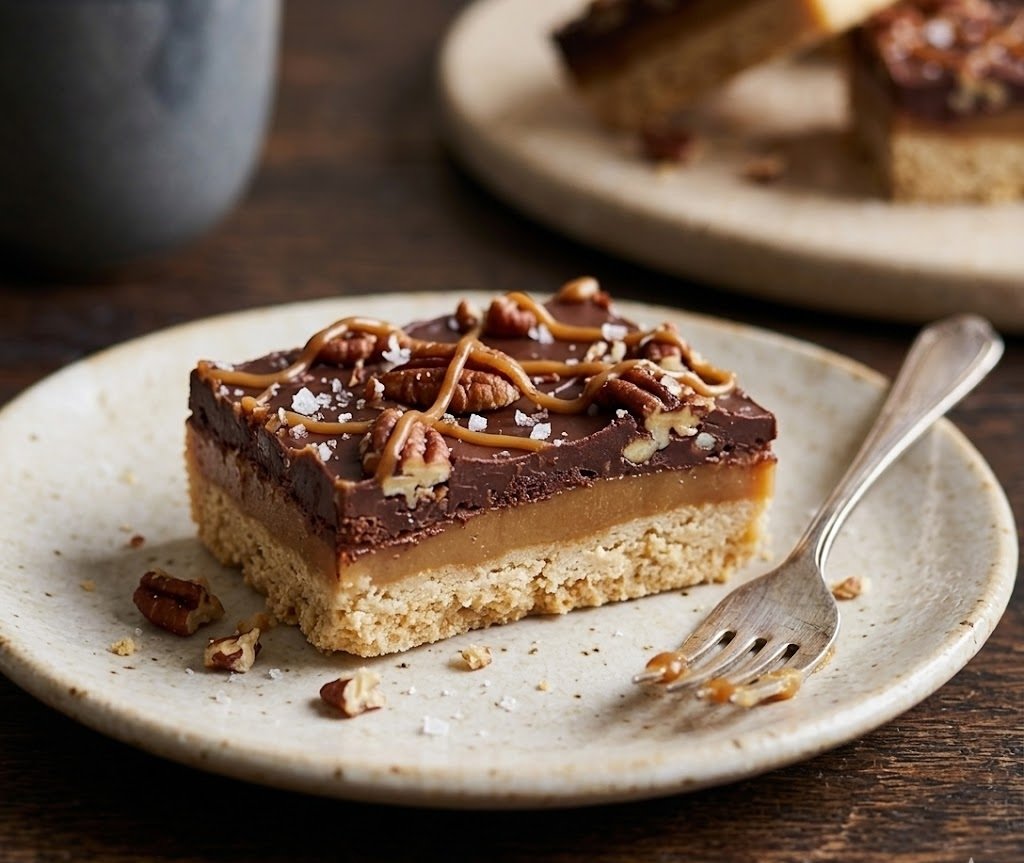
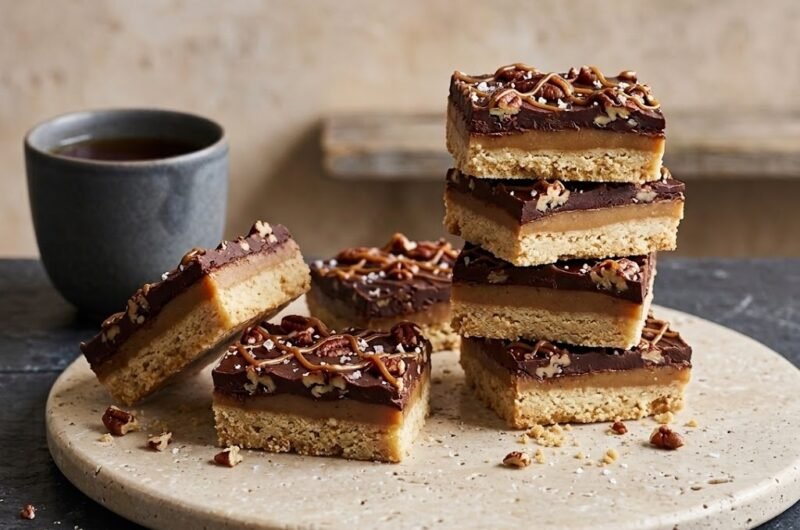
    This millionaire shortbread recipe is the ultimate indulgent tray bake, made with three irresistible layers of buttery shortbread, smooth caramel, and rich chocolate topping. Every bite has the perfect balance of crumbly texture, sweet caramel filling, and silky chocolate. Although it looks impressive, this classic bake is surprisingly simple to make at home with straightforward ingredients and easy steps. Perfect for afternoon tea, dessert platters, bake sales, or holiday treats, this recipe takes around 2 hours from start to finish including chilling time.

    Ingredients

    For the Shortbread Base

    • 250g plain flour
    • 75g caster sugar
    • 175g unsalted butter, cold and cubed
    • 1 pinch salt

    For the Caramel Filling

    • 150g unsalted butter
    • 150g light brown sugar
    • 397g tin condensed milk
    • 3 tablespoons golden syrup
    • 1 teaspoon vanilla extract
    • 1 pinch salt

    For the Chocolate Topping

    • 300g milk chocolate, chopped
    • 1 tablespoon vegetable oil or butter

    Kitchen Equipment

    • 20cm square baking tin
    • Baking parchment
    • Large saucepan
    • Mixing bowl
    • Spatula
    • Sharp knife

    How to Make Millionaire Shortbread Recipe

    • Prepare the oven and tin: Preheat the oven to 180°C or 160°C fan. Line a 20cm square baking tin with baking parchment, leaving some overhang on the sides for easy removal later.
    • Make the shortbread dough: Add the plain flour, caster sugar, salt, and cold cubed butter to a mixing bowl. Rub the butter into the flour using your fingertips until the mixture resembles fine breadcrumbs.
    • Press into the tin: Tip the mixture into the prepared tin and press it down firmly with the back of a spoon or the bottom of a glass so the surface is even and compact.
    • Bake the shortbread: Place the tin onto the middle shelf of the oven and bake for 25 minutes until lightly golden around the edges. Remove from the oven and leave to cool slightly while preparing the caramel.
    • Prepare the caramel filling: Add the butter, brown sugar, condensed milk, golden syrup, vanilla extract, and salt to a large saucepan. Place over low heat and stir continuously until the butter melts and the sugar dissolves completely.
    • Cook the caramel carefully: Increase the heat slightly and continue stirring constantly for 6 to 8 minutes until the caramel thickens and turns a deep golden colour. The mixture should coat the back of the spoon.
    • Pour over the shortbread: Spread the caramel evenly over the baked shortbread base using a spatula. Leave the tin at room temperature for 15 minutes before chilling in the refrigerator for 30 minutes.
    • Melt the chocolate topping: Place the chopped milk chocolate and oil into a heatproof bowl. Melt gently over a pan of simmering water or in short bursts in the microwave, stirring until smooth.
    • Add the chocolate layer: Pour the melted chocolate over the chilled caramel and spread evenly to the edges. Tap the tin gently on the counter to smooth the surface.
    • Chill and slice: Refrigerate for at least 1 hour until fully set. Remove from the tin using the parchment overhang and slice into squares using a sharp knife warmed in hot water.
    How to Make Millionaire Shortbread Recipe

    Tips for the Best Millionaire Shortbread Recipe

    Why is my caramel too soft?

    The caramel needs enough cooking time to thicken properly. Stir constantly and cook until it becomes noticeably thicker and darker golden in colour.

    How do I stop the chocolate from cracking when sliced?

    Add a tablespoon of butter or oil to the melted chocolate and let the tray sit at room temperature for 10 minutes before cutting.

    Can I use dark chocolate instead of milk chocolate?

    Yes, dark chocolate creates a richer finish and balances the sweetness of the caramel beautifully.

    Why is my shortbread crumbly?

    Make sure the base is pressed firmly into the tin before baking. This helps it hold together once sliced.

    Can I make millionaire shortbread ahead of time?

    Yes, this tray bake keeps very well and actually tastes even better after chilling overnight.

    Serving Suggestions

    • Serve with hot coffee or tea
    • Add to dessert platters for parties
    • Enjoy with vanilla ice cream
    • Wrap pieces individually for gifting
    • Cut into mini bite-sized squares for buffets

    Storage

    Room Temperature

    Store in an airtight container for up to 3 days in a cool room away from direct sunlight.

    Refrigerator

    Keep refrigerated for up to 1 week. Allow the slices to sit at room temperature for 15 minutes before serving for the best texture.

    Freezing

    Freeze the sliced millionaire shortbread in airtight containers for up to 3 months. Separate layers with baking parchment to prevent sticking.

    Nutrition

    • Calories: 425 kcal
    • Carbohydrates: 46g
    • Protein: 4g
    • Fat: 26g
    • Saturated Fat: 16g
    • Sodium: 120mg

    Nutrition values are estimates and may vary depending on ingredients used.

    FAQs

    Why is my caramel grainy?

    Grainy caramel usually happens when the sugar has not fully dissolved. Keep the heat low at first and stir constantly until smooth.

    Can I use dark chocolate for millionaire shortbread?

    Yes, dark chocolate works beautifully and gives a less sweet finish that balances the caramel layer.

    How long does millionaire shortbread need to chill?

    It should chill for at least 1 hour after adding the chocolate topping so the layers fully set before slicing.

    Can I freeze millionaire shortbread?

    Yes, wrap the slices well and freeze for up to 3 months. Thaw overnight in the refrigerator before serving.

    Millionaire Shortbread Recipe

    Recipe by Milli RoseCourse: DessertCuisine: BritishDifficulty: Easy
    Servings

    4

    servings
    Prep time

    30

    minutes
    Cooking time

    40

    minutes
    Calories

    300

    kcal
    Total time

    1

    hour 

    10

    minutes

    Classic millionaire shortbread with a buttery shortbread base, smooth caramel filling, and rich chocolate topping. Perfect for dessert tables, afternoon tea, and special treats.

    Ingredients

    • 250g plain flour

    • 75g caster sugar

    • 175g unsalted butter, cold and cubed

    • 1 pinch salt

    • 150g unsalted butter

    • 150g light brown sugar

    • 397g condensed milk

    • 3 tbsp golden syrup

    • 1 tsp vanilla extract

    • 300g milk chocolate

    • 1 tbsp vegetable oil or butter

    Directions

    • Preheat oven to 180°C or 160°C fan. Line a 20cm square baking tin with baking parchment.
    • Rub flour, sugar, salt, and butter together until the mixture resembles breadcrumbs.
    • Press the mixture firmly into the prepared tin.
    • Bake for 25 minutes until lightly golden.
    • Add butter, brown sugar, condensed milk, golden syrup, vanilla, and salt to a saucepan.
    • Cook while stirring continuously until thickened and golden.
    • Pour caramel over the shortbread base and chill briefly.
    • Melt chocolate with oil or butter until smooth.
    • Spread chocolate over the caramel layer evenly.
    • Chill until fully set, then slice into squares and serve.

    Notes

    • Use a sharp warm knife for cleaner slices.
    • Do not rush the caramel or it may split.
    • Store chilled during warm weather to keep the layers firm.

slot depo

sicbo online