Blog

  • Scampi Sauce Recipe

    Scampi Sauce Recipe

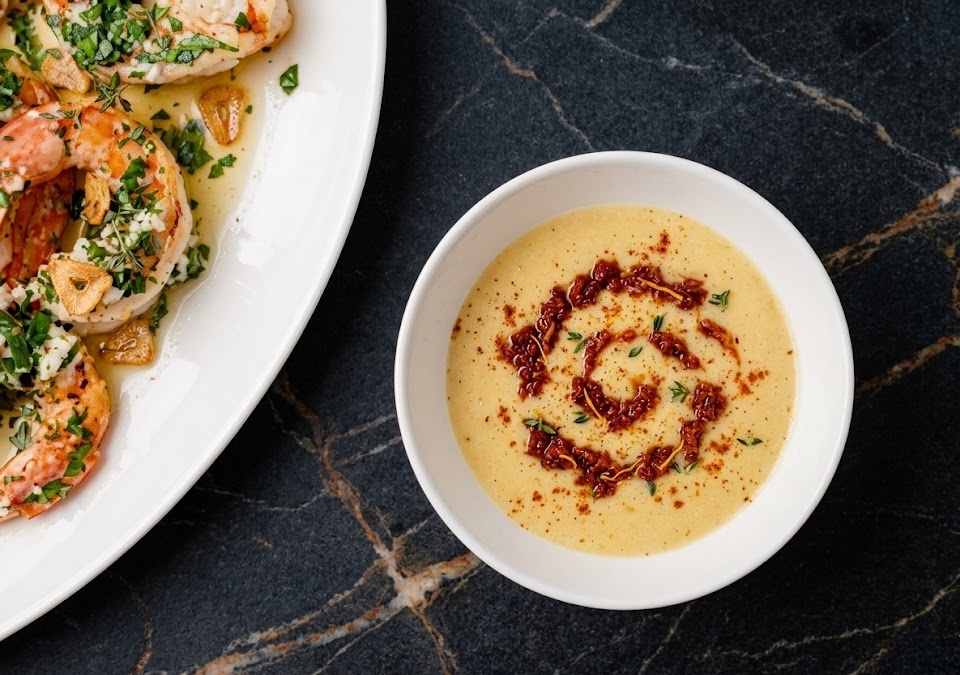
    If you love rich, buttery seafood flavors, this scampi sauce recipe is a must-have in your kitchen. Silky smooth with a perfect balance of garlic, lemon, and butter, it delivers a restaurant-quality taste in every spoonful. It’s incredibly easy to make, beginner-friendly, and comes together in under 20 minutes. Whether paired with shrimp, pasta, or crusty bread, this sauce transforms simple ingredients into something truly special.

    Ingredients

    For the Scampi Sauce

    • 4 tablespoons unsalted butter
    • 2 tablespoons olive oil
    • 5 cloves garlic, finely minced
    • ½ teaspoon red pepper flakes (optional)
    • 120ml dry white wine or chicken stock
    • 2 tablespoons fresh lemon juice
    • 1 teaspoon lemon zest
    • Salt, to taste
    • Freshly ground black pepper, to taste
    • 2 tablespoons fresh parsley, finely chopped

    Optional Add-Ins

    • 200g shrimp, peeled and deveined
    • Cooked pasta or linguine
    • Grated Parmesan cheese

    How to Make Scampi Sauce Recipe

    • Prepare the base: Heat olive oil and 2 tablespoons of butter in a large pan over medium heat until melted and gently sizzling.
    • Add garlic: Stir in the minced garlic and cook for 1 to 2 minutes until fragrant, making sure it does not brown.
    • Deglaze the pan: Pour in the white wine or chicken stock and let it simmer for 3 to 4 minutes to reduce slightly and deepen the flavor.
    • Add lemon: Stir in the lemon juice and zest, mixing well to create a bright, balanced sauce.
    • Finish with butter: Add the remaining butter and stir until fully melted and the sauce becomes glossy and smooth.
    • Season and garnish: Season with salt, black pepper, and red pepper flakes if using. Finish with chopped parsley.
    • Serve: Toss with cooked shrimp or pasta, or drizzle over seafood and serve immediately.
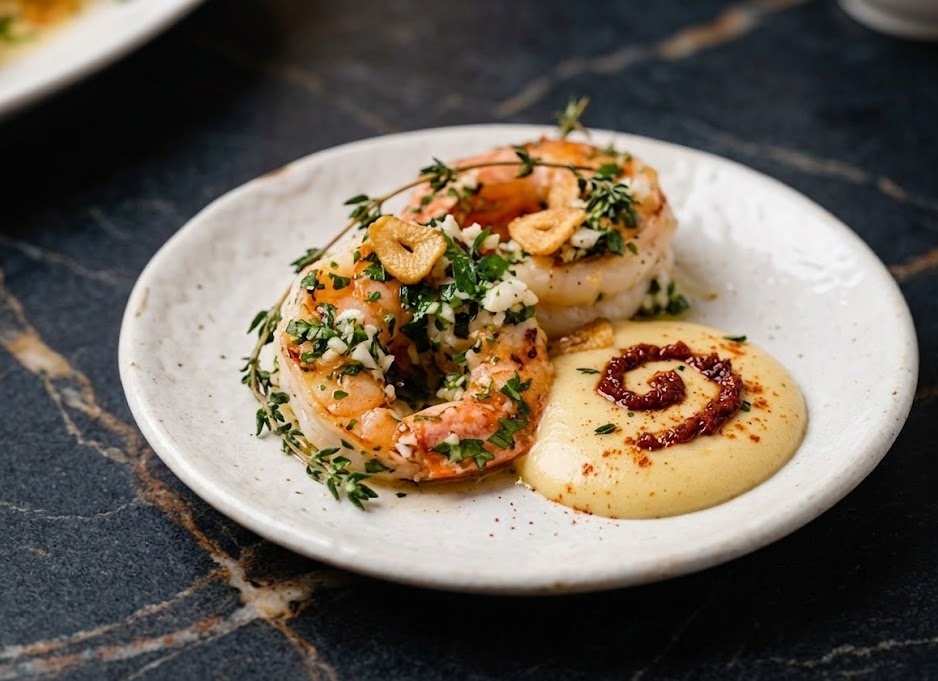
    How to Make Scampi Sauce Recipe

    Tips for the Best Scampi Sauce

    How do I prevent garlic from burning?

    Cook garlic over medium heat and stir constantly. Burnt garlic turns bitter and affects the entire sauce.

    Can I make it without wine?

    Yes, replace the wine with chicken stock or vegetable broth for a similar depth of flavor.

    How do I get a silky texture?

    Add butter at the end and stir gently. This helps emulsify the sauce for a smooth finish.

    Can I make it spicy?

    Increase the red pepper flakes or add a pinch of cayenne for extra heat.

    Serving Suggestions

    • Toss with linguine or spaghetti
    • Serve over sautéed shrimp or grilled fish
    • Drizzle over steamed vegetables
    • Use as a dipping sauce for crusty bread

    Storage

    Room Temperature

    Best served fresh. Do not leave out for more than 2 hours.

    Refrigerator

    Store in an airtight container for up to 3 days. Reheat gently over low heat.

    Freezing

    Not recommended as the butter may separate when thawed.

    Nutrition

    • Calories: 180 kcal
    • Carbohydrates: 2g
    • Protein: 1g
    • Fat: 19g
    • Saturated Fat: 10g
    • Sodium: 150mg

    Values are estimates and may vary based on ingredients used.

    FAQs

    Can I use bottled lemon juice?

    Fresh lemon juice is highly recommended for the best flavor, but bottled can be used in a pinch.

    What pasta works best with scampi sauce?

    Linguine and spaghetti are the most popular choices because they hold the sauce well.

    Can I make this dairy-free?

    You can replace butter with a plant-based alternative, though the flavor will differ slightly.

    Is this sauce only for shrimp?

    No, it pairs beautifully with chicken, fish, vegetables, or even as a dipping sauce.u003cbru003e
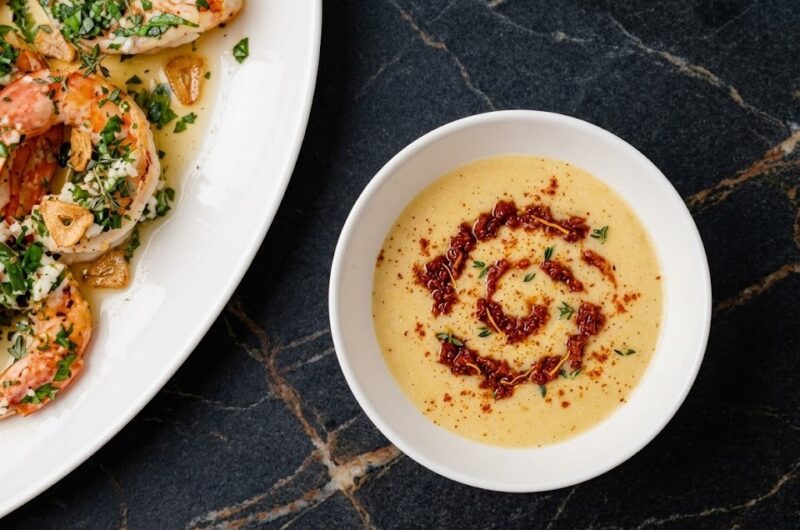
    Scampi Sauce Recipe

    Recipe by Milli RoseCourse: SauceCuisine: Italian-AmericanDifficulty: Easy
    Servings

    4

    servings
    Prep time

    30

    minutes
    Cooking time

    40

    minutes
    Calories

    300

    kcal
    Total time

    1

    hour 

    10

    minutes

    A rich, buttery garlic scampi sauce with lemon and herbs. Perfect for shrimp, pasta, or seafood dishes.

    Ingredients

    • 4 tablespoons butter

    • 2 tablespoons olive oil

    • 5 cloves garlic, minced

    • ½ teaspoon red pepper flakes

    • ½ cup white wine or broth

    • 1 tablespoon lemon juice

    • 1 teaspoon lemon zest

    • 2 tablespoons parsley

    • Salt and pepper

    • Optional cream or Parmesan

    Directions

    • Melt butter with olive oil over medium heat.
    • Add garlic and cook until fragrant.
    • Pour in wine or broth and simmer.
    • Add lemon juice, zest, and seasoning.
    • Stir in parsley and optional cream.
    • Serve warm with seafood or pasta.
  • Spicy Mayo Recipe

    Spicy Mayo Recipe

    This spicy mayo recipe is a creamy, bold, and irresistibly smooth sauce that instantly elevates everything from sandwiches to sushi. With its rich texture and balanced heat, it delivers a perfect blend of tangy, spicy, and slightly sweet flavors. It’s incredibly easy to make, requiring just a few pantry staples and under 5 minutes of your time. Whether you’re dipping, drizzling, or spreading, this sauce is a must-have for quick flavor upgrades.

    Ingredients

    For the Spicy Mayo

    • ½ cup mayonnaise
    • 1–2 tablespoons sriracha sauce (adjust to taste)
    • 1 teaspoon lemon juice (freshly squeezed)
    • ½ teaspoon garlic powder
    • ½ teaspoon honey (optional, for balance)
    • Pinch of salt (to taste)

    How to Make Spicy Mayo Recipe

    • Prepare the base: In a medium mixing bowl, add the mayonnaise. This forms the creamy foundation of your sauce.
    • Add the spice: Stir in the sriracha sauce. Start with 1 tablespoon and increase if you prefer a stronger kick.
    • Enhance the flavor: Add lemon juice, garlic powder, and honey if using. These ingredients balance the heat with tang and a hint of sweetness.
    • Mix thoroughly: Whisk everything together until smooth and fully combined. The sauce should be creamy with a light orange hue.
    • Taste and adjust: Add a pinch of salt if needed and adjust spice or acidity to your liking.
    • Chill before serving: For best flavor, cover and refrigerate for at least 10–15 minutes to allow the flavors to meld.
    How to Make Spicy Mayo Recipe

    Tips for the Best Spicy Mayo

    How can I make it less spicy?

    Simply reduce the amount of sriracha and add a bit more mayonnaise or honey to mellow the heat.

    What if my sauce is too thick?

    Add a few drops of water or extra lemon juice to loosen the consistency without affecting the flavor too much.

    Can I make it vegan?

    Yes, use a plant-based mayonnaise alternative and ensure your sriracha is vegan-friendly.

    How do I make it extra creamy?

    Use high-quality full-fat mayonnaise and whisk thoroughly for a silky smooth texture.

    Serving Suggestions

    • Drizzle over sushi rolls or poke bowls
    • Spread on burgers, wraps, or sandwiches
    • Use as a dip for fries, chicken tenders, or shrimp
    • Add to tacos or grilled meats for extra flavor

    Storage

    Room Temperature

    Not recommended. Due to the mayonnaise base, it should not be left out for more than 1 hour.

    Refrigerator

    Store in an airtight container for up to 5 days. Stir before using.

    Freezing

    Freezing is not advised as it can affect the texture and cause separation.

    Nutrition

    • Calories: 90 per tablespoon
    • Carbohydrates: 1g
    • Protein: 0g
    • Fat: 10g
    • Saturated Fat: 1.5g
    • Sodium: 120mg

    Note: Nutritional values are estimates and may vary depending on ingredients used.

    FAQs

    Can I use a different hot sauce?

    Yes, you can substitute sriracha with any hot sauce you prefer. Keep in mind that flavor and heat levels may vary.

    How long does spicy mayo last?

    When stored in the refrigerator in an airtight container, it stays fresh for up to 5 days.

    Can I make it without lemon juice?

    Yes, but lemon juice adds brightness. You can substitute with vinegar for a similar tang.

    Is spicy mayo gluten-free?

    Most versions are gluten-free, but always check your mayonnaise and hot sauce labels to be sure.

    Spicy Mayo Recipe

    Recipe by Home ChefCourse: CondimentCuisine: FusionDifficulty: Easy
    Servings

    8

    tablespoons
    Prep time

    5

    minutes
    Cooking timeminutes
    Total time

    5

    minutes
    Calories

    90

    kcal

    A quick and creamy spicy mayo sauce made with simple ingredients. Perfect for dipping, spreading, and drizzling over your favorite dishes.

    Ingredients

    • ½ cup mayonnaise

    • 1–2 tbsp sriracha sauce

    • 1 tsp lemon juice

    • ½ tsp garlic powder

    • ½ tsp honey (optional)

    • Pinch of salt

    Directions

    • Add mayonnaise to a bowl.
    • Mix in sriracha sauce.
    • Add lemon juice, garlic powder, and honey.
    • Whisk until smooth and creamy.
    • Taste and adjust seasoning.
    • Chill briefly before serving.

    Notes

    • Adjust spice level to taste.
    • Use full-fat mayo for best texture.
    • Store chilled and stir before use.
  • Chili Seasoning Mix Recipe

    Chili Seasoning Mix Recipe

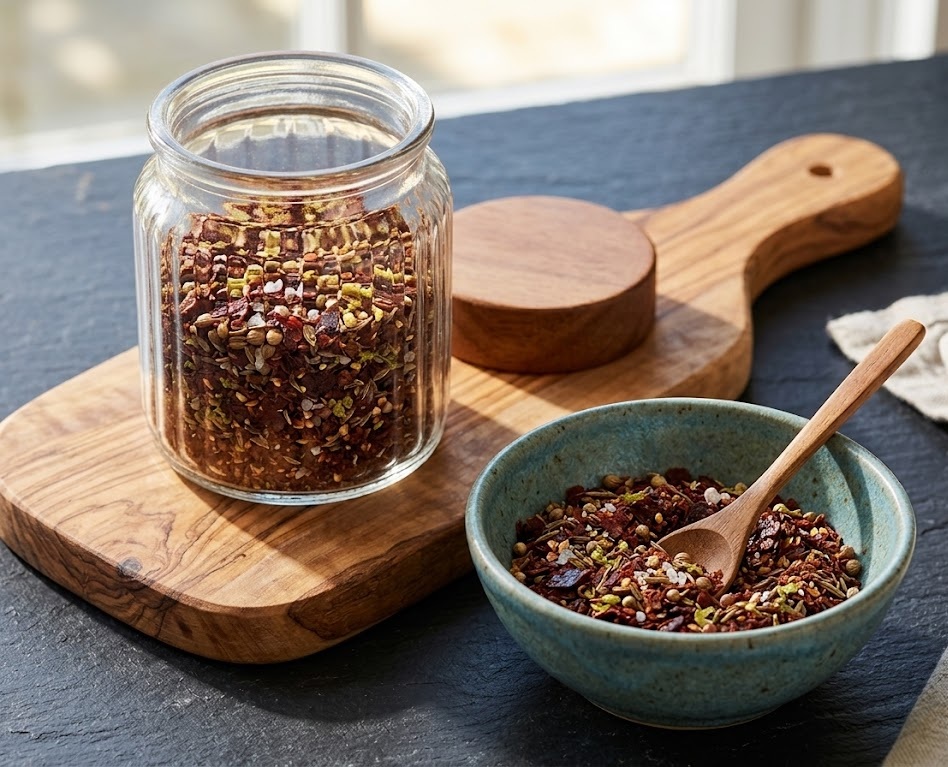
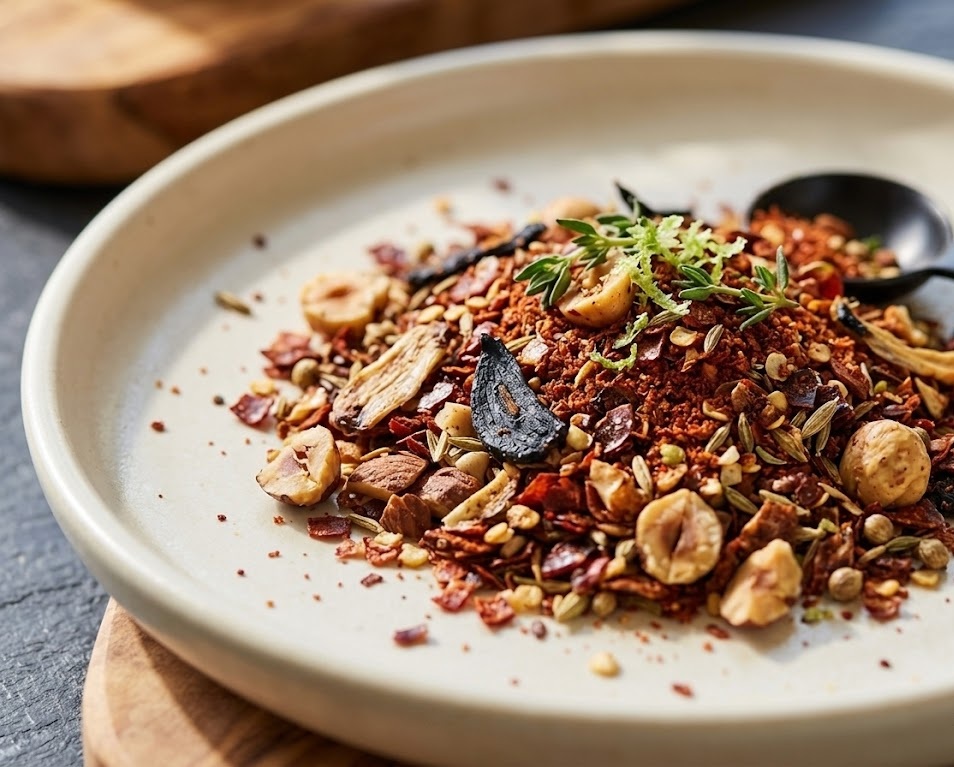
    If you love bold, smoky flavors in your cooking, this chili seasoning mix recipe is a must-have in your kitchen. It delivers a rich, well-balanced blend of spices with a warm, slightly spicy kick and a deep, earthy aroma. This homemade mix is quick and easy to prepare in just minutes, making it perfect for busy cooks. With a fine, slightly coarse texture, it blends beautifully into chili, soups, and marinades for consistent flavor every time.

    Ingredients

    For the Chili Seasoning Mix

    • 2 tablespoons chili powder
    • 1 tablespoon ground cumin
    • 1 tablespoon smoked paprika
    • 1 teaspoon garlic powder
    • 1 teaspoon onion powder
    • 1 teaspoon dried oregano
    • 1 teaspoon salt
    • ½ teaspoon black pepper
    • ½ teaspoon cayenne pepper (adjust to taste)
    • ½ teaspoon crushed red pepper flakes (optional)

    How to Make Chili Seasoning Mix Recipe

    • Prepare your tools: Gather a small mixing bowl, measuring spoons, and an airtight jar. Ensure everything is clean and dry so the seasoning stays fresh.
    • Measure the spices: Carefully measure all the spices using level spoons to maintain a balanced flavor profile.
    • Mix thoroughly: Add all ingredients to the bowl and stir well until evenly combined. Make sure there are no clumps.
    • Taste and adjust: If you prefer more heat, add extra cayenne or red pepper flakes. For a milder mix, reduce the spicy elements slightly.
    • Store properly: Transfer the seasoning mix into an airtight container or spice jar. Label it with the date for freshness.
    How to Make Chili Seasoning Mix Recipe

    Tips for the Best Chili Seasoning Mix

    How do I get a deeper flavor?

    Use smoked paprika instead of regular paprika. It adds a subtle smoky depth that enhances chili dishes beautifully.

    Can I control the spice level?

    Yes, adjust the cayenne pepper and red pepper flakes to suit your heat preference.

    Why does my mix taste dull?

    Old spices lose potency over time. Always use fresh spices for the best flavor.

    Can I make a larger batch?

    Absolutely. Simply double or triple the ingredients and store in a sealed container.

    Serving Suggestions

    • Stir into classic beef or vegetarian chili
    • Use as a rub for grilled chicken or beef
    • Add to soups, stews, or taco fillings
    • Sprinkle over roasted vegetables

    Storage

    Room Temperature

    Store in an airtight container in a cool, dry place for up to 6 months.

    Refrigerator

    Not necessary, but you can refrigerate to extend freshness slightly.

    Freezing

    Freezing is not required, but the mix can be frozen in airtight containers for up to 1 year.

    Nutrition

    • Calories: 20 per tablespoon
    • Carbohydrates: 3g
    • Protein: 1g
    • Fat: 1g
    • Saturated Fat: 0.2g
    • Sodium: 200mg

    Note: Nutritional values are approximate and may vary based on ingredient brands.

    FAQs

    How much seasoning mix should I use for chili?

    Use about 2 to 3 tablespoons of this mix for a standard pot of chili serving 4 to 6 people.

    Can I make this seasoning salt-free?

    Yes, simply omit the salt and add it separately when cooking to control sodium levels.

    Is this seasoning mix spicy?

    It has a mild to moderate heat level. You can adjust the cayenne pepper to make it milder or spicier.

    Can I use this for tacos or other dishes?

    Yes, this seasoning works well for tacos, burritos, grilled meats, and roasted vegetables.

    Chili Seasoning Mix Recipe

    Recipe by Home ChefCourse: CondimentCuisine: AmericanDifficulty: Easy
    Servings

    6

    tablespoons
    Prep time

    5

    minutes
    Cooking timeminutes
    Total time

    5

    minutes
    Calories

    20

    kcal

    A bold, smoky homemade chili seasoning mix made with simple pantry spices. Perfect for chili, tacos, and grilled dishes.

    Ingredients

    • 2 tablespoons chili powder

    • 1 tablespoon ground cumin

    • 1 tablespoon smoked paprika

    • 1 teaspoon garlic powder

    • 1 teaspoon onion powder

    • 1 teaspoon dried oregano

    • 1 teaspoon salt

    • ½ teaspoon black pepper

    • ½ teaspoon cayenne pepper

    • ½ teaspoon red pepper flakes (optional)

    Directions

    • Gather all spices and a mixing bowl.
    • Measure each spice carefully.
    • Combine all ingredients in the bowl.
    • Stir until evenly blended with no clumps.
    • Transfer to an airtight jar for storage.

    Notes

    • Adjust spice level to taste.
    • Store in a cool, dry place.
    • Use fresh spices for best flavor.
  • Bolognese Recipe

    Bolognese Recipe

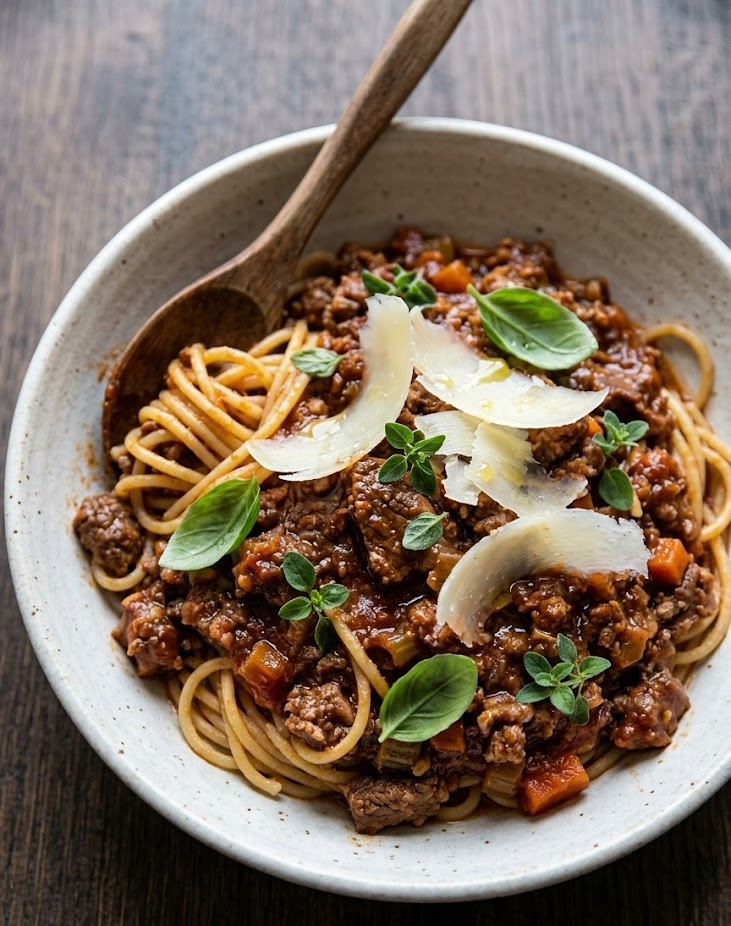
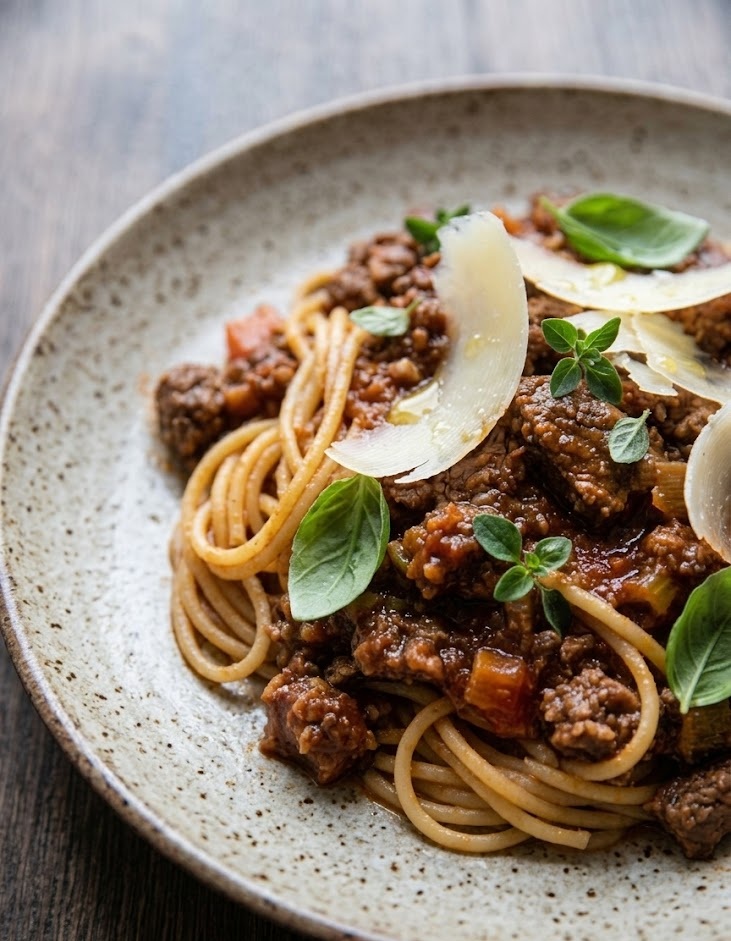
    If you are looking for a deeply comforting and authentic Italian meat sauce, this Bolognese recipe will quickly become a staple in your kitchen. This rich and savory sauce boasts a tender texture and complex flavor developed through slow simmering. While it requires a bit of patience, the difficulty level is low enough for any beginner to master with ease. You can expect to spend about twenty minutes on preparation and two hours of gentle cooking for a truly unforgettable meal.

    Ingredients

    The Aromatics and Base

    • 1 tablespoon olive oil
    • 2 tablespoons unsalted butter
    • 1 medium yellow onion, finely chopped
    • 1 medium carrot, finely chopped
    • 1 celery stalk, finely chopped
    • 3 cloves garlic, minced

    The Meat

    • 1 pound ground beef (80% lean)
    • 1/2 pound ground pork

    Liquids and Seasonings

    • 1/2 cup dry red wine
    • 1/2 cup whole milk
    • 2 tablespoons tomato paste
    • 1 can (28 ounces) crushed tomatoes
    • 1 teaspoon kosher salt
    • 1/2 teaspoon freshly ground black pepper
    • 1/4 teaspoon ground nutmeg

    How to Make Bolognese Recipe

    • Prepare the aromatics: Heat the olive oil and butter in a large heavy pot or Dutch oven over medium heat. Add the chopped onion, carrot, and celery. Cook for about 8 to 10 minutes until the vegetables are very soft and translucent. Add the minced garlic and cook for one more minute until fragrant.
    • Brown the meat: Increase the heat slightly and add the ground beef and ground pork to the pot. Break the meat apart with a wooden spoon as it cooks. Stir frequently until the meat is completely browned and no longer pink inside.
    • Incorporate the liquids: Pour the dry red wine into the pot and gently scrape any browned bits from the bottom. Let the wine simmer until it has almost entirely evaporated. Next, stir in the whole milk and the ground nutmeg, allowing the milk to bubble and reduce until the mixture looks thick.
    • Simmer the sauce: Stir in the tomato paste and cook for two minutes to deepen its flavor. Pour in the crushed tomatoes, then season the sauce with the kosher salt and black pepper. Bring the pot to a gentle boil, then immediately reduce the heat to the lowest setting.
    • Slow cook to perfection: Cover the pot with a lid, leaving it just slightly open to let steam escape. Let the sauce simmer gently for at least two hours, stirring occasionally. If the sauce looks too dry, you can add a small splash of water. Skim any excess fat from the top before serving.
    How to Make Bolognese Recipe

    Tips for Perfect Bolognese

    Why add milk to the meat sauce?

    Adding milk might seem unusual, but it is a traditional and vital step. The natural sugars in the milk help balance the acidity of the tomatoes, while the fat tenderizes the meat, giving the final dish a wonderfully rich and velvety texture.

    Can I speed up the cooking time?

    While you can eat the sauce after 30 minutes of simmering, the flavors will not be fully developed. Bolognese relies on a long, slow cooking process to break down the proteins and meld the ingredients together. Taking the full two hours is highly recommended for the best results.

    What type of pot works best?

    An enameled cast iron Dutch oven is the ideal vessel for this recipe. It holds heat evenly at low temperatures, preventing the sauce from burning during the long simmering phase.

    Serving Suggestions

    • Toss the warm sauce directly with freshly cooked wide pasta like tagliatelle or pappardelle.
    • Top generously with freshly grated Parmigiano Reggiano before serving.
    • Serve alongside warm crusty bread or garlic bread to soak up the leftover sauce.
    • Pair with a crisp, bitter green salad dressed in a simple lemon vinaigrette to cut through the richness of the meat.

    Storage

    Room Temperature

    Do not leave the Bolognese sauce at room temperature for more than two hours. Bacteria can grow rapidly in meat sauces left out on the counter.

    Refrigerator

    Allow the sauce to cool completely, then transfer it to an airtight container. It will keep perfectly in the refrigerator for up to four days. In fact, the flavor often improves on the second day as the ingredients continue to meld.

    Freezing

    This recipe freezes beautifully. Spoon the cooled sauce into freezer safe bags or containers, leaving a little room for expansion. Freeze for up to three months. Thaw overnight in the refrigerator and reheat gently on the stovetop when you are ready to eat.

    Nutrition

    • Calories: 350 kcal
    • Carbohydrates: 12g
    • Protein: 22g
    • Fat: 20g
    • Saturated Fat: 8g
    • Sodium: 450mg

    Disclaimer: These nutritional values are estimates based on standard measurements and ingredients. Actual values may vary depending on the specific brands and meat ratios used.

    FAQs

    Can I use only ground beef?

    Yes, while a traditional recipe uses a mix of beef and pork for depth of flavor and tender texture, using entirely ground beef will still yield a delicious and hearty sauce.

    Do I have to use wine in the sauce?

    The red wine adds wonderful acidity and complexity, but you can omit it. Substitute the wine with an equal amount of beef broth mixed with a teaspoon of red wine vinegar if you prefer cooking without alcohol.

    What is the best pasta for Bolognese?

    Wide, flat pasta shapes like tagliatelle, pappardelle, or fettuccine are the best choices because their broad surface area holds the thick, heavy meat sauce beautifully.

    Can I make this recipe in a slow cooker?

    Absolutely. Cook the aromatics, brown the meat, and reduce the wine and milk on the stovetop first. Then, transfer everything to your slow cooker along with the tomatoes and cook on low for six to eight hours.

    Bolognese Recipe

    Recipe by Home ChefCourse: Main Course, DinnerCuisine: ItalianDifficulty: Easy
    Servings

    4

    servings
    Prep time

    30

    minutes
    Cooking time

    40

    minutes
    Calories

    300

    kcal
    Total time

    1

    hour 

    10

    minutes

    A rich, slow cooked authentic Italian meat sauce with a melt in your mouth texture. The perfect comforting dinner to pair with your favorite pasta.

    Ingredients

    • 1 tbsp olive oil

    • 2 tbsp unsalted butter

    • 1 onion, finely chopped

    • 1 carrot, finely chopped

    • 1 celery stalk, finely chopped

    • 3 cloves garlic, minced

    • 1 lb ground beef (80% lean)

    • 1/2 lb ground pork

    • 1/2 cup dry red wine

    • 1/2 cup whole milk

    • 2 tbsp tomato paste

    • 28 oz crushed tomatoes

    • Salt, pepper, and nutmeg

    Directions

    • Heat olive oil and butter in a large pot. Sauté the chopped onion, carrot, and celery until soft. Add the garlic and cook for one minute.
    • Add the ground beef and ground pork. Break the meat apart and cook until browned and fully cooked through.
    • Pour in the dry red wine and simmer until evaporated. Stir in the milk and nutmeg, cooking until the liquid reduces.
    • Stir in the tomato paste, crushed tomatoes, salt, and pepper. Bring to a boil, then immediately turn heat to low.
    • Cover the pot slightly and let simmer gently for 2 hours, stirring occasionally. Toss with warm pasta and serve.

    Notes

    • Do not rush the simmering process; 2 hours yields the best flavor.
    • Using a mix of pork and beef creates a richer, more tender sauce.
    • Store leftovers in the fridge for up to 4 days.
  • Strawberry Sauce Recipe

    Strawberry Sauce Recipe

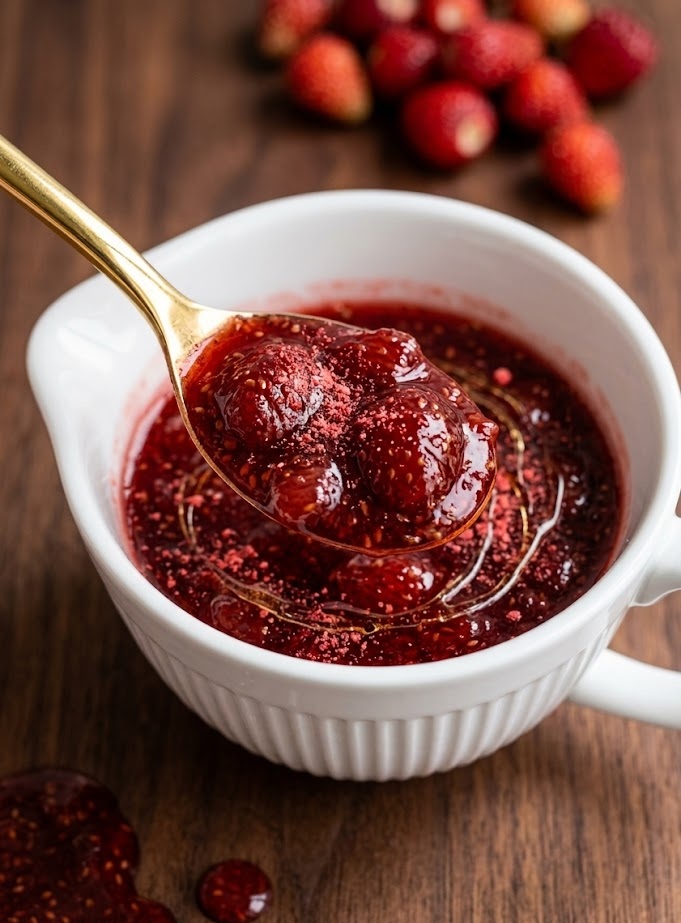
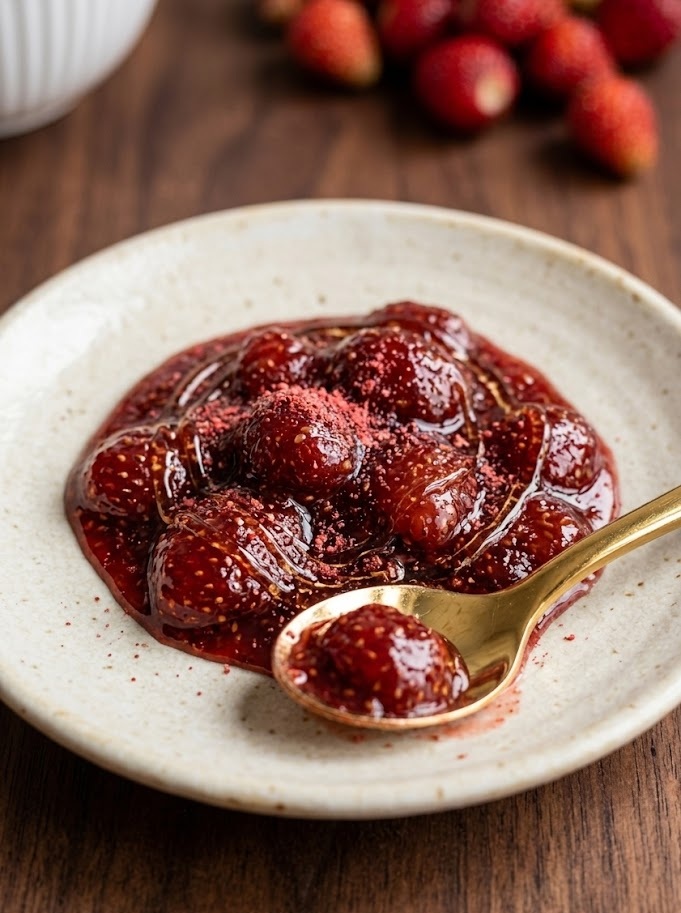
    This strawberry sauce recipe is a simple, vibrant topping made with fresh or frozen strawberries, gently simmered to create a glossy, spoonable consistency. It has a beautifully balanced flavor, combining natural sweetness with a subtle tang that enhances everything from desserts to breakfast dishes. The texture is smooth with soft fruit pieces, making it both rich and refreshing. Best of all, it’s incredibly easy to make and comes together in under 20 minutes.

    Ingredients

    For the Strawberry Sauce

    • 500g fresh or frozen strawberries, hulled
    • 100g caster sugar
    • 1 tablespoon lemon juice
    • 1 teaspoon vanilla extract (optional)
    • 2 tablespoons water
    • 1 teaspoon cornflour (optional, for thicker sauce)

    How to Make Strawberry Sauce Recipe

    • Prepare the strawberries: Wash, hull, and halve the strawberries if using fresh ones. If using frozen strawberries, allow them to thaw slightly for easier cooking.
    • Start cooking: Place the strawberries, sugar, lemon juice, and water into a medium saucepan. Set over medium heat and stir gently until the sugar begins to dissolve.
    • Simmer the mixture: Allow the mixture to come to a gentle simmer. Cook for 8 to 10 minutes, stirring occasionally, until the strawberries soften and release their juices.
    • Thicken if needed: For a thicker sauce, mix the cornflour with a little water to form a slurry and stir it into the sauce. Cook for an additional 1 to 2 minutes until slightly thickened.
    • Blend or mash: For a smoother texture, blend the sauce using a hand blender. Alternatively, mash lightly with a fork for a chunkier finish.
    • Add flavour and cool: Stir in the vanilla extract if using. Remove from heat and allow the sauce to cool slightly before serving or storing.
    How to Make Strawberry Sauce Recipe

    Tips for the Best Strawberry Sauce

    How do I make the sauce thicker?

    Add a cornflour slurry during cooking and simmer briefly. The sauce will also thicken naturally as it cools.

    Can I reduce the sugar?

    Yes, especially if your strawberries are naturally sweet. Taste and adjust according to your preference.

    Why is my sauce too runny?

    This usually means it needs a bit more cooking time. Let it simmer longer or use the optional thickening step.

    Can I use frozen strawberries?

    Absolutely. Frozen strawberries work perfectly and are a great year-round option.

    Serving Suggestions

    • Drizzle over pancakes, waffles, or French toast
    • Spoon onto cheesecake or ice cream
    • Swirl into yogurt or oatmeal
    • Use as a filling for cakes and pastries

    Storage

    Room Temperature

    Keep at room temperature for up to 2 hours before transferring to the fridge.

    Refrigerator

    Store in an airtight container for up to 5 days. Stir before using.

    Freezing

    Freeze in a sealed container for up to 3 months. Thaw in the refrigerator overnight before use.

    Nutrition

    • Calories: 80 kcal
    • Carbohydrates: 20g
    • Protein: 0.5g
    • Fat: 0g
    • Saturated Fat: 0g
    • Sodium: 2mg

    Note: Nutritional values are estimates and may vary based on ingredients used.

    FAQs

    Can I make strawberry sauce without sugar?

    Yes, you can use honey, maple syrup, or a sugar substitute. Adjust to taste depending on sweetness preference.

    How long does homemade strawberry sauce last?

    It keeps well in the refrigerator for up to 5 days when stored in an airtight container.

    Can I strain the sauce for a smooth finish?

    Yes, you can strain it through a sieve to remove seeds and create a silky texture.

    Is this sauce suitable for baking?

    Yes, it works well as a cake filling, topping, or swirl in baked goods.

    Strawberry Sauce Recipe

    Recipe by Home Chef CooksCourse: SauceCuisine: InternationalDifficulty: Easy
    Servings

    4

    servings
    Prep time

    30

    minutes
    Cooking time

    40

    minutes
    Calories

    300

    kcal
    Total time

    1

    hour 

    10

    minutes

    A quick and easy homemade strawberry sauce made with fresh or frozen strawberries. Perfect for desserts, breakfast, and baking.

    Ingredients

    • 500g strawberries

    • 100g caster sugar

    • 1 tbsp lemon juice

    • 1 tsp vanilla extract (optional)

    • 2 tbsp water

    • 1 tsp cornflour (optional)

    Directions

    • Prepare strawberries by washing, hulling, and halving.
    • Combine strawberries, sugar, lemon juice, and water in a saucepan.
    • Simmer for 8–10 minutes until softened and juicy.
    • Add cornflour slurry if thicker texture is desired.
    • Blend or mash to preferred consistency.
    • Cool slightly and serve or store.

    Notes

    • Adjust sugar based on sweetness of strawberries.
    • Blend for smooth sauce or leave chunky.
    • Store chilled for best freshness.
  • Peach Cobbler Recipe

    Peach Cobbler Recipe

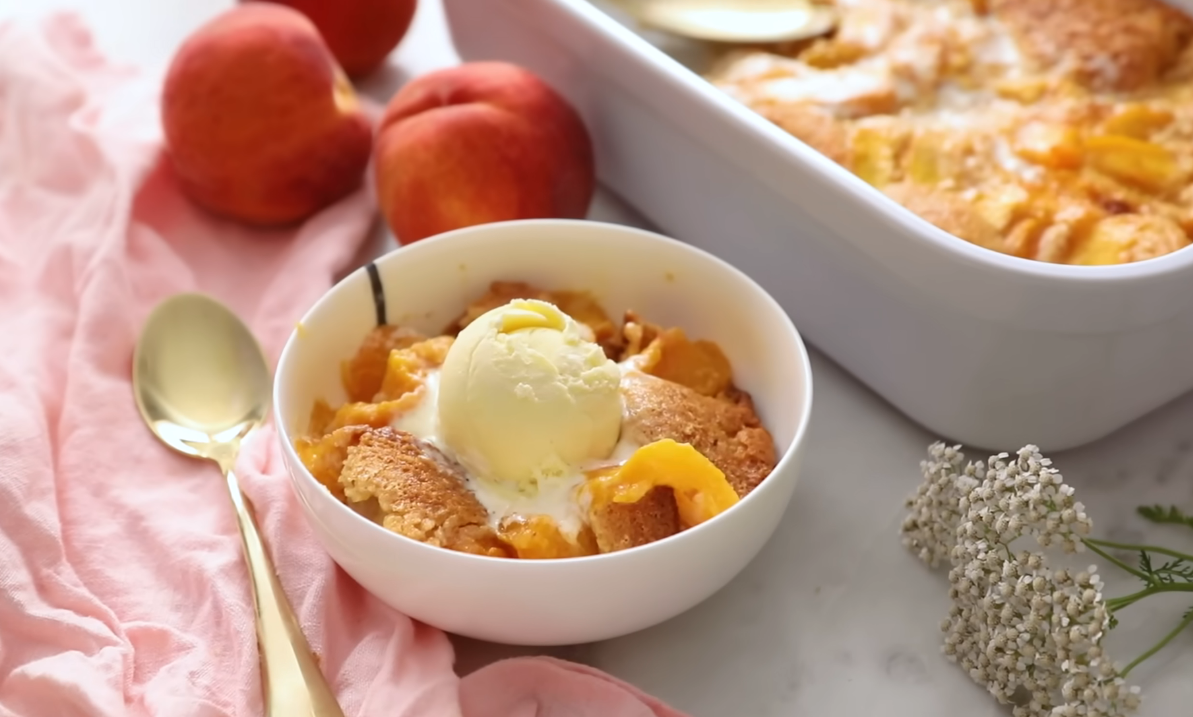
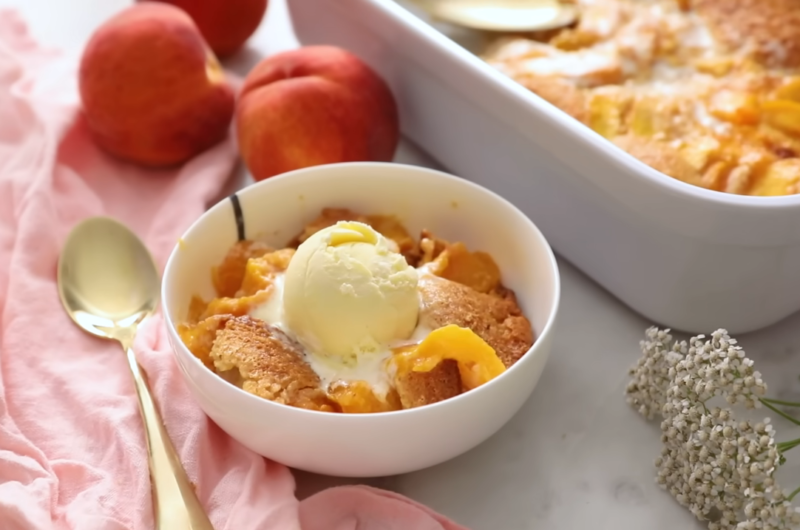
    If you love warm, comforting desserts packed with juicy fruit and buttery topping, this peach cobbler recipe is one you’ll want to make again and again. It features tender peaches baked beneath a golden, soft biscuit-style topping with crisp edges and a rich buttery flavor. The filling is sweet, syrupy, and perfectly balanced with cinnamon and vanilla. This easy homemade cobbler comes together with simple pantry ingredients and is perfect for weeknight desserts, summer gatherings, or holiday tables.

    Ingredients

    For the Peach Filling

    • 6 cups fresh peaches, peeled and sliced
    • 150g granulated sugar
    • 50g light brown sugar
    • 1 tablespoon lemon juice
    • 1 teaspoon vanilla extract
    • 1 teaspoon ground cinnamon
    • 2 tablespoons cornflour

    For the Cobbler Topping

    • 150g plain flour
    • 100g caster sugar
    • 2 teaspoons baking powder
    • Pinch of salt
    • 120ml whole milk
    • 115g unsalted butter, melted
    • Extra cinnamon sugar for topping

    How to Make Peach Cobbler Recipe

    • Prepare the oven: Preheat the oven to 180°C fan. Place the oven shelf in the middle position so the cobbler bakes evenly and develops a golden topping.
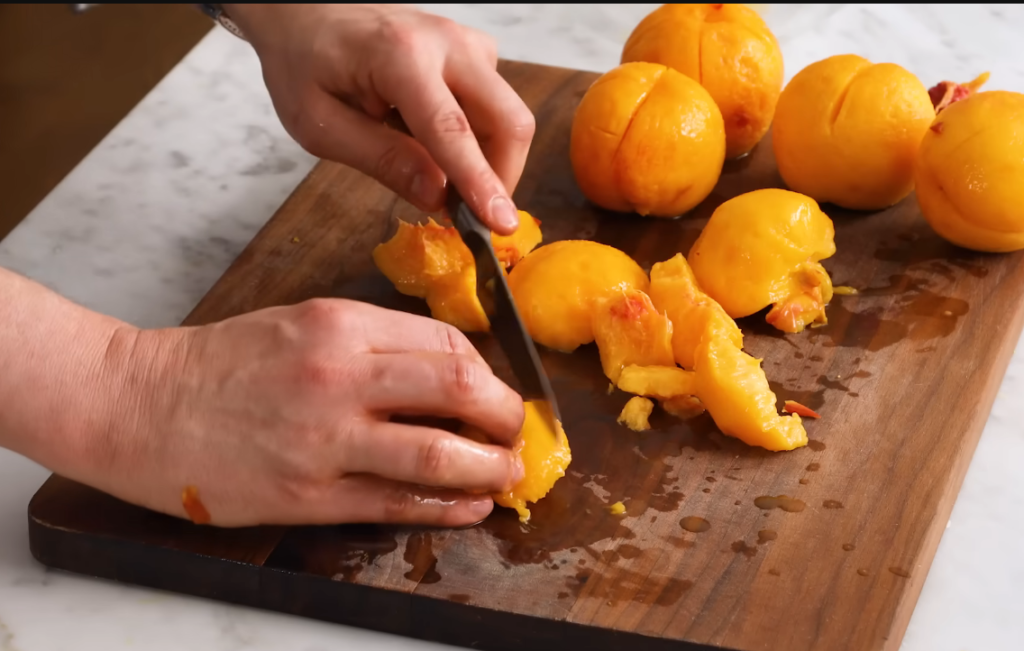
    • Prepare the peaches: Peel and slice the peaches into even wedges. Add them to a large mixing bowl with granulated sugar, brown sugar, lemon juice, vanilla extract, cinnamon, and cornflour. Stir well until the peaches are fully coated.
    • Fill the baking dish: Transfer the peach filling into a lightly greased 9×13-inch baking dish. Spread the fruit evenly so every spoonful gets plenty of peaches.
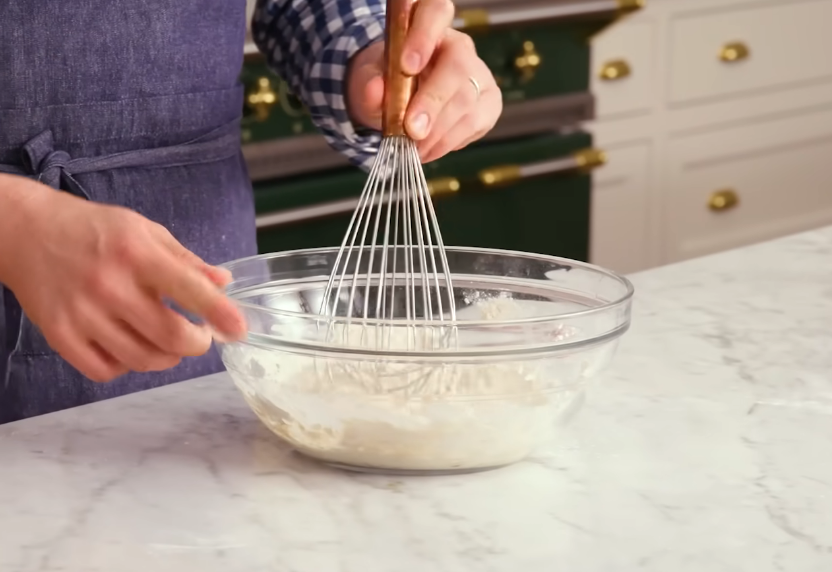
    • Mix the topping: In a separate bowl, whisk together the flour, caster sugar, baking powder, and salt. Pour in the milk and melted butter, then stir until a thick batter forms.
    • Assemble the cobbler: Spoon the topping mixture over the peaches. Leave a few small gaps so the fruit can bubble through while baking.
    • Add extra flavor: Sprinkle a little cinnamon sugar over the top for a crisp, caramelized finish.
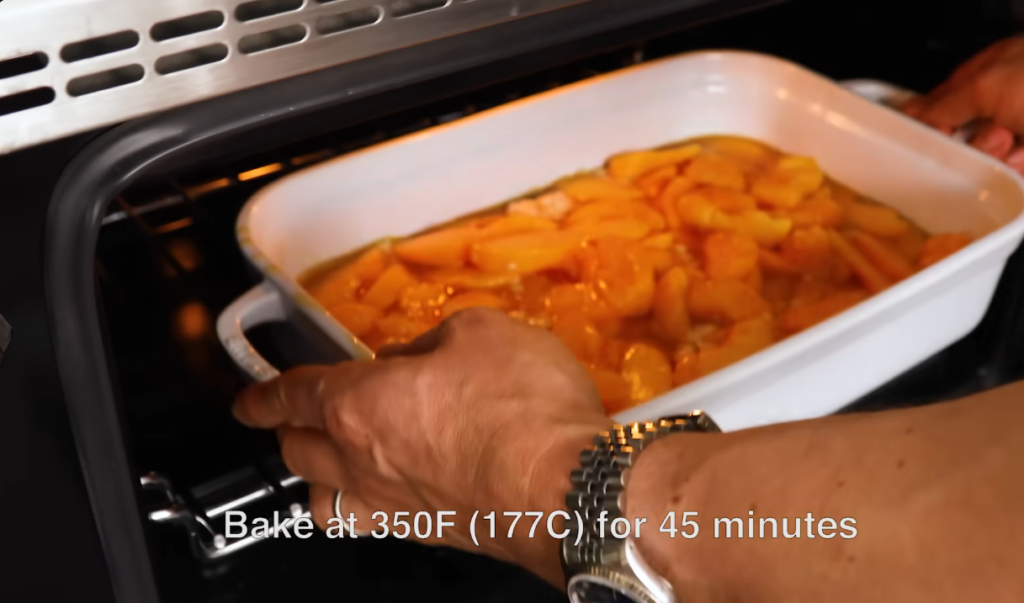
    • Bake the cobbler: Bake for 38 to 42 minutes until the topping is golden brown and the peach filling is bubbling around the edges.
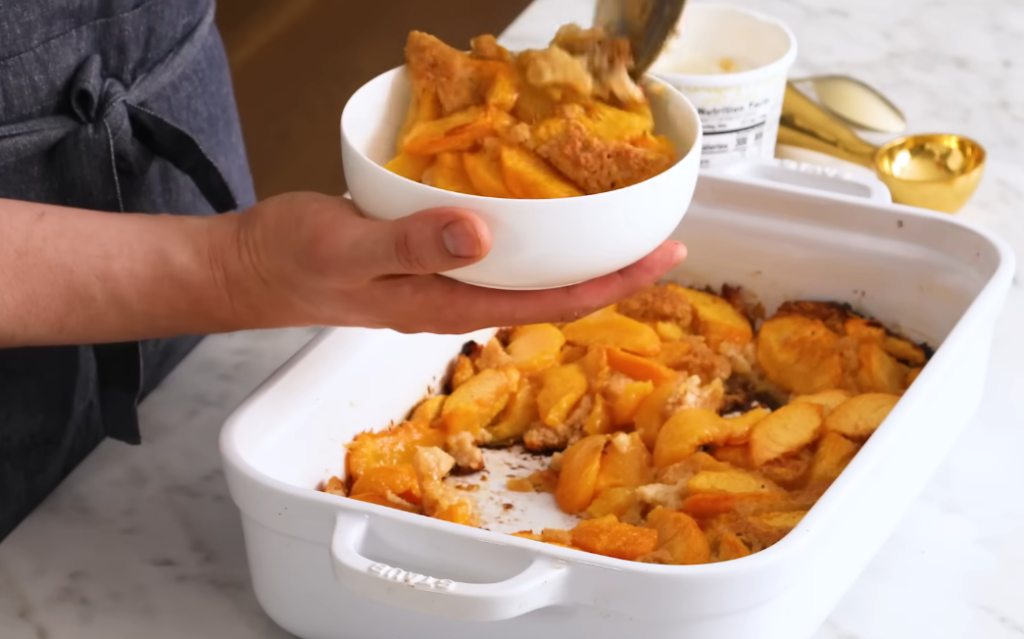
    • Cool before serving: Let the cobbler rest for at least 10 minutes before serving. This helps the filling thicken slightly and improves the texture.
    How to Make Peach Cobbler Recipe
    How to Make Peach Cobbler Recipe
    How to Make Peach Cobbler Recipe
    How to Make Peach Cobbler Recipe

    Tips for the Best Peach Cobbler

    How do I keep peach cobbler from becoming watery?

    Use ripe peaches and add cornflour to thicken the juices while baking. Let the cobbler cool slightly before serving so the filling sets properly.

    Can I use canned or frozen peaches?

    Yes. Drain canned peaches well before using. Frozen peaches should be thawed fully and patted dry to remove excess moisture.

    Why is my topping dense instead of fluffy?

    Do not overmix the batter. Stir only until combined to keep the topping soft and tender.

    How do I get a crisp golden topping?

    Sprinkle cinnamon sugar over the batter before baking. The sugar caramelizes in the oven and creates a lightly crisp surface.

    Serving Suggestions

    • Serve warm with vanilla ice cream
    • Add freshly whipped cream
    • Pair with caramel sauce for extra richness
    • Enjoy with hot coffee or sweet tea

    Storage

    Room Temperature

    Cover the cobbler tightly and keep it at room temperature for up to 8 hours.

    Refrigerator

    Store leftovers in an airtight container in the refrigerator for up to 4 days. Reheat in the oven for the best texture.

    Freezing

    Freeze cooled peach cobbler in a freezer-safe container for up to 3 months. Thaw overnight in the refrigerator before reheating.

    Nutrition

    • Calories: 320 kcal
    • Carbohydrates: 48g
    • Protein: 4g
    • Fat: 13g
    • Saturated Fat: 7g
    • Sodium: 180mg

    Nutrition values are estimates and may vary depending on ingredients used.

    FAQs

    Can I make peach cobbler ahead of time?

    Yes, you can bake the cobbler several hours ahead and reheat it before serving. It tastes especially good warm.

    What peaches work best for peach cobbler?

    Fresh ripe yellow peaches give the best flavor and texture, but frozen or canned peaches can also be used.

    Can I use self-raising flour instead of plain flour?

    Yes, but reduce or omit the baking powder since self-raising flour already contains leavening.

    How do I know when peach cobbler is fully baked?

    The topping should be golden brown and the peach filling should bubble around the edges of the baking dish.

    Peach Cobbler Recipe

    Recipe by Milli RoseCourse: DessertCuisine: AmericanDifficulty: Easy
    Servings

    8

    servings
    Prep time

    20

    minutes
    Cooking time

    40

    minutes
    Total time

    60

    minutes
    Calories

    320

    kcal

    1

    hour 

    Classic homemade peach cobbler made with juicy peaches and a buttery golden topping. Easy, warm, and comforting dessert perfect for any occasion.

    Ingredients

    • 6 cups fresh peaches, peeled and sliced

    • 150g granulated sugar

    • 50g light brown sugar

    • 1 tablespoon lemon juice

    • 1 teaspoon vanilla extract

    • 1 teaspoon ground cinnamon

    • 2 tablespoons cornflour

    • 150g plain flour

    • 100g caster sugar

    • 2 teaspoons baking powder

    • 120ml whole milk

    • 115g unsalted butter, melted

    • Pinch of salt

    • Extra cinnamon sugar for topping

    Directions

    • Preheat oven to 180°C fan. Grease a 9×13-inch baking dish lightly with butter.
    • Combine peaches, sugars, lemon juice, vanilla, cinnamon, and cornflour in a large bowl until evenly coated.
    • Spread the peach mixture evenly into the prepared baking dish.
    • In another bowl, whisk flour, sugar, baking powder, and salt together.
    • Stir in milk and melted butter until a thick batter forms.
    • Spoon the topping gently over the peaches without fully covering every gap.
    • Sprinkle cinnamon sugar over the top for extra crunch and flavor.
    • Bake for 40 minutes until golden brown and bubbling around the edges.
    • Cool for 10 minutes before serving warm with vanilla ice cream or whipped cream.

    Notes

    • Use ripe peaches for the best flavor and texture.
    • Frozen peaches can be used if fully thawed and drained.
    • The cobbler thickens more as it cools.
  • Prime Rib Roast Recipe

    Prime Rib Roast Recipe

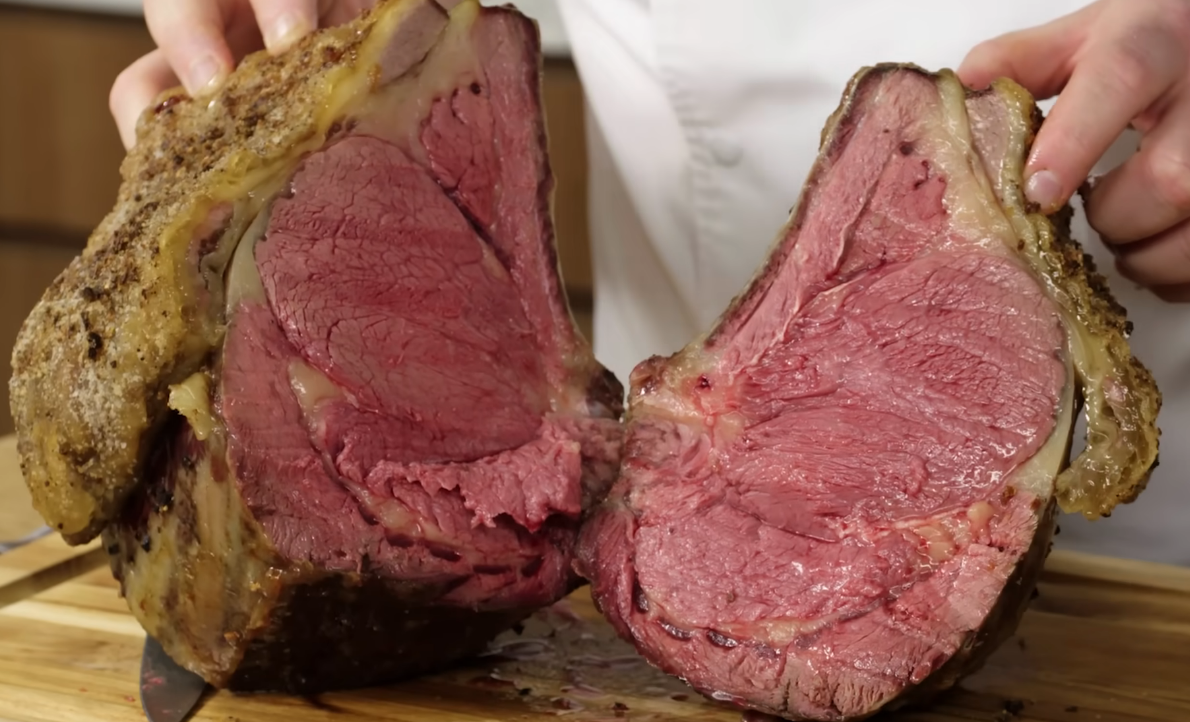
    If you want a show-stopping dinner that feels impressive yet surprisingly simple to make, this prime rib roast recipe is the perfect choice. The roast turns out incredibly juicy with a tender, buttery texture and a rich beefy flavor that melts in your mouth. A crisp herb crust on the outside adds the perfect balance to the succulent center. Although prime rib looks restaurant-worthy, this recipe is beginner-friendly and comes together with simple preparation and careful roasting.

    Prep Time: 20 minutes
    Cook Time: 2 hours 15 minutes
    Total Time: 2 hours 35 minutes
    Servings: 8 servings

    Ingredients

    For the Prime Rib Roast

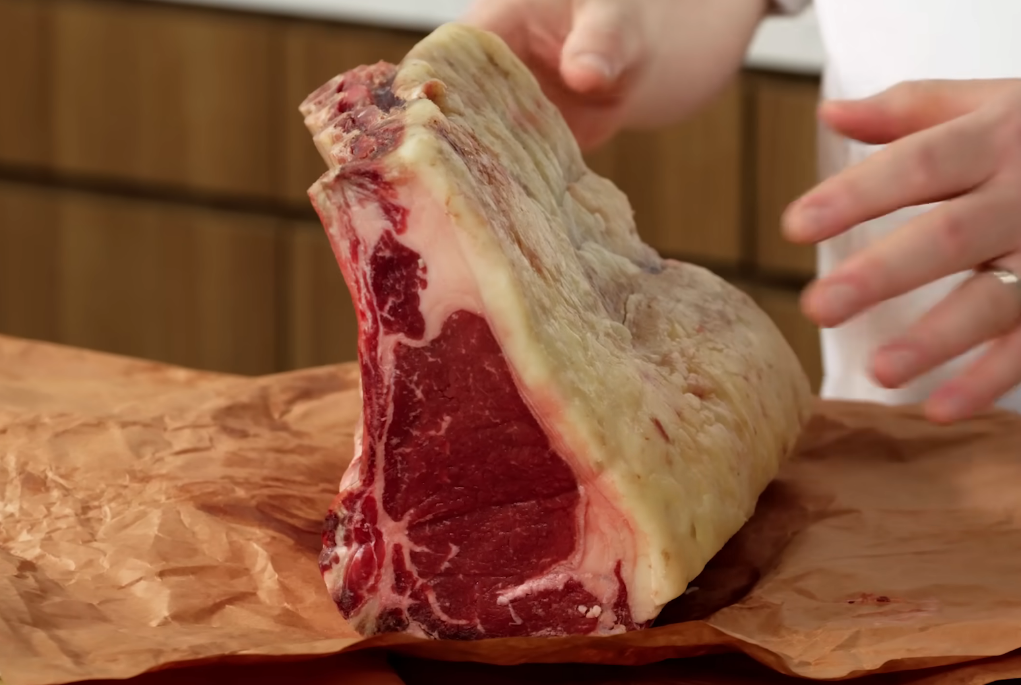
    • 1 bone-in prime rib roast (5 to 6 pounds)
    • 2 tablespoons olive oil
    • 2 tablespoons unsalted butter, softened
    • 4 garlic cloves, minced
    • 2 teaspoons kosher salt
    • 1 teaspoon black pepper
    • 1 tablespoon fresh rosemary, chopped
    • 1 tablespoon fresh thyme, chopped
    • 1 teaspoon onion powder
    • 1 teaspoon smoked paprika
    • Fresh parsley for garnish

    How to Make Prime Rib Roast Recipe

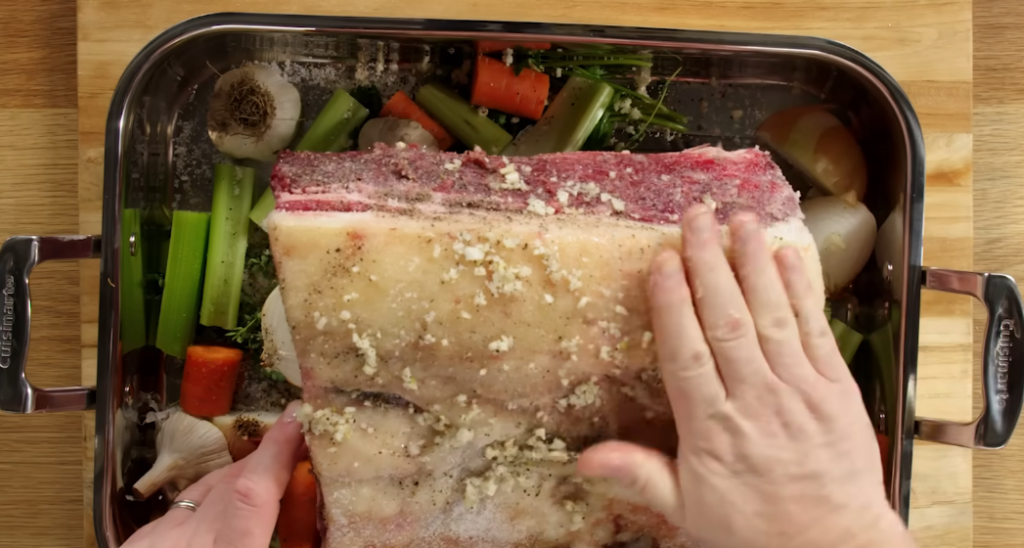
    • Prepare the oven: Preheat the oven to 230°C or 450°F. Place a rack in the center of the oven so the roast cooks evenly and develops a golden crust.
    • Prepare the roast: Pat the prime rib completely dry using paper towels. Removing excess moisture helps the exterior become crisp and flavorful during roasting.
    • Make the herb butter: In a small bowl, combine olive oil, softened butter, garlic, rosemary, thyme, kosher salt, black pepper, onion powder, and smoked paprika until fully mixed.
    • Season the meat: Rub the herb mixture generously over the entire roast, making sure every side is coated well.
    • Start roasting: Place the roast fat-side up on a roasting rack inside a roasting pan. Roast at 230°C or 450°F for 20 minutes to build a rich crust.
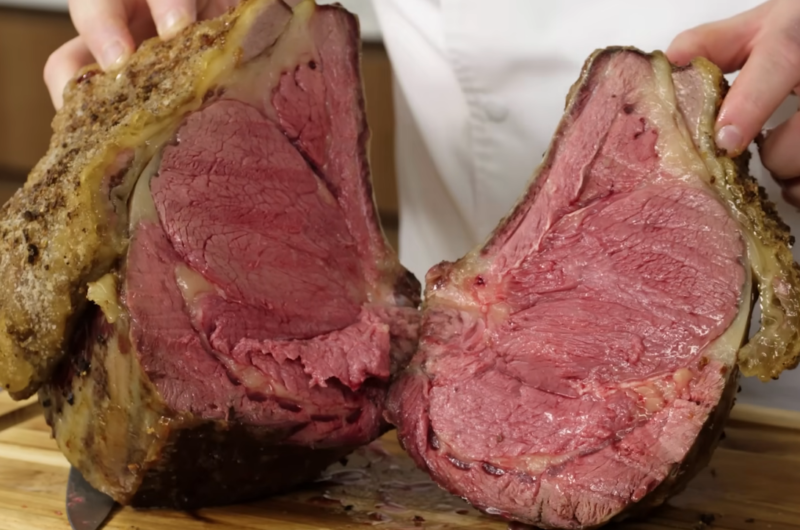
    • Lower the heat: Reduce the oven temperature to 160°C or 325°F and continue roasting for about 1 hour 45 minutes, or until the internal temperature reaches your preferred doneness.
    • Rest the roast: Remove the roast from the oven and loosely cover it with foil. Let it rest for 20 minutes before slicing so the juices stay inside the meat.
    • Slice and serve: Cut into thick slices and garnish with fresh parsley before serving warm.

    Tips for the Best Prime Rib Roast

    How do I keep prime rib juicy?

    Always let the roast rest after cooking. Cutting too early allows the juices to escape and can dry out the meat.

    Should prime rib be room temperature before roasting?

    Yes. Letting the roast sit at room temperature for about 1 hour helps it cook more evenly from edge to center.

    What is the best internal temperature for prime rib?

    For medium-rare, remove the roast at 52°C to 54°C or 125°F to 130°F. The temperature will continue rising slightly while resting.

    Do I need a roasting rack?

    A roasting rack helps air circulate around the meat and prevents the bottom from becoming soggy while roasting.

    Serving Suggestions

    • Serve with creamy mashed potatoes
    • Pair with roasted vegetables
    • Add Yorkshire pudding for a classic dinner
    • Serve alongside horseradish sauce or au jus
    • Pair with garlic butter green beans

    Storage

    Room Temperature

    Do not leave cooked prime rib at room temperature for more than 2 hours.

    Refrigerator

    Store leftovers in an airtight container in the refrigerator for up to 4 days.

    Freezing

    Wrap slices tightly in foil and place in freezer-safe bags. Freeze for up to 3 months. Thaw overnight in the refrigerator before reheating.

    Nutrition

    • Calories: 620 kcal
    • Carbohydrates: 2g
    • Protein: 48g
    • Fat: 46g
    • Saturated Fat: 18g
    • Sodium: 780mg

    Nutrition values are estimates and may vary depending on ingredients and portion sizes.

    FAQs

    How long should I cook prime rib roast per pound?

    Prime rib generally takes about 15 to 18 minutes per pound at 325°F for medium-rare doneness.

    Should prime rib be covered while roasting?

    No, roasting uncovered helps develop a crisp and flavorful crust on the outside of the meat.

    Can I prepare prime rib seasoning ahead of time?

    Yes, you can prepare the herb butter mixture up to 2 days in advance and store it in the refrigerator.

    What is the difference between ribeye and prime rib?

    Prime rib is a larger roast cut from the rib section, while ribeye is sliced into individual steaks from the same area.

    Prime Rib Roast Recipe

    Recipe by Milli RoseCourse: DinnerCuisine: AmericanDifficulty: Medium
    Servings

    8

    servings
    Prep time

    20

    minutes
    Cooking time

    2

    hours 

    15

    minutes
    Total time

    155

    minutes
    Calories

    620

    kcal

    2

    hours 

    35

    minutes

    Juicy and tender prime rib roast with garlic herb seasoning and a beautifully crisp crust. Perfect for holidays, special dinners, and family gatherings.

    Ingredients

    • 1 bone-in prime rib roast (5 to 6 pounds)

    • 2 tablespoons olive oil

    • 4 garlic cloves, minced

    • 2 teaspoons kosher salt

    • 1 teaspoon black pepper

    • 1 tablespoon fresh rosemary, chopped

    • 1 tablespoon fresh thyme, chopped

    • 1 teaspoon onion powder

    • 1 teaspoon smoked paprika

    • 2 tablespoons unsalted butter, softened

    • Fresh parsley for garnish

    Directions

    • Preheat oven to 230°C (450°F). Place the oven rack in the center position.
    • Pat the prime rib roast dry with paper towels to help the crust develop properly.
    • Mix olive oil, butter, garlic, rosemary, thyme, salt, pepper, onion powder, and smoked paprika in a bowl.
    • Rub the seasoning mixture all over the roast, coating every side evenly.
    • Place the roast fat-side up in a roasting pan fitted with a rack.
    • Roast at 230°C (450°F) for 20 minutes to create a flavorful crust.
    • Reduce oven temperature to 160°C (325°F) and continue roasting for 1 hour 45 minutes or until desired doneness.
    • Remove from the oven and tent loosely with foil. Rest for 20 minutes before slicing.
    • Slice and garnish with parsley before serving.

    Notes

    • Use a meat thermometer for accurate doneness.
    • Allowing the roast to rest keeps it juicy.
    • Leftovers make excellent sandwiches and wraps.
  • Butter Chicken Recipe

    Butter Chicken Recipe

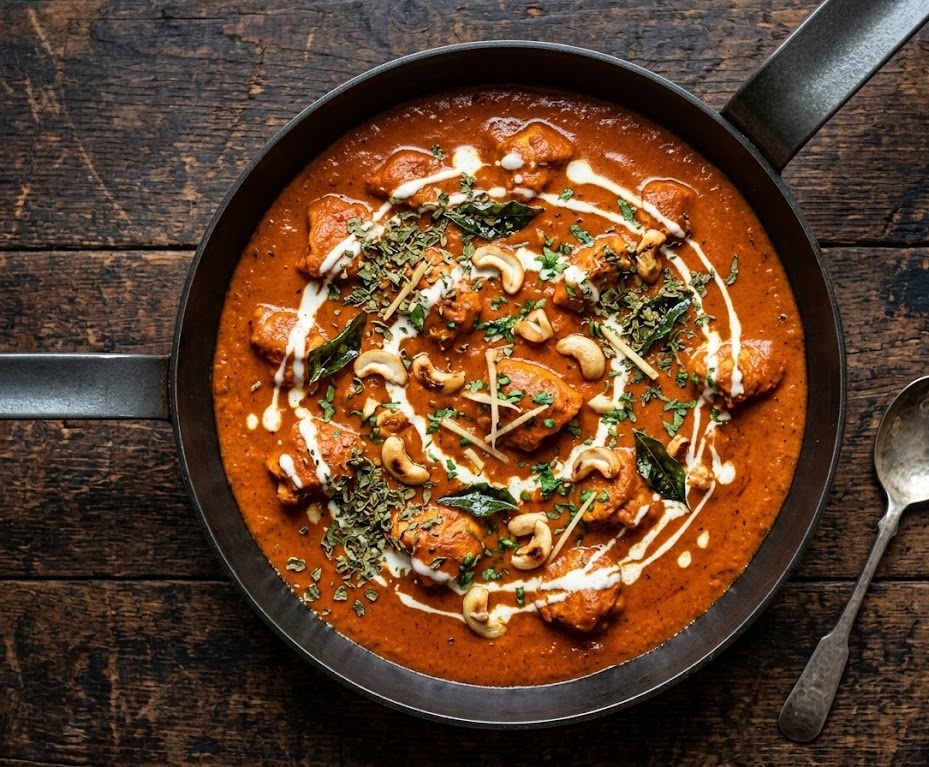
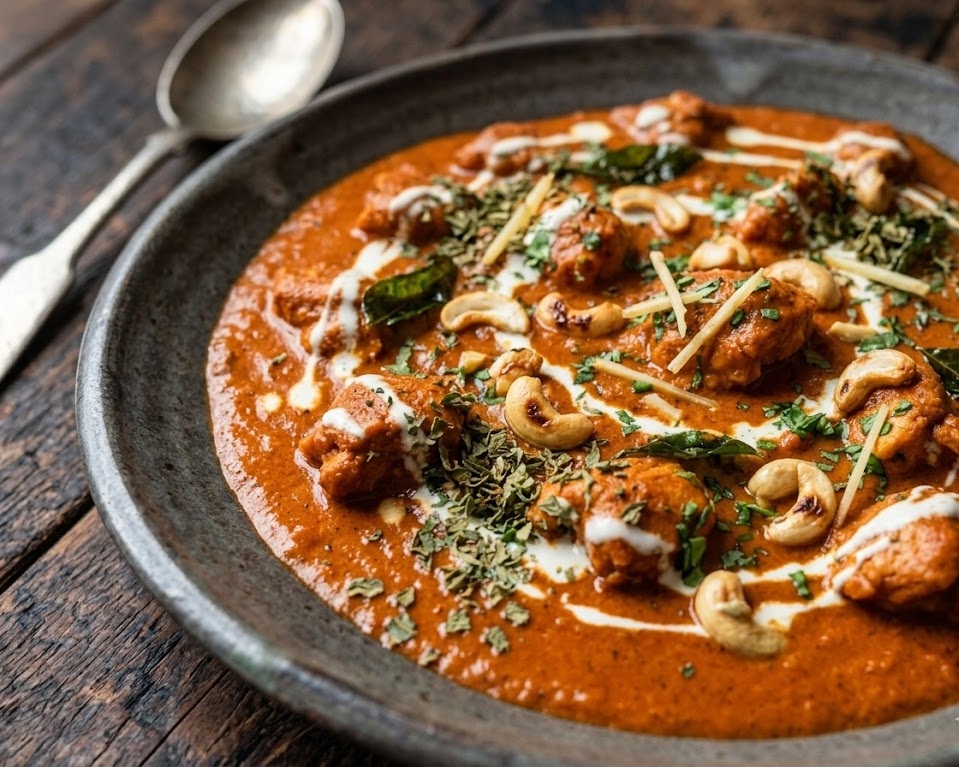
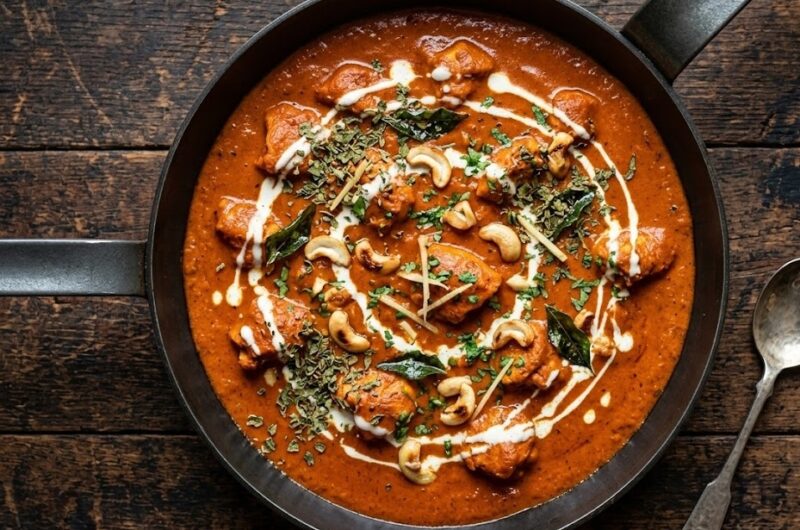
    Butter Chicken is a rich, creamy, and gently spiced curry that’s beloved for its silky tomato-based sauce and tender chicken pieces. The flavours are warm and comforting, with a perfect balance of sweetness, spice, and buttery richness. This recipe is approachable for home cooks and delivers restaurant-quality results with simple steps. Total time is around 1 hour, making it ideal for a satisfying weekend meal or a special dinner.

    Ingredients

    For the Chicken Marinade

    • 500g boneless chicken thighs, cut into bite-sized pieces
    • 150g plain yogurt
    • 2 cloves garlic, minced
    • 1 tbsp ginger paste
    • 1 tsp ground cumin
    • 1 tsp paprika
    • 1/2 tsp turmeric
    • 1 tsp salt
    • 1 tbsp lemon juice

    For the Sauce

    • 2 tbsp butter
    • 1 tbsp oil
    • 1 large onion, finely chopped
    • 2 cloves garlic, minced
    • 1 tbsp ginger paste
    • 400g canned chopped tomatoes
    • 1 tsp ground coriander
    • 1 tsp garam masala
    • 1/2 tsp chilli powder
    • 100ml double cream
    • 1 tsp sugar
    • Salt to taste

    For Garnish

    • Fresh coriander, chopped
    • A swirl of cream (optional)

    How to Make Butter Chicken Recipe

    • Prepare the oven: Preheat the oven to 200°C or 180°C fan. Place a shelf in the middle of the oven so the chicken cooks evenly and develops a light char.
    • Marinate the chicken: In a bowl, combine yogurt, garlic, ginger, spices, salt, and lemon juice. Add the chicken pieces, mix well, and leave to marinate for at least 30 minutes or overnight if possible.
    • Bake the chicken: Spread the marinated chicken on a lined baking tray. Bake for 20–25 minutes until cooked through and slightly charred at the edges.
    • Prepare the sauce base: In a large pan, heat butter and oil. Add chopped onion and cook gently until soft and golden.
    • Add aromatics: Stir in garlic and ginger, cooking for another minute until fragrant.
    • Build the sauce: Add chopped tomatoes, coriander, garam masala, and chilli powder. Simmer for 10–15 minutes until thickened.
    • Blend and enrich: For a smooth sauce, blend if desired. Return to the pan and stir in cream and sugar.
    • Combine and simmer: Add the cooked chicken to the sauce. Simmer for 10 minutes so the flavours meld together.
    • Finish and serve: Garnish with fresh coriander and a swirl of cream. Serve hot.
    How to Make Butter Chicken Recipe

    Tips

    How do I keep the chicken tender?

    Use chicken thighs and marinate well. Yogurt helps tenderise the meat and keeps it juicy.

    Can I make the sauce smoother?

    Yes, blend the sauce before adding the chicken for a velvety texture.

    How do I balance the flavours?

    Add a small amount of sugar or cream to balance acidity from tomatoes.

    Can I make it less spicy?

    Reduce the chilli powder and use mild paprika for a gentler heat.

    Serving Suggestions

    • Serve with steamed basmati rice
    • Pair with warm naan or roti
    • Add a side of cucumber raita
    • Include a fresh salad for balance

    Storage

    Room Temperature

    Do not leave out for more than 2 hours. Store promptly to maintain freshness.

    Refrigerator

    Keep in an airtight container for up to 3 days. Reheat gently before serving.

    Freezing

    Freeze for up to 3 months. Thaw overnight in the fridge and reheat thoroughly.

    Nutrition

    • Calories: 420 kcal
    • Carbohydrates: 12g
    • Protein: 28g
    • Fat: 30g
    • Saturated Fat: 15g
    • Sodium: 600mg

    These values are approximate and may vary depending on ingredients used.

    FAQs

    Can I use chicken breast instead of thighs?

    Yes, but chicken thighs are more tender and flavourful. Breast can be used if cooked carefully to avoid drying out.

    Is butter chicken very spicy?

    No, it is typically mild with a gentle warmth. You can adjust the spice level to your preference.

    Can I make this dish ahead of time?

    Yes, butter chicken tastes even better the next day as the flavours develop further.

    What can I use instead of cream?

    You can use coconut milk or a mixture of milk and butter for a lighter alternative.

    Butter Chicken Recipe

    Recipe by Milli RoseCourse: Main CourseCuisine: IndianDifficulty: Medium
    Servings

    4

    servings
    Prep time

    30

    minutes
    Cooking time

    40

    minutes
    Calories

    300

    kcal
    Total time

    1

    hour 

    10

    minutes

    Creamy, rich butter chicken with tender marinated chicken in a spiced tomato sauce. A comforting and flavourful classic.

    Ingredients

    • 500g chicken thighs

    • 150g yogurt

    • 2 cloves garlic

    • 1 tbsp ginger paste

    • Spices and seasoning

    • 2 tbsp butter

    • 1 onion

    • 400g chopped tomatoes

    • 100ml cream

    Directions

    • Preheat oven and prepare tray.
    • Marinate chicken.
    • Bake chicken until cooked.
    • Cook sauce base.
    • Combine chicken with sauce and simmer.

    Notes

    • Marinate overnight for best flavour.
    • Blend sauce for smooth texture.
  • Loco Moco Recipe

    Loco Moco Recipe

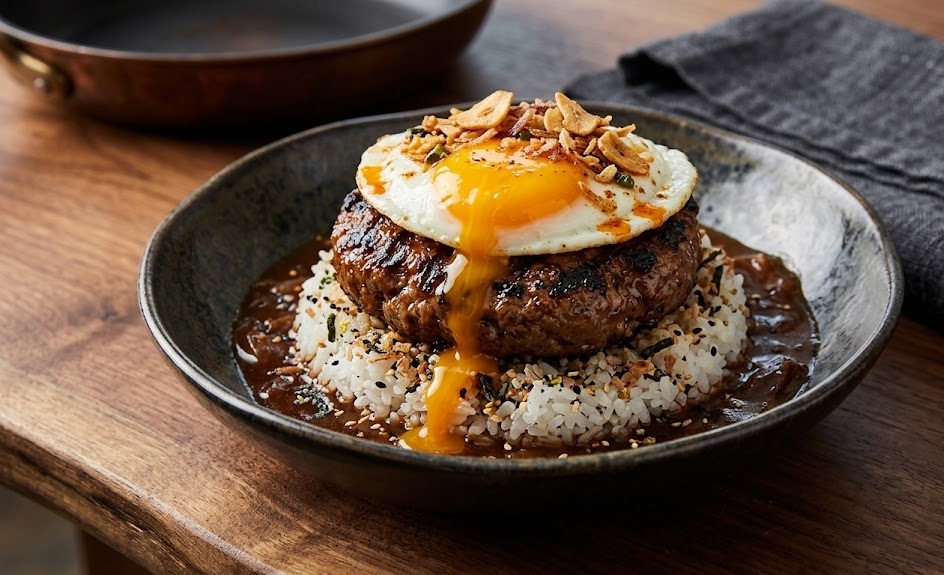
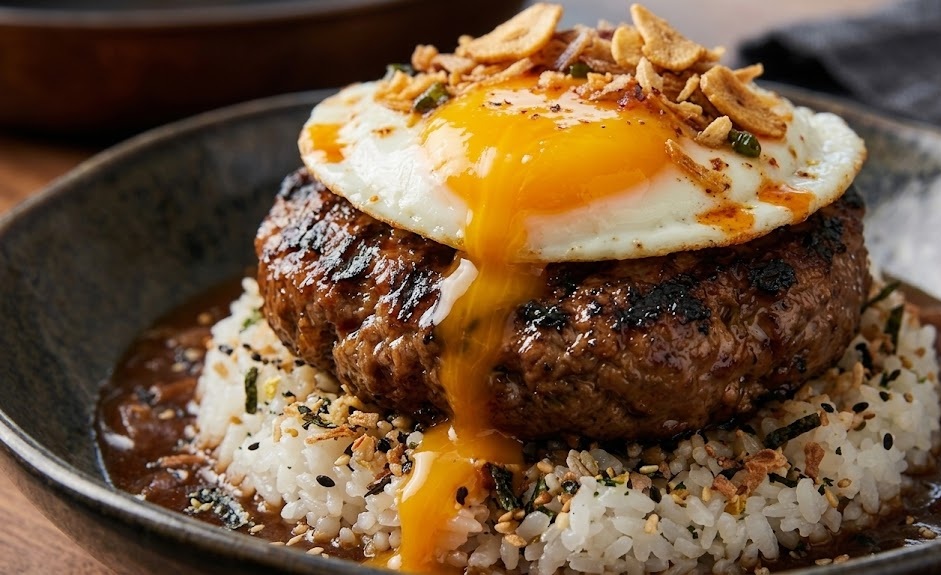
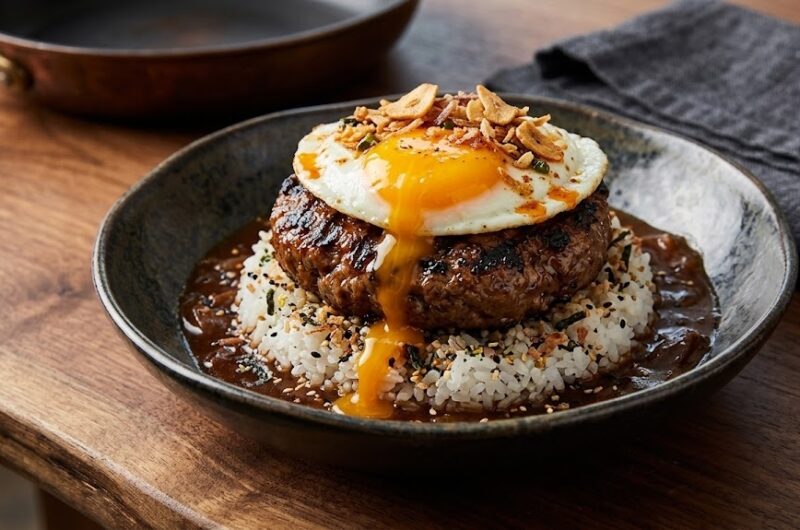
    Loco Moco is a comforting Hawaiian classic made with fluffy rice, a juicy beef patty, rich gravy, and a perfectly cooked egg on top. It is hearty, savoury, and deeply satisfying with layers of texture from soft rice to silky sauce. This is an easy, fuss-free dish that feels indulgent yet simple to prepare at home. You can have it ready in around 40 minutes, making it ideal for a filling lunch or dinner.

    Ingredients

    For the Rice Base

    • 2 cups cooked white rice (preferably short grain)
    • 1 tbsp butter
    • Pinch of salt

    For the Beef Patties

    • 500g minced beef
    • 1 small onion, finely chopped
    • 2 cloves garlic, minced
    • 1 tbsp soy sauce
    • 1 tbsp Worcestershire sauce
    • Salt and black pepper, to taste
    • 1 tbsp oil, for frying

    For the Gravy

    • 2 tbsp butter
    • 2 tbsp plain flour
    • 500ml beef stock
    • 1 tbsp soy sauce
    • 1 tsp Worcestershire sauce
    • Salt and pepper, to taste

    For the Topping

    • 4 eggs
    • 1 tbsp oil or butter
    • Spring onions, sliced (optional)

    How to Make Loco Moco Recipe

    • Prepare the base: Cook the rice according to package instructions. Stir in butter and a pinch of salt, then keep warm while you prepare the rest of the dish.
    • Mix the patties: In a large bowl, combine minced beef, onion, garlic, soy sauce, Worcestershire sauce, salt, and pepper. Mix gently until just combined, then shape into 4 equal patties.
    • Cook the patties: Heat oil in a frying pan over medium heat. Cook the patties for 4 to 5 minutes on each side until browned and cooked through. Remove and set aside.
    • Make the gravy: In the same pan, melt butter and stir in flour. Cook for 1 minute, then gradually whisk in beef stock. Add soy sauce and Worcestershire sauce, simmer until thickened, and season to taste.
    • Cook the eggs: In a separate pan, fry the eggs to your liking, preferably sunny-side up so the yolk stays runny.
    • Assemble the dish: Divide rice into bowls, place a beef patty on top, spoon over generous gravy, and finish with a fried egg. Garnish with spring onions if desired.
    How to Make Loco Moco Recipe

    Tips

    How do I keep the patties juicy?

    Avoid overmixing the beef and do not press the patties too firmly while cooking, as this can make them dense.

    Can I make the gravy smoother?

    Whisk continuously when adding stock to prevent lumps and cook gently until silky and thick.

    What type of rice works best?

    Short grain or medium grain rice gives the best soft and slightly sticky texture for this dish.

    How do I get the perfect egg?

    Cook on low heat and cover the pan briefly to set the whites while keeping the yolk runny.

    Serving Suggestions

    • Serve with a side of sautéed vegetables
    • Add a dash of hot sauce for extra flavour
    • Pair with a light cucumber salad
    • Enjoy with iced tea or fresh lemonade

    Storage

    Room Temperature

    Best enjoyed fresh. Do not leave out for more than 2 hours.

    Refrigerator

    Store components separately in airtight containers for up to 3 days. Reheat gently before serving.

    Freezing

    Beef patties and gravy can be frozen for up to 2 months. Thaw overnight in the fridge and reheat thoroughly.

    Nutrition

    • Calories: 520 kcal
    • Carbohydrates: 45g
    • Protein: 28g
    • Fat: 26g
    • Saturated Fat: 11g
    • Sodium: 780mg

    These values are approximate and may vary depending on ingredients used.

    FAQs

    What is Loco Moco traditionally made of?

    Loco Moco typically consists of white rice topped with a hamburger patty, brown gravy, and a fried egg. It is a classic Hawaiian comfort dish.

    Can I use chicken instead of beef?

    Yes, you can substitute minced chicken or turkey for a lighter version, though the flavour will be slightly different.

    Can I make this dish ahead of time?

    You can prepare the patties and gravy in advance, but cook the eggs fresh for best results.

    Is Loco Moco spicy?

    No, it is not spicy. However, you can add chilli sauce or pepper if you prefer a bit of heat.

    Loco Moco Recipe

    Recipe by Milli RoseCourse: Main CourseCuisine: HawaiianDifficulty: Easy
    Servings

    4

    servings
    Prep time

    30

    minutes
    Cooking time

    40

    minutes
    Calories

    300

    kcal
    Total time

    1

    hour 

    10

    minutes

    A hearty Hawaiian dish featuring fluffy rice, juicy beef patties, rich gravy, and a perfectly fried egg on top. Comfort food at its best.

    Ingredients

    • 2 cups cooked white rice

    • 1 tbsp butter

    • 500g minced beef

    • 1 onion, chopped

    • 2 garlic cloves, minced

    • 1 tbsp soy sauce

    • 1 tbsp Worcestershire sauce

    • Salt and pepper

    • 2 tbsp butter

    • 2 tbsp plain flour

    • 500ml beef stock

    • 4 eggs

    • 1 tbsp oil

    • Spring onions

    • Extra soy sauce to taste

    Directions

    • Cook rice and keep warm.
    • Mix beef with onion, garlic, sauces, and seasoning.
    • Shape into patties and fry until cooked through.
    • Make gravy using butter, flour, and beef stock.
    • Fry eggs until yolks are still runny.
    • Assemble rice, patty, gravy, and egg together.

    Notes

    • Use freshly cooked rice for best texture.
    • Adjust gravy thickness to your preference.
    • Serve immediately for best flavour.
  • Sticky Rice Recipe

    Sticky Rice Recipe

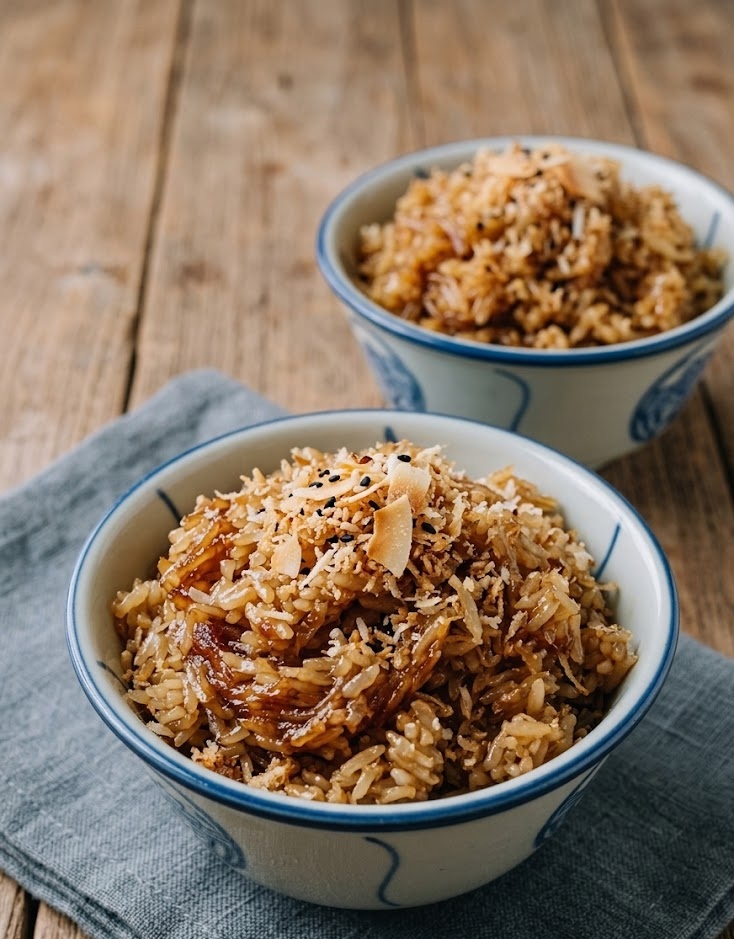
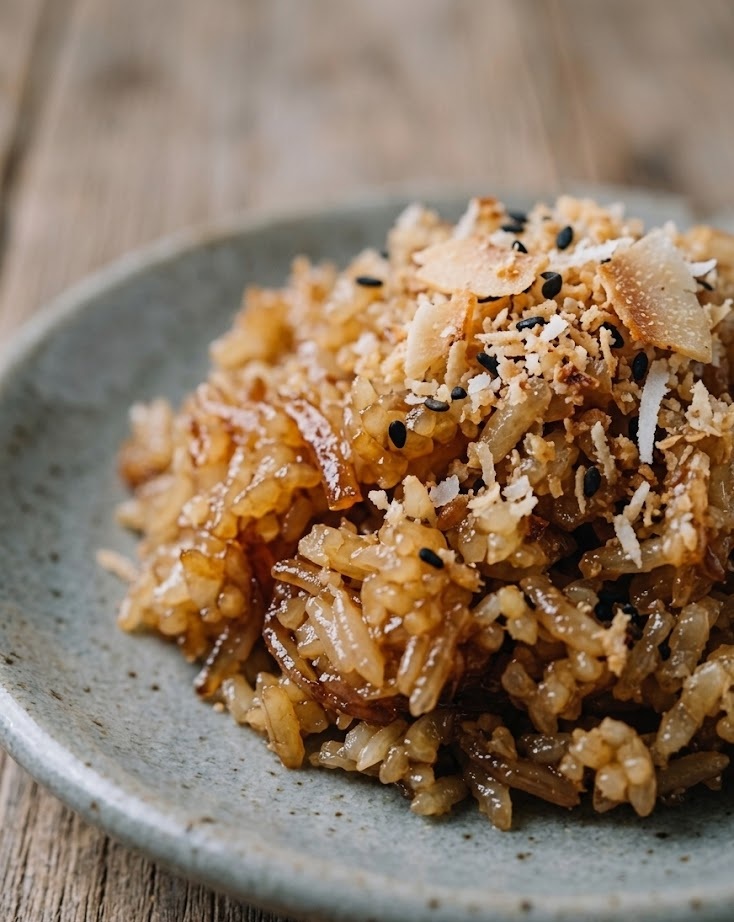
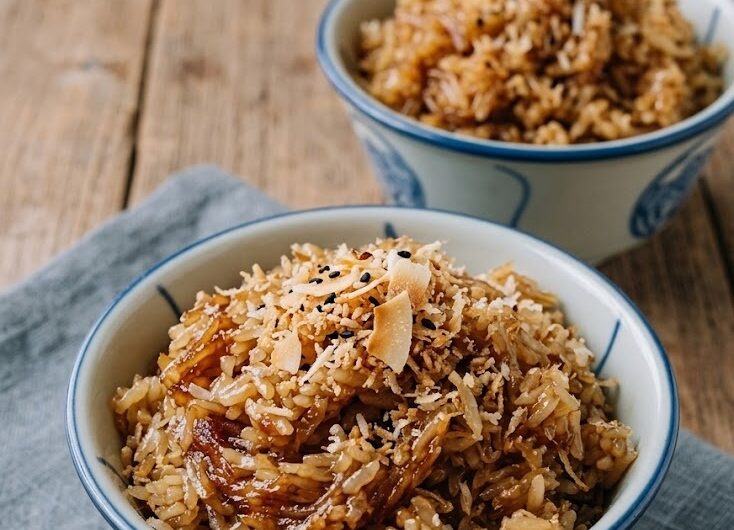
    Sticky rice is soft, slightly chewy, and beautifully glossy with a gentle sweetness that makes it incredibly comforting. This simple recipe produces perfectly tender grains that cling together just enough without becoming heavy. It is easy to prepare, even for beginners, and requires minimal ingredients. From start to finish, the dish takes around 40 minutes and delivers consistently satisfying results.

    Ingredients

    For the Sticky Rice

    • 250g glutinous rice (sticky rice)
    • 400ml water
    • 1/2 tsp salt

    Optional Sweet Topping

    • 200ml coconut milk
    • 2 tbsp caster sugar
    • 1/4 tsp salt

    How to Make Sticky Rice Recipe

    • Prepare the rice: Rinse the glutinous rice under cold water several times until the water runs clear. Soak the rice in fresh water for at least 20 minutes, then drain well.
    • Prepare the cooking setup: Add the drained rice and measured water into a medium saucepan. Stir in the salt and place over medium heat.
    • Cook the rice: Bring to a gentle boil, then reduce the heat to low. Cover with a tight-fitting lid and simmer for 12–15 minutes until the water is absorbed.
    • Steam and rest: Turn off the heat and let the rice sit covered for 10 minutes. This allows it to finish steaming and develop its sticky texture.
    • Prepare the topping (optional): In a small saucepan, gently heat coconut milk, sugar, and salt until dissolved. Do not boil.
    • Assemble and serve: Fluff the rice lightly with a fork. Spoon into bowls and drizzle with the warm coconut mixture if using.
    How to Make Sticky Rice Recipe

    Tips

    Why is my sticky rice too dry?

    This usually means there was not enough water or the heat was too high. Keep the heat low and ensure the lid stays on while cooking.

    How do I get perfectly sticky texture?

    Using glutinous rice is essential. Soaking the rice beforehand also helps achieve the right consistency.

    Can I make it sweeter?

    Yes, increase the sugar in the coconut topping or add a drizzle of honey before serving.

    Why is my rice mushy?

    Too much water or overcooking can cause this. Measure carefully and avoid stirring during cooking.

    Serving Suggestions

    • Serve with fresh mango slices for a classic pairing
    • Enjoy alongside grilled chicken or vegetables
    • Top with toasted sesame seeds for extra texture
    • Drizzle with coconut cream for a richer finish

    Storage

    Room Temperature

    Best enjoyed fresh, but can sit covered for up to 4 hours.

    Refrigerator

    Store in an airtight container for up to 3 days. Reheat gently with a splash of water.

    Freezing

    Freeze in portions for up to 1 month. Defrost overnight and steam lightly to restore texture.

    Nutrition

    • Calories: 220 kcal
    • Carbohydrates: 45g
    • Protein: 4g
    • Fat: 3g
    • Saturated Fat: 2g
    • Sodium: 150mg

    These values are approximate and may vary depending on ingredients used.

    FAQs

    What is the best rice for sticky rice?

    Glutinous rice, also known as sticky rice, is essential for achieving the correct texture. Regular rice will not give the same result.

    Do I need to soak the rice first?

    Yes, soaking helps the grains absorb water evenly and cook to the perfect soft and sticky consistency.

    Can I cook sticky rice without a steamer?

    Yes, this recipe uses a saucepan method which works well and is simple for home cooking.

    How do I reheat sticky rice?

    Add a small splash of water and heat gently in a pan or microwave, covered, to restore moisture.

    Sticky Rice Recipe

    Recipe by Milli RoseCourse: Side DishCuisine: AsianDifficulty: Easy
    Servings

    4

    servings
    Prep time

    30

    minutes
    Cooking time

    40

    minutes
    Calories

    300

    kcal
    Total time

    1

    hour 

    10

    minutes

    Soft, tender sticky rice with a delicate chew and optional coconut sweetness. A simple and comforting dish perfect for both sweet and savoury pairings.

    Ingredients

    • 250g glutinous rice

    • 400ml water

    • 1/2 tsp salt

    • 200ml coconut milk

    • 2 tbsp caster sugar

    • 1/4 tsp salt

    Directions

    • Rinse and soak the glutinous rice, then drain well.
    • Add rice, water and salt to a saucepan.
    • Bring to a boil, then cover and simmer on low heat.
    • Cook until water is absorbed and rice is tender.
    • Rest covered for 10 minutes.
    • Heat coconut milk with sugar and salt if using.
    • Serve rice warm with topping if desired.

    Notes

    • Soaking the rice improves texture.
    • Keep the lid on during cooking for best results.
    • Adjust sweetness to taste.

slot depo

sicbo online