Author: Rose Melton

  • Vanilla Cupcake Recipe

    Vanilla Cupcake Recipe

    If you need a reliable, bakery-style vanilla cupcake recipe that stays soft for days, this is the one I come back to again and again. These cupcakes bake up light and fluffy with a tender crumb, a buttery vanilla flavour, and just the right sweetness. It’s an easy, beginner-friendly recipe with simple steps and everyday ingredients. Total time is about 1 hour, including cooling and frosting.

    Ingredients

    For the vanilla cupcakes

    • 115g unsalted butter, softened (1/2 cup)
    • 200g caster sugar (1 cup)
    • 2 large eggs, room temperature
    • 2 tsp vanilla extract or vanilla bean paste
    • 180g plain flour (1 1/2 cups)
    • 1 1/2 tsp baking powder
    • 1/4 tsp fine salt
    • 120ml whole milk, room temperature (1/2 cup)

    For the vanilla buttercream

    • 200g unsalted butter, softened
    • 400g icing sugar, sifted
    • 2 tsp vanilla extract or vanilla bean paste
    • 2–3 tbsp milk or double cream
    • Pinch of salt

    Optional toppings

    • Sprinkles
    • Fresh berries
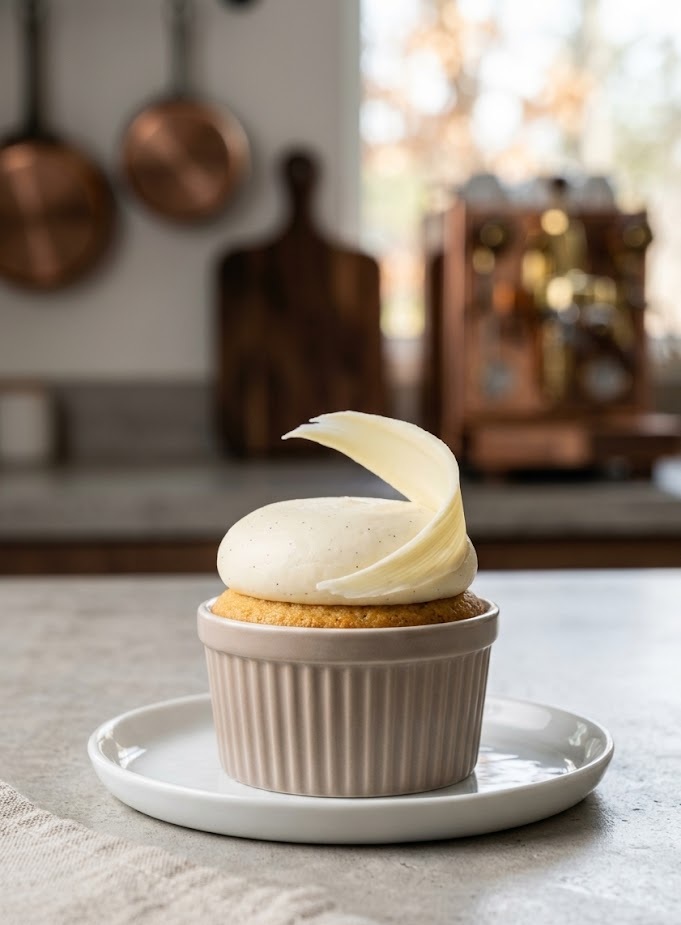
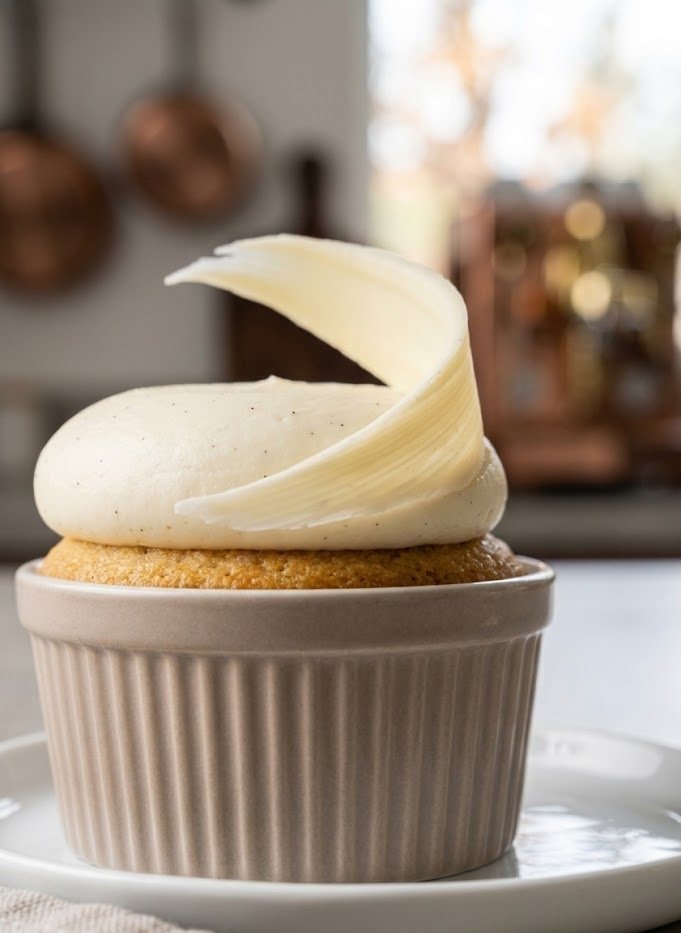
    • White chocolate curls

    How to Make Vanilla Cupcake Recipe

    Prepare the oven and tin

    • Prepare the oven: Preheat the oven to 180°C (160°C fan / 350°F). Place a shelf in the middle so the cupcakes bake evenly.
    • Line the tin: Line a 12-hole muffin tin with cupcake liners. (If your liners are very thin, double-line for sturdier sides.)

    Mix the batter

    • Cream butter and sugar: Beat the softened butter and caster sugar for 2–3 minutes until pale, fluffy, and slightly increased in volume.
    • Add eggs and vanilla: Beat in the eggs one at a time, scraping down the bowl as needed. Mix in the vanilla.
    • Combine dry ingredients: In a separate bowl, whisk together the flour, baking powder, and salt.
    • Finish the batter: Add the dry ingredients in two additions, alternating with the milk. Mix on low and stop as soon as the batter is smooth. Overmixing makes cupcakes tough.

    Bake

    • Fill the liners: Divide the batter evenly, filling each liner about 2/3 full for a neat rise.
    • Bake: Bake for 16–20 minutes, until lightly golden and the tops spring back when gently pressed. A toothpick should come out clean or with a few soft crumbs.

    Cool

    • Rest in the tin: Let the cupcakes sit in the tin for 5 minutes so they set and are easier to move.
    • Cool completely: Transfer to a wire rack and cool fully before frosting. Warm cupcakes will melt buttercream.

    Make the buttercream and assemble

    • Beat the butter: Beat the softened butter for about 2 minutes until smooth and lighter in colour.
    • Add icing sugar gradually: Add the sifted icing sugar in 2–3 additions, beating well between each. Start on low so it doesn’t puff everywhere.
    • Flavour and loosen: Beat in vanilla and a pinch of salt. Add milk or cream, 1 tablespoon at a time, until the frosting is fluffy and pipeable.
    • Frost the cupcakes: Pipe or spread buttercream onto completely cooled cupcakes, then finish with sprinkles or berries.
    How to Make Vanilla Cupcake Recipe

    Tips for Perfect Vanilla Cupcakes

    Why did my cupcakes turn out dense?

    The most common causes are overmixing after adding flour, or using cold ingredients that don’t emulsify properly. Mix on low and stop as soon as the batter is smooth, and bring eggs and milk to room temperature first.

    How do I keep cupcakes flat enough to frost neatly?

    Fill liners only about 2/3 full and bake on the middle shelf. If your oven runs hot, reduce the temperature slightly (to 175°C / 345°F) and bake a minute or two longer for a gentler rise.

    Why do my cupcakes sink in the middle?

    Sinking usually means they were underbaked or the oven door was opened too early. Bake until the tops spring back and a tester comes out clean, and avoid opening the oven during the first 12 minutes.

    How do I get a stronger vanilla flavour?

    Use vanilla bean paste in both the cupcakes and the buttercream. You can also rub the sugar with the seeds of a vanilla pod before creaming with butter for an extra fragrant batter.

    Serving Suggestions

    • Serve with fresh berries and a dusting of icing sugar for a simple, pretty finish.
    • Pair with coffee, tea, or a glass of cold milk.
    • Turn them into birthday cupcakes with coloured buttercream and sprinkles.
    • Fill with jam or lemon curd by coring the centre and piping in a teaspoon.

    Storage

    Room temperature

    Store frosted cupcakes in a single layer in an airtight container for up to 2 days. Keep them in a cool spot away from direct sun or heat.

    Refrigerator

    If your kitchen is warm, refrigerate in an airtight container for up to 5 days. Let cupcakes sit at room temperature for 30–45 minutes before serving so the buttercream softens and the crumb tastes tender again.

    Freezing

    Freeze unfrosted cupcakes (best texture) for up to 3 months. Wrap individually, then place in a freezer bag or container. Thaw at room temperature still wrapped to prevent condensation, then frost fresh. You can freeze frosted cupcakes too, but the buttercream may lose a little of its silky finish.

    Nutrition

    • Calories: 455 kcal
    • Carbohydrates: 64 g
    • Protein: 4 g
    • Fat: 21 g
    • Saturated fat: 13 g
    • Sodium: 160 mg

    Disclaimer: Nutrition values are estimates and will vary depending on ingredients and portion sizes.

    FAQs

    Can I make this vanilla cupcake recipe without milk?

    Yes. Swap the milk for the same amount of dairy-free milk (like oat or soy) or use half-and-half water and sour cream for a slightly richer crumb. Keep the liquid amount the same so the batter stays balanced.

    How do I make these cupcakes extra moist?

    Use room temperature ingredients, avoid overbaking, and store them airtight as soon as they’re fully cooled. If you want even more moisture, replace 2 tablespoons of the milk with full-fat sour cream or Greek yogurt.

    Can I use self-raising flour instead of plain flour?

    You can. Replace the plain flour with 180g self-raising flour and reduce the baking powder to 1/2 teaspoon. The texture will be very similar.

    Why is my buttercream too runny or too stiff?

    Runny buttercream usually means the butter was overly soft or the kitchen is warm. Chill it for 10–15 minutes, then re-whip. If it’s too stiff, add milk or cream 1 teaspoon at a time until it pipes smoothly.

    Can I bake this as a small cake instead of cupcakes?

    Yes. This recipe works well in a lined 20cm (8-inch) round tin. Bake at the same temperature for about 22–28 minutes, checking with a skewer for doneness.

    Vanilla Cupcake Recipe

    Recipe by Milli RoseCourse: DessertCuisine: AmericanDifficulty: Easy
    Servings

    12

    cupcakes
    Prep time

    20

    minutes
    Cooking time

    18

    minutes
    Total time

    60

    minutes
    Calories

    455

    kcal

    38

    minutes

    Soft, fluffy vanilla cupcakes topped with classic vanilla buttercream. An easy, dependable recipe that bakes evenly, tastes buttery and fragrant, and is perfect for birthdays, bake sales, or everyday treats.

    Ingredients

    • 115g unsalted butter, softened (1/2 cup)

    • 200g caster sugar (1 cup)

    • 2 large eggs, room temperature

    • 2 tsp vanilla extract or vanilla bean paste

    • 180g plain flour (1 1/2 cups)

    • 1 1/2 tsp baking powder

    • 1/4 tsp fine salt

    • 120ml whole milk, room temperature (1/2 cup)

    • 200g unsalted butter, softened (for buttercream)

    • 400g icing sugar, sifted (about 3 1/3 cups)

    • 2 tsp vanilla extract or vanilla bean paste (for buttercream)

    • 2–3 tbsp milk or double cream (for buttercream)

    • Pinch of salt (for buttercream)

    • Sprinkles or fresh berries, to decorate (optional)

    Directions

    • Preheat the oven to 180°C (160°C fan / 350°F). Line a 12-hole muffin tin with cupcake liners.
    • Cream the softened butter and sugar for 2–3 minutes until pale and fluffy.
    • Beat in the eggs one at a time, then mix in the vanilla.
    • Whisk the flour, baking powder, and salt in a separate bowl.
    • Add the dry ingredients in two additions, alternating with the milk, mixing just until smooth.
    • Divide the batter evenly between liners, filling each about 2/3 full.
    • Bake for 16–20 minutes until lightly golden and springy. Cool in the tin for 5 minutes, then transfer to a rack.
    • Make the buttercream: beat butter for 2 minutes, then gradually beat in icing sugar, vanilla, salt, and enough milk/cream to reach a pipeable consistency.
    • Pipe or spread frosting onto fully cooled cupcakes and decorate as you like.

    Notes

    • Room temperature ingredients help the batter emulsify for a finer crumb.
    • Mix just until combined once the flour goes in to keep cupcakes light.
    • For extra flavour, use vanilla bean paste in both cake and frosting.
  • Eton Mess Recipe

    Eton Mess Recipe

    Eton mess is a classic British dessert made with crisp meringue, softly whipped cream, and juicy strawberries, all tumbled together into a gorgeous, creamy cloud. You get a mix of textures in every spoonful: crunchy, chewy, silky, and bursting with fresh fruit. It’s an easy dessert to master, even if you’ve never made meringue before, and it looks effortlessly impressive. Total time is about 1 hour 30 minutes if you make meringues from scratch (mostly hands-off), or 15 minutes if you use shop-bought.

    What Is Eton Mess and How Does It Taste?

    Eton mess is a traditional English dessert said to have roots at Eton College. It’s all about contrast: crisp meringue shards soften slightly as they meet the cream, while strawberries add sweetness and a little brightness. The flavour is simple and comforting, and the look is beautifully rustic, so you do not need to fuss with perfect layers.

    Ingredients

    For the meringues (or use shop-bought)

    • 2 large egg whites (about 60g), room temperature
    • 120g caster sugar
    • 1 tsp cornflour
    • 1/2 tsp white wine vinegar or lemon juice

    For the strawberries

    • 500g strawberries, hulled and quartered (or sliced if large)
    • 1 to 2 tbsp caster sugar (use less if the berries are very sweet)
    • 1 tsp vanilla extract or vanilla bean paste

    For the cream

    • 300ml double cream, cold
    • 150g thick Greek yogurt (optional, for a lighter tang)

    To finish (optional)

    • Extra strawberries
    • Crushed freeze-dried strawberries for a punchy berry finish
    • Fresh mint leaves

    How to Make Eton Mess

    • Prepare the oven: Preheat the oven to 120°C or 100°C fan. Line a large baking tray with baking parchment and keep the shelf in the middle so the meringues dry out evenly.
    • Whip the egg whites: In a clean, grease-free bowl, whisk the egg whites until they hold soft peaks. You want them foamy and airy, not dry.
    • Add the sugar and make it glossy: With the mixer running, add the caster sugar a tablespoon at a time. Keep whisking until the meringue is thick, shiny, and holds stiff peaks. Rub a little between your fingers, it should feel smooth, not gritty.
    • Mix in stabilisers: Sprinkle over the cornflour and drizzle in the vinegar (or lemon juice). Fold gently with a spatula just until combined. This helps the meringues stay crisp and slightly marshmallowy inside.
    • Bake: Spoon or pipe the meringue into 8 to 10 nests or swirls on the prepared tray. Bake for 1 hour, then turn the oven off and leave the meringues inside to cool completely with the door closed. This slow cooling helps prevent cracks and stickiness.
    • Cool and prep the fruit: Once the meringues are cool and crisp, set them aside. Toss the strawberries with the sugar and vanilla, then leave for 10 to 15 minutes so they turn glossy and juicy.
    • Whip the cream: Whip the cold double cream to soft peaks. If using Greek yogurt, fold it in gently at the end so the cream stays light and spoonable.
    • Assemble: Right before serving, roughly crush the meringues into bite-sized pieces. Fold most of the meringue and most of the strawberries (plus their juices) through the cream, keeping a few streaks rather than fully mixing. Spoon into glasses or bowls and finish with extra berries and a final scatter of meringue.
    How to Make Eton Mess

    Tips

    Why is my meringue soft or sticky?

    Soft meringue usually means it has absorbed moisture. Make sure the meringues cool fully in the switched-off oven, then store them in an airtight container. If your kitchen is humid, add an extra 10 to 15 minutes to the bake time and keep the oven temperature low.

    How do I stop the cream from turning grainy?

    Stop whipping at soft peaks. If you go too far, the cream looks lumpy and starts to separate. If you catch it early, fold in a splash of cold cream by hand to loosen it.

    Can I make this ahead without it going soggy?

    Yes, but keep everything separate. Store meringues airtight, strawberries covered in the fridge, and whipped cream chilled. Combine at the last minute for the best crunch.

    What’s the quickest shortcut version?

    Use shop-bought meringue nests, whip the cream, macerate the strawberries for 10 minutes, then assemble. It tastes wonderful and takes about 15 minutes.

    Serving Suggestions

    • Spoon into chilled glasses for a simple dinner-party dessert.
    • Serve with a drizzle of strawberry coulis for extra fruitiness.
    • Add raspberries or blackberries for a mixed-berry version.
    • Top with a little lemon zest to brighten the cream.

    Storage

    Room temperature

    Meringues keep best at room temperature in an airtight container for up to 1 week. Keep them away from heat and humidity.

    Refrigerator

    Once assembled, Eton mess is at its best straight away. If you have leftovers, refrigerate in a covered container and eat within 24 hours. The texture will soften, but it will still taste lovely.

    Freezing

    Freezing assembled Eton mess is not recommended because the cream and strawberries change texture. You can freeze baked meringues in an airtight container for up to 1 month, then defrost at room temperature with the lid on to reduce condensation.

    Nutrition

    • Calories: 380 kcal
    • Carbohydrates: 41g
    • Protein: 4g
    • Fat: 22g
    • Saturated Fat: 14g
    • Sodium: 90mg

    Nutrition values are estimates and will vary based on portion size, strawberries, and whether you use yogurt or shop-bought meringues.

    FAQs

    Can I make Eton mess the day before?

    You can prep everything the day before, but do not assemble it until just before serving. Keep the meringues in an airtight container at room temperature, and refrigerate the strawberries and whipped cream separately.

    What can I use instead of strawberries?

    Raspberries, blackberries, or a mixed-berry blend work beautifully. In winter, try poached rhubarb or a spoonful of lemon curd swirled through the cream.

    How do I know when meringues are done?

    They should feel dry and lift cleanly from the parchment. If they still feel tacky underneath, give them another 10 to 15 minutes, then cool them in the turned-off oven so they crisp up fully.

    Can I use whipped topping instead of real cream?

    You can, but real double cream gives the best flavour and texture. If using a non-dairy topping, choose one that whips thick and keep it chilled, then assemble right before serving.

    Why did my meringue collapse or leak syrup?

    This usually happens if the sugar was added too quickly, the meringue was underwhipped, or the oven temperature was too high. Add sugar gradually, whisk until glossy and stiff, and bake low and slow.

    Eton Mess

    Recipe by Milli RoseCourse: DessertCuisine: BritishDifficulty: Easy
    Servings

    6

    servings
    Prep time

    20

    minutes
    Cooking time

    1

    hour 
    Total time

    90

    minutes
    Calories

    380

    kcal

    1

    hour 

    20

    minutes

    A classic British dessert of crisp meringue, softly whipped vanilla cream, and sweet macerated strawberries, all folded together for a dreamy mix of crunch and cream.

    Ingredients

    • 2 large egg whites (about 60g), room temperature

    • 120g caster sugar

    • 1 tsp cornflour

    • 1/2 tsp white wine vinegar or lemon juice

    • 500g strawberries, hulled and quartered

    • 1–2 tbsp caster sugar (for the strawberries)

    • 1 tsp vanilla extract or vanilla bean paste

    • 300ml double cream, cold

    • 150g thick Greek yogurt (optional, for a lighter tang)

    • Extra strawberries, crushed freeze-dried strawberries, or mint (optional, to finish)

    Directions

    • Preheat the oven to 120°C (100°C fan). Line a baking tray with baking parchment.
    • Whip egg whites to soft peaks, then gradually add caster sugar until glossy and stiff.
    • Fold in cornflour and vinegar. Spoon or pipe 8–10 meringues onto the tray.
    • Bake for 1 hour, then switch the oven off and cool the meringues inside (door closed) until crisp.
    • Toss strawberries with sugar and vanilla. Leave 10–15 minutes to get juicy.
    • Whip cream to soft peaks (fold in yogurt if using). Gently fold through crushed meringue and strawberries, keeping streaks.

    Notes

    • If using shop-bought meringues, skip steps 1–4 and assemble just before serving.
    • For the best texture, keep the components separate until the last minute.
    • Do not overwhip the cream. Soft peaks keep the dessert light and spoonable.
  • Reseña de Spincasino: bonos, juegos y pagos

    Reseña de Spincasino: bonos, juegos y pagos

    Esta review está enfocada en pagos y condiciones, porque al final es lo que más afecta la experiencia. Spincasino se presenta como un casino en línea con una variedad amplia de juegos y un sistema de bonos que busca ser claro desde el inicio. Aun así, conviene revisar las condiciones de apuestas y retiros antes de decidir si se ajusta contigo.

    Si quieres comprobar la disponibilidad actual y el proceso de registro, puedes hacerlo desde entrar a spincasinosplay.com. El resto de puntos que verás aquí se basa en condiciones habituales que el casino publica en su sección de promociones y en cómo suelen funcionar sus normas de la cuenta.

    Alta, verificación y cómo funciona la cuenta

    El acceso suele dividirse en dos etapas: crear cuenta y completar verificación. En la práctica, la verificación se vuelve necesaria cuando intentas retirar fondos. Los métodos más comunes son documento de identidad (DNI o pasaporte) y un justificante de domicilio reciente (por ejemplo, factura o extracto). También se suele pedir que el nombre y los datos de la cuenta coincidan con los del documento.

    Para evitar demoras, lo recomendable es completar la comprobación antes de acumular grandes ganancias. En muchos casinos, si la verificación se retrasa, los pagos pueden quedar pendientes hasta que se apruebe la documentación.

    Promociones y condiciones de apuesta

    Spincasino maneja un bono de bienvenida y promociones rotativas. El bono de bienvenida se estructura en dos partes: un depósito 100% hasta 200€ y un bono extra en forma de 25 spins gratis en una selección de tragamonedas. La oferta suele estar limitada a nuevos usuarios y requiere registro con el código o el botón de bono del sitio.

    En cuanto a la activación, el bono de bienvenida normalmente se activa al realizar el primer depósito elegible. Los spins gratis suelen tener condiciones separadas, con una lista de juegos admitidos. Las promociones con giros gratis suelen tener un plazo de uso (por ejemplo, dentro de las primeras semanas desde la activación).

    Sobre la apuesta requerida, una regla común en este tipo de bonos es un requisito de 35x sobre el bono total (incluyendo el valor del bono de depósito y/o los giros convertidos a valor). El saldo del bono suele no permitir retiros directos, pero sí puede usarse para jugar dentro del casino.

    Comparativa rápida de bonos y requisitos

    Bono Importe Condición típica Uso
    Bienvenida (depósito) 100% hasta 200 € Apuesta 35x Saldo para jugar
    Bienvenida (giros gratis) 25 giros Juegos seleccionados Giros en tragamonedas
    Promos rotativas Según campaña Varía por oferta Depende de la promo
    Reclamación de bono Requisito de activación Aplicación en cuenta Antes del plazo

    Juegos disponibles: tragamonedas y mesas

    La biblioteca de Spincasino se apoya en tragamonedas y juegos de mesa. En tragamonedas, lo habitual es encontrar variedad de temas, volatilidades y RTP. También suele haber tragamonedas con mecánicas de multiplicadores o “bonus rounds”. En mesas, normalmente se incluyen opciones clásicas como ruleta, blackjack y variantes de video poker o poker simplificado, según la disponibilidad del catálogo.

    Un punto práctico es que la disponibilidad puede cambiar con el tiempo. Por eso, si tienes juegos específicos, conviene buscarlos desde el lobby y verificar si aparecen como disponibles en tu región. En algunos casos, ciertos juegos pueden estar limitados por licencias o por el tipo de cuenta.

    Pagos: métodos, tiempos y límites de retiro

    Desde la perspectiva de pagos, Spincasino suele ofrecer varios métodos para depositar y cobrar. Lo más común en casinos de este tipo es que acepten tarjetas (crédito/débito), transferencias y monederos electrónicos. Para retiros, la política suele priorizar el mismo método usado para el depósito, al menos hasta cierto punto.

    Los tiempos de procesamiento normalmente se dividen en dos partes: tiempo interno del casino y tiempo bancario o del proveedor de pago. En términos realistas, el casino suele procesar retiros en horas laborales o dentro de 24-72 horas, y el resto depende del método elegido. Si ya completaste verificación, el proceso suele ser más rápido.

    Sobre límites, muchos casinos establecen un mínimo de retiro y un tope por transacción. En Spincasino, el mínimo de retiro suele estar en torno a 20 € y el máximo por solicitud en 1.000 €, aunque puede variar según el método y el estado de verificación. Si tu cuenta no está verificada, es posible que los límites sean menores o que el retiro quede bloqueado hasta completar documentos.

    Resumen de límites y tiempos esperados

    Apartado Importe Observaciones
    Mínimo de retiro 20 € Puede variar por método
    Máximo por solicitud 1.000 € Revisar límites según cuenta
    Tramitación del casino 24-72 horas Tras verificación aprobada
    Tiempo del procesador Horas a varios días Depende de banco o monedero

    Pros y contras de Spincasino en la práctica

    • Pros: bono de bienvenida con depósito y giros gratis, condiciones de apuesta relativamente claras (35x), y múltiples métodos de pago habituales.
    • Contras: los giros gratis están limitados a juegos específicos y el saldo de bono suele no permitir retiros directos.
    • Contras: los retiros pueden retrasarse si la verificación se completa tarde o si la documentación no coincide con la cuenta.

    Consejos prácticos antes de apostar y retirar

    • Lee la sección de “Promociones” y revisa el requisito de apuesta antes de usar el bono; el 35x puede cambiar tu ritmo de juego.
    • Si planeas retirar, completa verificación desde el inicio para evitar que el primer retiro se quede pendiente.
    • Haz una prueba con un retiro pequeño cuando sea posible, para confirmar que el método de pago funciona bien en tu cuenta.

    FAQ sobre Spincasino y retiros

    ¿El bono de bienvenida se puede retirar como saldo? Normalmente no. El bono suele estar destinado a jugar y cumplir un requisito de apuesta antes de que las ganancias resultantes puedan retirarse.

    ¿Qué pasa si no uso los giros gratis en el plazo? Si expira el tiempo de la promoción, los giros no utilizados suelen perderse. Conviene revisar la fecha de caducidad al activar el bono.

    ¿Cuánto tarda un retiro? El casino suele procesar en 24-72 horas tras la verificación. El tiempo final depende del método de pago (banco o monedero).

    ¿Puedo retirar por un método distinto al del depósito? En muchos casos se permite, pero puede haber restricciones. Lo habitual es que primero se intente el mismo método usado para depositar.

    ¿Cuál es el mínimo de retiro? Suele estar en torno a 20 €. Aun así, puede variar según el método y el estado de tu cuenta.

    ¿Necesito verificación para retirar? Generalmente sí. La verificación suele ser obligatoria antes de que el retiro se procese.

  • empanada recipe

    empanada recipe

    These homemade empanadas are crisp and golden on the outside with a tender, buttery crust and a rich, savoury beef filling inside. The flavour is warm and gently spiced, with little pops of salty olive and creamy egg in every bite. I’d call this a confident beginner recipe: there are a few steps, but none are hard if you take them one at a time. Total time is about 1 hour 30 minutes, including chilling and cooling.

    Ingredients

    For the empanada dough

    • 360g plain flour (about 2 3/4 cups)
    • 1 tsp fine salt
    • 1 tsp caster sugar (optional, helps browning)
    • 170g unsalted butter, cold and cut into small cubes
    • 1 large egg
    • 1 tbsp white vinegar or cider vinegar
    • 120ml ice-cold water (add 1–2 tbsp more only if needed)

    For the beef filling

    • 1 tbsp olive oil
    • 1 medium onion, finely diced
    • 1 small red pepper, finely diced
    • 3 garlic cloves, finely chopped
    • 450g minced beef
    • 2 tbsp tomato purée
    • 1 1/2 tsp ground cumin
    • 1 tsp smoked paprika
    • 1 tsp dried oregano
    • 1/4 tsp chilli flakes (optional)
    • 120ml beef stock
    • 60g green olives, chopped
    • 30g raisins (optional)
    • Fine salt and black pepper, to taste
    • 2 hard-boiled eggs, chopped

    For assembling and baking

    • 1 egg
    • 1 tbsp milk
    • Plain flour, for rolling

    How to Make Empanadas

    • Prepare the oven: Preheat the oven to 200°C or 180°C fan. Place a shelf in the middle of the oven and line a large baking tray with baking parchment.
    • Mix the dough: Add the flour, salt and sugar (if using) to a large bowl. Tip in the cold butter and rub it in with your fingertips until the mixture looks like coarse crumbs with a few pea-sized bits of butter still visible.
    • Bring it together: Whisk the egg with the vinegar, then add it to the bowl. Drizzle in the ice-cold water and mix with a fork until the dough starts clumping. Use your hands to press it together. It should look smooth and hold its shape, not sticky.
    • Chill: Flatten the dough into a disc, wrap well, and chill for 30 minutes. This makes it easier to roll and helps the crust bake up flaky.
    • Cook the filling: Heat the olive oil in a large frying pan over medium heat. Add the onion and red pepper and cook for 6–8 minutes until soft. Stir in the garlic for 30 seconds, then add the minced beef and cook until browned.
    • Season and thicken: Stir in the tomato purée, cumin, smoked paprika, oregano and chilli flakes. Pour in the beef stock and simmer for 6–10 minutes, stirring often, until the mixture is thick and not watery. Stir in the olives and raisins (if using), then taste and season with salt and pepper.
    • Cool the filling: Tip the filling into a bowl and let it cool completely. Once cool, stir in the chopped hard-boiled eggs. This step matters because warm filling will melt the butter in the dough and make sealing harder.
    • Roll and cut: Lightly flour your work surface. Roll the chilled dough to about 2–3mm thick. Cut 12 circles, about 12–13cm wide (a side plate works well as a guide). Re-roll scraps as needed, keeping the dough as cool as you can.
    • Assemble: Spoon 1 to 1 1/2 tablespoons of filling onto one half of each circle, leaving a clean border around the edge. Dip a finger in water and moisten the border, then fold into a half-moon and press firmly to seal.
    • Crimp and finish: Crimp the edge with a fork or do a simple rope crimp. Place on the lined tray. Whisk the egg with the milk and brush lightly over the tops for a glossy, golden finish.
    • Bake: Bake for 20–25 minutes, or until deeply golden and crisp. If your oven runs cool, give them a couple more minutes. You want colour for the best flavour.
    • Cool and serve: Let the empanadas cool on the tray for 10 minutes so the filling settles. Serve warm, or let them cool to room temperature for picnics and lunch boxes.
    How to Make Empanadas

    Tips

    Why is my empanada dough tough?

    Tough dough usually comes from overworking or adding too much water. Mix just until it holds together, and stop. If you are unsure, slightly drier dough is better than sticky dough, and chilling helps the flour hydrate without extra mixing.

    How do I stop empanadas from leaking in the oven?

    Make sure the filling is thick and fully cool, and don’t overfill. Keep the rim of the dough clean, press firmly to seal, then crimp. If you spot a tiny tear, patch it with a small scrap of dough and a dab of water.

    What’s the secret to a crisp, golden crust?

    Use cold butter, keep the dough chilled, and bake hot. The egg wash adds shine and colour, but the real difference is a properly preheated oven and giving them enough time to brown.

    Can I make the filling ahead of time?

    Yes, and it actually makes assembly easier. Make it up to 2 days ahead, cool, cover, and refrigerate. Bring it back to room temperature for 15–20 minutes so it is easier to spoon.

    Serving Suggestions

    • Serve with chimichurri or a simple salsa verde
    • Add a side salad with citrusy dressing to cut through the richness
    • Dip in sour cream or garlicky yoghurt sauce
    • Pair with roasted corn, rice, or black beans for a fuller meal

    Storage

    Room Temperature

    Keep baked empanadas at room temperature for up to 2 hours. After that, refrigerate for food safety.

    Refrigerator

    Store cooled empanadas in an airtight container for up to 4 days. Reheat on a tray at 180°C fan for 8–12 minutes until hot and crisp again.

    Freezing

    Empanadas freeze beautifully. Freeze unbaked empanadas on a lined tray until solid, then transfer to a freezer bag for up to 3 months. Bake from frozen at 200°C (180°C fan) for 25–33 minutes, brushing with egg wash right before baking.

    Nutrition

    • Calories: 320 kcal
    • Carbohydrates: 26 g
    • Protein: 12 g
    • Fat: 19 g
    • Saturated Fat: 9 g
    • Sodium: 420 mg

    Nutrition values are estimates and will vary depending on the exact ingredients and brands you use.

    FAQs

    Can I use shop-bought pastry for empanadas?

    Yes. Ready-rolled shortcrust works in a pinch, and so do empanada discos if you can find them. Keep the filling thick and cool, and bake until deeply golden so the base cooks through.

    Can I fry these instead of baking?

    You can. Heat neutral oil to about 175°C, fry in batches for 2–4 minutes per side until golden, then drain well. Fried empanadas are richer, so keep the filling fairly dry to prevent splattering.

    Why did my empanadas open while baking?

    This usually happens when the edges are not sealed firmly, the rim has filling or grease on it, or the filling was still warm. Wipe the rim clean, moisten with water, press to seal, then crimp. Chilling assembled empanadas for 10 minutes also helps.

    Can I make empanadas ahead for a party?

    Yes. Assemble them up to 1 day ahead and refrigerate on a tray (covered). Brush with egg wash right before baking. You can also freeze them unbaked and bake straight from frozen with a few extra minutes in the oven.

    What other fillings work well?

    Shredded chicken with peppers, cheese and sweetcorn; spinach and feta; pulled pork; or a simple ham and cheese. Keep fillings thick, not saucy, so the pastry stays crisp and the seams stay sealed.

    Baked Beef Empanadas

    Recipe by Home Chef CooksCourse: MainCuisine: Latin AmericanDifficulty: Medium
    Servings

    12

    empanadas
    Prep time

    35

    minutes
    Cooking time

    25

    minutes
    Total time

    90

    minutes
    Calories

    320

    kcal

    1

    hour 

    Crisp, flaky baked beef empanadas with a buttery homemade dough and a richly seasoned filling. Perfect for parties, lunch boxes, or make-ahead dinners.

    Ingredients

    • 360g plain flour (about 2 3/4 cups)

    • 1 tsp fine salt

    • 1 tsp caster sugar (optional)

    • 170g unsalted butter, cold and cubed

    • 1 large egg

    • 1 tbsp white vinegar or cider vinegar

    • 120ml ice-cold water (add a splash more if needed)

    • 1 tbsp olive oil

    • 1 medium onion, finely diced

    • 1 small red pepper, finely diced

    • 3 garlic cloves, finely chopped

    • 450g minced beef (10–15% fat works well)

    • 2 tbsp tomato purée

    • 1 1/2 tsp ground cumin

    • 1 tsp smoked paprika

    • 1 tsp dried oregano

    • 1/4 tsp chilli flakes (optional)

    • 120ml beef stock

    • 60g green olives, chopped (about 1/2 cup)

    • 30g raisins (optional)

    • 2 hard-boiled eggs, chopped

    • 1 egg + 1 tbsp milk (egg wash)

    Directions

    • Make the dough: Mix flour, salt (and sugar if using). Rub in cold butter until crumbly, then mix in egg and vinegar. Add ice water just until a dough forms. Wrap and chill 30 minutes.
    • Cook the filling: Sauté onion and red pepper in olive oil until soft. Add garlic, then mince and cook until browned. Stir in tomato purée and spices, then add stock and simmer until thick. Stir in olives and raisins (if using). Cool completely, then mix in chopped egg.
    • Roll and fill: Roll chilled dough to about 2–3mm thick and cut 12–13cm circles. Add 1–1 1/2 tbsp filling to each, keeping edges clean.
    • Seal and crimp: Moisten edge with water, fold into a half-moon and press to seal. Crimp with a fork or do a rope crimp. Chill 10 minutes if the kitchen is warm.
    • Bake: Brush with egg wash and bake at 200°C (180°C fan) for 20–25 minutes until deep golden. Cool 10 minutes before serving.

    Notes

    • Cool the filling completely before assembling, otherwise the dough softens and is harder to seal.
    • Keep the dough cold for the flakiest texture. If it warms up, pop it back in the fridge for 10 minutes.
    • Freeze unbaked empanadas on a tray, then bag them up. Bake from frozen, adding 5–8 minutes.
  • fatayer recipe

    fatayer recipe

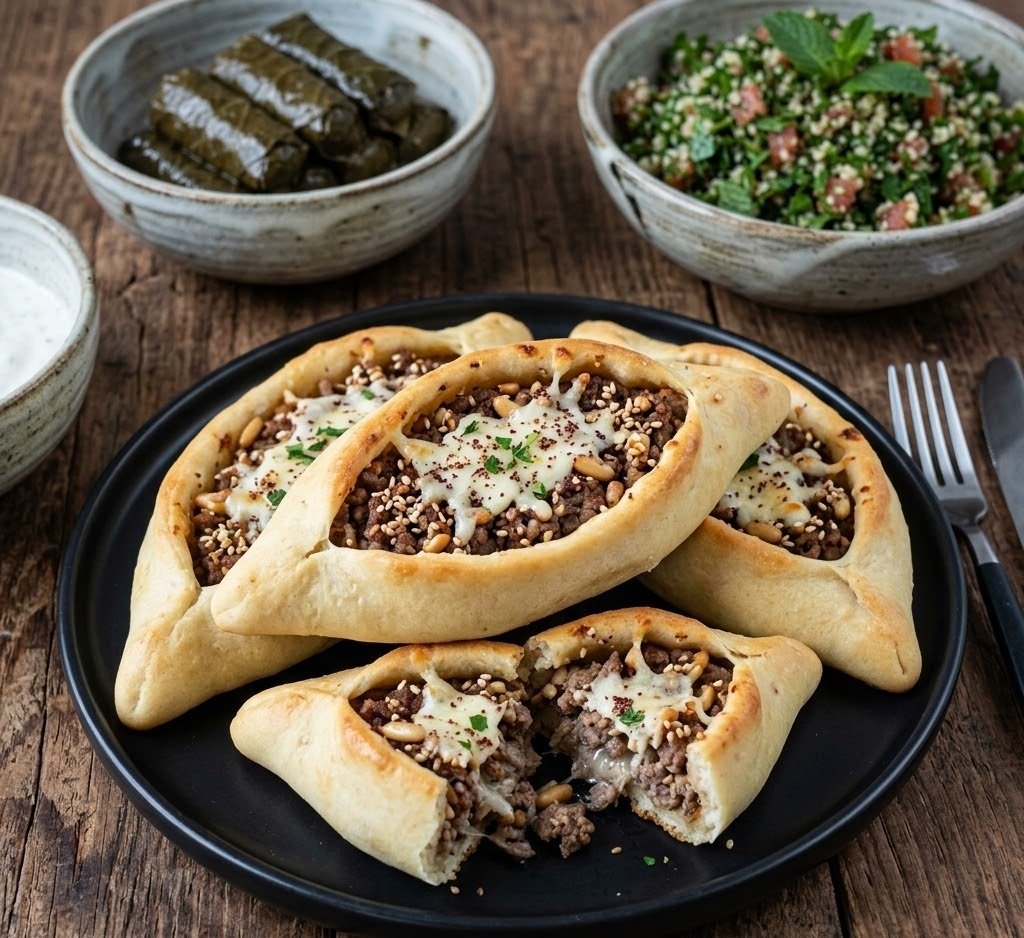
    If you love soft, pillowy bread wrapped around a bright, tangy filling, this fatayer recipe is one you will want to make on repeat. These classic Middle Eastern spinach fatayer bake up lightly golden with a tender, chewy dough and a savoury filling flavoured with lemon and sumac. The process is very doable for beginner bakers, with simple steps and forgiving dough. Total time is about 1 hour 35 minutes, including rising.

    Ingredients

    For the dough

    • 450g plain flour (about 3 1/2 cups), plus extra for dusting
    • 2 1/4 tsp instant yeast (1 x 7g sachet)
    • 1 tbsp granulated sugar
    • 1 1/2 tsp fine salt
    • 3 tbsp olive oil
    • 240ml warm water (1 cup), about 38–40°C
    • 120ml warm milk (1/2 cup)

    For the spinach filling

    • 450g fresh spinach (about 10–12 packed cups)
    • 1 small onion, very finely diced
    • 2 tbsp olive oil
    • 2 tbsp sumac
    • 2 tbsp lemon juice (about 1 lemon)
    • 1/2 tsp fine salt, plus more to taste
    • 1/4 tsp black pepper
    • 2 tbsp toasted pine nuts (optional)

    For finishing (optional)

    • 1 egg + 1 tbsp milk, whisked together (egg wash)
    • Sesame seeds or nigella seeds, for sprinkling

    How to Make Fatayer

    • Prepare the dough: In a large bowl, mix the flour, instant yeast, sugar, and salt. Add the olive oil, warm water, and warm milk. Mix until a shaggy dough forms, then knead for 8–10 minutes (by hand) or 6–7 minutes (stand mixer) until smooth and elastic.
    • Let it rise: Lightly oil the bowl, return the dough, cover, and leave to rise in a warm spot for 60 minutes, or until doubled in size.
    • Make the filling: Wilt the spinach in a large pan over medium heat (or microwave in batches) until just collapsed. Tip into a colander and cool for a few minutes, then squeeze very dry with your hands. Chop finely and mix with the onion, olive oil, sumac, lemon juice, salt, pepper, and pine nuts (if using). Taste and adjust lemon, salt, or sumac to your liking.
    • Prepare the oven: Preheat the oven to 200°C or 180°C fan (400°F or 350°F fan). Line 2 large baking trays with baking parchment and set a shelf in the middle of the oven for even baking.
    • Divide and roll: Punch down the dough and divide it into 12 equal pieces (about 70–75g each). Roll each piece into a ball, then roll into a 12–13cm circle on a lightly floured surface. Keep the rest covered so the dough does not dry out.
    • Fill and shape: Place 1 1/2 to 2 tbsp of filling in the centre of each circle, leaving a border. Bring up two sides and pinch, then bring up the third side to form a triangle. Pinch the three seams firmly so they are well sealed.
    • Finish: Transfer to the trays, leaving space between each. For a glossier finish, brush the tops lightly with egg wash and sprinkle with sesame or nigella seeds.
    • Bake: Bake for 12–15 minutes, rotating the trays halfway through, until the fatayer are lightly golden and the bottoms are set.
    • Cool and serve: Let the fatayer cool on the tray for 10 minutes, then move to a rack. Serve warm or at room temperature.
    How to Make Fatayer

    Tips

    Why did my fatayer open in the oven?

    This usually comes down to sealing or overfilling. Keep the filling to about 1 1/2 to 2 tablespoons per piece, leave a clear border, and pinch the seams firmly. If the dough feels floury and will not stick, wipe a tiny bit of water along the edge before pinching.

    How do I stop the filling from making the dough soggy?

    Squeeze the spinach aggressively. It should feel dry and fluffy, not damp. If you skip this, the liquid will steam inside the pastry and soften the dough.

    My dough is tight and keeps shrinking. What should I do?

    Let it rest. If the dough springs back when you roll, cover the pieces and rest for 10 minutes, then try again. Resting relaxes the gluten and makes shaping much easier.

    How do I get evenly golden fatayer without drying them out?

    Bake on the middle shelf at the right temperature and pull them as soon as they are lightly golden. Fatayer should be tender, not deeply browned. If your oven runs hot, drop the temperature by 10°C and bake a minute longer.

    Serving Suggestions

    • Serve with cucumber and yoghurt (or labneh) and a drizzle of olive oil.
    • Add a simple tomato and mint salad on the side.
    • Pair with lentil soup for a cosy, filling meal.
    • Pack into lunchboxes with olives and sliced peppers.

    Storage

    Room temperature

    Keep fatayer in an airtight container for up to 1 day. They are best the day they are baked, but still lovely slightly warmed.

    Refrigerator

    Store in an airtight container for up to 4 days. Reheat in a 180°C oven (160°C fan) for 6–8 minutes to bring back the soft bread texture.

    Freezing

    Freeze baked and fully cooled fatayer for up to 2 months. Freeze in a single layer first, then transfer to a freezer bag. Reheat from frozen at 180°C (160°C fan) for 10–12 minutes, or until hot through.

    Nutrition

    • Calories: 175 kcal
    • Carbohydrates: 26 g
    • Protein: 5 g
    • Fat: 6 g
    • Saturated fat: 1 g
    • Sodium: 260 mg

    Disclaimer: Nutrition values are estimates and will vary based on ingredients and portion sizes.

    FAQs

    What is fatayer made of?

    Fatayer is typically made from a soft yeasted dough filled with savoury mixtures like spinach with sumac and lemon, cheese, or spiced meat. The pastries are commonly shaped into triangles or little boats, then baked until lightly golden.

    Can I use frozen spinach for fatayer?

    Yes. Thaw it completely, then squeeze it extremely dry. Frozen spinach holds a lot of water, so be thorough. Once it is dry, mix it with onion, sumac, lemon, and olive oil as usual.

    How do I keep fatayer from getting soggy?

    The key is moisture control. Squeeze the spinach very well, avoid watery add-ins, and do not overload the filling. Also cool the baked fatayer on a rack so steam does not soften the bottoms.

    Can I make fatayer dough ahead of time?

    Yes. After the first rise, punch down the dough, cover tightly, and refrigerate overnight. Let it sit at room temperature for 30–45 minutes before dividing and shaping so it rolls easily.

    Why does my fatayer dough feel dry or stiff?

    Flour brands vary and measuring by cups can add extra flour. If the dough feels tight, add 1 teaspoon of warm water at a time while kneading until the dough is soft and smooth. It should feel slightly tacky, not sticky.

    Fatayer Recipe (Spinach Triangles)

    Recipe by Milli RoseCourse: Snack, AppetizerCuisine: Middle Eastern, LevantineDifficulty: Easy
    Servings

    12

    fatayer
    Prep time

    35

    minutes
    Cooking time

    15

    minutes
    Total time

    95

    minutes
    Calories

    175

    kcal

    50

    minutes

    Soft, chewy homemade fatayer stuffed with a lemony spinach and sumac filling, shaped into classic triangles and baked until golden.

    Ingredients

    • For the dough
    • 450g plain flour (about 3 1/2 cups), plus extra for dusting

    • 2 1/4 tsp instant yeast (7g sachet)

    • 1 tbsp granulated sugar

    • 1 1/2 tsp fine salt

    • 3 tbsp olive oil

    • 240ml warm water (1 cup), about 38–40°C

    • 120ml warm milk (1/2 cup)

    • For the spinach filling
    • 450g fresh spinach (about 10–12 packed cups)

    • 1 small onion, very finely diced

    • 2 tbsp olive oil

    • 2 tbsp sumac

    • 2 tbsp lemon juice (about 1 lemon)

    • 1/2 tsp fine salt, plus more to taste

    • 1/4 tsp black pepper

    • 2 tbsp toasted pine nuts (optional)

    • For finishing
    • 1 egg + 1 tbsp milk, for egg wash (optional)

    • Sesame seeds or nigella seeds, for sprinkling (optional)

    Directions

    • Make the dough: Mix flour, yeast, sugar and salt. Add olive oil, warm water and warm milk, then knead until smooth and elastic.
    • Let the dough rise: Cover and leave in a warm spot until doubled in size.
    • Prep the filling: Wilt spinach, squeeze it very dry, then chop. Mix with onion, olive oil, sumac, lemon juice, salt, pepper and pine nuts.
    • Preheat oven to 200°C (180°C fan). Line baking trays with parchment.
    • Divide and roll: Split dough into 12 pieces and roll into 12–13cm circles.
    • Fill and shape: Add filling, then pinch into triangles to seal well.
    • Egg wash (optional): Brush tops and sprinkle seeds.
    • Bake 12–15 minutes until lightly golden and set.
    • Cool 10 minutes, then serve warm or at room temperature.

    Notes

    • Squeeze the spinach extremely well to prevent soggy fatayer.
    • Seal the corners firmly and avoid overfilling so they do not open in the oven.
    • If your kitchen is cool, let the dough rise in an oven turned off with just the light on.
    • Fatayer are best the day they are baked, but reheat beautifully.
  • RojaBet: revisión práctica de bonos, juegos y pagos

    RojaBet: revisión práctica de bonos, juegos y pagos

    Esta review está enfocada en transacciones y uso cotidiano. La idea es que tengas una comprensión de cómo funciona RojaBet en aspectos como bonos, catálogo de juegos, opciones de retirada y tiempos de procesamiento. También incluyo una sección de pros y contras para que puedas decidir con menos dudas.

    Si quieres revisar el sitio por tu cuenta, puedes entrar a RojaBet. A partir de ahí, lo más útil es comprobar dos cosas: las términos del bono vigente y las formas de pago disponibles para tu país.

    Promos y requisitos: lo que suele importar

    RojaBet suele manejar una estructura de bonos típica: bienvenida, recarga y promociones puntuales. En la práctica, lo que cambia la experiencia no es solo el porcentaje del bono, sino el condición de apuesta (wager) y el tope máximo que puedes convertir en ganancias.

    Para orientar tu revisión, estas son condiciones que se aplican con frecuencia en bonos de bienvenida. Importante: revisa siempre el panel de “Promociones” porque pueden variar con el tiempo o según el método de depósito.

    Tipo de bono Oferta Apuesta requerida (wager) Límite de bono
    Bienvenida 100% hasta 200 € 35x Ganancias sobre el bono hasta 400 €
    Recarga 20% hasta 100 € 30x Ganancias sobre el bono hasta 200 €
    Promoción semanal Hasta 50 € en premios Depende de la mecánica Definido por la promo
    Eventos sin depósito Tickets o giros Normalmente 0x Según el evento

    Un detalle práctico: si el wager es alto, conviene organizar apuestas más pequeñas y constantes para completar el requisito sin gastar de más. También mira si hay restricciones por apuesta (por ejemplo, un máximo por giro o por ronda), ya que eso afecta el ritmo con el que se cumple el bono.

    Biblioteca de juegos: variedad y enfoque realista

    En un casino como este, el catálogo es relevante porque define si puedes mantener una rutina estable: slots para probar volatilidad, mesas para sesiones cortas y juegos con reglas claras. RojaBet suele incluir una mezcla de tragamonedas, ruleta, blackjack y juegos de mesa con apuestas moderadas.

    Como referencia, el sitio suele presentar alrededor de 300 a 500 juegos entre máquinas y mesas, con rotación frecuente de títulos. En slots normalmente encontrarás categorías como temas clásicos, jackpots y máquinas con multiplicadores. En mesas, lo habitual es encontrar variantes de ruleta (europea y americana) y blackjack con reglas estándar.

    Si tu prioridad es jugar desde el móvil, busca juegos con UI clara y botones grandes. En la práctica, los juegos de mesa tienden a ser más sensibles a la latencia que las slots, así que conviene probar primero en una sesión corta.

    Opciones de pago en RojaBet y tiempos habituales

    Para evaluar pagos, lo más útil es entender tres puntos: qué métodos están disponibles, si exigen verificación antes de retirar y cuánto tarda el procesamiento. En RojaBet, el flujo suele ser el siguiente: depósito inmediato o casi inmediato, y retiros sujetos a validación de cuenta.

    Los formas de pago suelen incluir tarjeta (crédito/débito), transferencias y monederos electrónicos. En algunos casos, el retiro puede requerir que uses el mismo método con el que depositaste, al menos para el primer retiro, especialmente cuando el bono está activo.

    En cuanto a tiempos, una referencia común es: retiros procesados dentro de 24 horas en días laborables, con el tiempo adicional de la entidad bancaria o del proveedor del monedero. Por eso, el “tiempo total” puede variar entre 1 y 5 días, según el método.

    Método Depósito Retiro (proceso) Notas prácticas
    Tarjeta Inmediato o minutos Hasta 24 h laborables Puede requerir mismo método
    Transferencia Según banco 1-2 días laborables Revisa límites del banco
    Monedero electrónico Minutos Hasta 24 h laborables Frecuente para retiros rápidos
    Cripto (si está disponible) Minutos Hasta 24 h laborables Depende de red y confirmaciones

    También conviene revisar límites. Algunos casinos establecen mínimo de retiro (por ejemplo, 20 €) y máximo por día. Si planeas retirar montos grandes, revisa el límite antes de acumular saldo con bonos, porque una parte del retiro podría quedar pendiente hasta completar verificación o cumplir requisitos.

    Validación, límites y seguridad para retirar saldo

    La verificación suele pedirse antes del primer retiro o cuando el saldo supera ciertos umbrales. Normalmente solicitan documento de identidad y prueba de dirección. Esto no es raro en la industria: ayuda a reducir rechazos y revisiones manuales.

    En cuanto a límites, es común encontrar límites de apuesta y límites de retirada por método. Si juegas con bonos, evita aumentar tu ritmo de apuestas de forma brusca: si el sistema detecta actividad inusual, puede activar revisiones adicionales.

    Para una experiencia más estable, mantén un patrón de juego coherente y conserva capturas de pantalla de promociones si el bono es clave para tu sesión. Esto te puede ahorrar tiempo si el soporte pide aclaraciones.

    Ventajas y desventajas de RojaBet en el día a día

    Lo mejor

    • Bonos con condiciones relativamente claras (wager y límites visibles en la sección de promociones).
    • Variedad suficiente para alternar tragamonedas y mesas sin depender de un solo tipo de juego.
    • Retiro con procesamiento habitual dentro de 24 horas laborables, según método.

    Lo que debes revisar antes de apostar

    • El wager puede ser exigente; conviene prever para no sobrepasar tu presupuesto.
    • Posibles restricciones de retiro con bonos activos o necesidad de usar el mismo método de depósito.
    • Los tiempos finales dependen de tu banco o proveedor del monedero.

    Consejos prácticos para usar bonos y retirar sin problemas

    Primero, revisa el requisito de apuesta y el límite máximo asociado al bono. Segundo, haz un depósito de prueba si es tu primera vez, especialmente si planeas retirar pronto. Tercero, completa la verificación antes de acumular grandes saldos: suele reducir retrasos.

    Cuarto, antes de iniciar una sesión por bono, define un objetivo de pérdidas y ganancias. Los bonos no cambian el riesgo del juego; solo cambian la forma en que se calculan las ganancias elegibles. Quinto, guarda el historial de depósitos y retiros, y revisa el panel de “Promociones” para confirmar que el bono está activo y en estado correcto.

    Si buscas una forma simple de evaluar el casino, tu checklist puede ser: método de pago que usas, tiempo estimado de retiro para ese método, verificación necesaria y condiciones del bono. Con esos datos, la decisión es más directa.

    Preguntas frecuentes sobre RojaBet

    ¿Cómo sé si mi bono aplica a mi saldo? Revisa el apartado de “Promociones” y confirma que el bono esté en estado activo para tu cuenta.

    ¿Se puede retirar dinero antes de completar el wager? Depende del bono. En muchos casos, las ganancias vinculadas al bono requieren completar el requisito; el saldo base suele estar sujeto a condiciones de verificación.

    ¿Qué métodos de pago suelen estar disponibles? Comúnmente tarjeta, transferencia y monederos electrónicos. La disponibilidad exacta puede variar por país.

    ¿Cuánto tarda un retiro? El procesamiento suele estar dentro de 24 horas laborables; el tiempo total depende del banco o del proveedor del monedero.

    ¿Piden verificación para retirar? Con frecuencia sí, normalmente antes del primer retiro o cuando el saldo supera umbrales. Ten listo documento de identidad y prueba de dirección.

    ¿Hay límites de retiro? Suele haber un mínimo y un máximo por transacción o por día. Revisa “Retirar” en tu cuenta para ver los límites vigentes.

    ¿Las mesas y las slots tienen reglas diferentes para bonos? Puede variar: algunos bonos aplican con distintos porcentajes según el tipo de juego. Consulta la tabla de contribución del bono dentro de la promoción.

  • Leek and Potato Soup Recipe

    Leek and Potato Soup Recipe

    This leek and potato soup is smooth, velvety, and gently sweet from the leeks, with a satisfying, creamy body from the potatoes. It is an easy, reliable soup that tastes like it simmered all afternoon, but it comes together quickly on a weeknight. I finish it with a small splash of cream (optional) and a handful of crisp oven croutons for contrast. Total time is about 55 minutes, and it is very beginner-friendly.

    Ingredients

    For the soup

    • 3 large leeks (about 600g), white and light green parts only
    • 1 medium onion, finely chopped
    • 2 tbsp unsalted butter
    • 1 tbsp olive oil
    • 2 garlic cloves, finely chopped (optional)
    • 650g potatoes (Maris Piper, Yukon Gold, or King Edward), peeled and diced
    • 1 litre vegetable or chicken stock, preferably hot
    • 2 sprigs fresh thyme (or 1/2 tsp dried thyme)
    • 1 bay leaf
    • 150ml double cream or whole milk (optional, to finish)
    • 1 1/2 tsp fine salt, plus more to taste
    • Black pepper, to taste

    For crunchy croutons (optional)

    • 2 thick slices crusty bread (sourdough is great), cut into 1.5cm cubes
    • 1 tbsp olive oil
    • 1/4 tsp fine salt
    • 1/4 tsp dried thyme (or a pinch of fresh thyme leaves)

    To serve (optional)

    • Chives, finely sliced
    • Extra black pepper
    • A swirl of cream or a drizzle of olive oil

    How to Make Leek and Potato Soup

    • Prepare the oven: Preheat the oven to 200°C or 180°C fan. Line a small tray with baking paper so the croutons crisp evenly and do not stick.
    • Prep the leeks properly: Slice the leeks, then place them in a large bowl of cold water and swish well to release any grit. Lift the leeks out (do not pour the sandy water back over them) and drain thoroughly.
    • Mix and bake the croutons: Toss the bread cubes with olive oil, salt, and thyme. Spread on the tray in a single layer and bake for 10 to 12 minutes, turning once, until crisp and golden. Set aside.
    • Start the soup base: In a large saucepan or Dutch oven, melt the butter with the olive oil over medium-low heat. Add the leeks and onion, then cook gently for 10 to 12 minutes until soft and sweet. Stir often and keep the heat low so they do not brown.
    • Add the potatoes and stock: Stir in the garlic (if using) for 1 minute. Add the diced potatoes, hot stock, thyme, bay leaf, and salt. Bring to a gentle simmer.
    • Cook until tender: Simmer uncovered for 15 to 20 minutes, or until the potatoes are very soft when pierced with a knife. Remove the bay leaf and thyme sprigs.
    • Blend (mix) until smooth: Use a stick blender to blend the soup directly in the pot until silky. If using a countertop blender, cool the soup for 10 minutes first, blend in batches, and vent the lid so steam can escape.
    • Finish, cool slightly, and assemble to serve: Stir in the cream or milk (if using) and warm gently over low heat. Taste and adjust salt and pepper. Ladle into bowls, then top with chives, black pepper, and a handful of crunchy croutons.
    How to Make Leek and Potato Soup

    Tips

    How do I clean leeks so the soup is not gritty?

    Slice first, then wash. Leeks trap sand between their layers, so soaking the sliced leeks in cold water and lifting them out is far more effective than rinsing under the tap.

    How do I keep leek and potato soup from tasting bitter?

    Bitter notes usually come from browning the leeks or using very dark stock. Cook the leeks over medium-low heat until soft, not golden, and use a mild stock. A small splash of cream also rounds out any sharp edges.

    Why did my soup turn gluey after blending?

    Over-blending can make potatoes gummy, especially with a high-speed blender. Blend only until smooth, and avoid blending for several minutes straight. A stick blender is very forgiving here.

    How can I make it thicker or thinner?

    For a thicker soup, simmer a few minutes longer before blending, or add an extra 100g of potato. For a thinner soup, add a splash of hot stock or milk until it is exactly the consistency you like.

    Can I make this without cream?

    Yes. The potatoes make it naturally creamy. Finish with whole milk, a drizzle of olive oil, or simply leave it as is and season well.

    Serving Suggestions

    • Serve with buttered crusty bread or a toasted cheese sandwich.
    • Add a simple green salad with a sharp vinaigrette to balance the richness.
    • Top with crispy bacon bits or pan-fried mushrooms for a heartier bowl.
    • Make it dinner-worthy with roasted chicken, salmon, or sausages on the side.

    Storage

    Room temperature

    Cool the soup quickly and do not leave it out for more than 2 hours (1 hour if your kitchen is warm). Transfer to containers once it stops steaming.

    Refrigerator

    Store in an airtight container for up to 4 days. Reheat gently on the hob over low heat, stirring often. If the soup thickens in the fridge, loosen with a splash of stock or water.

    Freezing

    Freeze for up to 3 months. For best texture, freeze before adding cream, then stir cream in after reheating. Defrost overnight in the fridge, or thaw in a saucepan over low heat, stirring regularly.

    Nutrition

    • Calories: 240 kcal
    • Carbohydrates: 26 g
    • Protein: 4 g
    • Fat: 14 g
    • Saturated fat: 8 g
    • Sodium: 650 mg

    Disclaimer: Nutrition values are estimates and will vary based on stock, dairy, and portion size.

    FAQs

    Do I need to use only the white part of the leek?

    The white and light green parts are ideal because they are tender and sweet. The dark green tops can be tougher, but you can save them for stock if you like.

    Can I make leek and potato soup without cream?

    Yes. The potatoes naturally thicken the soup, so it still tastes creamy. Finish with a little whole milk, a drizzle of olive oil, or leave it dairy-free and adjust seasoning.

    What potatoes are best for leek and potato soup?

    Floury potatoes (like Maris Piper, King Edward, or Yukon Gold) blend up smoothly and give the soup its classic velvety texture. Waxy potatoes work, but the soup can be slightly thinner.

    How do I blend hot soup safely?

    A stick blender is the easiest option. If using a countertop blender, let the soup cool for 10 minutes, blend in batches, and vent the lid (cover with a folded tea towel) so steam can escape.

    Why is my leek and potato soup watery?

    It may need a little longer simmering so the potatoes fully soften and release starch. You can also add an extra potato, or simmer the blended soup for a few minutes to reduce and thicken.

    Leek and Potato Soup Recipe

    Recipe by Milli RoseCourse: Soup, Lunch, DinnerCuisine: British, French-inspiredDifficulty: Easy
    Servings

    6

    bowls
    Prep time

    15

    minutes
    Cooking time

    40

    minutes
    Total time

    55

    minutes
    Calories

    240

    kcal

    55

    minutes

    A smooth, creamy leek and potato soup with buttery leeks, tender potatoes, and optional crisp oven croutons. Easy, cozy, and perfect for lunch or dinner.

    Ingredients

    • 3 large leeks (about 600g), white and light green parts only, well washed and thinly sliced

    • 1 medium onion, finely chopped

    • 2 tbsp unsalted butter

    • 1 tbsp olive oil

    • 2 garlic cloves, finely chopped (optional)

    • 650g potatoes (Maris Piper, Yukon Gold, or King Edward), peeled and diced

    • 1 litre vegetable or chicken stock, hot

    • 2 sprigs fresh thyme (or 1/2 tsp dried thyme)

    • 1 bay leaf

    • 150ml double cream or whole milk (optional, to finish)

    • 1 1/2 tsp fine salt, plus more to taste

    • Black pepper, to taste

    Directions

    • Wash and slice the leeks, then prep the onion, garlic, and potatoes.
    • Melt butter with olive oil in a large pot. Add leeks and onion and cook gently until soft, 10 to 12 minutes.
    • Stir in garlic (if using) for 1 minute, then add potatoes, thyme, bay leaf, salt, and stock.
    • Simmer uncovered until potatoes are very tender, 15 to 20 minutes.
    • Remove bay leaf and thyme sprigs. Blend until smooth using a stick blender or countertop blender.
    • Stir in cream or milk (if using). Warm gently, then adjust salt and pepper.
    • Serve hot with chopped chives and croutons if you like.

    Notes

    • Cook the leeks gently without browning to keep the flavour sweet and the soup pale.
    • For the smoothest soup, blend while warm, then pass through a sieve (optional).
    • Cool slightly before blending in a countertop blender, and never fill it more than halfway.
  • Bubble and Squeak Recipe

    Bubble and Squeak Recipe

    Bubble and squeak is a classic British way to turn leftover potatoes and vegetables into crisp-edged, golden cakes with a soft, savoury middle. It’s full of comforting flavours, lightly peppery from cabbage, and rich from butter and a little frying oil. This is an easy, beginner-friendly recipe that’s hard to mess up and very forgiving with leftovers. Total time is about 35 minutes, depending on how cold your mash is to start.

    Ingredients

    For the bubble and squeak mix

    • 500g cold leftover mashed potatoes (or cooked potatoes, mashed and fully chilled)
    • 250g cooked cabbage (savoy/green), squeezed dry and finely chopped
    • 75g leftover cooked vegetables (sprouts, carrots, peas), finely chopped (optional)
    • 2 spring onions, finely sliced (optional)
    • 1 large egg, beaten (optional, helps binding)
    • 2 tbsp plain flour (plus extra if needed)
    • 1 tsp Dijon or English mustard (optional)
    • 3/4 tsp fine salt (adjust depending on how seasoned your leftovers are)
    • 1/2 tsp black pepper

    For crisping

    • 2 tbsp vegetable oil
    • 25g butter, melted

    To serve (optional)

    • Fried or poached eggs
    • Bacon, sausages, or leftover roast meat
    • Brown sauce or ketchup

    How to Make Bubble and Squeak

    Oven preparation

    • Prepare the oven: Preheat the oven to 220°C or 200°C fan. Place a shelf in the middle of the oven so the cakes crisp evenly.
    • Line the tray: Line a large baking tray with baking parchment, then brush the parchment lightly with a little oil to stop sticking and encourage browning.

    Mixing

    • Dry the cabbage: If your cabbage is at all wet, squeeze it well in clean kitchen paper or a tea towel. This keeps the mixture from turning soft and steamy in the oven.
    • Combine the mix: In a large bowl, mix the cold mashed potatoes, chopped cabbage, and any extra vegetables. Add spring onions, flour, mustard, salt, and pepper, then mix until evenly combined.
    • Bind if needed: If your leftovers are crumbly or the cakes don’t hold together when you squeeze a spoonful, mix in the beaten egg.

    Baking

    • Shape the cakes: With lightly floured hands, shape the mixture into 8 patties (about 2cm thick). If it feels sticky, sprinkle in 1–2 extra tablespoons of flour.
    • Brush for crisp edges: Place the patties on the tray. Brush the tops with melted butter and a little oil for a deeper golden crust.
    • Bake and flip: Bake for 15 minutes, then carefully flip each cake with a spatula. Bake for another 8–10 minutes, until golden and crisp at the edges.

    Cooling

    • Rest before serving: Let the cakes sit on the tray for 5 minutes. This helps them firm up so they don’t break when you lift them.

    Assembling

    • Plate up: Serve two cakes per person for a light meal, or one as a side.
    • Add toppings: Top with a fried egg, or serve alongside bacon or sausages. A little brown sauce is very traditional.
    How to Make Bubble and Squeak

    Tips

    Why are my cakes turning out soft instead of crispy?

    This usually comes down to moisture and heat. Make sure the cabbage is squeezed dry, use cold mash, and bake hot (220°C/200°C fan). Brushing with butter and oil helps the surface crisp rather than dry out.

    How do I stop bubble and squeak from falling apart?

    Use cold potatoes, don’t skip the resting time after baking, and add the egg if your leftovers are crumbly. If the mixture still feels loose, add a little more flour a teaspoon at a time.

    Can I make it more flavourful if my leftovers are bland?

    Mustard, spring onions, a pinch of garlic powder, or a small handful of grated cheddar all work well. Taste the mixture before shaping and adjust salt and pepper carefully.

    What’s the best way to get an extra-crisp finish?

    Bake as written, then pan-fry the cakes in a hot frying pan with a thin slick of oil for 1–2 minutes per side. It’s a small extra step that gives you that classic crackly crust.

    Serving Suggestions

    • Top with a fried egg and a grind of black pepper
    • Serve with bacon or sausages for a hearty breakfast
    • Pair with baked beans and grilled tomatoes
    • Add a spoonful of chutney or brown sauce on the side
    • Serve with a simple green salad for lunch

    Storage

    Room temperature

    Best eaten fresh. If you need to hold them briefly, keep them out for up to 2 hours, then refrigerate.

    Refrigerator

    Cool completely, then store in an airtight container for up to 3 days. Reheat on a baking tray at 200°C/180°C fan for 8–12 minutes until hot and crisp again (microwaving works, but softens the crust).

    Freezing

    Freeze baked cakes in a single layer on a tray until solid, then transfer to a freezer bag or container. Freeze for up to 2 months. Reheat from frozen at 200°C/180°C fan for 15–20 minutes, flipping once, until piping hot.

    Nutrition

    • Calories: 250 kcal
    • Carbohydrates: 34 g
    • Protein: 6 g
    • Fat: 10 g
    • Saturated fat: 3 g
    • Sodium: 420 mg

    Disclaimer: Nutrition values are estimates and will vary depending on your leftovers and exact ingredients used.

    FAQs

    Can I make bubble and squeak without cabbage?

    Yes. Cabbage is traditional, but you can swap it for chopped Brussels sprouts, kale, spinach (squeezed very dry), or extra mixed veg. Aim for similar volume and keep the veg as dry as possible so the cakes crisp up.

    Can I pan-fry instead of baking?

    Absolutely. Heat a thin layer of oil in a frying pan over medium heat and cook the patties for 4–5 minutes per side until deeply golden. Work in batches and don’t move them too early or they can break.

    Why is my bubble and squeak mixture sticky?

    Sticky mixture usually means the mash is warm or the vegetables are wet. Chill the mash, squeeze the cabbage dry, and add a little extra flour if needed. A beaten egg can also help the patties hold their shape.

    Can I make it ahead for breakfast?

    Yes. Shape the patties, cover, and refrigerate for up to 24 hours before baking. You can also bake them in advance and reheat in a hot oven to bring back the crisp edges.

    What potatoes work best for bubble and squeak?

    Floury potatoes (like Maris Piper or King Edward) make a drier mash that crisps beautifully. If your mash is very buttery or creamy, add a bit more flour and make sure the oven is hot.

    Crispy Bubble and Squeak Cakes

    Recipe by Milli RoseCourse: Breakfast, Brunch, SideCuisine: BritishDifficulty: Easy
    Servings

    8

    cakes (approx.)
    Prep time

    10

    minutes
    Cooking time

    25

    minutes
    Total time

    35

    minutes
    Calories

    250

    kcal

    35

    minutes

    Crisp on the outside, soft in the middle, these bubble and squeak cakes are the perfect way to use up leftover mashed potatoes and cabbage. Bake them for an easy, hands-off crisp, then serve with fried eggs or bacon.

    Ingredients

    • 500g cold leftover mashed potatoes (or cooked, mashed potatoes), well chilled

    • 250g cooked cabbage (savoy/green), squeezed dry and finely chopped

    • 75g leftover cooked veg (carrot, sprouts, peas), finely chopped (optional)

    • 2 spring onions, finely sliced (optional)

    • 1 large egg, beaten (optional, helps binding)

    • 2 tbsp plain flour (plus extra for shaping if needed)

    • 1 tsp Dijon or English mustard (optional)

    • 3/4 tsp fine salt (adjust to taste, depending on leftovers)

    • 1/2 tsp black pepper

    • 2 tbsp vegetable oil

    • 25g butter, melted

    Directions

    • Preheat the oven to 220°C (200°C fan) and line a large tray with baking parchment. Brush the parchment lightly with a little of the oil.
    • In a large bowl, mix the cold mashed potatoes, chopped cabbage, any extra veg, and spring onions. Add the egg (if using), flour, mustard, salt, and pepper, then mix until evenly combined.
    • With lightly floured hands, shape into 8 patties (about 2cm thick). If the mixture feels sticky, add 1–2 more tablespoons of flour.
    • Place on the tray. Brush the tops with melted butter and a little oil for extra crisping.
    • Bake for 15 minutes, then carefully flip and bake for 8–10 minutes more until deep golden and crisp at the edges.
    • Rest for 5 minutes before serving so the cakes firm up. Serve as-is, or top with fried eggs, bacon, or sausages.

    Notes

    • Cold mash works best. Warm potatoes make the mixture soft and harder to crisp.
    • Squeeze cooked cabbage dry to avoid soggy cakes.
    • For an extra-crisp finish, pan-fry the baked cakes for 1–2 minutes per side in a hot frying pan.
    • Freeze baked cakes on a tray, then bag up for quick breakfasts.
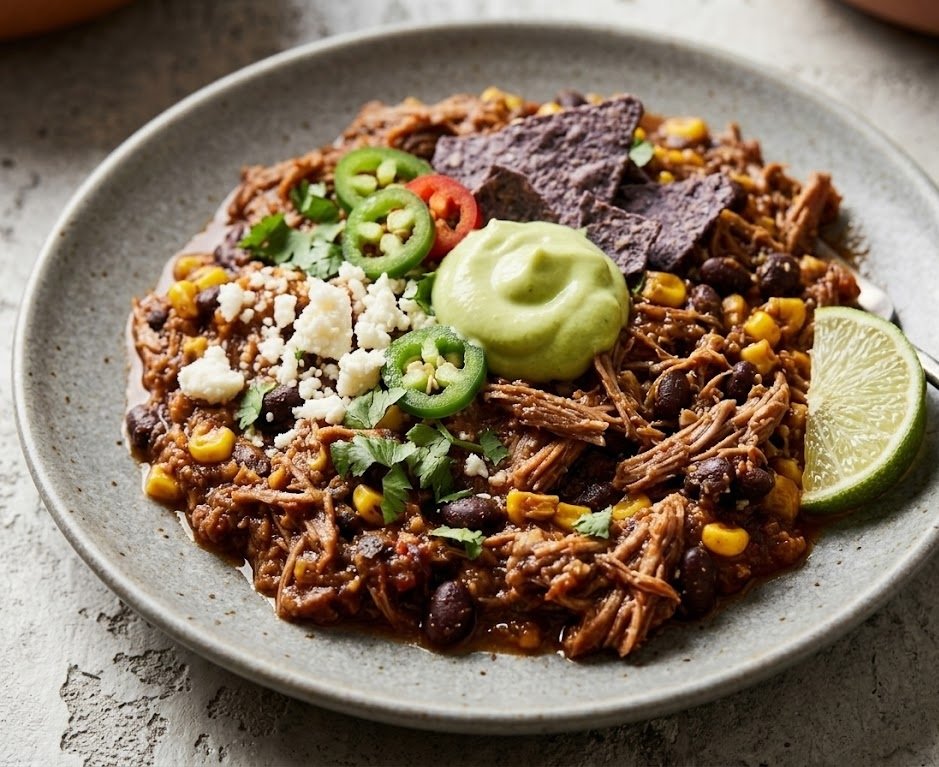
  • chili con carne recipe

    chili con carne recipe

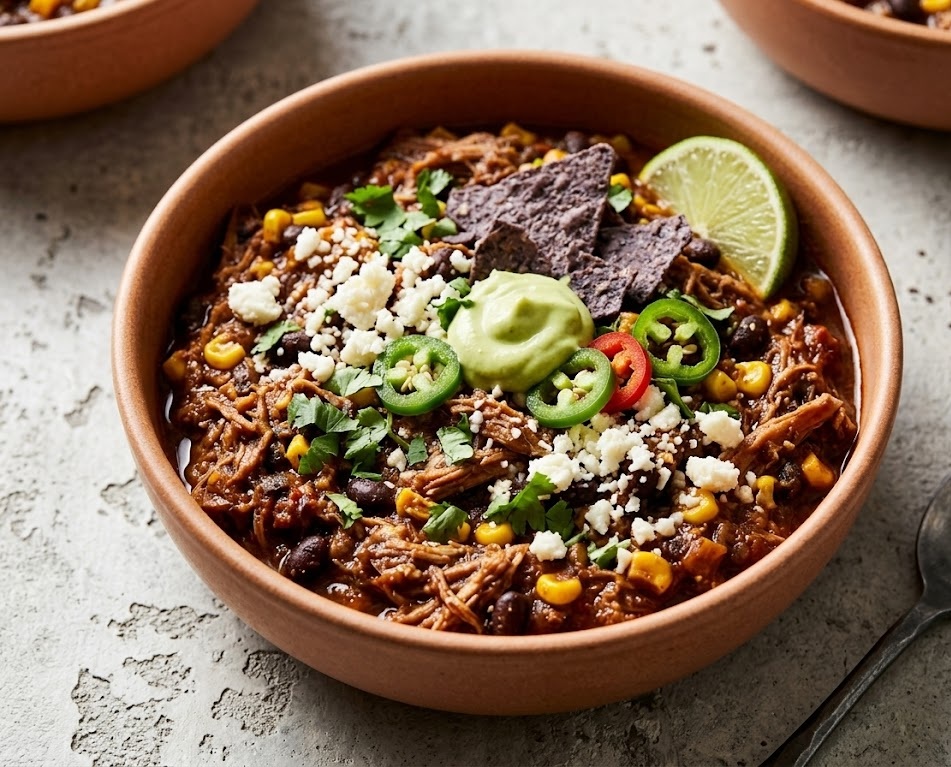
    This chili con carne is a rich, hearty bowl of slow-cooked comfort made with beef, beans, tomatoes, and warm spices. It’s thick and spoonable with a deep, smoky flavour and a gentle heat you can easily adjust. The method is straightforward and beginner-friendly, with most of the time being hands-off while it simmers. Total time is about 1 hour 45 minutes, and it tastes even better the next day.

    Ingredients

    For the chili base

    • 1 tbsp olive oil
    • 1 large onion, finely diced
    • 1 red pepper, diced
    • 2 carrots, finely diced (optional, but great for sweetness)
    • 4 garlic cloves, minced
    • 500g beef mince (10–15% fat gives the best flavour)

    Spices and seasoning

    • 2 tsp ground cumin
    • 2 tsp smoked paprika
    • 1 tsp chilli powder (plus more to taste)
    • 1 tsp dried oregano
    • 1/2 tsp ground coriander (optional)
    • 1/2 tsp fine salt, plus more to taste
    • 1/2 tsp black pepper

    Liquids and beans

    • 2 tbsp tomato purée
    • 1 x 400g tin chopped tomatoes
    • 250ml beef stock
    • 1 x 400g tin kidney beans, drained and rinsed
    • 1 x 400g tin black beans, drained and rinsed (or use another tin of kidney beans)
    • 1 tsp unsweetened cocoa powder (optional, adds a subtle richness)
    • 1 tbsp lime juice (to finish)

    Optional toppings (for serving)

    • Sour cream or Greek yoghurt
    • Grated cheddar
    • Sliced jalapeños
    • Fresh coriander
    • Diced avocado

    How to Make Chili Con Carne

    • Prepare the oven: Preheat the oven to 160°C or 140°C fan. Place a shelf in the middle of the oven so the pot cooks evenly and the chilli gently thickens without catching.
    • Soften the vegetables: Heat the olive oil in a large oven-safe pot (a Dutch oven is ideal) over medium heat. Add the onion, pepper, and carrots. Cook for 8 to 10 minutes, stirring now and then, until softened. Stir in the garlic and cook for 1 minute.
    • Brown the beef: Add the mince and cook for 6 to 8 minutes, breaking it up with a spoon, until well browned. Browning properly here gives you a deeper, meatier chilli.
    • Mix in the flavour base: Stir in the tomato purée, cumin, smoked paprika, chilli powder, oregano, coriander (if using), salt, and pepper. Cook for 1 to 2 minutes, stirring constantly, so the spices toast and become fragrant.
    • Bake (oven simmer) to develop flavour: Add the chopped tomatoes, beef stock, and cocoa powder (if using). Bring to a gentle simmer on the hob, then cover with a lid and transfer to the oven for 1 hour 15 minutes.
    • Thicken and add the beans: Carefully remove the pot from the oven and place it back on the hob over low heat. Stir in the kidney beans and black beans. Simmer uncovered for 10 to 15 minutes, stirring occasionally, until thick and glossy.
    • Cool and rest: Turn off the heat and let the chilli stand for 10 minutes. This short rest makes it thicker and helps the flavours settle.
    • Assemble and serve: Stir in the lime juice, then taste and adjust seasoning. Serve hot with your favourite sides and toppings.
    How to Make Chili Con Carne

    Tips

    Why is my chili con carne watery?

    It usually just needs a bit more uncovered simmering. Remove the lid and simmer on low for 10 to 20 minutes, stirring occasionally. If you want it thicker still, mash a small spoonful of beans against the side of the pot and stir them back in.

    How do I stop chili from tasting bitter or harsh?

    Burnt garlic or over-toasted spices are the common culprits. Keep the heat moderate, add garlic after the onions have softened, and toast the spices for only 1 to 2 minutes. If it still tastes sharp, a squeeze of lime at the end and a small pinch of sugar can balance it.

    What’s the best beef for chili con carne?

    Beef mince with a little fat (around 10 to 15%) gives the best flavour and texture. Very lean mince can taste dry, so you may need a touch more oil and a little extra simmering time to get it rich.

    How can I make it hotter or milder without ruining the flavour?

    For hotter chilli, add extra chilli powder a little at a time, or finish with sliced jalapeños or hot sauce at the table. For milder chilli, reduce the chilli powder and lean into smoked paprika and cumin for warmth without heat. Sour cream on top also softens spice nicely.

    Serving Suggestions

    • Steamed rice with grated cheddar and coriander
    • Nachos with melted cheese, jalapeños, and sour cream
    • Jacket potatoes with chilli and a spoon of Greek yoghurt
    • Soft tortillas with avocado and a squeeze of lime
    • Mac and cheese topped with a ladle of chilli

    Storage

    Room temperature

    Cool the chilli quickly, then do not leave it out for more than 2 hours (or 1 hour in very warm weather). Transfer to containers once it has stopped steaming heavily.

    Refrigerator

    Store in an airtight container for up to 4 days. Reheat in a saucepan over medium-low heat until piping hot, stirring often. Add a splash of water or stock if it has thickened too much.

    Freezing

    Chili con carne freezes beautifully for up to 3 months. Cool completely, portion into freezer-safe tubs, and label with the date. Defrost overnight in the fridge, then reheat thoroughly on the hob until bubbling hot all the way through.

    Nutrition

    • Calories: 520 kcal
    • Carbohydrates: 38 g
    • Protein: 36 g
    • Fat: 24 g
    • Saturated fat: 8 g
    • Sodium: 980 mg

    Disclaimer: Nutrition values are estimates and will vary depending on the mince, stock, and toppings you use.

    FAQs

    What is the secret to really good chili con carne?

    Brown the mince properly, toast the spices briefly, and give it time to simmer. That combination builds layers of flavour and takes the chilli from flat to rich and rounded.

    Can I make chili con carne without beans?

    Yes. Simply leave the beans out and simmer a little longer uncovered to thicken. You can also add extra peppers or a diced courgette for bulk.

    How do I thicken chili con carne quickly?

    Simmer it uncovered until it reduces, or mash a few spoonfuls of beans and stir them back in. If you are in a hurry, mix 1 tsp cornflour with 1 tbsp cold water and stir it in, then simmer for 2 to 3 minutes.

    Can I make chili con carne in a slow cooker?

    Yes. Brown the onion and mince first for best flavour, then add everything except the beans and cook on LOW for 6 to 8 hours (or HIGH for 3 to 4). Stir in the beans for the final 30 minutes.

    Is chili con carne better the next day?

    It often is. Resting overnight lets the spices mellow and the sauce thicken. Cool it quickly, refrigerate, then reheat gently with a splash of stock if needed.

    Chili Con Carne Recipe

    Recipe by Milli RoseCourse: DinnerCuisine: Tex-MexDifficulty: Easy
    Servings

    6

    bowls
    Prep time

    15

    minutes
    Cooking time

    1

    hour 

    30

    minutes
    Total time

    105

    minutes
    Calories

    520

    kcal

    1

    hour 

    45

    minutes

    A thick, hearty chili con carne made with beef mince, beans, tomatoes, and warm spices. Easy to make, freezer-friendly, and perfect for rice, nachos, or jacket potatoes.

    Ingredients

    • 1 tbsp olive oil

    • 1 large onion, finely diced

    • 1 red pepper, diced

    • 2 carrots, finely diced (optional)

    • 4 garlic cloves, minced

    • 500g beef mince (10–15% fat works well)

    • 2 tbsp tomato purée

    • 2 tsp ground cumin

    • 2 tsp smoked paprika

    • 1 tsp chilli powder (plus more to taste)

    • 1 tsp dried oregano

    • 1/2 tsp ground coriander (optional)

    • 1/2 tsp fine salt, plus more to taste

    • 1/2 tsp black pepper

    • 1 x 400g tin chopped tomatoes

    • 250ml beef stock

    • 1 x 400g tin kidney beans, drained and rinsed

    • 1 x 400g tin black beans, drained and rinsed (or use another tin of kidney beans)

    • 1 tsp unsweetened cocoa powder (optional, for depth)

    • 1 tbsp lime juice (to finish)

    Directions

    • Preheat the oven to 160°C (140°C fan). Place a shelf in the middle of the oven.
    • Soften the onion and pepper in olive oil, then add garlic.
    • Brown the beef mince well, then stir in tomato purée and spices.
    • Add tomatoes and stock, bring to a simmer, then cover and cook in the oven for 75 minutes.
    • Stir in beans and cook uncovered for 10–15 minutes to thicken.
    • Rest for 10 minutes, then finish with lime juice and adjust seasoning.

    Notes

    • For a thicker chili, simmer uncovered for the final 10–15 minutes.
    • For a milder chili, use less chilli powder and add a spoon of sour cream when serving.
    • Chili tastes even better the next day and freezes beautifully.
  • Soda Farls Recipe

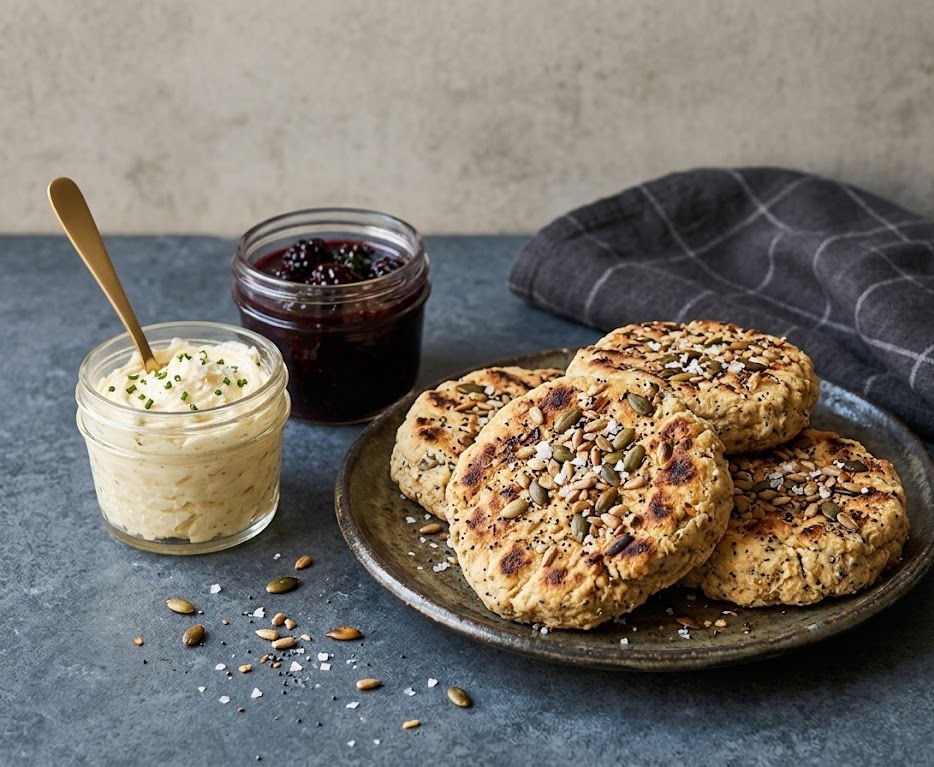
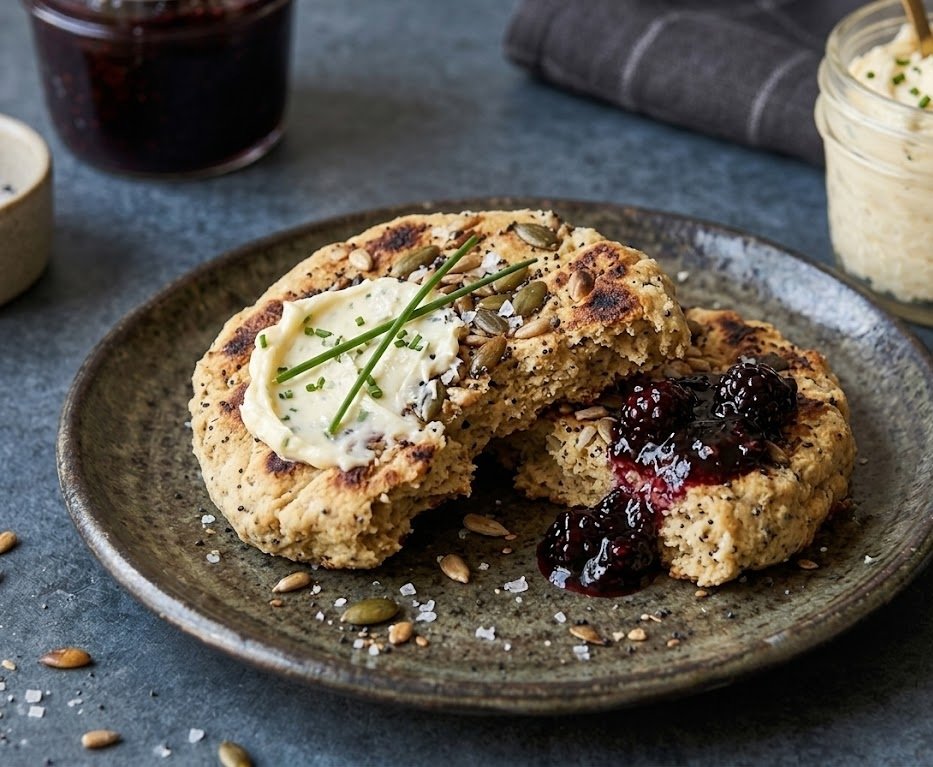
    Soda Farls Recipe

    Soda farls are a traditional Northern Irish quick bread, cooked on a hot griddle and cut into quarters (farls) before cooking. They are tender and soft in the centre with a lightly crisp, flour-dusted crust, and they taste gently tangy thanks to buttermilk. This is an easy, beginner-friendly bread with no yeast, no proving, and very little kneading. From start to finish, you can have warm soda farls on the table in about 25 minutes.

    Ingredients

    For the soda farls

    • 450g plain flour, plus extra for dusting
    • 1 tsp bicarbonate of soda (baking soda)
    • 1 tsp fine salt
    • 40g cold unsalted butter, diced (optional, but adds tenderness)
    • 360–420ml buttermilk, as needed

    For cooking and serving

    • A little extra flour, for the work surface
    • Butter, for serving
    • Jam or honey (optional)

    How to Make Soda Farls

    • Prepare the oven: Preheat the oven to 200°C or 180°C fan. Place a shelf in the middle of the oven. Line a small baking tray with baking parchment, ready for finishing the farls after griddling.
    • Prepare the pan: Set a cast-iron skillet, griddle pan, or heavy frying pan over medium-low heat. Keep it dry with no oil. Soda farls cook best gently, so the centre cooks through before the outside gets too dark.
    • Mix the dry ingredients: In a large bowl, whisk together the flour, bicarbonate of soda, and salt. This quick whisk matters because it spreads the raising agent evenly, so you do not get bitter pockets of baking soda.
    • Rub in the butter (optional): Add the cold diced butter and rub it into the flour with your fingertips until it looks like fine breadcrumbs. This step gives a softer, more tender farl, especially if you like them split and buttered.
    • Add the buttermilk: Make a well in the centre and pour in most of the buttermilk. Stir with a fork until a shaggy dough forms. If it looks dry or floury, add a splash more buttermilk. You want a soft dough that holds together but is not sticky and wet.
    • Shape and cut: Tip the dough onto a lightly floured surface. Bring it together with just a few gentle turns. Divide into 2 equal pieces, pat each into a round about 2cm thick, then cut each round into 4 wedges to make 8 farls.
    • Griddle: Place the farls onto the hot pan with a little space between them. Cook for 5–7 minutes per side, until nicely browned and easy to flip. If they are colouring too fast, turn the heat down.
    • Bake to finish: Transfer the griddled farls to the lined baking tray and bake for 5–8 minutes, until set in the centre. A good sign is a hollow-ish sound when you tap the thickest part.
    • Cool and assemble: Cool on a wire rack for 10 minutes so the crumb finishes setting. Split each farl, add plenty of butter, and serve warm.
    How to Make Soda Farls

    Tips

    Why are my soda farls tough?

    Tough farls usually come from overworking the dough or adding too much flour while shaping. Mix just until the dough comes together, then handle it lightly. If the dough feels sticky, dust your hands and the surface lightly rather than kneading in lots of extra flour.

    How do I stop the outside browning before the middle is cooked?

    Keep the heat at medium-low and be patient. If your pan runs hot, move it slightly off the heat for a moment between flips. Finishing the farls in the oven for a few minutes is the easiest way to guarantee a cooked centre without scorching.

    What is the best pan for soda farls?

    A cast-iron skillet or flat griddle gives the most even browning and steady heat. A heavy-based frying pan also works well. Thin pans tend to create hot spots, which can burn the surface.

    Can I make buttermilk at home?

    Yes. Mix 400ml milk with 1 tablespoon lemon juice or white vinegar, then leave it for 5 minutes. It will thicken slightly and work well here, although real buttermilk usually gives the best flavour.

    Serving Suggestions

    • Split and spread with salted butter and strawberry jam.
    • Serve alongside a full Irish breakfast with eggs and bacon.
    • Toast leftovers and top with cheddar and chutney.
    • Use as a quick bread with soup, especially potato or leek.

    Storage

    Room temperature

    Cool completely, then store in an airtight container for up to 2 days. If your kitchen is warm, wrap them well to prevent drying.

    Refrigerator

    I do not recommend refrigerating soda farls because it can make them stale faster. If you must, keep them tightly wrapped and toast before serving.

    Freezing

    Freeze cooled farls in a freezer bag for up to 2 months. For best results, slip a small piece of baking parchment between farls so you can take out what you need. Defrost at room temperature, then toast or warm in a low oven until heated through.

    Nutrition

    • Calories: 240 kcal
    • Carbohydrates: 45 g
    • Protein: 7 g
    • Fat: 4 g
    • Saturated Fat: 2 g
    • Sodium: 430 mg

    Disclaimer: Nutrition values are estimates and will vary based on brands, exact measurements, and serving size.

    FAQs

    What are soda farls made of?

    Soda farls are made from plain flour, bicarbonate of soda (baking soda), salt, and buttermilk. Some versions also include a little butter for tenderness. The dough is shaped into a round, cut into quarters (farls), then cooked on a griddle.

    What is the difference between soda farls and soda bread?

    They use similar ingredients, but soda farls are typically cooked on a griddle and cut into wedges before cooking, while soda bread is usually baked as a loaf in the oven. Farls cook faster and have a more evenly browned, pan-cooked crust.

    Can I make soda farls without buttermilk?

    Yes. You can make a quick substitute by mixing 400ml milk with 1 tablespoon lemon juice or white vinegar and letting it stand for 5 minutes. You may need slightly less or more liquid depending on your flour.

    Why do my soda farls taste bitter?

    Bitterness usually comes from too much bicarbonate of soda or uneven mixing. Measure the baking soda carefully and whisk it through the flour well before adding the buttermilk so it distributes evenly.

    Can I cook soda farls only on the griddle without finishing in the oven?

    Yes, as long as you keep the heat low enough and cook them long enough for the centre to set. The oven finish is a helpful extra step if your farls are browning quickly or you prefer a guaranteed cooked-through centre.

    Soda Farls Recipe

    Recipe by Milli RoseCourse: Breakfast, SideCuisine: IrishDifficulty: Easy
    Servings

    8

    farls
    Prep time

    10

    minutes
    Cooking time

    15

    minutes
    Total time

    25

    minutes
    Calories

    240

    kcal

    25

    minutes

    Soft, tender Irish soda farls cooked on a griddle and finished briefly in the oven for perfect doneness. A quick, no-yeast bread that’s ideal with butter and jam or alongside a full breakfast.

    Ingredients

    • 450g plain flour, plus extra for dusting

    • 1 tsp bicarbonate of soda (baking soda)

    • 1 tsp fine salt

    • 40g cold unsalted butter, diced (optional but recommended)

    • 360–420ml buttermilk, as needed

    • Butter, for serving

    Directions

    • Preheat the oven to 200°C (180°C fan) and line a small tray. Heat a dry cast-iron pan or griddle over medium-low heat.
    • Mix flour, bicarbonate of soda, and salt in a large bowl. Rub in the cold butter (if using) until it looks like fine crumbs.
    • Stir in most of the buttermilk to make a soft, shaggy dough. Add more buttermilk a splash at a time if it looks dry.
    • Tip onto a floured surface and bring together with a few gentle turns. Divide into 2 pieces, shape each into a round about 2cm thick, then cut each round into 4 farls.
    • Cook on the hot, dry griddle for 5–7 minutes per side until well browned and lifting easily. Adjust heat as needed so they do not scorch.
    • Transfer to the oven for 5–8 minutes to finish cooking through. They should sound hollow when tapped and feel set in the centre.
    • Cool for 10 minutes on a rack, then split and serve warm with butter.

    Notes

    • Handle the dough as little as possible. Overworking makes farls tough.
    • Keep the heat medium-low. Too hot and they brown before the centre cooks.
    • No buttermilk? Use 400ml milk mixed with 1 tbsp lemon juice or white vinegar. Rest 5 minutes before using.

slot depo

sicbo online