Author: Rose Melton

  • Gazpacho Recipe

    Gazpacho Recipe

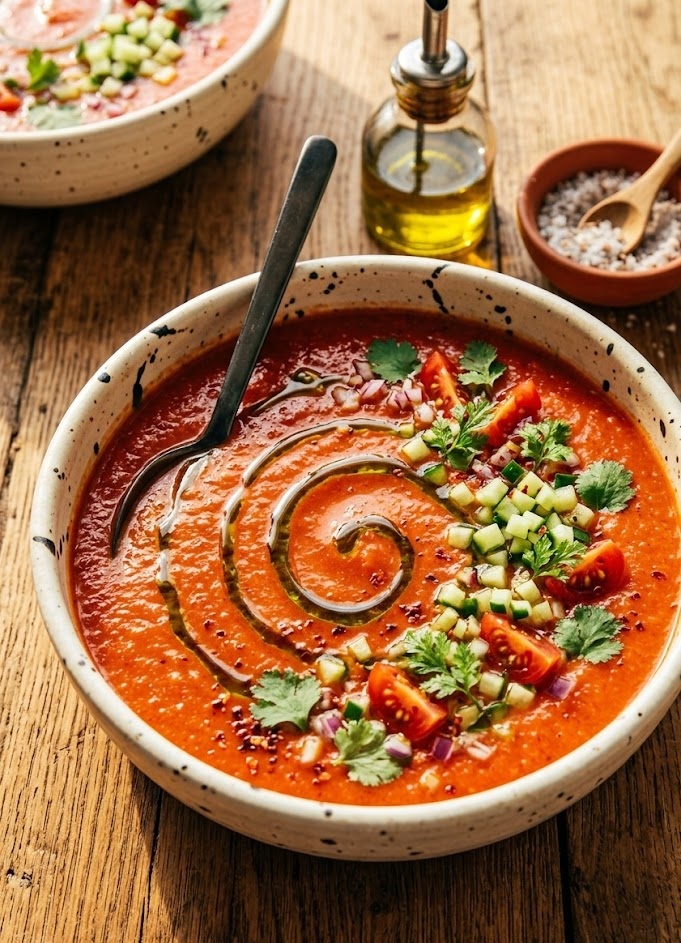
    This gazpacho recipe is the perfect chilled soup for warm days when you want something fresh, light, and full of vibrant flavour. Made with ripe tomatoes, crisp cucumber, sweet peppers, garlic, and olive oil, this classic Spanish dish has a smooth, silky texture with a refreshing bite. It is incredibly easy to prepare with no cooking required, making it ideal for beginners and busy home cooks alike. From start to finish, this refreshing homemade gazpacho takes about 20 minutes to prepare, plus chilling time for the best flavour.

    Ingredients

    For the Gazpacho

    • 1kg ripe tomatoes, roughly chopped
    • 1 medium cucumber, peeled and chopped
    • 1 red bell pepper, deseeded and chopped
    • 1 small red onion, chopped
    • 2 garlic cloves, peeled
    • 2 slices stale white bread, crusts removed
    • 3 tablespoons extra virgin olive oil
    • 2 tablespoons red wine vinegar
    • 250ml cold water
    • 1 teaspoon sea salt
    • ½ teaspoon freshly ground black pepper

    For Garnishing

    • Extra chopped cucumber
    • Diced tomatoes
    • Chopped red pepper
    • Fresh basil leaves
    • Extra virgin olive oil for drizzling
    • Crusty bread or croutons

    How to Make Gazpacho Recipe

    • Prepare the vegetables: Wash the tomatoes, cucumber, and pepper thoroughly. Roughly chop all the vegetables into medium-sized pieces so they blend evenly.
    • Soak the bread: Tear the stale bread into small pieces and soak it in a little cold water for 2 to 3 minutes. This helps create the traditional creamy texture.
    • Add ingredients to the blender: Place the tomatoes, cucumber, red pepper, onion, garlic, soaked bread, olive oil, vinegar, salt, pepper, and cold water into a large blender or food processor.
    • Blend until smooth: Blend the mixture for 1 to 2 minutes until completely smooth and silky. Scrape down the sides if needed to ensure everything blends evenly.
    • Taste and adjust: Taste the gazpacho and adjust the seasoning with extra salt, pepper, or vinegar if needed. If the soup feels too thick, add a little extra cold water.
    • Chill the soup: Transfer the gazpacho to a large bowl or jug, cover, and refrigerate for at least 2 hours. Chilling allows the flavours to develop fully.
    • Serve and garnish: Pour the chilled gazpacho into bowls or glasses. Top with diced vegetables, fresh basil, a drizzle of olive oil, and croutons before serving.

    How to Make Gazpacho Recipe

    Tips for the Best Gazpacho Recipe

    How do I make gazpacho smoother?

    Blend the soup for a little longer and strain it through a fine sieve for an ultra-silky texture.

    Can I make gazpacho ahead of time?

    Yes, gazpacho actually tastes better after a few hours in the refrigerator because the flavours have time to deepen and blend together.

    Why is my gazpacho too acidic?

    If your tomatoes are very acidic, add a small pinch of sugar to balance the flavour naturally.

    What are the best tomatoes for gazpacho?

    Use ripe, juicy tomatoes such as Roma or vine-ripened tomatoes for the richest flavour and colour.

    Can I make gazpacho without bread?

    Yes, you can leave out the bread for a lighter and gluten-free version, although the soup will be slightly thinner.

    Serving Suggestions

    • Serve with warm crusty bread
    • Pair with grilled chicken or seafood
    • Top with homemade croutons
    • Enjoy alongside a fresh green salad
    • Serve in small glasses as a summer starter

    Storage

    Room Temperature

    Gazpacho should not be left at room temperature for more than 1 hour, especially during warm weather.

    Refrigerator

    Store the soup in an airtight container in the refrigerator for up to 4 days. Stir well before serving.

    Freezing

    Freeze gazpacho in freezer-safe containers for up to 2 months. Thaw overnight in the refrigerator and blend briefly before serving for the best texture.

    Nutrition

    • Calories: 165 kcal
    • Carbohydrates: 14g
    • Protein: 3g
    • Fat: 11g
    • Saturated Fat: 2g
    • Sodium: 420mg

    Nutrition values are estimates and may vary depending on ingredients used.

    FAQs

    Can I make gazpacho without a blender?

    Yes, you can finely chop all the vegetables by hand for a chunkier traditional texture, although blending creates a smoother soup.

    How long should gazpacho chill before serving?

    For the best flavour, chill gazpacho for at least 2 hours before serving.

    Can I freeze homemade gazpacho?

    Yes, gazpacho freezes well for up to 2 months in airtight containers.

    Is gazpacho served hot or cold?

    Traditional gazpacho is always served cold, making it perfect for warm weather meals.

    Gazpacho Recipe

    Recipe by Milli RoseCourse: SoupCuisine: SpanishDifficulty: Easy
    Servings

    6

    servings
    Prep time

    20

    minutes
    Cooking timeminutes
    Total time

    140

    minutes
    Calories

    165

    kcal

    A refreshing chilled Spanish tomato soup made with fresh vegetables, olive oil, and bread for a smooth and vibrant summer dish.

    Ingredients

    • 1kg ripe tomatoes, roughly chopped

    • 1 medium cucumber, peeled and chopped

    • 1 red bell pepper, deseeded and chopped

    • 1 small red onion, chopped

    • 2 garlic cloves

    • 2 slices stale white bread

    • 3 tablespoons extra virgin olive oil

    • 2 tablespoons red wine vinegar

    • 250ml cold water

    • 1 teaspoon sea salt

    • ½ teaspoon black pepper

    • Extra chopped cucumber

    • Diced tomatoes

    • Fresh basil leaves

    • Crusty bread or croutons

    Directions

    • Wash and roughly chop all vegetables.
    • Soak the bread in cold water for a few minutes.
    • Add vegetables, bread, olive oil, vinegar, seasoning, and water to a blender.
    • Blend until completely smooth and silky.
    • Taste and adjust seasoning if needed.
    • Chill the gazpacho in the refrigerator for at least 2 hours.
    • Serve cold with fresh garnishes and crusty bread.

    Notes

    • Use ripe tomatoes for the best flavour and colour.
    • Chilling the soup improves the taste significantly.
    • Blend longer for an extra smooth texture.
  • Milk Bread Recipe

    Milk Bread Recipe

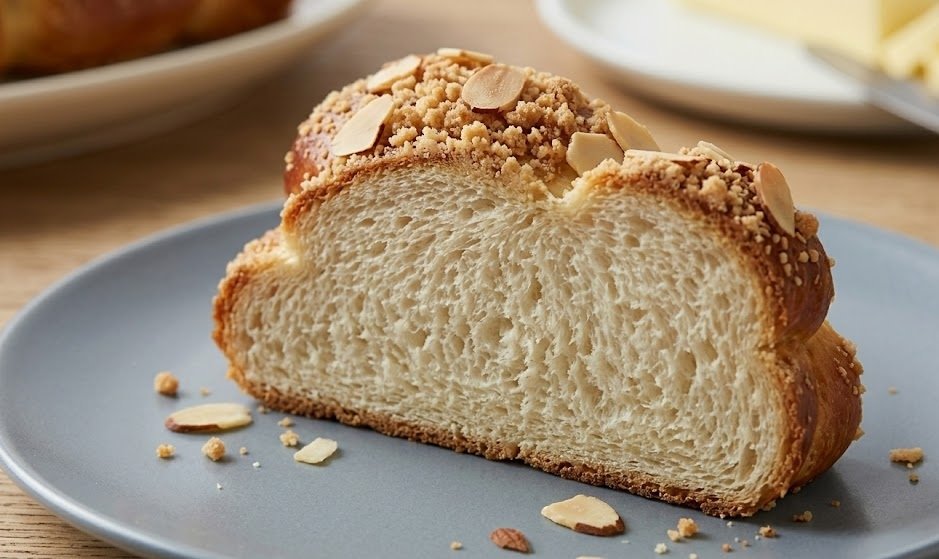
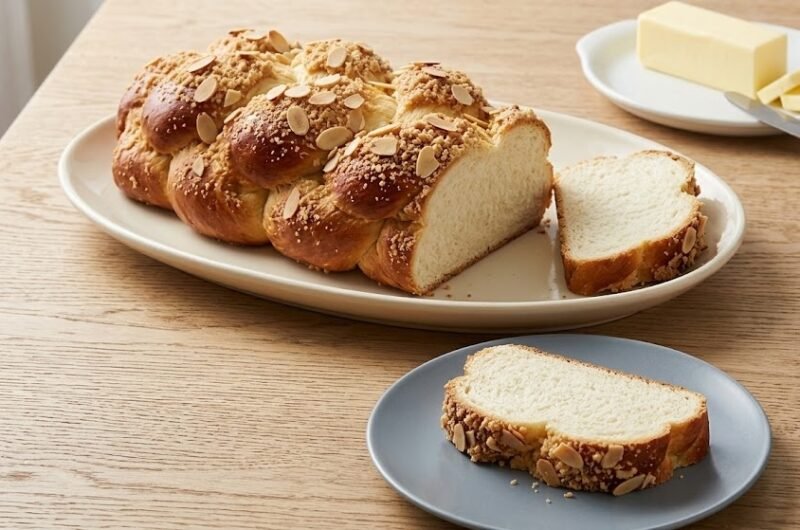
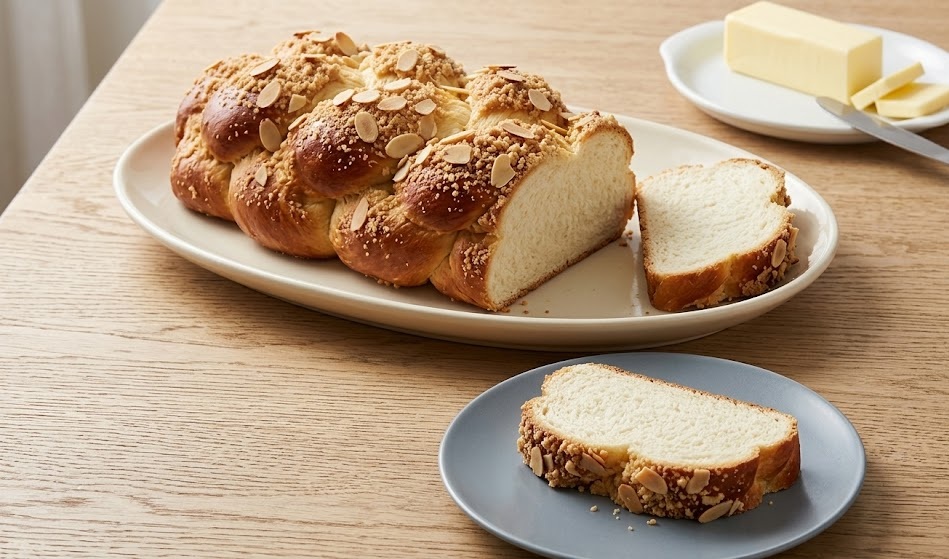
    If you love soft, fluffy homemade bread with a rich buttery flavor, this milk bread recipe is one you’ll want to bake again and again. Known for its tender crumb and beautifully light texture, milk bread is perfect for sandwiches, breakfast toast, or simply enjoying warm with butter. This recipe uses simple pantry ingredients and an easy step-by-step method that works wonderfully for beginner bakers. From start to finish, the entire process takes around 3 hours, including rising time, and rewards you with bakery-style bread that stays soft for days.

    What Is Milk Bread?

    Milk bread is an incredibly soft and slightly sweet bread made with milk, butter, sugar, and yeast. It is famous for its pillowy texture and delicate crumb that almost melts in your mouth. Japanese milk bread, often called Hokkaido milk bread, is especially loved for its feathery softness and rich flavor.

    This homemade version bakes into a golden loaf with a beautifully tender interior that pulls apart easily. The milk and butter give the bread richness, while the kneading process creates the smooth elastic dough responsible for its signature texture.

    Milk Bread Recipe Ingredients

    For the Dough

    • 4 cups bread flour
    • 2¼ teaspoons instant yeast
    • ¼ cup granulated sugar
    • 1 teaspoon salt
    • 1 cup warm whole milk
    • 1 large egg
    • ¼ cup unsalted butter, softened
    • 2 tablespoons milk powder

    For Brushing

    • 1 tablespoon milk
    • 1 tablespoon melted butter

    Kitchen Equipment

    • Large mixing bowl
    • Stand mixer with dough hook or mixing spoon
    • 9×5-inch loaf tin
    • Measuring cups and spoons
    • Pastry brush
    • Wire cooling rack

    Preparation and Baking Time

    • Prep Time: 25 minutes
    • Rising Time: 1 hour 30 minutes
    • Baking Time: 30 minutes
    • Total Time: Approximately 3 hours
    • Servings: 10 slices

    How to Make Milk Bread Recipe

    • Prepare the yeast mixture: Warm the milk until slightly warm but not hot. Pour it into a large bowl and stir in the sugar and yeast. Leave for 5 to 10 minutes until slightly foamy.
    • Mix the dough: Add the bread flour, salt, milk powder, egg, and softened butter to the bowl. Mix until a shaggy dough forms.
    • Knead until smooth: Knead the dough for 10 to 12 minutes until smooth, elastic, and slightly tacky. If using a stand mixer, knead on medium speed with the dough hook attachment.
    • First rise: Place the dough into a lightly greased bowl and cover with a clean towel. Leave to rise in a warm place for about 1 hour or until doubled in size.
    • Shape the dough: Punch down the risen dough and divide it into three equal portions. Shape each portion into a smooth ball, then roll into oval shapes and fold into thirds before rolling up tightly.
    • Prepare the loaf tin: Grease a 9×5-inch loaf tin lightly with butter. Arrange the rolled dough pieces side by side inside the tin.
    • Second rise: Cover loosely and allow the dough to rise again for 40 to 45 minutes until puffy and nearly doubled.
    • Prepare the oven: Preheat the oven to 180°C or 160°C fan. Place a shelf in the middle of the oven so the bread bakes evenly.
    • Brush and bake: Brush the top gently with milk for a shiny golden finish. Bake for 28 to 32 minutes until deeply golden and the loaf sounds hollow when tapped underneath.
    • Finish and cool: Remove the loaf from the tin and brush lightly with melted butter while still warm. Cool completely on a wire rack before slicing.
    How to Make Milk Bread Recipe

    Helpful Tips for the Best Milk Bread

    Why is my milk bread not soft enough?

    Milk bread becomes soft through proper kneading and enough rising time. Make sure the dough is kneaded until elastic and avoid adding too much extra flour.

    Can I make milk bread without a stand mixer?

    Yes, this dough can easily be kneaded by hand. It takes slightly longer, but the texture turns out beautifully soft and fluffy.

    How do I know when the bread is fully baked?

    The loaf should have a deep golden top and sound hollow when tapped underneath. You can also check that the internal temperature reaches 88°C to 90°C.

    Why did my bread collapse after baking?

    Over-proofing can cause the loaf to collapse. Allow the dough to rise until doubled but not excessively puffed.

    Can I use plain flour instead of bread flour?

    You can, but bread flour gives the loaf a softer and chewier texture because of its higher protein content.

    Serving Suggestions

    • Serve warm with butter and jam
    • Use for soft sandwiches
    • Toast and drizzle with honey
    • Make French toast with thick slices
    • Pair with soup for a comforting meal

    Storage Instructions

    Room Temperature

    Store the bread in an airtight container or bread bag for up to 3 days. Keep it in a cool dry place.

    Refrigerator

    Although refrigeration can dry bread slightly, you can refrigerate it for up to 5 days in a sealed container.

    Freezing

    Slice the bread before freezing so individual pieces can be removed easily. Freeze in an airtight freezer bag for up to 2 months.

    Nutrition Information

    • Calories: 220 kcal
    • Carbohydrates: 34g
    • Protein: 7g
    • Fat: 6g
    • Saturated Fat: 3g
    • Sodium: 240mg

    Nutrition values are estimates and may vary depending on ingredients used.

    FAQs

    Can I make milk bread ahead of time?

    Yes, you can bake the bread a day in advance and store it tightly wrapped to keep it soft and fresh.

    Why is Japanese milk bread so soft?

    The milk, butter, and enriched dough create a tender crumb while proper kneading develops elasticity for the signature fluffy texture.

    Can I freeze milk bread dough?

    Yes, after the first rise you can freeze the shaped dough tightly wrapped for up to 1 month.

    What is the best way to reheat milk bread?

    Warm slices in the microwave for 10 seconds or toast lightly for a fresh bakery-style texture.

    Milk Bread Recipe

    Recipe by Milli RoseCourse: BreadCuisine: JapaneseDifficulty: Easy
    Servings

    4

    servings
    Prep time

    30

    minutes
    Cooking time

    40

    minutes
    Calories

    300

    kcal
    Total time

    1

    hour 

    10

    minutes

    Soft, fluffy homemade milk bread with a rich buttery flavor and tender crumb. Perfect for sandwiches, toast, or enjoying warm with butter.

    Ingredients

    • 4 cups bread flour

    • 2¼ teaspoons instant yeast

    • ¼ cup granulated sugar

    • 1 teaspoon salt

    • 1 cup warm whole milk

    • 1 large egg

    • ¼ cup unsalted butter, softened

    • 2 tablespoons milk powder

    Directions

    • Warm the milk and mix with sugar and yeast. Leave until foamy.
    • Add flour, salt, milk powder, egg, and butter. Mix into a dough.
    • Knead until smooth and elastic.
    • Place in a greased bowl and leave to rise until doubled.
    • Divide and shape the dough into rolls before placing into the loaf tin.
    • Allow the dough to rise again until puffy.
    • Preheat oven to 180°C and brush the dough with milk.
    • Bake for 28 to 32 minutes until golden brown.
    • Brush with melted butter and cool completely before slicing.

    Notes

    • Use bread flour for the softest texture.
    • Avoid adding too much extra flour during kneading.
    • The loaf freezes beautifully for later use.
  • key lime pie recipe

    key lime pie recipe

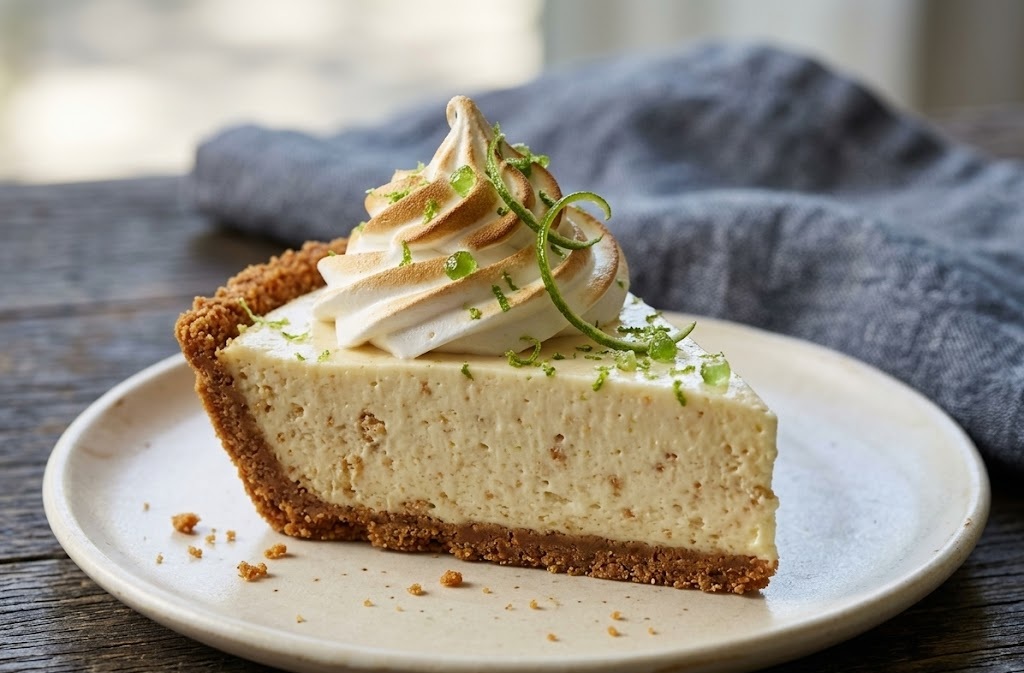
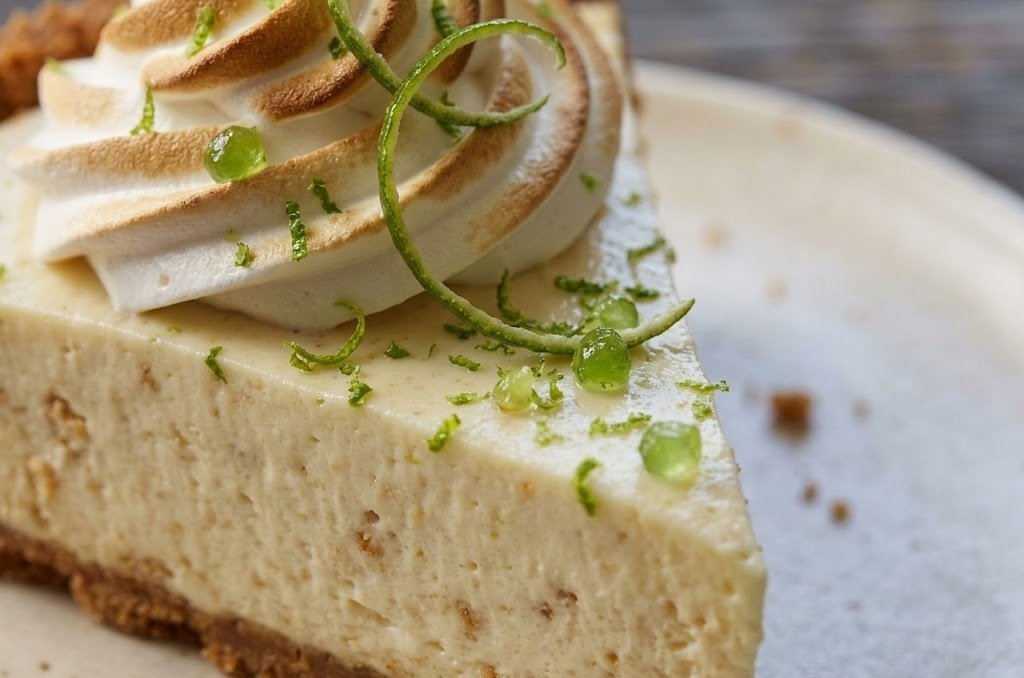
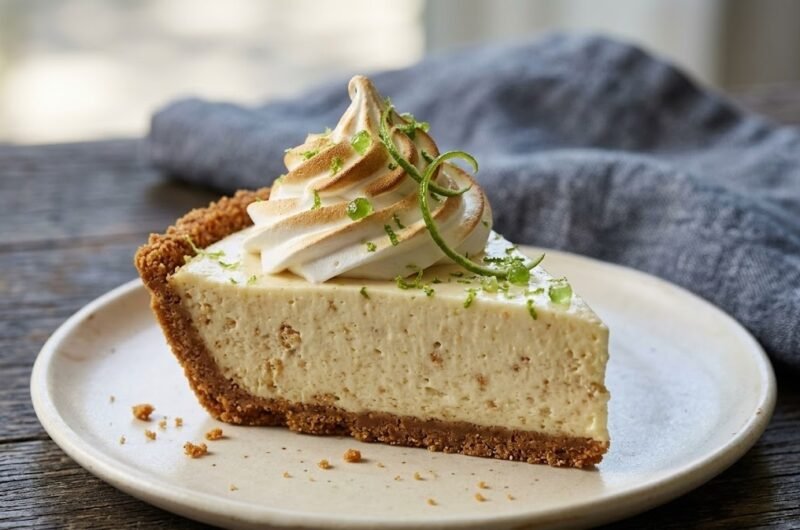
    This key lime pie recipe is bright, creamy, and packed with fresh citrus flavor in every bite. The filling is silky smooth with the perfect balance of sweetness and tanginess, all tucked inside a crisp buttery biscuit crust and topped with soft whipped cream. It may look impressive, but this pie is wonderfully simple to make, even for beginner bakers. From start to finish, the whole recipe takes around 4 hours including chilling time, making it perfect for weekends, holidays, or summer gatherings.

    What Is Key Lime Pie?

    Key lime pie is a classic American dessert known for its creamy citrus filling and crisp crumb crust. Traditional versions are made with key lime juice, sweetened condensed milk, and egg yolks, which create a rich custard-like texture after baking. The flavor is fresh, zesty, sweet, and slightly tart, making it one of the most refreshing desserts you can serve.

    This homemade version delivers a smooth filling with a crisp buttery crust and a soft whipped cream topping that balances the citrus beautifully. It is chilled before serving, which gives the pie its signature cool and creamy texture.

    Key Lime Pie Recipe Ingredients

    For the Crust

    • 250g digestive biscuits or graham crackers, crushed
    • 100g unsalted butter, melted
    • 2 tablespoons caster sugar

    For the Filling

    • 4 large egg yolks
    • 2 tins sweetened condensed milk (397g each)
    • 160ml key lime juice
    • 1 tablespoon finely grated lime zest

    For the Topping

    • 300ml double cream
    • 2 tablespoons icing sugar
    • Lime slices or extra zest for decoration

    Kitchen Equipment

    • 23cm pie dish
    • Mixing bowls
    • Whisk
    • Food processor or rolling pin
    • Measuring jug
    • Spatula

    Preparation and Cooking Time

    • Prep Time: 20 minutes
    • Cooking Time: 15 minutes
    • Chilling Time: 3 hours
    • Total Time: 3 hours 35 minutes
    • Servings: 10 slices

    How to Make Key Lime Pie Recipe

    • Prepare the oven: Preheat the oven to 180°C or 160°C fan. Place a shelf in the middle of the oven so the pie bakes evenly and the crust turns lightly golden.
    • Make the biscuit crust: Crush the digestive biscuits into fine crumbs using a food processor or rolling pin. Tip the crumbs into a bowl and stir in the melted butter and caster sugar until the texture resembles wet sand.
    • Press into the pie dish: Spoon the crumb mixture into a 23cm pie dish. Press firmly into the base and sides using the back of a spoon or the bottom of a glass. Make sure the crust is compact and even.
    • Bake the crust: Place the crust into the oven and bake for 10 minutes until lightly golden and set. Remove from the oven and allow it to cool slightly while preparing the filling.
    • Whisk the egg yolks: Add the egg yolks to a large bowl and whisk for about 2 minutes until slightly thickened and pale.
    • Add the condensed milk: Pour in the sweetened condensed milk and whisk until fully smooth and combined.
    • Mix in the lime: Add the key lime juice and lime zest. Whisk again until the mixture thickens slightly and becomes silky smooth.
    • Fill the crust: Pour the lime filling into the prepared crust and smooth the top with a spatula.
    • Bake the pie: Return the pie to the oven and bake for 15 minutes. The filling should look set around the edges with a slight wobble in the centre.
    • Cool completely: Remove the pie from the oven and allow it to cool at room temperature for 30 minutes.
    • Chill before serving: Transfer the pie to the refrigerator and chill for at least 3 hours until fully set and cold.
    • Prepare the topping: Whip the double cream and icing sugar together until soft peaks form. Spoon or pipe onto the chilled pie and decorate with lime slices or zest before serving.
    How to Make Key Lime Pie Recipe

    Helpful Tips for the Best Pie

    How do I keep the crust from falling apart?

    Press the crumb mixture firmly into the dish and bake it before adding the filling. This helps the crust hold together neatly when sliced.

    Can I use regular limes instead of key limes?

    Yes, regular Persian limes work very well if key limes are unavailable. The flavor will be slightly less floral but still delicious and fresh.

    Why is my filling not setting properly?

    The filling needs enough chilling time to firm up completely. Make sure the pie chills for at least 3 hours before slicing.

    How do I get neat slices?

    Use a sharp knife dipped in warm water and wipe it clean between slices for smooth, tidy servings.

    Can I make this pie ahead of time?

    Yes, key lime pie is perfect for making ahead. It tastes even better after chilling overnight in the refrigerator.

    Serving Suggestions

    • Serve chilled with extra whipped cream
    • Add fresh berries for color and freshness
    • Pair with iced coffee or hot tea
    • Garnish with lime zest curls for presentation
    • Serve with coconut ice cream for a tropical twist

    Storage Instructions

    Room Temperature

    This pie should not be left at room temperature for more than 2 hours because of the dairy-based filling.

    Refrigerator

    Store covered in the refrigerator for up to 4 days. Keep the pie chilled until ready to serve for the best texture.

    Freezing

    You can freeze the pie without whipped cream for up to 2 months. Wrap tightly in plastic wrap and foil. Thaw overnight in the refrigerator before serving.

    Nutrition Information

    • Calories: 420 kcal
    • Carbohydrates: 42g
    • Protein: 7g
    • Fat: 25g
    • Saturated Fat: 14g
    • Sodium: 210mg

    Nutrition values are estimates and may vary depending on ingredient brands and portion sizes.

    FAQs

    Can I make key lime pie without baking?

    Yes, some no-bake versions use whipped cream or cream cheese for stability, but the traditional version is lightly baked for the best texture.

    What is the difference between key limes and regular limes?

    Key limes are smaller and more aromatic with a slightly floral flavor, while regular limes are larger and sharper in taste.

    Can I freeze key lime pie?

    Yes, key lime pie freezes very well. Wrap it tightly and freeze for up to 2 months.

    Why is my key lime pie watery?

    Watery pie usually happens when the filling has not chilled long enough or too much juice was added.

    Key Lime Pie Recipe

    Recipe by Milli RoseCourse: DessertCuisine: AmericanDifficulty: Easy
    Servings

    4

    servings
    Prep time

    30

    minutes
    Cooking time

    40

    minutes
    Calories

    300

    kcal
    Total time

    1

    hour 

    10

    minutes

    Creamy and tangy key lime pie with a buttery biscuit crust and whipped cream topping. A refreshing dessert perfect for any occasion.

    Ingredients

    • 250g digestive biscuits or graham crackers, crushed

    • 100g unsalted butter, melted

    • 2 tbsp caster sugar

    • 4 large egg yolks

    • 2 tins sweetened condensed milk

    • 160ml key lime juice

    • 1 tbsp lime zest

    • 300ml double cream

    • 2 tbsp icing sugar

    • Lime slices for decoration

    Directions

    • Preheat oven to 180°C or 160°C fan.
    • Mix biscuit crumbs with melted butter and sugar.
    • Press mixture into pie dish and bake for 10 minutes.
    • Whisk egg yolks until pale.
    • Add condensed milk, lime juice and zest.
    • Pour filling into crust.
    • Bake pie for 15 minutes until set around the edges.
    • Cool completely then chill for 3 hours.
    • Whip cream with icing sugar and decorate pie before serving.

    Notes

    • Chill thoroughly before slicing for the cleanest cuts.
    • Fresh lime juice gives the best flavor.
    • The pie can be made one day ahead and refrigerated overnight.
  • Simple pizza recipe

    Simple pizza recipe

    This simple pizza recipe is perfect for anyone who wants homemade pizza with a crisp golden crust, rich tomato sauce, and bubbling melted cheese without complicated steps. The dough is soft on the inside with lightly crisp edges, while the topping combination delivers classic comforting flavour in every bite. It is an easy beginner-friendly recipe that works beautifully for family dinners, weekend cooking, or casual gatherings. From start to finish, this homemade pizza takes around 1 hour and 30 minutes including dough rising time.

    What Is Simple Pizza and How Does It Taste?

    Simple pizza is a classic homemade yeast dough pizza topped with tomato sauce, mozzarella cheese, and your favourite toppings. The crust bakes into a beautifully balanced texture with a crisp bottom and soft chewy centre. The tomato sauce brings a rich savoury flavour while melted mozzarella creates that irresistible stretchy finish.

    This recipe keeps everything approachable and beginner-friendly while still delivering authentic homemade pizza flavour. It is versatile, easy to customise, and far more satisfying than takeaway pizza.

    Simple Pizza Recipe Ingredients

    For the Pizza Dough

    • 500g strong bread flour
    • 1 tsp salt
    • 1 tsp caster sugar
    • 7g fast-action dried yeast
    • 2 tbsp olive oil
    • 325ml warm water

    For the Pizza Sauce

    • 200ml passata
    • 1 tbsp olive oil
    • 1 garlic clove, minced
    • 1 tsp dried oregano
    • ½ tsp salt
    • ¼ tsp black pepper

    For the Topping

    • 250g mozzarella cheese, grated
    • 1 small red onion, thinly sliced
    • 1 small green pepper, sliced
    • 12 pepperoni slices
    • Extra oregano for sprinkling
    • Olive oil for brushing

    Preparation and Cooking Time

    • Prep Time: 20 minutes
    • Rising Time: 45 minutes
    • Cook Time: 15 minutes
    • Total Time: 1 hour 20 minutes
    • Servings: 4 pizzas slices portions

    How to Make Simple Pizza Recipe

    • Prepare the dough: Add the bread flour, salt, sugar, and dried yeast to a large mixing bowl. Stir everything together evenly. Pour in the olive oil and warm water, then mix until a soft dough forms.
    • Knead the dough: Transfer the dough onto a lightly floured surface and knead for 8 to 10 minutes until smooth, elastic, and soft. If the dough feels sticky, add a small dusting of flour.
    • Leave the dough to rise: Place the dough into a lightly oiled bowl and cover with a clean tea towel. Leave it in a warm place for about 45 minutes or until doubled in size.
    • Prepare the sauce: In a small bowl, combine the passata, olive oil, garlic, oregano, salt, and black pepper. Stir until fully mixed.
    • Prepare the oven: Preheat the oven to 220°C or 200°C fan. Place a baking tray or pizza stone inside the oven while it heats so the base becomes crisp during baking.
    • Shape the pizza: Punch down the risen dough and place it onto a lightly floured surface. Roll or stretch it into a large round pizza shape around 30cm wide.
    • Add the toppings: Transfer the dough onto baking parchment. Spread the tomato sauce evenly over the base, leaving a small border around the edges. Sprinkle over the mozzarella cheese, then add onion slices, green pepper, and pepperoni.
    • Bake the pizza: Carefully slide the pizza onto the hot tray or pizza stone. Bake for 12 to 15 minutes until the crust is golden and the cheese is bubbling.
    • Finish and serve: Remove the pizza from the oven and leave it to cool for 2 minutes before slicing. Sprinkle with extra oregano and serve warm.
    Simple pizza recipe

    Tips for the Best Homemade Pizza

    Why is my pizza dough too sticky?

    Pizza dough should feel soft but manageable. If it sticks heavily to your hands, add a little extra flour during kneading, but avoid adding too much or the crust may become dry.

    How do I make the crust crispier?

    Preheating the baking tray or pizza stone makes a huge difference. A hot surface helps the bottom cook quickly and creates a crisp golden crust.

    Can I make the dough ahead of time?

    Yes. You can prepare the dough the night before and keep it covered in the refrigerator. Allow it to come back to room temperature before shaping.

    What cheese works best for homemade pizza?

    Mozzarella gives the best melt and stretch. You can also mix it with cheddar or parmesan for extra flavour.

    How do I stop the pizza becoming soggy?

    Use a moderate amount of sauce and avoid overly wet toppings. Preheating the tray also helps prevent a soft base.

    Serving Suggestions

    • Serve with garlic bread and fresh salad
    • Pair with homemade coleslaw
    • Add chilli flakes for extra heat
    • Enjoy with roasted vegetables
    • Serve with dipping sauces like garlic mayo or ranch

    Storage Instructions

    Room Temperature

    Pizza can sit at room temperature for up to 2 hours before refrigeration is needed.

    Refrigerator

    Store leftover pizza slices in an airtight container in the refrigerator for up to 3 days. Reheat in the oven for the best texture.

    Freezing

    Wrap individual pizza slices tightly in cling film and freeze for up to 2 months. Reheat directly from frozen in a hot oven until heated through.

    Nutrition Information

    • Calories: 420 kcal
    • Carbohydrates: 48g
    • Protein: 18g
    • Fat: 17g
    • Saturated Fat: 7g
    • Sodium: 760mg

    Nutrition values are estimates and may vary depending on ingredients used.

    FAQs

    Can I make pizza dough without a mixer?

    Yes, this dough can easily be mixed and kneaded by hand using a large bowl and a lightly floured surface.

    What flour is best for homemade pizza?

    Strong bread flour works best because it creates a chewy and elastic pizza crust.

    Can I freeze pizza dough?

    Yes, wrap the dough tightly after the first rise and freeze for up to 2 months. Thaw overnight before using.

    How do I reheat leftover pizza?

    Reheat pizza in a hot oven for 5 to 7 minutes to keep the crust crisp and the cheese melted.

    WP Recipe Card Code


    Simple Pizza Recipe

    Recipe by Milli RoseCourse: Main CourseCuisine: ItalianDifficulty: Easy
    Servings

    4

    servings
    Prep time

    30

    minutes
    Cooking time

    40

    minutes
    Calories

    300

    kcal
    Total time

    1

    hour 

    10

    minutes

    Easy homemade pizza with a crisp crust, rich tomato sauce, bubbling mozzarella, and classic toppings. Perfect for beginners and family dinners.

    Ingredients

    • 500g strong bread flour

    • 1 tsp salt

    • 1 tsp caster sugar

    • 7g fast-action dried yeast

    • 2 tbsp olive oil

    • 325ml warm water

    • 200ml passata

    • 1 garlic clove, minced

    • 1 tsp dried oregano

    • 250g mozzarella cheese, grated

    • 1 small red onion, sliced

    • 1 small green pepper, sliced

    • 12 pepperoni slices

    • Extra oregano

    • Olive oil for brushing

    • Baking parchment

    Directions

    • Combine flour, salt, sugar, and yeast in a bowl.
    • Add olive oil and warm water and mix into a soft dough.
    • Knead the dough for 8 to 10 minutes until smooth and elastic.
    • Place in an oiled bowl, cover, and leave to rise until doubled.
    • Mix passata, garlic, oregano, salt, and pepper to make the sauce.
    • Preheat oven to 220°C and heat a baking tray or pizza stone.
    • Shape the dough into a pizza base and spread with sauce.
    • Add mozzarella, onion, peppers, and pepperoni.
    • Bake for 12 to 15 minutes until golden and bubbling.
    • Cool slightly, slice, and serve warm.

    Notes

    • Preheat the tray for a crispier base.
    • Do not overload with toppings.
    • Pizza dough can be frozen for up to 2 months.
  • Cheesecake Recipe

    Cheesecake Recipe

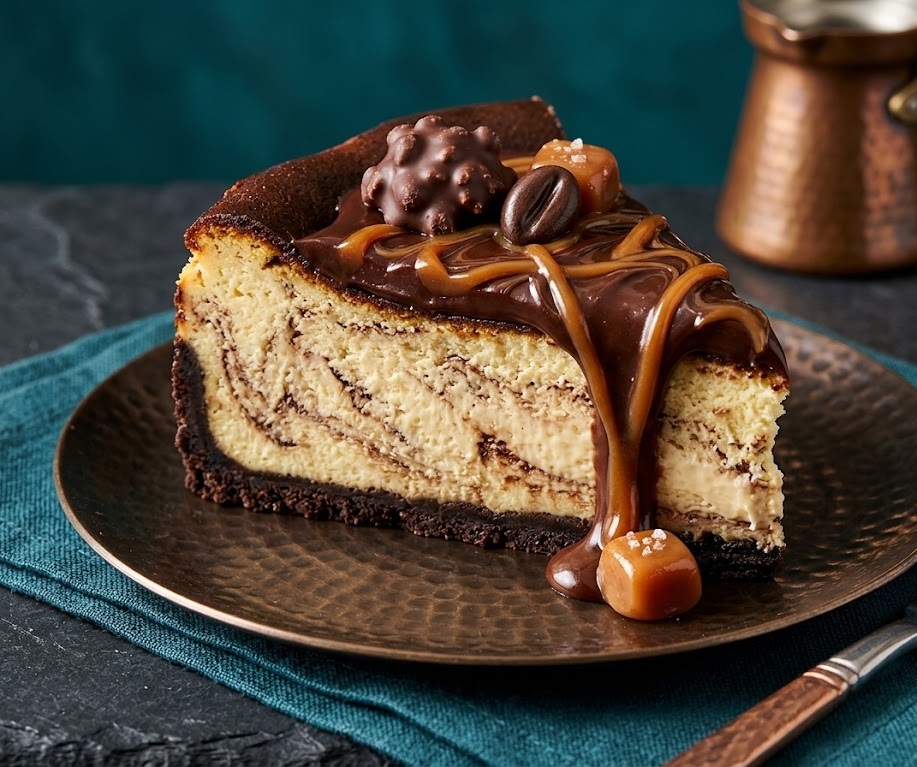
    If you’re looking for a rich, creamy, bakery-style dessert that feels both classic and impressive, this cheesecake recipe is exactly what you need. With its buttery biscuit base, silky smooth filling, and perfectly balanced sweetness, this homemade cheesecake delivers luxurious texture and flavour in every bite. Despite its elegant appearance, this recipe is surprisingly beginner-friendly and comes together with simple ingredients and clear steps. Perfect for holidays, birthdays, dinner parties, or weekend baking, this cheesecake recipe takes around 6 hours total including chilling time for the best texture.

    What Is Cheesecake?

    Cheesecake is a rich dessert made with a smooth cream cheese filling baked over a buttery biscuit crust. Unlike traditional cakes, cheesecake has a dense yet creamy texture that melts in your mouth while remaining wonderfully light and silky when chilled properly.

    This cheesecake recipe features a classic vanilla filling with a crisp digestive biscuit base and a delicate tang from cream cheese and sour cream. The slow baking and gradual cooling process help create that signature velvety texture with a smooth top and perfectly set centre.

    Every slice delivers the perfect balance of sweetness, creaminess, and buttery crunch, making this one of the most loved desserts for every occasion.

    Cheesecake Recipe Ingredients

    For the Biscuit Base

    • 250g digestive biscuits
    • 120g unsalted butter, melted
    • 2 tablespoons light brown sugar

    For the Cheesecake Filling

    • 900g full-fat cream cheese, softened
    • 250g caster sugar
    • 240ml sour cream
    • 1 tablespoon vanilla extract
    • 4 large eggs
    • 2 egg yolks
    • 1 tablespoon cornflour
    • 1 tablespoon lemon juice
    • Pinch of salt

    For the Optional Topping

    • Fresh berries
    • Whipped cream
    • Berry sauce or caramel sauce
    • Mint leaves for garnish

    Preparation and Cooking Time

    • Prep Time: 25 minutes
    • Baking Time: 1 hour 10 minutes
    • Cooling Time: 1 hour
    • Chilling Time: 4 hours minimum
    • Total Time: About 6 hours 35 minutes
    • Servings: 12 slices

    How to Make Cheesecake Recipe

    • Prepare the oven: Preheat the oven to 160°C or 140°C fan. Grease and line the base of a 9-inch springform cake tin with baking parchment. Wrap the outside of the tin with foil if using a water bath.
    • Make the biscuit base: Crush the digestive biscuits into fine crumbs using a food processor or rolling pin. Mix with melted butter and brown sugar until evenly coated and resembling wet sand.
    • Press into the tin: Firmly press the biscuit mixture into the bottom of the prepared tin using the back of a spoon or flat glass. Chill in the refrigerator for 15 minutes while preparing the filling.
    • Prepare the filling: In a large bowl, beat the softened cream cheese until completely smooth and creamy. Add caster sugar and mix until fully combined.
    • Add remaining ingredients: Mix in the sour cream, vanilla extract, lemon juice, cornflour, and salt. Add the eggs and egg yolks one at a time, mixing on low speed after each addition until just combined. Avoid overmixing to prevent cracks.
    • Fill the tin: Pour the cheesecake filling over the chilled biscuit base and smooth the top gently with a spatula.
    • Bake the cheesecake: Place the cheesecake in the oven and bake for 65 to 75 minutes. The edges should look set while the centre still has a slight wobble when gently shaken.
    • Cool gradually: Turn off the oven and leave the cheesecake inside with the door slightly open for 1 hour. This slow cooling helps prevent cracking.
    • Chill before serving: Remove the cheesecake from the oven and refrigerate for at least 4 hours or overnight for the best texture and flavour.
    • Decorate and serve: Top with fresh berries, whipped cream, or your favourite sauce before slicing and serving chilled.
    How to Make Cheesecake Recipe

    Expert Tips for Perfect Cheesecake

    How Do You Prevent Cheesecake from Cracking?

    Avoid overmixing the batter once the eggs are added, as too much air can cause cracks during baking. Cooling the cheesecake slowly inside the oven also helps maintain a smooth top.

    Why Should Cream Cheese Be Room Temperature?

    Softened cream cheese blends more smoothly and prevents lumps in the filling. Cold cream cheese can create a grainy texture that is difficult to fix later.

    Can You Bake Cheesecake Without a Water Bath?

    Yes, although a water bath helps create gentler heat and reduces cracking. If skipping the water bath, place a tray of hot water on the lower oven shelf instead.

    Why Does Cheesecake Need Chilling Time?

    Chilling allows the filling to fully set and develop its signature dense yet creamy texture. Cutting too early can result in a soft, messy centre.

    What Is the Best Way to Slice Cheesecake?

    Use a sharp knife dipped in hot water and wiped clean between slices. This creates clean, professional-looking cuts every time.

    Serving Suggestions

    • Serve with fresh strawberries or raspberries
    • Drizzle with salted caramel sauce
    • Top with blueberry compote
    • Add whipped cream and chocolate shavings
    • Pair with coffee or espresso after dinner

    Storage Instructions

    Room Temperature

    Cheesecake should not sit at room temperature for more than 2 hours because of the dairy-based filling.

    Refrigerator

    Store covered in the refrigerator for up to 5 days. Keep it in an airtight container or wrap tightly with plastic wrap to maintain freshness.

    Freezing

    Freeze individual slices or the whole cheesecake tightly wrapped for up to 3 months. Thaw overnight in the refrigerator before serving.

    Nutrition Information

    • Calories: 480 kcal
    • Carbohydrates: 32g
    • Protein: 8g
    • Fat: 36g
    • Saturated Fat: 21g
    • Sodium: 340mg

    Nutrition values are estimates and may vary depending on ingredients used.

    FAQs

    Why did my cheesecake crack on top?

    Cheesecake usually cracks from overmixing, sudden temperature changes, or overbaking. Cooling it slowly in the oven helps prevent cracks.

    Can I make cheesecake ahead of time?

    Yes, cheesecake is actually better when made a day ahead because chilling improves both texture and flavour.

    Can I freeze cheesecake?

    Yes, cheesecake freezes very well. Wrap it tightly and freeze for up to 3 months.

    What biscuits work best for cheesecake base?

    Digestive biscuits are classic, but graham crackers, vanilla wafers, or shortbread biscuits also work beautifully.

    Cheesecake Recipe

    Recipe by Milli RoseCourse: DessertCuisine: AmericanDifficulty: Medium
    Servings

    4

    servings
    Prep time

    30

    minutes
    Cooking time

    40

    minutes
    Calories

    300

    kcal
    Total time

    1

    hour 

    10

    minutes

    Rich and creamy baked cheesecake with a buttery biscuit crust and smooth vanilla filling. Perfect for holidays, celebrations, or everyday dessert cravings.

    Ingredients

    • 250g digestive biscuits

    • 120g unsalted butter, melted

    • 2 tbsp light brown sugar

    • 900g full-fat cream cheese, softened

    • 250g caster sugar

    • 240ml sour cream

    • 1 tbsp vanilla extract

    • 4 large eggs

    • 2 egg yolks

    • 1 tbsp cornflour

    • 1 tbsp lemon juice

    • Pinch of salt

    • Fresh berries for topping

    • Whipped cream or berry sauce

    Directions

    • Preheat oven to 160°C (140°C Fan). Grease and line a 9-inch springform tin.
    • Crush digestive biscuits and combine with melted butter and brown sugar.
    • Press the biscuit mixture firmly into the bottom of the tin and chill.
    • Beat cream cheese until smooth, then mix in sugar.
    • Add sour cream, vanilla, lemon juice, cornflour and salt.
    • Mix in eggs and yolks one at a time until just combined.
    • Pour filling over the crust and smooth the top.
    • Bake for 65–75 minutes until edges are set and centre slightly wobbly.
    • Cool slowly in the oven with the door slightly open for 1 hour.
    • Refrigerate for at least 4 hours before slicing and serving.

    Notes

    • Use full-fat cream cheese for the creamiest texture.
    • Avoid overmixing after adding eggs to reduce cracking.
    • Cheesecake tastes even better after chilling overnight.
  • Pancake Recipe

    Pancake Recipe

    This pancake recipe gives you soft, fluffy pancakes with golden edges and a light buttery flavor that tastes just like a classic homemade breakfast should. They are quick to prepare, easy enough for beginners, and perfect for busy mornings or relaxed weekend brunches. The texture is tender and airy inside with a beautifully crisp surface that cooks evenly every time. From start to finish, this recipe takes about 25 minutes and uses simple pantry staples you likely already have at home.

    Ingredients

    For the Pancake Batter

    • 2 cups plain flour
    • 2 tablespoons caster sugar
    • 1 tablespoon baking powder
    • ½ teaspoon salt
    • 2 large eggs
    • 1¾ cups whole milk
    • ¼ cup unsalted butter, melted
    • 1 teaspoon vanilla extract

    For Cooking

    • 1 tablespoon butter or neutral oil

    For Serving

    • Maple syrup
    • Fresh berries
    • Banana slices
    • Extra butter
    • Honey or whipped cream

    How to Make pancake recipe

    • Prepare the pan: Place a non-stick frying pan or griddle over medium heat. Allow it to heat gently for a few minutes so the pancakes cook evenly and develop a golden colour without burning.
    • Mix the dry ingredients: In a large mixing bowl, whisk together the plain flour, caster sugar, baking powder, and salt until evenly combined.
    • Whisk the wet ingredients: In a separate bowl or jug, whisk the eggs, milk, melted butter, and vanilla extract until smooth and fully blended.
    • Combine the batter: Pour the wet mixture into the dry ingredients and stir gently until just combined. A few small lumps are perfectly fine. Avoid overmixing or the pancakes may become dense.
    • Rest the batter: Leave the batter to rest for 5 minutes. This allows the flour to hydrate properly and helps create softer, fluffier pancakes.
    • Grease the pan: Lightly grease the hot pan with butter or oil. Wipe away excess fat with kitchen paper so the pancakes cook evenly without becoming greasy.
    • Cook the pancakes: Pour about ¼ cup of batter into the pan for each pancake. Cook for 2 to 3 minutes until bubbles appear on the surface and the edges begin to look set.
    • Flip and finish: Turn the pancakes carefully and cook for another 1 to 2 minutes until golden brown and cooked through.
    • Keep warm and serve: Transfer cooked pancakes to a warm plate while you finish the remaining batter. Serve warm with your favourite toppings and syrup.
    How to Make pancake recipe

    Tips for the Best Pancakes

    Why are my pancakes not fluffy?

    Flat pancakes are usually caused by overmixing the batter or using old baking powder. Stir the batter gently and make sure your baking powder is fresh for the best rise.

    How do I stop pancakes from burning?

    Keep the heat at medium rather than high. A pan that is too hot will burn the outside before the centre cooks properly.

    Should pancake batter be thick or thin?

    The batter should be thick enough to slowly pour from a spoon but not overly stiff. If it feels too thick, add a splash of milk.

    Can I make pancakes ahead of time?

    Yes, pancakes reheat very well. Store them in the fridge or freezer and warm them in a toaster, oven, or microwave before serving.

    Why should I rest pancake batter?

    Resting the batter allows the flour to absorb the liquid fully, resulting in softer pancakes with a lighter texture.

    Serving Suggestions

    • Serve with maple syrup and butter
    • Top with strawberries, blueberries, or raspberries
    • Add crispy bacon for a sweet and savoury breakfast
    • Spread with chocolate hazelnut spread and banana slices
    • Finish with whipped cream and a dusting of icing sugar

    Storage

    Room Temperature

    Pancakes can sit at room temperature for up to 2 hours after cooking. Keep them loosely covered so they stay soft.

    Refrigerator

    Store cooled pancakes in an airtight container in the fridge for up to 4 days. Separate layers with baking paper to prevent sticking.

    Freezing

    Freeze pancakes in a sealed freezer-safe bag for up to 3 months. Reheat directly from frozen in a toaster or warm oven.

    Nutrition

    • Calories: 220 kcal
    • Carbohydrates: 28g
    • Protein: 6g
    • Fat: 9g
    • Saturated Fat: 5g
    • Sodium: 320mg

    Nutrition values are estimates and may vary depending on ingredients and portion sizes.

    FAQs

    Can I make pancake batter the night before?

    Yes, you can prepare the batter ahead and keep it covered in the refrigerator overnight. Stir gently before cooking.

    What is the best pan for pancakes?

    A non-stick frying pan or flat griddle works best because it distributes heat evenly and prevents sticking.

    Can I use wholemeal flour for pancakes?

    Yes, you can replace half the plain flour with wholemeal flour for a slightly nuttier flavour and heartier texture.

    How do I keep pancakes warm while cooking batches?

    Place cooked pancakes on a baking tray in a low oven at 100°C until ready to serve.

    Pancake Recipe

    Recipe by Milli RoseCourse: BreakfastCuisine: AmericanDifficulty: Easy
    Servings

    4

    servings
    Prep time

    30

    minutes
    Cooking time

    40

    minutes
    Calories

    300

    kcal
    Total time

    1

    hour 

    10

    minutes

    Soft, fluffy homemade pancakes with a buttery flavour and golden finish. Perfect for breakfast, brunch, or a quick family treat.

    Ingredients

    • 2 cups plain flour

    • 2 tablespoons caster sugar

    • 1 tablespoon baking powder

    • ½ teaspoon salt

    • 2 large eggs

    • 1¾ cups whole milk

    • ¼ cup unsalted butter, melted

    • 1 teaspoon vanilla extract

    • 1 tablespoon butter or oil for cooking

    • Maple syrup and fresh berries for serving

    Directions

    • Heat a non-stick frying pan or griddle over medium heat.
    • Whisk together the flour, sugar, baking powder, and salt in a large bowl.
    • In another bowl, whisk the eggs, milk, melted butter, and vanilla extract.
    • Pour the wet ingredients into the dry ingredients and stir gently until just combined.
    • Allow the batter to rest for 5 minutes before cooking.
    • Lightly grease the pan with butter or oil.
    • Pour small portions of batter into the pan and cook until bubbles form on the surface.
    • Flip the pancakes and cook until golden brown and fully cooked through.
    • Serve warm with maple syrup, butter, and fresh berries.

    Notes

    • Do not overmix the batter or the pancakes may become dense.
    • Allow the batter to rest for softer pancakes.
    • Pancakes can be frozen for up to 3 months.
  • Banana Bread Recipe

    Banana Bread Recipe

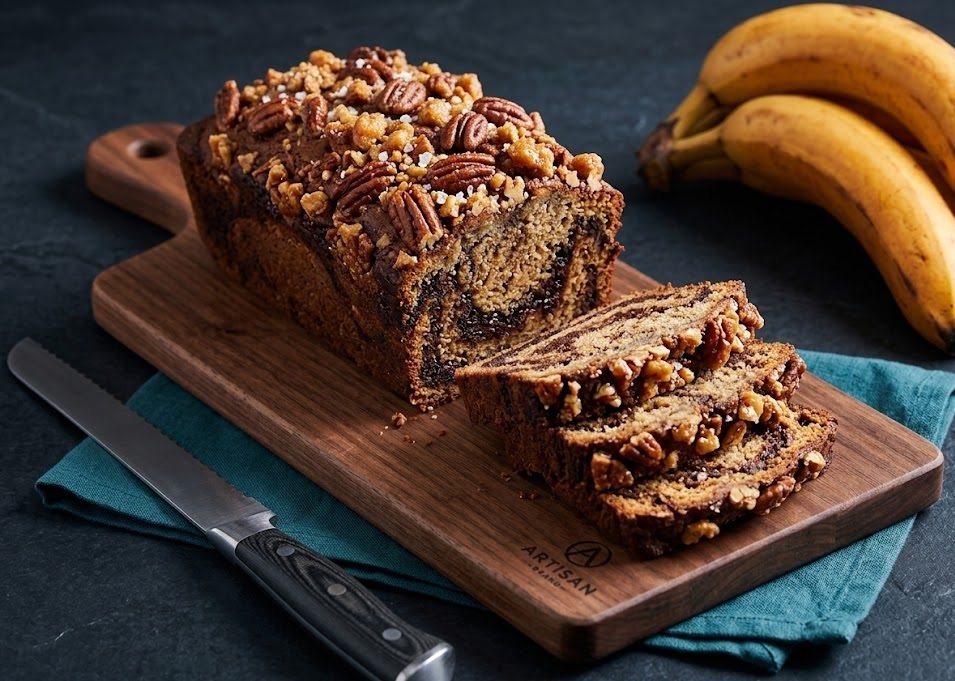
    If you are looking for a soft, moist, and perfectly sweet homemade bake, this banana bread recipe is one of the easiest and most reliable recipes you can make. It has a rich banana flavour, a tender crumb, and a beautifully golden crust that makes every slice irresistible. This classic loaf is simple enough for beginners yet delicious enough to become a regular family favourite. From mixing bowl to table, the whole recipe comes together in just over an hour.

    This banana bread recipe is one of those classic homemade bakes that never goes out of style. With its soft texture, rich banana flavour, and simple preparation, it is perfect for breakfast, afternoon tea, or an easy dessert. Whether you keep it classic or add your favourite mix-ins, this loaf delivers delicious results every time.

    Ingredients

    For the Banana Bread

    • 3 ripe bananas, mashed
    • 115g unsalted butter, melted
    • 150g light brown sugar
    • 2 large eggs
    • 1 teaspoon vanilla extract
    • 190g plain flour
    • 1 teaspoon bicarbonate of soda
    • 1/2 teaspoon salt
    • 1 teaspoon ground cinnamon
    • 75g chopped walnuts or chocolate chips
    • Butter or baking spray, for greasing

    How to Make banana bread recipe

    • Prepare the oven: Preheat the oven to 180°C or 160°C fan. Grease and line a 2lb loaf tin with baking parchment so the banana bread releases easily after baking.
    • Mash the bananas: Place the ripe bananas into a large mixing bowl and mash with a fork until mostly smooth. A few small lumps are perfectly fine and add texture.
    • Mix the wet ingredients: Add the melted butter, brown sugar, eggs, and vanilla extract to the bananas. Whisk together until smooth and fully combined.
    • Combine the dry ingredients: In a separate bowl, whisk together the flour, bicarbonate of soda, salt, and cinnamon so everything is evenly distributed.
    • Make the batter: Fold the dry ingredients into the wet mixture using a spatula. Mix gently until no dry flour remains. Stir in walnuts or chocolate chips if using.
    • Fill the loaf tin: Pour the batter into the prepared tin and smooth the top evenly with the back of a spoon.
    • Bake the banana bread: Bake for 50 to 55 minutes until the loaf is golden brown and a skewer inserted into the centre comes out clean.
    • Cool before slicing: Leave the loaf in the tin for 10 minutes, then transfer to a wire rack to cool completely before slicing.
    How to Make banana bread recipe

    Tips for the Best Banana Bread

    How ripe should bananas be for banana bread?

    The best bananas for banana bread are very ripe with dark brown spots on the peel. Overripe bananas are sweeter, softer, and give the loaf a stronger banana flavour.

    Why is my banana bread dry?

    Dry banana bread is usually caused by overbaking or adding too much flour. Measure ingredients carefully and check the loaf a few minutes before the baking time ends.

    Can I add chocolate chips or nuts?

    Yes, chopped walnuts, pecans, or chocolate chips work beautifully in this recipe. Fold them in gently at the end to avoid overmixing the batter.

    How do I know when banana bread is fully baked?

    Insert a skewer or toothpick into the centre of the loaf. If it comes out clean or with a few crumbs, the banana bread is ready.

    Serving Suggestions

    • Serve warm with butter
    • Enjoy with tea or coffee
    • Add sliced bananas and honey on top
    • Toast slices lightly for breakfast
    • Serve with vanilla ice cream for dessert

    Storage

    Room Temperature

    Store banana bread in an airtight container for up to 3 days. Keep it in a cool, dry place to maintain freshness.

    Refrigerator

    For longer storage, refrigerate the loaf for up to 1 week. Wrap it tightly to prevent it from drying out.

    Freezing

    Wrap individual slices or the whole loaf tightly in cling film and freeze for up to 3 months. Defrost at room temperature before serving.

    Nutrition

    • Calories: 285 kcal
    • Carbohydrates: 38g
    • Protein: 4g
    • Fat: 13g
    • Saturated Fat: 7g
    • Sodium: 240mg

    Nutrition values are estimates and may vary depending on ingredients used.

    FAQs

    Can I make banana bread without nuts?

    Yes, simply leave out the nuts or replace them with chocolate chips if preferred.

    Can I use frozen bananas?

    Yes, thaw frozen bananas completely and drain any excess liquid before using.

    Why did my banana bread sink in the middle?

    This usually happens if the loaf is underbaked or the oven door was opened too early during baking.

    Can I make this banana bread gluten free?

    Yes, use a good-quality gluten-free plain flour blend designed for baking.

    Banana Bread Recipe

    Recipe by Milli RoseCourse: DessertCuisine: AmericanDifficulty: Easy
    Servings

    10

    slices
    Prep time

    15

    minutes
    Cooking time

    55

    minutes
    Total time

    70

    minutes
    Calories

    285

    kcal

    1

    hour 

    10

    minutes

    Soft, moist banana bread packed with ripe banana flavour and finished with a golden crust. Perfect for breakfast, snacks, or dessert.

    Ingredients

    • 3 ripe bananas, mashed

    • 115g unsalted butter, melted

    • 150g light brown sugar

    • 2 large eggs

    • 1 tsp vanilla extract

    • 190g plain flour

    • 1 tsp bicarbonate of soda

    • 1/2 tsp salt

    • 1 tsp ground cinnamon

    • 75g chopped walnuts or chocolate chips

    • Butter or baking spray for greasing

    Directions

    • Preheat the oven to 180°C (160°C fan). Grease and line a 2lb loaf tin with baking parchment.
    • Mash the ripe bananas in a large bowl until mostly smooth.
    • Add melted butter, brown sugar, eggs, and vanilla extract. Mix until fully combined.
    • In a separate bowl, whisk together flour, bicarbonate of soda, salt, and cinnamon.
    • Fold the dry ingredients into the banana mixture until just combined. Stir in walnuts or chocolate chips if using.
    • Pour the batter into the prepared loaf tin and smooth the top.
    • Bake for 50–55 minutes until golden and a skewer inserted into the centre comes out clean.
    • Leave to cool in the tin for 10 minutes before transferring to a wire rack to cool completely.
    • Slice and serve warm or at room temperature.

    Notes

    • Use very ripe bananas for the best flavour and sweetness.
    • Avoid overmixing the batter to keep the loaf soft.
    • The loaf freezes well for up to 3 months.
  • Peach Pie Recipe

    Peach Pie Recipe

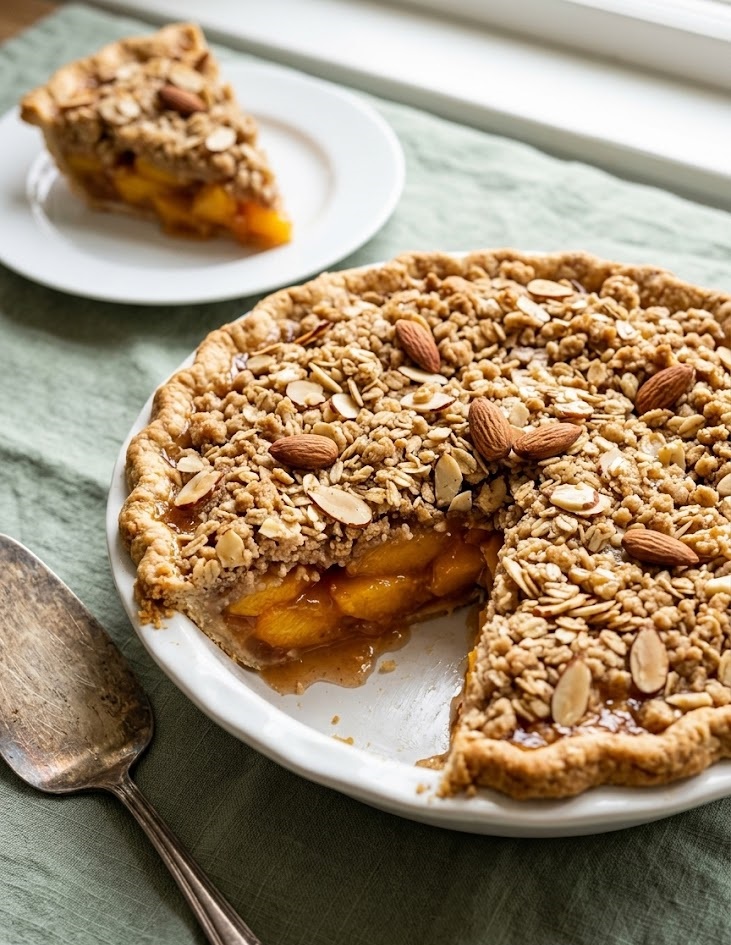
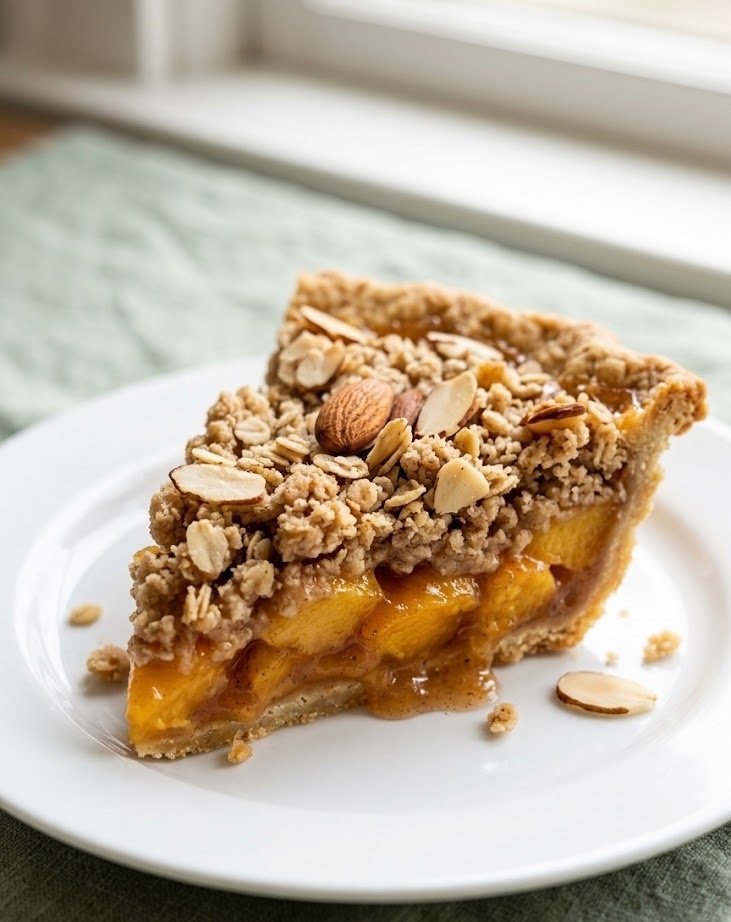
    This peach pie recipe is everything a homemade summer dessert should be. It features a buttery, flaky pastry crust filled with juicy peaches coated in warm cinnamon, brown sugar, and vanilla for the perfect balance of sweetness and spice. The filling bakes into a rich, glossy texture while the crust turns beautifully golden and crisp.

    Despite its classic bakery-style appearance, this pie is surprisingly simple to make at home. With easy-to-follow steps and straightforward ingredients, it’s suitable for both beginner bakers and experienced home cooks. From preparation to cooling, the entire recipe takes about 2 hours and delivers a comforting dessert that tastes incredible served warm or chilled.

    Ingredients

    For the Pastry Crust

    • 2 ½ cups plain flour
    • 1 teaspoon salt
    • 1 tablespoon caster sugar
    • 225g cold unsalted butter, cubed
    • 6 to 8 tablespoons ice water

    For the Peach Filling

    • 6 cups fresh peaches, peeled and sliced
    • ¾ cup light brown sugar
    • ¼ cup caster sugar
    • ¼ cup cornflour
    • 1 teaspoon ground cinnamon
    • ¼ teaspoon ground nutmeg
    • 1 tablespoon lemon juice
    • 1 teaspoon vanilla extract

    For Finishing

    • 1 egg, beaten
    • 1 tablespoon demerara sugar

    How to Make Peach Pie Recipe

    • Prepare the oven: Preheat the oven to 200°C or 180°C fan. Place a shelf in the middle of the oven and put a baking tray inside while heating so the base cooks evenly and becomes crisp.
    • Make the pastry: In a large mixing bowl, combine the flour, salt, and caster sugar. Rub the cold butter into the flour using your fingertips until the mixture resembles coarse breadcrumbs.
    • Add the water: Gradually mix in the ice water, one tablespoon at a time, until the dough starts to come together. Divide into two discs, wrap in cling film, and chill for 30 minutes.
    • Prepare the filling: Place the sliced peaches into a large bowl. Add the brown sugar, caster sugar, cornflour, cinnamon, nutmeg, lemon juice, and vanilla extract. Toss gently until evenly coated.
    • Roll out the pastry: Lightly flour a work surface and roll out one pastry disc large enough to line a 9-inch pie dish. Carefully transfer the pastry into the dish and press gently into the edges.
    • Fill the pie: Spoon the peach filling into the pastry case, spreading it evenly. Dot any remaining juices over the top.
    • Add the top crust: Roll out the second pastry disc and place it over the filling. Trim excess pastry, crimp the edges, and cut small slits in the top to allow steam to escape during baking.
    • Brush and bake: Brush the pie with beaten egg and sprinkle with demerara sugar. Place onto the hot baking tray and bake for 50 to 55 minutes until golden brown and bubbling.
    • Cool before slicing: Remove from the oven and allow the pie to cool for at least 1 hour. This helps the filling thicken and makes slicing much easier.
    How to Make Peach Pie Recipe

    Tips for the Best Peach Pie

    How do I stop the filling from becoming watery?

    Use ripe but firm peaches and avoid overly juicy fruit. Cornflour helps thicken the filling properly during baking.

    Should I peel the peaches?

    Yes, peeling gives the pie a smoother, softer texture and prevents chewy skins in the finished filling.

    Why is my pastry shrinking?

    Chilling the dough before rolling and again before baking helps prevent shrinkage and keeps the crust flaky.

    Can I use frozen peaches?

    Yes, but thaw and drain them well first to remove excess liquid before mixing the filling.

    Serving Suggestions

    • Serve warm with vanilla ice cream
    • Add freshly whipped cream on top
    • Pair with hot coffee or tea
    • Dust lightly with icing sugar before serving

    Storage

    Room Temperature

    Keep the pie loosely covered at room temperature for up to 1 day.

    Refrigerator

    Store covered in the fridge for up to 4 days. Reheat slices in the oven for the best texture.

    Freezing

    The baked pie can be frozen for up to 3 months. Wrap tightly in cling film and foil before freezing. Thaw overnight in the refrigerator before reheating.

    Nutrition

    • Calories: 420 kcal
    • Carbohydrates: 54g
    • Protein: 5g
    • Fat: 21g
    • Saturated Fat: 12g
    • Sodium: 210mg

    Nutrition values are estimates and may vary depending on ingredients used.

    FAQs

    Can I make peach pie ahead of time?

    Yes, peach pie can be baked a day in advance and stored covered at room temperature or in the refrigerator.

    What are the best peaches for peach pie?

    Fresh ripe but firm peaches work best because they hold their shape while baking and provide the best flavour.

    Can I use canned peaches instead of fresh peaches?

    Yes, but drain them thoroughly before using to avoid excess liquid in the filling.

    How do I keep the bottom crust crisp?

    Baking the pie on a preheated baking tray helps the bottom crust cook properly and stay crisp.

    Peach Pie Recipe

    Recipe by Milli RoseCourse: DessertCuisine: AmericanDifficulty: Medium
    Servings

    8

    slices
    Prep time

    35

    minutes
    Cooking time

    55

    minutes
    Total time

    120

    minutes
    Calories

    420

    kcal

    1

    hour 

    30

    minutes

    Classic homemade peach pie with a flaky buttery crust and juicy cinnamon peach filling. Perfect for summer desserts, family gatherings, and special occasions.

    Ingredients

    • 2 ½ cups plain flour

    • 1 tsp salt

    • 1 tbsp caster sugar

    • 225g cold unsalted butter, cubed

    • 6–8 tbsp ice water

    • 6 cups fresh peaches, peeled and sliced

    • ¾ cup light brown sugar

    • ¼ cup caster sugar

    • ¼ cup cornflour

    • 1 tsp ground cinnamon

    • ¼ tsp ground nutmeg

    • 1 tbsp lemon juice

    • 1 tsp vanilla extract

    • 1 egg, beaten

    • 1 tbsp demerara sugar

    Directions

    • Preheat oven to 200°C (180°C fan). Place a baking tray inside the oven while preheating.
    • Mix flour, salt and sugar in a bowl. Rub in cold butter until the mixture resembles breadcrumbs.
    • Add ice water gradually until the dough comes together. Divide into two discs and chill for 30 minutes.
    • Combine sliced peaches, sugars, cornflour, cinnamon, nutmeg, lemon juice and vanilla in a large bowl.
    • Roll out one pastry disc and line a 9-inch pie dish. Spoon in the peach filling evenly.
    • Roll out the second pastry disc and place over the filling. Seal edges and cut steam vents.
    • Brush the top with beaten egg and sprinkle with demerara sugar.
    • Bake for 50–55 minutes until the crust is golden and the filling is bubbling.
    • Cool for at least 1 hour before slicing so the filling can set properly.

    Notes

    • Use ripe but firm peaches for the best texture.
    • If the crust browns too quickly, cover the edges loosely with foil.
    • The pie tastes even better after resting for several hours.
  • Chess Pie Recipe

    Chess Pie Recipe

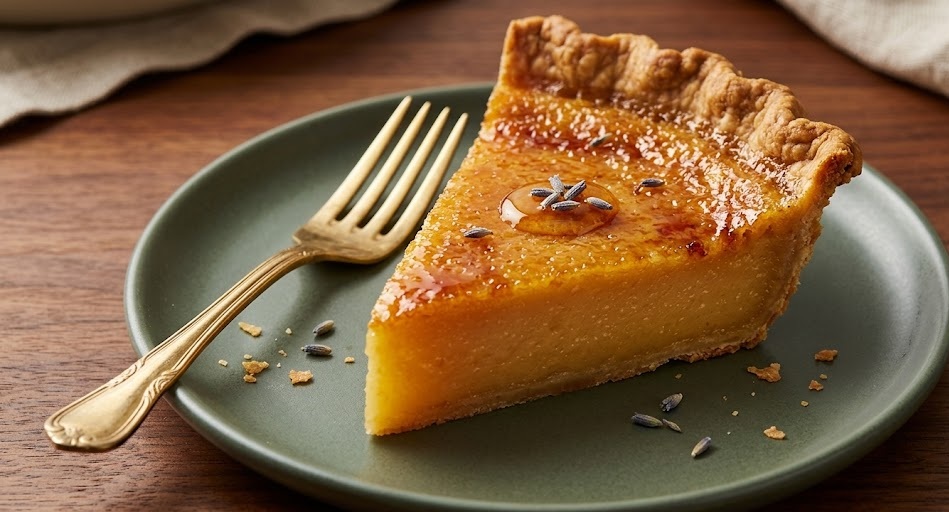
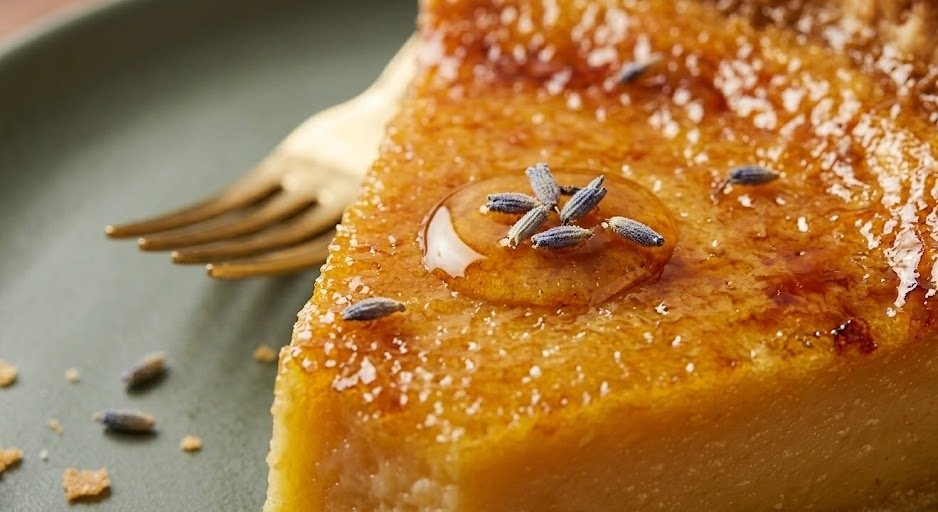
    If you love classic Southern desserts, this chess pie recipe is one you’ll want to keep forever. Rich, buttery, and perfectly sweet, chess pie has a silky custard filling with a lightly crisp, golden top that forms as it bakes. The texture is smooth and creamy with a delicate crackly surface that makes every slice irresistible. This easy homemade pie comes together with simple pantry staples, making it perfect for holidays, Sunday dinners, or anytime you crave an old-fashioned dessert. Best of all, it’s beginner-friendly and ready with minimal prep and simple baking steps.

    What Is Chess Pie?

    Chess pie is a traditional Southern dessert known for its rich custard filling and crisp sugary top. It’s made with butter, sugar, eggs, and a small amount of cornmeal, which gives the pie its signature texture. Unlike fruit pies, chess pie focuses on simple pantry ingredients that bake into something deeply comforting and flavorful.

    The flavor is sweet, buttery, and slightly caramelized with hints of vanilla and lemon. The center stays soft and creamy while the top develops a delicate golden crust during baking. This classic pie is simple, nostalgic, and incredibly satisfying served chilled or at room temperature.

    Chess Pie Recipe Ingredients

    For the Pie Crust

    • 1 unbaked 9-inch pie crust
    • 1 tablespoon plain flour, for dusting

    For the Chess Pie Filling

    • 1½ cups granulated sugar
    • 1 tablespoon yellow cornmeal
    • 1 tablespoon plain flour
    • ½ teaspoon salt
    • ½ cup unsalted butter, melted and slightly cooled
    • 4 large eggs
    • ¼ cup whole milk
    • 1 tablespoon white vinegar
    • 1 teaspoon pure vanilla extract
    • 1 tablespoon fresh lemon juice
    • Freshly grated nutmeg, optional

    Optional Toppings

    • Whipped cream
    • Fresh berries
    • Powdered sugar

    Preparation and Baking Time

    • Prep Time: 15 minutes
    • Bake Time: 50 minutes
    • Total Time: 1 hour 5 minutes
    • Servings: 8 slices

    How to Make Chess Pie Recipe

    • Prepare the oven: Preheat the oven to 180°C or 160°C fan. Position a shelf in the center of the oven so the pie bakes evenly and develops a beautifully golden top.
    • Prepare the crust: Place the unbaked pie crust into a 9-inch pie dish. Lightly dust the bottom with a little flour to help prevent sogginess while baking.
    • Mix the dry ingredients: In a large mixing bowl, whisk together the sugar, cornmeal, flour, and salt until fully combined.
    • Add the wet ingredients: Pour in the melted butter, eggs, milk, vinegar, vanilla extract, and lemon juice. Whisk until the filling becomes smooth and creamy with no streaks remaining.
    • Fill the pie shell: Carefully pour the filling into the prepared pie crust. Sprinkle a light pinch of freshly grated nutmeg over the top if desired.
    • Bake the pie: Transfer the pie to the preheated oven and bake for 45 to 50 minutes. The top should look golden and lightly crisp while the center remains slightly soft with a gentle wobble.
    • Cool completely: Remove the pie from the oven and allow it to cool fully at room temperature. The filling will continue to set as it cools.
    • Slice and serve: Serve chilled or at room temperature with whipped cream, powdered sugar, or fresh berries if desired.
    How to Make Chess Pie Recipe

    Helpful Tips for Perfect Chess Pie

    Why Did My Chess Pie Crack on Top?

    A few cracks are completely normal and part of the pie’s classic appearance. Overbaking can create larger cracks, so remove the pie once the center still has a slight wobble.

    How Do I Keep the Bottom Crust Crisp?

    Dusting the crust lightly with flour before adding the filling helps absorb excess moisture. Baking the pie on the lower-middle rack also helps the crust cook properly.

    Can I Use Store-Bought Pie Crust?

    Yes, store-bought refrigerated pie crust works beautifully and makes this recipe even easier for busy bakers.

    Should Chess Pie Be Refrigerated?

    Yes, once cooled, refrigerate the pie to keep the custard filling fresh and properly set.

    What Makes Chess Pie Different From Custard Pie?

    Chess pie contains cornmeal and vinegar, which create its signature texture and slightly tangy flavor compared to classic custard pie.

    Serving Suggestions

    • Serve chilled with freshly whipped cream
    • Add fresh strawberries or raspberries on the side
    • Pair with vanilla ice cream for extra richness
    • Enjoy with hot coffee or sweet iced tea
    • Dust lightly with powdered sugar before serving

    Storage Instructions

    Room Temperature

    Chess pie can sit at room temperature for up to 4 hours before refrigeration is recommended.

    Refrigerator

    Store covered in the refrigerator for up to 4 days. The flavor becomes even richer after chilling overnight.

    Freezing

    Wrap the cooled pie tightly in plastic wrap and foil before freezing for up to 2 months. Thaw overnight in the refrigerator before serving.

    Nutrition Information

    • Calories: 420 kcal
    • Carbohydrates: 48g
    • Protein: 5g
    • Fat: 24g
    • Saturated Fat: 13g
    • Sodium: 210mg

    Nutrition values are estimates and may vary depending on ingredients used.

    FAQs

    Why is it called chess pie?

    The exact origin is unclear, but many believe the name came from the phrase ‘just pie’ spoken with a Southern accent or because the pie was stored in a pie chest.

    Can I make chess pie ahead of time?

    Yes, chess pie is perfect for making ahead. Bake it a day in advance and refrigerate until ready to serve.

    Why does chess pie have vinegar in it?

    The vinegar balances the sweetness and helps create the signature texture without making the pie taste sour.

    Can I freeze homemade chess pie?

    Yes, chess pie freezes very well. Wrap it tightly and freeze for up to 2 months for best quality.

    Chess Pie Recipe

    Recipe by Milli RoseCourse: DessertCuisine: SouthernDifficulty: Easy
    Servings

    4

    servings
    Prep time

    30

    minutes
    Cooking time

    40

    minutes
    Calories

    300

    kcal
    Total time

    1

    hour 

    10

    minutes

    Classic Southern chess pie with a rich buttery custard filling and crisp golden top. Easy to make with simple pantry ingredients.

    Ingredients

    • 1 unbaked 9-inch pie crust

    • 1½ cups granulated sugar

    • 1 tablespoon yellow cornmeal

    • 1 tablespoon plain flour

    • ½ teaspoon salt

    • ½ cup unsalted butter, melted

    • 4 large eggs

    • ¼ cup whole milk

    • 1 tablespoon white vinegar

    • 1 teaspoon vanilla extract

    • 1 tablespoon fresh lemon juice

    Directions

    • Preheat oven to 180°C (160°C fan). Place the pie crust into a 9-inch pie dish.
    • Whisk together sugar, cornmeal, flour, and salt in a mixing bowl.
    • Add melted butter, eggs, milk, vinegar, vanilla, and lemon juice.
    • Whisk until the filling is completely smooth and creamy.
    • Pour the filling into the prepared pie crust.
    • Bake for 45 to 50 minutes until golden with a slight wobble in the center.
    • Cool completely before slicing and serving.

    Notes

    • Do not overbake or the filling may crack excessively.
    • Allow the pie to cool fully so the custard sets properly.
    • Store leftovers covered in the refrigerator for up to 4 days.
  • Shoofly Pie Recipe

    Shoofly Pie Recipe

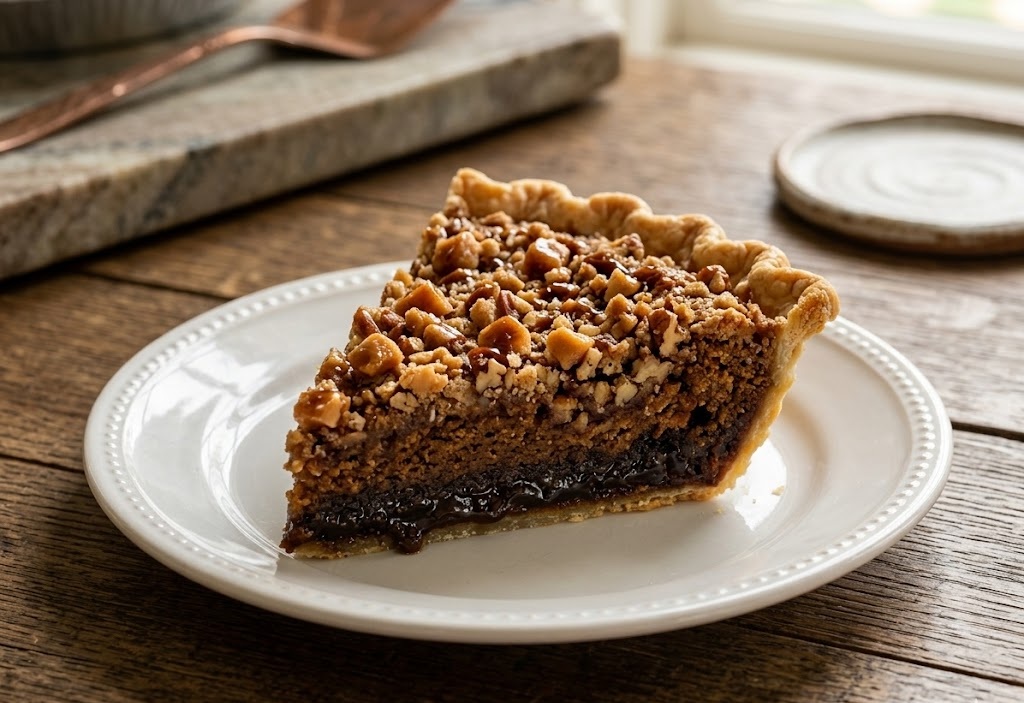
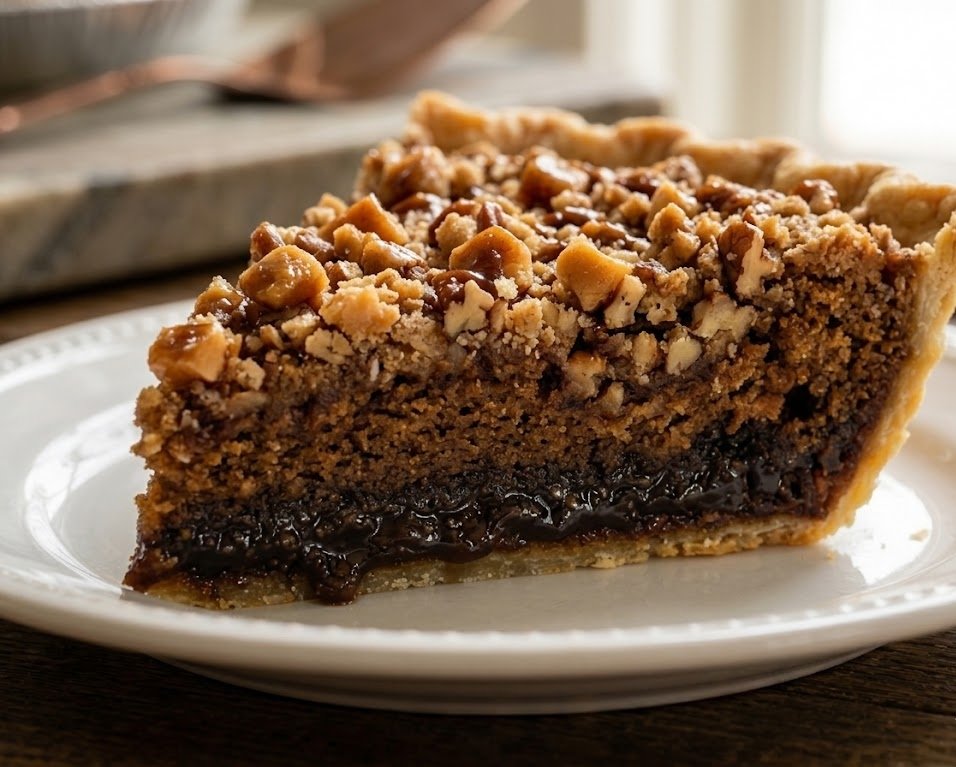
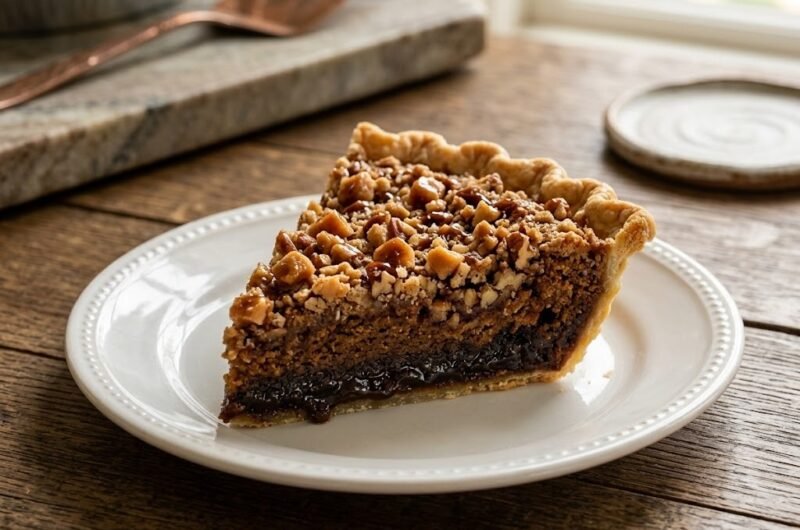
    If you love old-fashioned desserts with rich flavor and cozy bakery-style texture, this shoofly pie recipe is a must-try. This classic Pennsylvania Dutch pie features a flaky crust filled with a sweet molasses filling and topped with buttery crumb streusel that bakes into a soft, gooey center. The flavor is deep, warm, and caramel-like with hints of spice and brown sugar in every bite.

    This homemade shoofly pie recipe is surprisingly simple to make, even for beginner bakers. The combination of crumb topping and silky molasses filling creates the perfect balance between cake-like texture and sticky pie filling. From start to finish, the entire recipe takes just over an hour, making it ideal for holidays, weekend baking, or comforting family desserts.

    Ingredients

    For the Pie Crust

    • 1 unbaked 9-inch pie crust

    For the Crumb Topping

    • 1 1/2 cups all-purpose flour
    • 3/4 cup light brown sugar
    • 1/4 teaspoon salt
    • 1/2 teaspoon ground cinnamon
    • 1/4 teaspoon ground nutmeg
    • 1/4 cup unsalted butter, melted

    For the Molasses Filling

    • 1 large egg
    • 3/4 cup molasses
    • 3/4 cup boiling water
    • 1/2 teaspoon baking soda

    For Serving

    • Fresh whipped cream
    • Vanilla ice cream

    How to Make Shoofly Pie Recipe

    • Prepare the oven: Preheat the oven to 220°C or 200°C fan. Place a shelf in the middle of the oven so the pie bakes evenly and develops a golden crumb topping.
    • Prepare the pie crust: Fit the pie crust into a 9-inch pie dish and crimp the edges neatly. Place the prepared crust in the refrigerator while making the filling.
    • Make the crumb topping: In a large bowl, combine the flour, brown sugar, salt, cinnamon, and nutmeg. Pour in the melted butter and mix with a fork until the mixture forms coarse crumbs.
    • Reserve the crumbs: Set aside half of the crumb mixture for the top of the pie. The remaining crumbs will go into the bottom of the crust.
    • Mix the filling: In another bowl, whisk together the egg, molasses, and boiling water until smooth. Stir in the baking soda carefully as the mixture will foam slightly.
    • Assemble the pie: Sprinkle half of the crumb mixture into the prepared pie crust. Slowly pour the molasses filling over the crumbs. Finish by scattering the remaining crumb topping evenly over the top.
    • Bake the pie: Bake for 15 minutes at 220°C. Reduce the oven temperature to 175°C or 160°C fan and continue baking for 30 minutes until the center is mostly set and the top looks golden.
    • Cool before slicing: Remove the pie from the oven and let it cool completely at room temperature. This helps the filling set properly and improves the texture.
    How to Make Shoofly Pie Recipe

    Tips for the Best Shoofly Pie

    How do I keep shoofly pie from becoming runny?

    Allow the pie to cool completely before slicing. The filling continues to set as it cools, giving you cleaner slices and better texture.

    What type of molasses works best?

    Use regular or mild molasses for the best flavor. Blackstrap molasses can taste too bitter and overpower the pie.

    Why is my crumb topping dry?

    If the crumb mixture seems too dry, add an extra tablespoon of melted butter until it resembles damp sand.

    Can I use homemade pie crust?

    Absolutely. Homemade buttery pie crust works beautifully and adds extra flavor and flakiness to the finished pie.

    Serving Suggestions

    • Serve slightly warm with whipped cream
    • Pair with vanilla ice cream for a classic dessert
    • Enjoy with hot coffee or spiced tea
    • Dust lightly with powdered sugar before serving

    Storage

    Room Temperature

    Store the pie covered at room temperature for up to 2 days. Keep it in a cool, dry place away from direct sunlight.

    Refrigerator

    Refrigerate leftovers in an airtight container for up to 5 days. Let slices come to room temperature before serving for the best flavor.

    Freezing

    Wrap the cooled pie tightly in plastic wrap and foil before freezing. Freeze for up to 2 months and thaw overnight in the refrigerator.

    Nutrition

    • Calories: 420 kcal
    • Carbohydrates: 62g
    • Protein: 4g
    • Fat: 18g
    • Saturated Fat: 7g
    • Sodium: 210mg

    Nutrition values are estimates and may vary depending on ingredients used.

    FAQs

    What is shoofly pie made of?

    Shoofly pie is traditionally made with molasses filling, buttery crumb topping, and a flaky pie crust. The filling creates a rich, sweet texture while the crumbs add structure and flavor.

    Why is it called shoofly pie?

    The pie became known as shoofly pie because the sweet molasses filling attracted flies while cooling on windowsills, leading bakers to shoo them away.

    Can I make shoofly pie ahead of time?

    Yes, shoofly pie actually tastes even better the next day as the flavors deepen and the filling settles properly.

    Do I need to refrigerate shoofly pie?

    You can keep shoofly pie at room temperature for up to 2 days, but refrigeration is recommended for longer storage.

    Shoofly Pie Recipe

    Recipe by Milli RoseCourse: DessertCuisine: AmericanDifficulty: Easy
    Servings

    8

    slices
    Prep time

    20

    minutes
    Cooking time

    45

    minutes
    Total time

    65

    minutes
    Calories

    420

    kcal

    1

    hour 

    5

    minutes

    Traditional shoofly pie with a flaky crust, rich molasses filling, and buttery crumb topping. A classic Pennsylvania Dutch dessert perfect for holidays and cozy gatherings.

    Ingredients

    • 1 unbaked 9-inch pie crust

    • 1 1/2 cups all-purpose flour

    • 3/4 cup light brown sugar

    • 1/4 cup unsalted butter, melted

    • 1 large egg

    • 3/4 cup molasses

    • 3/4 cup boiling water

    • 1/2 teaspoon baking soda

    • 1/4 teaspoon salt

    • 1/2 teaspoon ground cinnamon

    • 1/4 teaspoon ground nutmeg

    • Whipped cream for serving

    Directions

    • Preheat the oven to 220°C (200°C fan). Place the pie crust into a 9-inch pie dish and crimp the edges.
    • In a bowl, mix flour, brown sugar, cinnamon, nutmeg, salt, and melted butter until crumbly.
    • Reserve half of the crumb mixture for the topping.
    • In another bowl, whisk together egg, molasses, and boiling water.
    • Stir baking soda into the molasses mixture until combined.
    • Sprinkle half the crumb mixture into the pie crust.
    • Pour the molasses filling carefully over the crumbs.
    • Top evenly with the remaining crumb mixture.
    • Bake for 15 minutes, then reduce oven temperature to 175°C (160°C fan) and bake for another 30 minutes until set.
    • Cool completely before slicing and serving.

    Notes

    • Use mild molasses for a sweeter flavor.
    • Allow the pie to cool fully before slicing for clean pieces.
    • The pie tastes even better the next day.

slot depo

sicbo online