Author: Rose Melton

  • Chicken Marsala Recipe

    Chicken Marsala Recipe

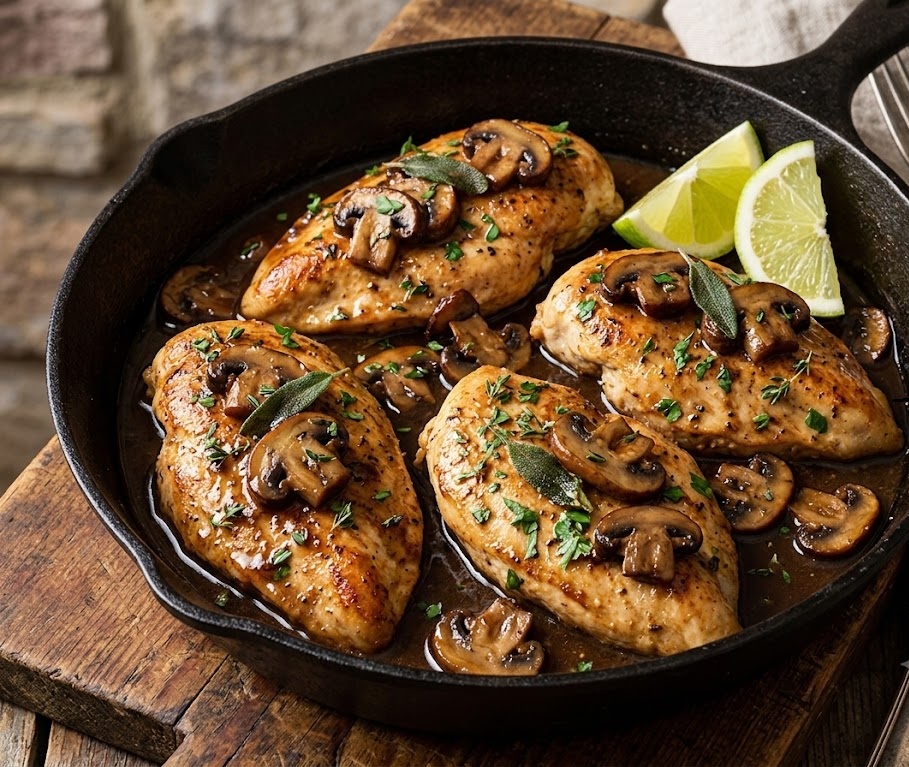
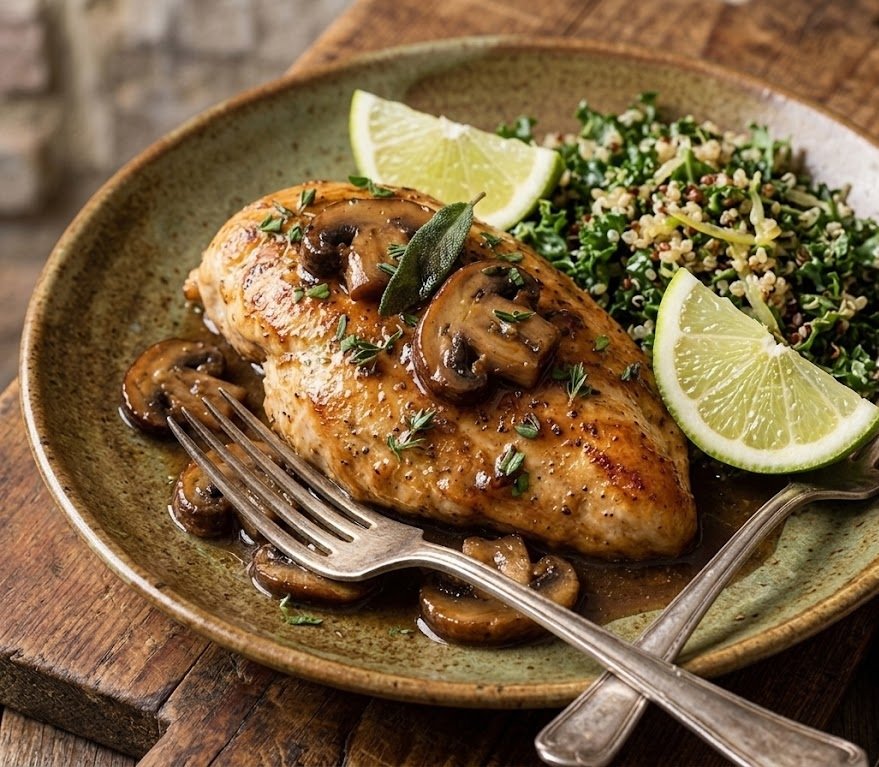
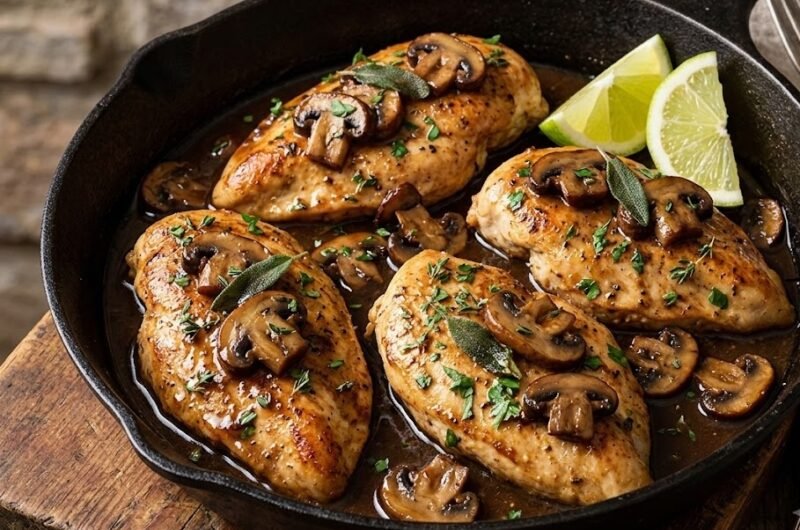
    If you love rich, comforting Italian-American dinners that feel restaurant-worthy without being difficult to make, this chicken marsala recipe is exactly what you need. Tender pan-fried chicken cutlets are coated in a silky mushroom and Marsala wine sauce that’s savory, buttery, and packed with deep flavor. The chicken stays juicy while the sauce turns glossy and smooth, making every bite incredibly satisfying. Best of all, this easy chicken marsala comes together in about 40 minutes, making it perfect for both weeknight dinners and special occasions.

    What Is Chicken Marsala?

    Chicken Marsala is a classic Italian-American dish made with lightly floured chicken cutlets simmered in a rich mushroom and Marsala wine sauce. The sauce develops a deep savory flavor from caramelized mushrooms, chicken stock, butter, and sweet Marsala wine. The result is a beautifully balanced dish that tastes rich without feeling heavy.

    The chicken becomes tender and flavorful while the sauce turns silky and glossy. Mushrooms add earthy depth, and the Marsala wine brings subtle sweetness that perfectly complements the savory ingredients. This dish is elegant enough for dinner parties but simple enough for beginner home cooks.

    Chicken Marsala Recipe Ingredients

    Main Ingredients

    • 4 boneless skinless chicken breasts
    • 1 teaspoon salt
    • ½ teaspoon black pepper
    • ½ cup plain flour
    • 3 tablespoons olive oil
    • 2 tablespoons unsalted butter
    • 300g cremini or button mushrooms, sliced
    • 3 garlic cloves, minced
    • 180ml Marsala wine
    • 180ml chicken stock
    • 120ml heavy cream
    • 1 tablespoon chopped fresh parsley

    For Serving

    • Mashed potatoes
    • Buttered pasta
    • Steamed vegetables
    • Extra parsley for garnish

    Kitchen Equipment

    • Large frying pan or skillet
    • Tongs
    • Sharp knife
    • Cutting board
    • Measuring cups and spoons
    • Shallow dish for flour

    Preparation and Cooking Time

    • Prep Time: 15 minutes
    • Cook Time: 25 minutes
    • Total Time: 40 minutes
    • Servings: 4 servings

    How to Make Chicken Marsala Recipe

    • Prepare the chicken: Slice each chicken breast horizontally to create thin cutlets. Place the chicken between sheets of baking parchment and gently pound to an even thickness. Season both sides with salt and black pepper.
    • Coat the chicken: Add the flour to a shallow bowl. Lightly dredge each chicken piece in flour, shaking off any excess. This coating helps create a golden crust and thickens the sauce slightly while cooking.
    • Cook the chicken: Heat the olive oil in a large skillet over medium-high heat. Add the chicken and cook for about 4 minutes per side until golden brown and cooked through. Transfer the chicken to a plate and keep warm.
    • Cook the mushrooms: Reduce the heat to medium. Add the butter and sliced mushrooms to the same pan. Cook for 6 to 8 minutes until the mushrooms release their moisture and become golden brown.
    • Add the garlic: Stir the minced garlic into the mushrooms and cook for 30 seconds until fragrant. Avoid letting the garlic brown too much.
    • Deglaze the pan: Pour in the Marsala wine and gently scrape the bottom of the pan to lift all the flavorful browned bits. Simmer for about 3 minutes until the wine reduces slightly.
    • Make the sauce: Add the chicken stock and heavy cream. Stir well and simmer for 5 minutes until the sauce thickens slightly and becomes smooth.
    • Return the chicken: Place the cooked chicken back into the skillet and spoon the sauce over the top. Simmer for 2 to 3 minutes so the chicken absorbs the flavor of the sauce.
    • Finish and serve: Sprinkle with chopped parsley and serve immediately with mashed potatoes, pasta, or vegetables.
    How to Make Chicken Marsala Recipe

    Helpful Tips for the Best Chicken Marsala

    How do I keep the chicken tender?

    Pounding the chicken to an even thickness helps it cook evenly and prevents dryness. Avoid overcooking the chicken once it turns golden and cooked through.

    What type of mushrooms work best?

    Cremini mushrooms give the richest flavor, but white button mushrooms also work well. Slice them evenly so they cook consistently.

    Can I make chicken marsala without cream?

    Yes, you can leave out the cream for a lighter sauce. The dish will still taste delicious with just Marsala wine and chicken stock.

    Why is my sauce too thin?

    Allow the sauce to simmer gently for a few extra minutes so it reduces properly. The flour coating on the chicken also helps naturally thicken the sauce.

    What is the best Marsala wine to use?

    Dry Marsala wine creates the most balanced flavor for savory dishes. Sweet Marsala can be used if you prefer a slightly sweeter sauce.

    Serving Suggestions

    • Serve with creamy mashed potatoes
    • Pair with buttered fettuccine or spaghetti
    • Add roasted asparagus or green beans
    • Enjoy with crusty bread for soaking up the sauce
    • Serve alongside a fresh green salad

    Storage Instructions

    Room Temperature

    Chicken Marsala should not sit out for more than 2 hours. Serve immediately for the best texture and flavor.

    Refrigerator

    Store leftovers in an airtight container in the refrigerator for up to 3 days. Reheat gently on the stovetop or in the microwave until hot.

    Freezing

    Freeze cooled chicken marsala in a freezer-safe container for up to 2 months. Thaw overnight in the refrigerator before reheating.

    Nutrition Information

    • Calories: 480 kcal
    • Carbohydrates: 14g
    • Protein: 39g
    • Fat: 26g
    • Saturated Fat: 10g
    • Sodium: 720mg

    Nutrition values are estimates and may vary depending on ingredients used.

    FAQs

    Can I make chicken marsala ahead of time?

    Yes, you can prepare the dish a day ahead and gently reheat it before serving. The flavors become even richer after resting.

    What can I use instead of Marsala wine?

    You can substitute dry sherry or white wine if needed, though the flavor will be slightly different from traditional chicken marsala.

    Can I use chicken thighs instead of chicken breasts?

    Yes, boneless skinless chicken thighs work very well and stay especially juicy during cooking.

    How do I thicken chicken marsala sauce?

    Allow the sauce to simmer longer to reduce naturally, or stir in a small slurry of cornflour and water if needed.
    Chicken Marsala Recipe

    Recipe by Milli RoseCourse: DinnerCuisine: Italian-AmericanDifficulty: Easy
    Servings

    4

    servings
    Prep time

    30

    minutes
    Cooking time

    40

    minutes
    Calories

    300

    kcal
    Total time

    1

    hour 

    10

    minutes

    Tender chicken cutlets simmered in a rich mushroom and Marsala wine sauce. An easy Italian-American classic perfect for weeknight dinners or special occasions.

    Ingredients

    • 4 boneless skinless chicken breasts

    • 1 tsp salt

    • 1/2 tsp black pepper

    • 1/2 cup plain flour

    • 3 tbsp olive oil

    • 2 tbsp unsalted butter

    • 300g mushrooms, sliced

    • 3 garlic cloves, minced

    • 180ml Marsala wine

    • 180ml chicken stock

    • 120ml heavy cream

    Directions

    • Slice and pound the chicken cutlets evenly. Season with salt and pepper.
    • Dredge the chicken lightly in flour and shake off excess.
    • Heat olive oil in a skillet and cook chicken until golden and cooked through.
    • Transfer chicken to a plate and cook mushrooms in butter until browned.
    • Add garlic and cook briefly until fragrant.
    • Pour in Marsala wine and simmer until slightly reduced.
    • Add chicken stock and cream, then simmer until the sauce thickens.
    • Return chicken to the skillet and coat with sauce.
    • Garnish with parsley and serve warm.

    Notes

    • Use dry Marsala wine for the best balanced flavor.
    • Do not overcrowd the pan while browning the chicken.
    • The sauce thickens more as it cools slightly.
  • Easy Sirloin Steak Recipe

    Easy Sirloin Steak Recipe

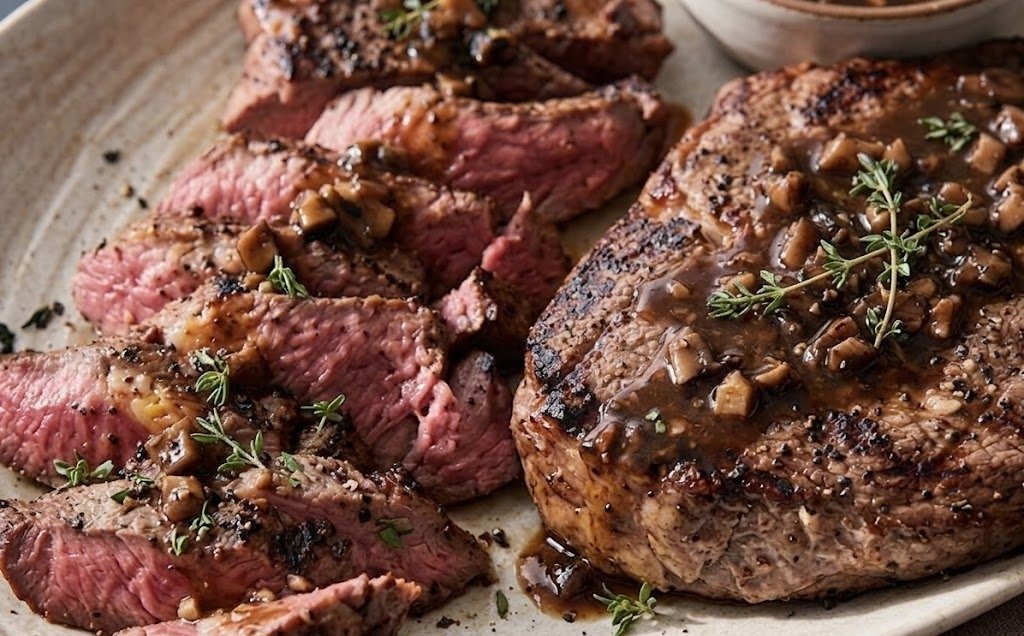
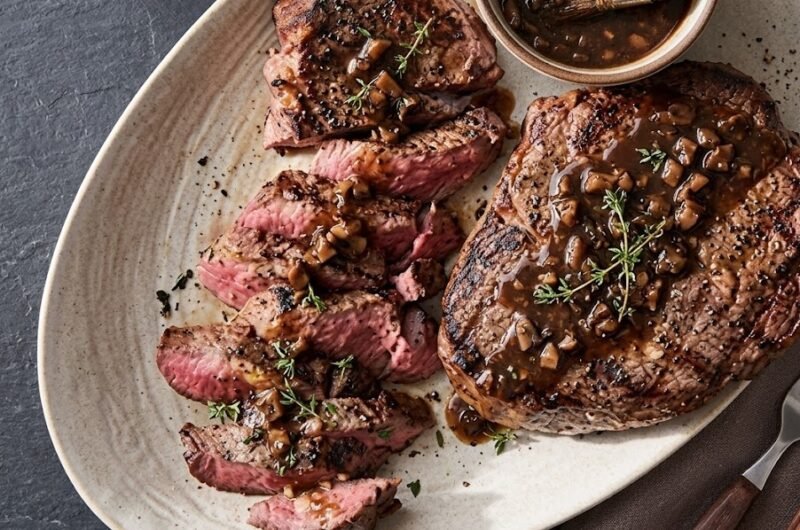
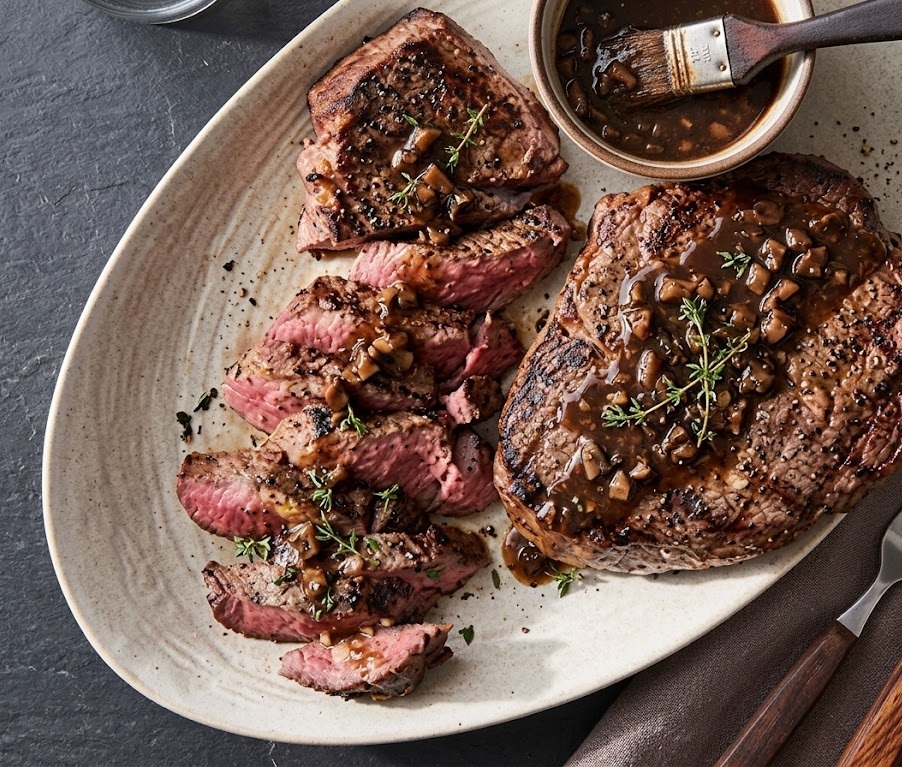
    If you’re looking for a simple, juicy, and flavour-packed dinner that feels restaurant-quality without the fuss, this easy sirloin steak recipe is exactly what you need. Perfectly seared on the outside with a tender, buttery centre, this steak delivers rich beefy flavour with minimal ingredients and effort. It’s an ideal beginner-friendly recipe that comes together quickly, making it perfect for busy weeknights or relaxed weekend dinners. With a crisp golden crust, garlic butter finish, and perfectly cooked interior, this steak recipe proves that great steak at home can be incredibly easy.

    Ingredients

    For the Steak

    • 2 sirloin steaks, about 250g each
    • 1 tablespoon olive oil
    • 1 teaspoon sea salt
    • 1 teaspoon freshly ground black pepper

    For the Garlic Butter

    • 2 tablespoons unsalted butter
    • 2 garlic cloves, crushed
    • 2 sprigs fresh rosemary
    • 1 sprig fresh thyme
    • Extra butter for serving, optional

    How to Make Easy Sirloin Steak Recipe

    • Prepare the steaks: Remove the sirloin steaks from the refrigerator about 30 minutes before cooking. Letting the steaks come to room temperature helps them cook evenly and stay tender.
    • Season well: Pat the steaks dry with paper towels to remove excess moisture. Season both sides generously with sea salt and freshly ground black pepper.
    • Heat the pan: Place a heavy frying pan or cast iron skillet over high heat. Allow it to become very hot before adding the oil. A properly heated pan creates the perfect golden crust.
    • Sear the steaks: Add the olive oil and place the steaks carefully into the pan. Cook without moving them for 2 to 3 minutes to develop a rich caramelised crust.
    • Flip and add butter: Turn the steaks over using tongs. Add the butter, crushed garlic, rosemary, and thyme to the pan.
    • Baste continuously: Tilt the pan slightly and spoon the melted garlic butter over the steaks repeatedly while they cook for another 2 to 3 minutes. This keeps the steaks juicy and full of flavour.
    • Rest before serving: Transfer the steaks to a warm plate and allow them to rest for 5 minutes. Resting helps the juices redistribute throughout the meat.
    • Slice and serve: Slice against the grain for maximum tenderness and serve immediately with extra garlic butter if desired.
    How to Make Easy Sirloin Steak Recipe

    Tips for the Best Sirloin Steak

    How do I get a good crust on steak?

    Make sure the pan is very hot before adding the steaks. Patting the meat dry also helps create a crisp golden crust instead of steaming.

    Should I cook steak straight from the fridge?

    No. Letting the steak sit at room temperature for around 30 minutes helps it cook more evenly and prevents a cold centre.

    How do I know when sirloin steak is done?

    For medium-rare, cook until the internal temperature reaches around 54°C. Medium is closer to 60°C. A meat thermometer gives the most accurate results.

    Why should steak rest after cooking?

    Resting allows the juices to settle back into the meat, keeping the steak tender and juicy when sliced.

    Serving Suggestions

    • Serve with mashed potatoes and green beans
    • Pair with crispy fries and garlic aioli
    • Add a fresh green salad on the side
    • Serve with roasted vegetables and herb butter
    • Pair with creamy peppercorn sauce

    Storage

    Room Temperature

    Cooked steak can sit at room temperature for up to 2 hours before it should be refrigerated.

    Refrigerator

    Store leftover steak in an airtight container in the refrigerator for up to 3 days. Reheat gently in a skillet to avoid drying it out.

    Freezing

    Wrap cooked steak tightly in foil or freezer-safe bags and freeze for up to 2 months. Thaw overnight in the refrigerator before reheating.

    Nutrition

    • Calories: 420 kcal
    • Carbohydrates: 2g
    • Protein: 38g
    • Fat: 29g
    • Saturated Fat: 11g
    • Sodium: 640mg

    Nutrition values are estimates and may vary depending on ingredients used.

    FAQs

    What is the best pan for cooking sirloin steak?

    A heavy cast iron skillet works best because it holds heat well and creates a beautiful golden crust.

    Can I cook sirloin steak in the oven?

    Yes, you can finish thicker steaks in the oven after searing them in a hot pan for a few minutes on each side.

    How long should I rest steak after cooking?

    Rest the steak for at least 5 minutes before slicing to keep it juicy and tender.

    Can I use dried herbs instead of fresh?

    Yes, but fresh herbs provide better aroma and flavour. Use a smaller amount of dried herbs as they are more concentrated.

    Easy Sirloin Steak Recipe

    Recipe by Milli RoseCourse: DinnerCuisine: AmericanDifficulty: Easy
    Servings

    2

    steaks
    Prep time

    10

    minutes
    Cooking time

    10

    minutes
    Total time

    20

    minutes
    Calories

    420

    kcal

    20

    minutes

    Juicy and tender sirloin steak cooked in a hot skillet with garlic butter and fresh herbs. A quick and easy steak dinner perfect for weeknights or special occasions.

    Ingredients

    • 2 sirloin steaks, about 250g each

    • 1 tablespoon olive oil

    • 1 teaspoon sea salt

    • 1 teaspoon freshly ground black pepper

    • 2 tablespoons unsalted butter

    • 2 garlic cloves, crushed

    • 2 sprigs fresh rosemary

    • 1 sprig fresh thyme

    • Extra butter for serving, optional

    Directions

    • Remove the steaks from the refrigerator 30 minutes before cooking to allow them to come to room temperature.
    • Pat the steaks dry with paper towels and season generously with salt and black pepper on both sides.
    • Heat a heavy frying pan or cast iron skillet over high heat until very hot.
    • Add olive oil and carefully place the steaks into the pan.
    • Cook for 2 to 3 minutes on the first side without moving them to create a golden crust.
    • Flip the steaks and add butter, garlic, rosemary, and thyme to the pan.
    • Spoon the melted garlic butter over the steaks continuously for another 2 to 3 minutes until cooked to your preferred doneness.
    • Transfer the steaks to a plate and rest for 5 minutes before slicing.
    • Serve warm with extra butter if desired.

    Notes

    • Always rest steak before slicing to keep it juicy.
    • Use a hot pan for the best crust and flavour.
    • Fresh herbs add incredible aroma and richness.
  • Canned Chicken Salad Recipe

    Canned Chicken Salad Recipe

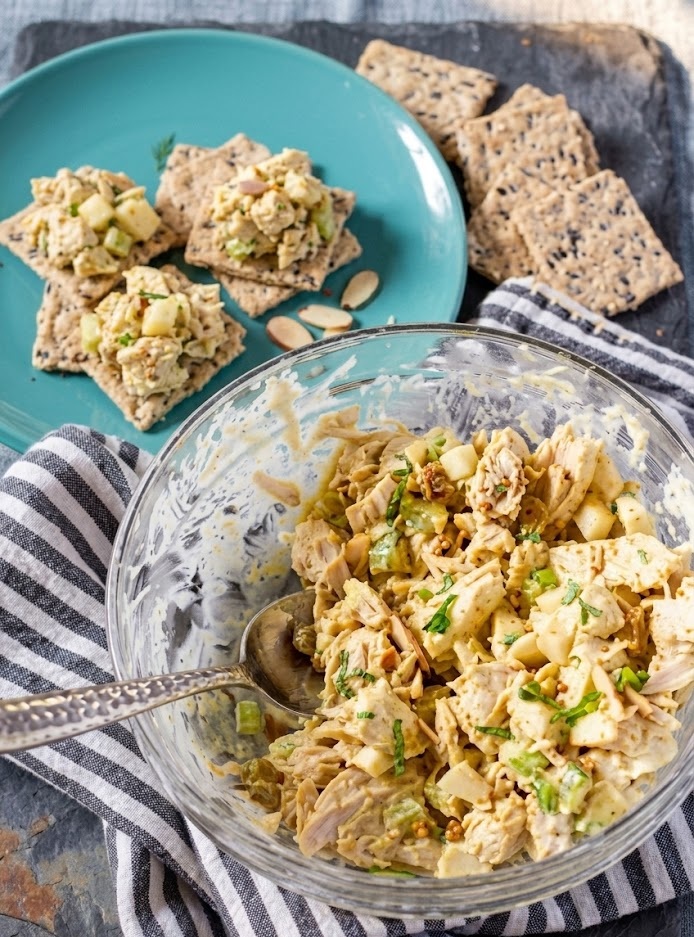
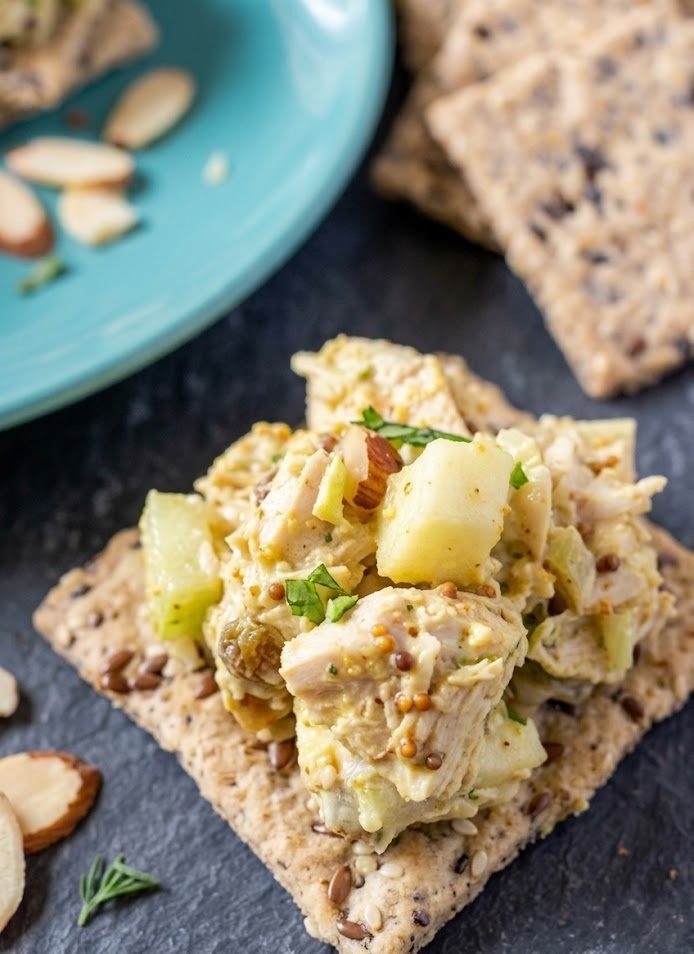
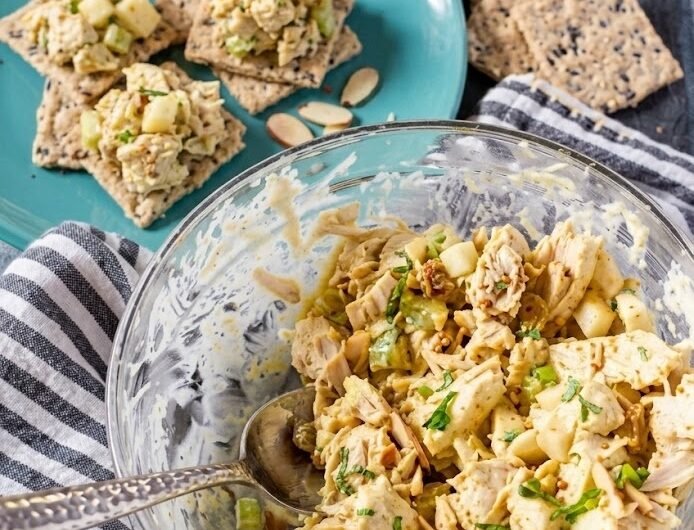
    If you need a quick, satisfying lunch that tastes fresh and homemade, this canned chicken salad recipe is the perfect solution. It combines tender canned chicken with crisp vegetables, creamy dressing, and simple pantry staples for a salad that is rich, crunchy, and full of flavor. This easy recipe comes together in minutes, making it ideal for busy weekdays, meal prep, or light family dinners. With its creamy texture, balanced seasoning, and versatile serving options, this chicken salad is one of those dependable recipes you will make again and again.

    What Is Canned Chicken Salad?

    Canned chicken salad is a quick and creamy cold salad made with canned chicken, mayonnaise, crunchy vegetables, and simple seasonings. It has a smooth and creamy base balanced by crisp celery, onion, and fresh herbs for texture and freshness.

    The flavor is savory, slightly tangy, and perfectly seasoned, making it delicious for sandwiches, wraps, crackers, or lettuce cups. Unlike heavier deli salads, this homemade version tastes lighter and fresher while still being hearty and satisfying.

    One of the best things about this recipe is how convenient it is. Since canned chicken is already cooked, there is no need for roasting or poaching chicken beforehand. Everything mixes together in one bowl in about 10 minutes, making it one of the easiest homemade lunches you can prepare.

    Ingredients

    For the Chicken Salad

    • 2 cans chicken breast, drained well (12.5 oz each)
    • ½ cup mayonnaise
    • 1 teaspoon Dijon mustard
    • 2 celery stalks, finely diced
    • ¼ small red onion, finely diced
    • 2 tablespoons chopped fresh parsley
    • 1 tablespoon lemon juice
    • ½ teaspoon garlic powder
    • ½ teaspoon salt
    • ¼ teaspoon black pepper

    Optional Add-Ins

    • ¼ cup chopped grapes
    • 2 tablespoons chopped walnuts or pecans
    • 1 tablespoon sweet pickle relish
    • 1 chopped hard-boiled egg

    For Serving

    • Bread or croissants
    • Crackers
    • Lettuce leaves
    • Sliced tomatoes

    Preparation and Total Time

    • Prep Time: 10 minutes
    • Cook Time: 0 minutes
    • Total Time: 10 minutes
    • Servings: 4

    How to Make Canned Chicken Salad

    • Drain the chicken: Open the canned chicken and drain it thoroughly. Press lightly with a fork to remove excess liquid so the salad stays creamy rather than watery.
    • Prepare the vegetables: Finely dice the celery and red onion. Chop the parsley into small pieces for even flavor throughout the salad.
    • Mix the dressing: In a medium mixing bowl, combine the mayonnaise, Dijon mustard, lemon juice, garlic powder, salt, and black pepper. Stir until smooth and creamy.
    • Add the chicken: Flake the canned chicken with a fork and add it to the bowl. Stir gently until the chicken is fully coated with the dressing mixture.
    • Fold in the vegetables: Add the celery, onion, and parsley. Mix until evenly distributed. If using optional add-ins like grapes, nuts, or relish, stir them in now.
    • Chill before serving: Cover the bowl and refrigerate the chicken salad for at least 20 minutes if possible. This helps the flavors blend together and improves the texture.
    • Serve and enjoy: Spoon the chicken salad onto bread, croissants, lettuce leaves, or crackers and serve cold.
    How to Make Canned Chicken Salad

    Helpful Tips

    How do I keep canned chicken salad from becoming watery?

    Drain the canned chicken very well before mixing. Excess liquid is the main reason chicken salad becomes runny. Press the chicken gently with paper towels if needed.

    Can I make this recipe healthier?

    Yes. Replace part or all of the mayonnaise with plain Greek yogurt for a lighter version with extra protein and less fat.

    What is the best canned chicken to use?

    Use high-quality canned chicken breast packed in water for the best flavor and texture. Chunk-style chicken works especially well in salads.

    How can I add more flavor?

    Fresh herbs, diced pickles, chopped bacon, paprika, or a little hot sauce can easily boost the flavor without making the salad complicated.

    Can I prepare chicken salad ahead of time?

    Yes. This recipe is excellent for meal prep and actually tastes even better after chilling for a few hours.

    Serving Suggestions

    • Serve in toasted sandwich bread or croissants
    • Spoon into lettuce wraps for a lighter meal
    • Pair with crackers for a quick snack plate
    • Serve with sliced tomatoes and cucumber salad
    • Add to wraps with spinach and avocado

    Storage Instructions

    Room Temperature

    Because this recipe contains mayonnaise, it should not sit at room temperature for more than 2 hours.

    Refrigerator

    Store the chicken salad in an airtight container in the refrigerator for up to 4 days. Stir before serving if any liquid separates slightly.

    Freezing

    Freezing is not recommended because mayonnaise can separate and become grainy once thawed.

    Nutrition Information

    • Calories: 320 kcal
    • Carbohydrates: 3g
    • Protein: 28g
    • Fat: 21g
    • Saturated Fat: 4g
    • Sodium: 690mg

    Nutrition values are estimates and may vary depending on the exact ingredients used.

    FAQs

    Can I use fresh chicken instead of canned chicken?

    Yes, cooked shredded chicken breast or rotisserie chicken works perfectly in this recipe.

    How long does canned chicken salad last in the fridge?

    Properly stored in an airtight container, chicken salad stays fresh for up to 4 days in the refrigerator.

    Can I make canned chicken salad without mayonnaise?

    Yes, you can substitute plain Greek yogurt, sour cream, or mashed avocado for mayonnaise.

    What can I serve with chicken salad?

    Chicken salad pairs well with sandwiches, crackers, lettuce wraps, pasta salad, chips, or fresh vegetables.

    Canned Chicken Salad Recipe

    Recipe by Milli RoseCourse: LunchCuisine: AmericanDifficulty: Easy
    Servings

    4

    servings
    Prep time

    10

    minutes
    Cooking timeminutes
    Total time

    10

    minutes
    Calories

    320

    kcal

    Creamy, quick, and flavorful canned chicken salad made with simple pantry ingredients and crisp vegetables. Perfect for sandwiches, wraps, or light lunches.

    Ingredients

    • 2 cans chicken breast, drained well

    • ½ cup mayonnaise

    • 1 teaspoon Dijon mustard

    • 2 celery stalks, finely diced

    • ¼ small red onion, finely diced

    • 2 tablespoons chopped fresh parsley

    • 1 tablespoon lemon juice

    • ½ teaspoon garlic powder

    • ½ teaspoon salt

    • ¼ teaspoon black pepper

    • ¼ cup chopped grapes (optional)

    • 2 tablespoons chopped walnuts (optional)

    • 1 tablespoon sweet pickle relish (optional)

    • Bread, crackers, or lettuce leaves for serving

    Directions

    • Drain the canned chicken thoroughly and flake with a fork.
    • Dice the celery, onion, and parsley into small even pieces.
    • In a mixing bowl, stir together mayonnaise, Dijon mustard, lemon juice, garlic powder, salt, and black pepper.
    • Add the chicken to the bowl and stir until fully coated.
    • Fold in celery, onion, parsley, and any optional add-ins.
    • Cover and chill the salad for at least 20 minutes before serving for best flavor.
    • Serve cold in sandwiches, wraps, lettuce cups, or with crackers.

    Notes

    • Drain the canned chicken well to prevent watery salad.
    • Chill before serving for the best flavor and texture.
    • Store leftovers in the refrigerator for up to 4 days.
  • Cherry Dump Cake Recipe

    Cherry Dump Cake Recipe

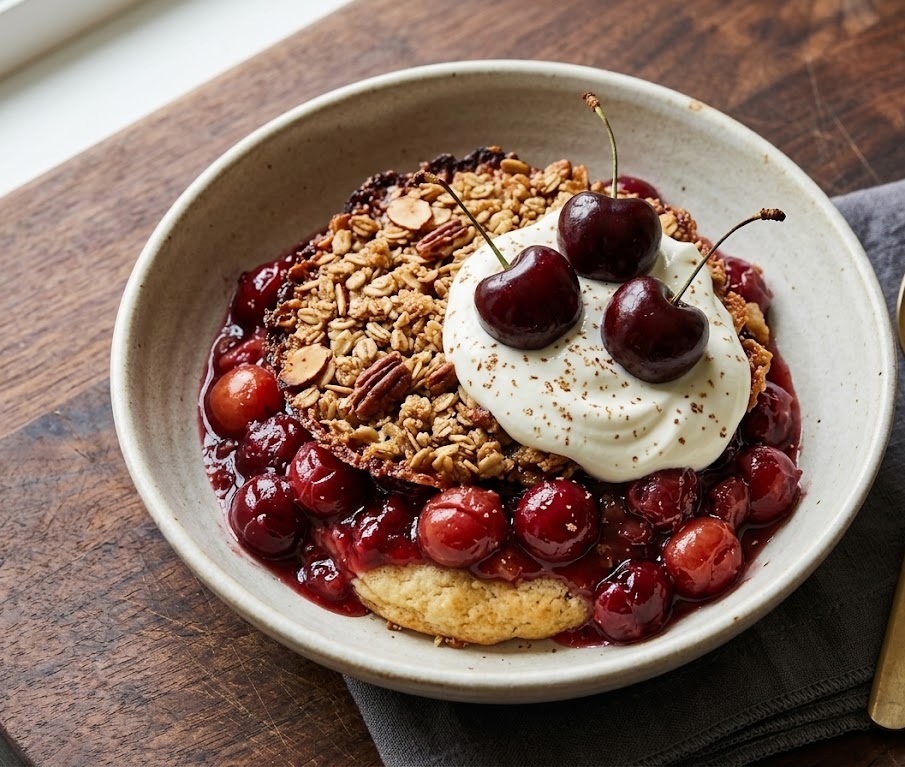
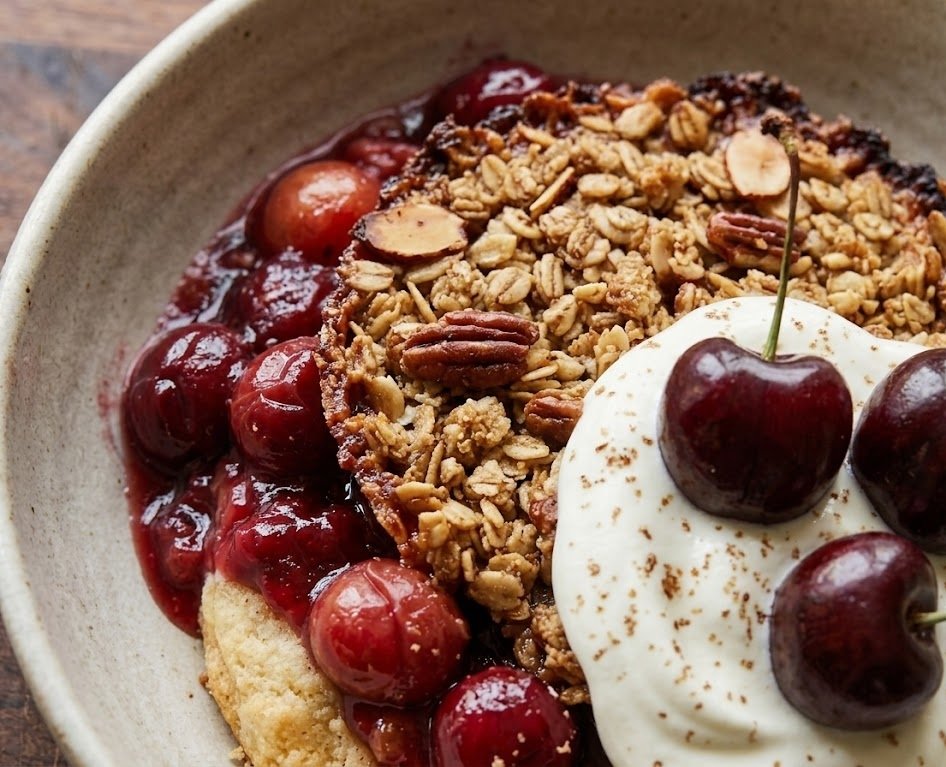
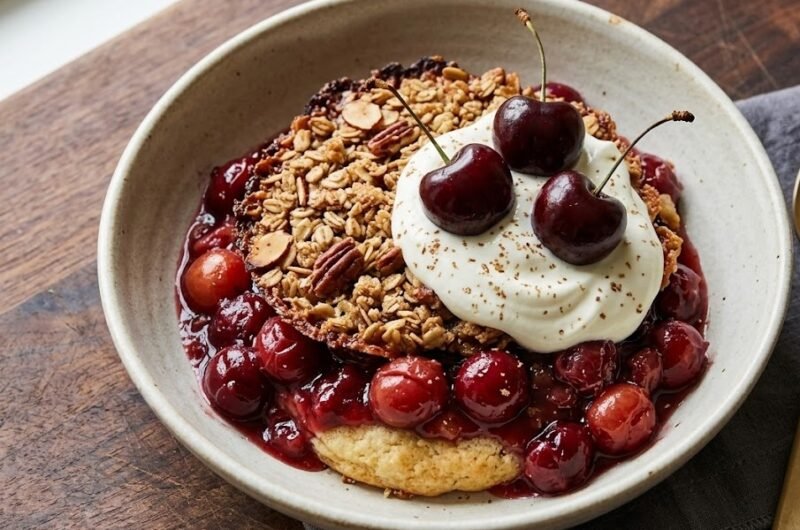
    If you need a simple dessert that tastes like pure comfort, this Cherry Dump Cake Recipe is one of the easiest treats you can make. With layers of sweet cherry pie filling, buttery cake topping, and a golden crisp finish, this classic dessert delivers rich flavor with very little effort. The texture is warm and gooey underneath with a lightly crisp topping that pairs beautifully with ice cream or whipped cream. Perfect for beginners, this easy cherry dump cake comes together in just minutes and bakes into a crowd-pleasing dessert everyone loves.

    What Is Cherry Dump Cake?

    Cherry dump cake is a classic American dessert made by layering cherry pie filling with dry cake mix and melted butter before baking until golden and bubbly. Unlike traditional cakes that require mixing bowls and careful measuring, this dessert is wonderfully simple and forgiving.

    The filling becomes rich, jammy, and soft while the cake topping turns buttery and crisp around the edges. Every bite combines warm cherries with sweet vanilla cake flavor, making it perfect for family gatherings, potlucks, holidays, or an easy weeknight dessert.

    Cherry Dump Cake Recipe Ingredients

    For the Cherry Filling

    • 2 cans cherry pie filling (21 ounces each)
    • 1 teaspoon vanilla extract
    • 1 teaspoon almond extract

    For the Cake Topping

    • 1 box yellow cake mix (15.25 ounces)
    • 170g unsalted butter, melted
    • 2 tablespoons light brown sugar

    Optional Serving Toppings

    • Vanilla ice cream
    • Whipped cream
    • Fresh cherries
    • Powdered sugar

    Preparation and Baking Time

    • Prep Time: 10 minutes
    • Baking Time: 45 minutes
    • Total Time: 55 minutes
    • Servings: 8 servings

    How to Make Cherry Dump Cake Recipe

    • Prepare the oven: Preheat the oven to 180°C or 160°C fan. Grease a 23 x 33cm baking dish lightly with butter or non-stick spray so the filling does not stick during baking.
    • Add the cherry filling: Spoon both cans of cherry pie filling into the prepared baking dish. Spread evenly across the bottom of the dish using the back of a spoon. Stir in the vanilla extract and almond extract for extra flavor.
    • Add the cake mix: Sprinkle the dry yellow cake mix evenly over the cherry filling. Try to cover the filling completely without mixing the layers together.
    • Pour over the butter: Slowly drizzle the melted butter over the entire surface of the cake mix. Cover as much of the dry mix as possible so the topping bakes evenly and becomes golden and crisp.
    • Add extra sweetness: Sprinkle the brown sugar lightly over the top for added caramel flavor and a slightly crisp finish.
    • Bake the dump cake: Place the dish onto the middle oven shelf and bake for 40 to 45 minutes until the topping is golden brown and the cherry filling is bubbling around the edges.
    • Cool before serving: Remove the cake from the oven and allow it to cool for at least 10 minutes before serving. This helps the filling settle slightly and improves the texture.
    • Serve warm: Spoon the warm cherry dump cake into bowls and top with vanilla ice cream or whipped cream for the perfect finishing touch.
    How to Make Cherry Dump Cake Recipe

    Helpful Tips for the Best Cherry Dump Cake

    Why is my dump cake still powdery on top?

    This usually happens when the melted butter does not fully cover the cake mix. Drizzle the butter slowly and evenly so most of the dry mix becomes moist during baking.

    Can I use a different cake mix flavor?

    Yes, white cake mix, vanilla cake mix, or butter cake mix all work beautifully with cherry filling. Chocolate cake mix also creates a richer dessert.

    How do I make the topping crispier?

    For a crispier topping, bake the cake uncovered and allow it to cook until deeply golden brown around the edges.

    Can I add nuts to the recipe?

    Absolutely. Chopped pecans or sliced almonds add wonderful crunch and pair very well with cherries.

    Do I need to mix the ingredients together?

    No. A traditional dump cake works best when the layers stay separate. Simply layer the ingredients directly into the baking dish.

    Serving Suggestions

    • Serve warm with vanilla ice cream
    • Add whipped cream and fresh cherries
    • Pair with hot coffee or tea
    • Dust lightly with powdered sugar
    • Serve with toasted almonds for extra crunch

    Storage Instructions

    Room Temperature

    Cherry dump cake can sit covered at room temperature for up to 6 hours if serving the same day.

    Refrigerator

    Store leftovers in an airtight container in the refrigerator for up to 4 days. Reheat individual portions in the microwave for 30 seconds before serving.

    Freezing

    Freeze cooled portions in freezer-safe containers for up to 2 months. Thaw overnight in the refrigerator and reheat before serving.

    Nutrition Information

    • Calories: 390 kcal
    • Carbohydrates: 58g
    • Protein: 3g
    • Fat: 17g
    • Saturated Fat: 10g
    • Sodium: 420mg

    Nutrition values are estimated and may vary depending on ingredients used.

    Frequently Asked Questions

    Can I use homemade cherry filling instead?

    Yes, homemade cherry filling works beautifully in this recipe. Make sure it is thick enough so the dessert does not become watery.

    What size baking dish works best?

    A 23 x 33cm baking dish gives the best depth and allows the topping to bake evenly.

    Can I make cherry dump cake ahead of time?

    Yes, you can bake it a day ahead and reheat gently before serving. It tastes especially good warm.

    Can I use fresh cherries instead of canned filling?

    Yes, but fresh cherries should be cooked with sugar and thickener first to create a pie filling consistency.

    Cherry Dump Cake Recipe

    Recipe by Milli RoseCourse: DessertCuisine: AmericanDifficulty: Easy
    Servings

    4

    servings
    Prep time

    30

    minutes
    Cooking time

    40

    minutes
    Calories

    300

    kcal
    Total time

    1

    hour 

    10

    minutes

    Easy cherry dump cake made with sweet cherry pie filling, buttery cake topping, and baked until golden and bubbly.

    Ingredients

    • 2 cans cherry pie filling (21 ounces each)

    • 1 teaspoon vanilla extract

    • 1 teaspoon almond extract

    • 1 box yellow cake mix (15.25 ounces)

    • 170g unsalted butter, melted

    • 2 tablespoons light brown sugar

    • Vanilla ice cream, for serving

    • Whipped cream, for serving

    Directions

    • Preheat oven to 180°C (160°C fan). Grease a 23 x 33cm baking dish.
    • Spread the cherry pie filling evenly into the baking dish and stir in vanilla and almond extract.
    • Sprinkle the dry cake mix evenly over the cherry layer without stirring.
    • Drizzle melted butter evenly across the cake mix.
    • Sprinkle brown sugar over the top for extra flavor and texture.
    • Bake for 40 to 45 minutes until golden brown and bubbling around the edges.
    • Cool for 10 minutes before serving warm with ice cream or whipped cream.

    Notes

    • Do not stir the layers together for the best texture.
    • Use melted butter evenly to avoid dry patches.
    • Store leftovers refrigerated for up to 4 days.
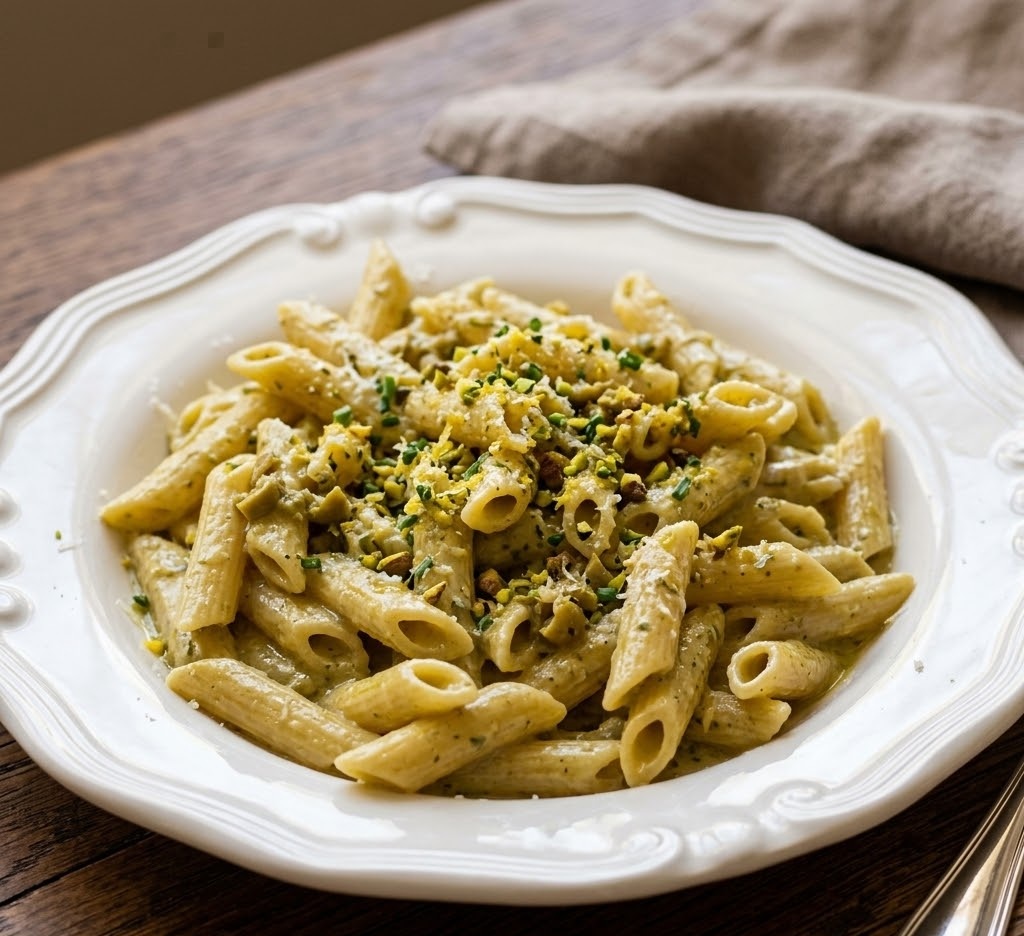
  • Olive Green Alfredo Sauce Recipe

    Olive Green Alfredo Sauce Recipe

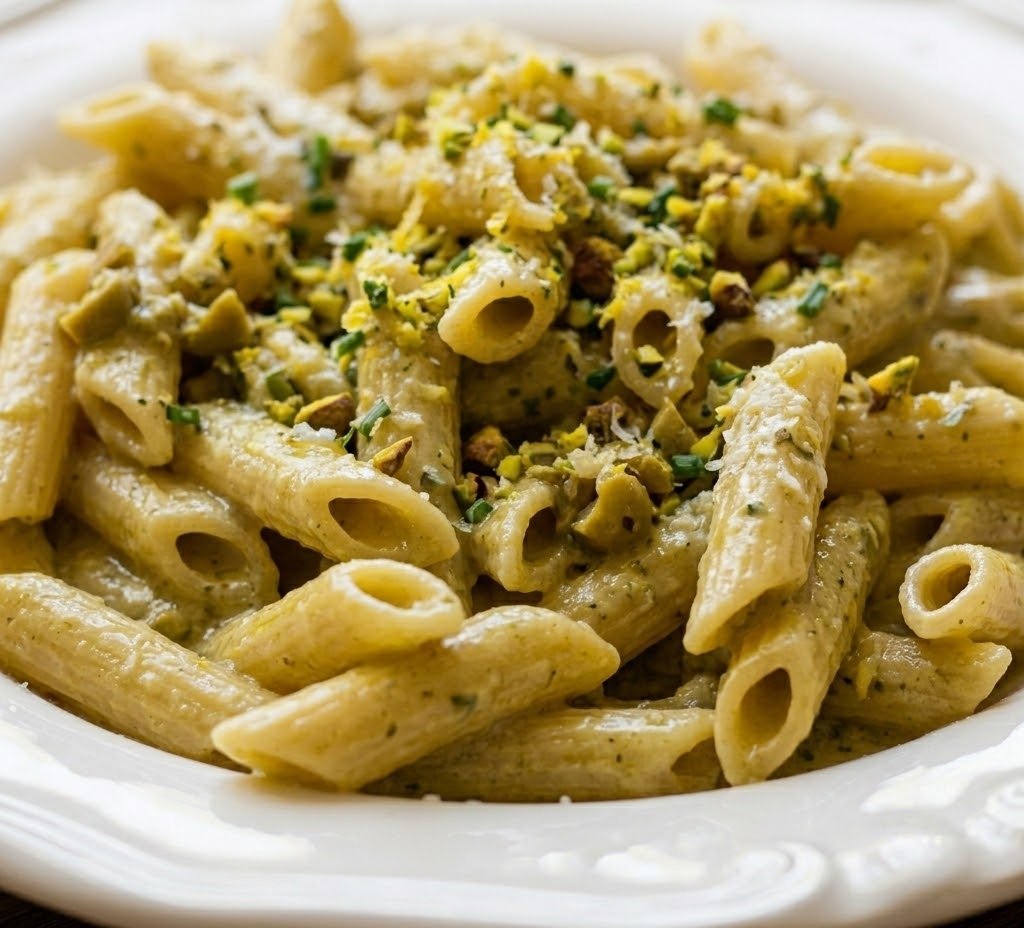
    If you love rich, creamy pasta sauces with a fresh and vibrant twist, this Olive Green Alfredo Sauce Recipe is one you’ll want to make again and again. This velvety green Alfredo combines the classic buttery Parmesan flavour of traditional Alfredo sauce with spinach, basil, and garlic for a beautifully smooth sauce packed with colour and flavour. It is creamy, savoury, slightly herbaceous, and wonderfully comforting while still feeling fresh and light enough for everyday dinners.

    This recipe is simple enough for beginners yet impressive enough for serving guests. The sauce comes together in about 25 minutes, making it ideal for quick weeknight meals or relaxed weekend cooking. Toss it with pasta, spoon it over chicken, or use it as a dipping sauce for warm bread.

    Ingredients

    For the Green Alfredo Sauce

    • 2 tablespoons unsalted butter
    • 1 tablespoon olive oil
    • 4 garlic cloves, minced
    • 2 cups fresh spinach
    • 1 cup fresh basil leaves
    • 1½ cups heavy cream
    • 1 cup freshly grated Parmesan cheese
    • ½ teaspoon salt
    • ¼ teaspoon black pepper
    • ¼ teaspoon Italian seasoning
    • ¼ cup reserved pasta water

    For Serving

    • Cooked fettuccine, penne, or linguine
    • Extra Parmesan cheese
    • Fresh basil leaves
    • Black pepper

    How to Make Olive Green Alfredo Sauce Recipe

    • Prepare the ingredients: Wash the spinach and basil thoroughly and pat dry. Grate the Parmesan cheese finely so it melts smoothly into the sauce.
    • Cook the garlic: Melt the butter with olive oil in a large frying pan over medium heat. Add the minced garlic and cook for about 1 minute until fragrant.
    • Wilt the greens: Add the spinach and basil leaves to the pan. Stir gently for 2 to 3 minutes until the leaves soften and reduce in volume.
    • Blend until smooth: Transfer the cooked greens to a blender or food processor. Blend until completely smooth and creamy.
    • Add the cream: Return the green mixture to the pan and pour in the heavy cream. Stir well and simmer gently for 3 to 4 minutes.
    • Finish the Alfredo sauce: Stir in the Parmesan cheese, salt, pepper, and Italian seasoning. Mix until the cheese fully melts and the sauce becomes silky and thick.
    • Adjust the texture: Add a little reserved pasta water if the sauce feels too thick. Stir until smooth and glossy.
    • Serve immediately: Toss the sauce with hot cooked pasta and garnish with extra Parmesan and basil before serving.
    How to Make Olive Green Alfredo Sauce Recipe

    Tips for the Best Olive Green Alfredo Sauce

    How do you keep Alfredo sauce smooth?

    Use freshly grated Parmesan cheese and keep the heat low after adding it. High heat can cause the cheese to separate and turn grainy.

    Can you make the sauce brighter green?

    Add a little extra basil or a handful of parsley for a more vibrant green colour and fresher flavour.

    Why is my Alfredo sauce too thick?

    Stir in reserved pasta water a little at a time until the sauce reaches your preferred consistency.

    Can you add protein to this sauce?

    Yes, grilled chicken, shrimp, salmon, or sliced steak all work beautifully with this creamy green Alfredo sauce.

    Serving Suggestions

    • Serve with fettuccine or linguine
    • Spoon over grilled chicken breast
    • Use as a dipping sauce for garlic bread
    • Drizzle over roasted vegetables
    • Pair with baked salmon or shrimp

    Storage

    Room Temperature

    This sauce should not sit at room temperature for more than 2 hours because of the cream and cheese.

    Refrigerator

    Store cooled Alfredo sauce in an airtight container in the refrigerator for up to 3 days. Reheat gently over low heat while stirring frequently.

    Freezing

    You can freeze the sauce for up to 2 months, although cream sauces may separate slightly after thawing. Reheat slowly and whisk well before serving.

    Nutrition

    • Calories: 420 kcal
    • Carbohydrates: 8g
    • Protein: 12g
    • Fat: 38g
    • Saturated Fat: 22g
    • Sodium: 620mg

    Nutrition values are estimates and may vary depending on ingredients used.

    FAQs

    Can I make Olive Green Alfredo Sauce ahead of time?

    Yes, you can prepare the sauce up to 2 days in advance and store it in the refrigerator. Reheat gently over low heat before serving.

    What pasta works best with green Alfredo sauce?

    Fettuccine, linguine, penne, and rigatoni all hold the creamy sauce beautifully.

    Can I use milk instead of heavy cream?

    Yes, but the sauce will be lighter and less rich. Whole milk works best for a creamier texture.

    How do I make the sauce more flavourful?

    Add extra garlic, fresh basil, or a little lemon zest for a brighter and deeper flavour.

    Olive Green Alfredo Sauce Recipe

    Recipe by Milli RoseCourse: SauceCuisine: Italian-AmericanDifficulty: Easy
    Servings

    4

    servings
    Prep time

    10

    minutes
    Cooking time

    15

    minutes
    Total time

    25

    minutes
    Calories

    420

    kcal

    25

    minutes

    Creamy green Alfredo sauce made with spinach, basil, Parmesan, cream, and garlic. A smooth and flavourful pasta sauce ready in under 30 minutes.

    Ingredients

    • 2 tablespoons unsalted butter

    • 4 garlic cloves, minced

    • 2 cups fresh spinach

    • 1 cup fresh basil leaves

    • 1 tablespoon olive oil

    • 1½ cups heavy cream

    • 1 cup freshly grated Parmesan cheese

    • ½ teaspoon salt

    • ¼ teaspoon black pepper

    • ¼ teaspoon Italian seasoning

    • ¼ cup reserved pasta water

    • Cooked fettuccine or pasta of choice

    Directions

    • Melt butter with olive oil in a large pan over medium heat.
    • Add minced garlic and cook for 1 minute until fragrant but not browned.
    • Add spinach and basil leaves, then cook for 2 to 3 minutes until wilted.
    • Transfer the mixture to a blender and blend until smooth.
    • Return the mixture to the pan and pour in the heavy cream.
    • Simmer gently for 3 to 4 minutes while stirring frequently.
    • Add Parmesan cheese, salt, pepper, and Italian seasoning.
    • Stir until the cheese melts completely and the sauce becomes smooth.
    • Add reserved pasta water if needed to loosen the sauce.
    • Toss with cooked pasta and serve immediately.

    Notes

    • Use freshly grated Parmesan for the smoothest texture.
    • Do not boil the sauce after adding cheese.
    • Add extra basil for a stronger herb flavour.
  • Shawarma Sauce Recipe

    Shawarma Sauce Recipe

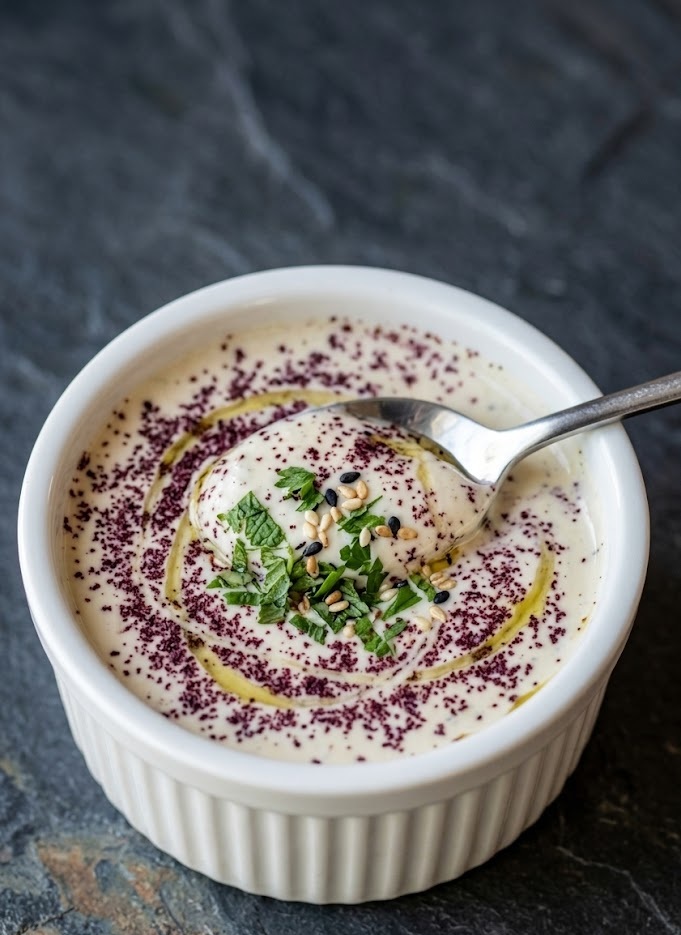
    If you love the rich, creamy flavor that makes shawarma wraps so irresistible, this homemade shawarma sauce recipe is exactly what you need. Smooth, garlicky, tangy, and packed with Middle Eastern-inspired flavor, this easy sauce transforms grilled chicken, beef, lamb, or vegetables into something truly special. The texture is silky and creamy with a bold savory finish that works beautifully as a dip, drizzle, or sandwich spread. Best of all, this beginner-friendly recipe comes together in just 10 minutes using simple pantry ingredients.

    Shawarma Sauce Recipe Ingredients

    For the Creamy Sauce Base

    • 1 cup mayonnaise
    • 1/2 cup plain Greek yogurt
    • 4 garlic cloves, finely grated
    • 2 tablespoons fresh lemon juice
    • 1 tablespoon white vinegar

    For the Seasoning

    • 1 teaspoon ground cumin
    • 1/2 teaspoon paprika
    • 1/2 teaspoon salt
    • 1/4 teaspoon black pepper

    For Adjusting the Texture

    • 1 to 2 tablespoons cold water, as needed

    How to Make Shawarma Sauce Recipe

    • Prepare the ingredients: Finely grate the garlic cloves and squeeze fresh lemon juice. Using fresh garlic and lemon gives the sauce its authentic bold flavor.
    • Mix the creamy base: Add the mayonnaise and Greek yogurt to a medium bowl. Stir until smooth and fully blended.
    • Add the flavorings: Stir in the grated garlic, lemon juice, and white vinegar. Mix well so the garlic distributes evenly throughout the sauce.
    • Season the sauce: Add cumin, paprika, salt, and black pepper. Whisk thoroughly until the sauce becomes creamy and smooth with no lumps remaining.
    • Adjust the consistency: If you want a thinner shawarma sauce for drizzling over wraps or salads, add cold water one tablespoon at a time until you reach your preferred texture.
    • Chill before serving: Cover the bowl and refrigerate the sauce for at least 30 minutes. This resting time allows the garlic and spices to blend beautifully into the sauce.
    • Serve and enjoy: Spoon the sauce over shawarma wraps, grilled meats, fries, burgers, or roasted vegetables.
    How to Make Shawarma Sauce Recipe

    Tips for the Best Shawarma Sauce

    How do I make the sauce more garlicky?

    Add an extra clove of garlic or let the sauce chill longer before serving. The garlic flavor becomes stronger as it rests.

    Can I make shawarma sauce without mayonnaise?

    Yes, you can replace the mayonnaise with extra Greek yogurt for a lighter version. The sauce will be tangier and slightly less creamy.

    Why is my sauce too thick?

    Simply whisk in a little cold water or extra lemon juice until the sauce reaches your preferred consistency.

    How can I make the sauce spicy?

    Add a pinch of cayenne pepper, chili flakes, or a small amount of hot sauce for extra heat.

    What type of yogurt works best?

    Plain full-fat Greek yogurt gives the richest texture and prevents the sauce from becoming watery.

    Serving Suggestions

    • Drizzle over chicken shawarma wraps
    • Serve alongside grilled kebabs
    • Use as a dip for fries or roasted potatoes
    • Spread inside pita sandwiches
    • Spoon over rice bowls and salads
    • Pair with grilled vegetables

    Storage Instructions

    Room Temperature

    Because the sauce contains mayonnaise and yogurt, it should not sit at room temperature for more than 2 hours.

    Refrigerator

    Store the sauce in an airtight container in the refrigerator for up to 5 days. Stir before serving if any separation occurs.

    Freezing

    Freezing is not recommended because the mayonnaise and yogurt can separate after thawing, affecting the texture.

    Nutrition

    • Calories: 95 kcal
    • Carbohydrates: 2g
    • Protein: 1g
    • Fat: 10g
    • Saturated Fat: 2g
    • Sodium: 210mg

    Nutrition values are estimates and may vary depending on the exact ingredients used.

    FAQs

    What is shawarma sauce made of?

    Traditional shawarma sauce is usually made with mayonnaise, yogurt, garlic, lemon juice, and warm spices such as cumin and paprika.

    Can I make shawarma sauce ahead of time?

    Yes, shawarma sauce actually tastes better after a few hours in the refrigerator because the flavors have time to blend together.

    How long does homemade shawarma sauce last?

    Stored in an airtight container in the refrigerator, homemade shawarma sauce stays fresh for up to 5 days.

    Is shawarma sauce spicy?

    This version is mild and creamy, but you can easily make it spicy by adding cayenne pepper or chili sauce.

    Shawarma Sauce Recipe

    Recipe by Milli RoseCourse: SauceCuisine: Middle EasternDifficulty: Easy
    Servings

    8

    servings
    Prep time

    10

    minutes
    Cooking timeminutes
    Total time

    10

    minutes
    Calories

    95

    kcal

    Creamy homemade shawarma sauce made with garlic, yogurt, mayonnaise, and lemon juice. Perfect for wraps, grilled meats, fries, and kebabs.

    Ingredients

    • 1 cup mayonnaise

    • 1/2 cup plain Greek yogurt

    • 4 garlic cloves, finely grated

    • 2 tablespoons fresh lemon juice

    • 1 tablespoon white vinegar

    • 1 teaspoon ground cumin

    • 1/2 teaspoon paprika

    • 1/2 teaspoon salt

    • 1/4 teaspoon black pepper

    • 2 tablespoons cold water, if needed

    Directions

    • Add mayonnaise and Greek yogurt to a medium mixing bowl.
    • Grate the garlic finely and stir it into the bowl along with lemon juice and white vinegar.
    • Season with cumin, paprika, salt, and black pepper.
    • Whisk thoroughly until smooth, creamy, and evenly combined.
    • Add cold water a little at a time if you prefer a thinner consistency for drizzling.
    • Cover and refrigerate for at least 30 minutes before serving for the best flavor.

    Notes

    • Fresh garlic gives the strongest flavor.
    • Refrigerating the sauce improves the taste and texture.
    • Add extra lemon juice for a brighter, tangier finish.
  • Brown Butter Chocolate Chip Cookies Recipe

    Brown Butter Chocolate Chip Cookies Recipe

    If you love rich, bakery-style cookies with crisp golden edges and soft, gooey centres, this Brown Butter Chocolate Chip Cookies Recipe is one you’ll make again and again. Browning the butter adds a deep caramel flavour that takes classic chocolate chip cookies to a whole new level. These cookies are soft in the middle, lightly crisp around the edges, and packed with melted chocolate in every bite. They are surprisingly easy to make and perfect for beginner bakers, with a total time of around 1 hour including chilling.

    Ingredients

    For the Cookie Dough

    • 170g unsalted butter
    • 150g light brown sugar
    • 100g caster sugar
    • 1 large egg
    • 1 egg yolk
    • 2 teaspoons vanilla extract
    • 250g plain flour
    • 1 teaspoon bicarbonate of soda
    • 1/2 teaspoon baking powder
    • 1/2 teaspoon fine sea salt
    • 200g dark chocolate chips or chopped chocolate

    For Topping

    • Flaky sea salt, optional

    How to Make Brown Butter Chocolate Chip Cookies Recipe

    • Prepare the oven: Preheat the oven to 180°C or 160°C fan. Line two large baking trays with baking parchment and set aside.
    • Brown the butter: Add the butter to a saucepan over medium heat. Stir continuously as the butter melts and begins to foam. Continue cooking until golden brown specks appear and the butter smells nutty and caramel-like. Remove from the heat and cool for 10 minutes.
    • Mix the sugars: Pour the browned butter into a large mixing bowl. Add the light brown sugar and caster sugar, then whisk until glossy and smooth.
    • Add the eggs and vanilla: Whisk in the egg, egg yolk, and vanilla extract until fully combined and creamy.
    • Combine the dry ingredients: In a separate bowl, mix together the flour, bicarbonate of soda, baking powder, and salt.
    • Make the dough: Fold the dry ingredients into the wet mixture using a spatula until just combined. Stir through the chocolate chips evenly.
    • Chill the dough: Cover the bowl and chill the dough in the refrigerator for 30 minutes. This helps create thicker, chewier cookies.
    • Shape the cookies: Scoop portions of dough onto the prepared trays, leaving enough space for spreading during baking.
    • Bake the cookies: Bake for 10 to 12 minutes until the edges are golden brown but the centres still look slightly soft.
    • Cool and serve: Sprinkle with flaky sea salt if desired. Leave the cookies on the tray for 10 minutes before transferring to a wire rack to cool completely.
    How to Make Brown Butter Chocolate Chip Cookies Recipe

    Tips for the Best Brown Butter Chocolate Chip Cookies

    Why should I chill the cookie dough?

    Chilling helps the flour absorb moisture and prevents the cookies from spreading too much. It also improves the flavour and gives a chewier texture.

    How do I know when the butter is browned properly?

    The butter should smell nutty and have golden brown bits at the bottom of the pan. Watch carefully because it can burn quickly.

    Can I use milk chocolate instead of dark chocolate?

    Yes, milk chocolate creates a sweeter cookie, while dark chocolate balances the rich brown butter flavour beautifully.

    Why are my cookies dry?

    Too much flour or overbaking can make cookies dry. Measure flour accurately and remove the cookies when the centres still look slightly soft.

    How can I make bakery-style thick cookies?

    Chill the dough thoroughly and use larger scoops of cookie dough. Slightly underbaking also keeps the centres soft and thick.

    Serving Suggestions

    • Serve warm with a cold glass of milk
    • Pair with coffee or hot chocolate
    • Sandwich vanilla ice cream between two cookies
    • Drizzle with melted chocolate for dessert platters
    • Enjoy with salted caramel sauce

    Storage

    Room Temperature

    Store the cookies in an airtight container for up to 5 days. Add a slice of bread to the container to help keep them soft.

    Refrigerator

    Cookie dough can be refrigerated for up to 3 days before baking. Let it sit at room temperature for 10 minutes before scooping.

    Freezing

    Freeze baked cookies or raw cookie dough balls for up to 3 months. Bake directly from frozen, adding 1 to 2 extra minutes to the baking time.

    Nutrition

    • Calories: 320 kcal
    • Carbohydrates: 38g
    • Protein: 4g
    • Fat: 17g
    • Saturated Fat: 10g
    • Sodium: 180mg

    Nutrition values are estimates and may vary depending on ingredients used.

    FAQs

    Can I freeze brown butter chocolate chip cookie dough?

    Yes, scoop the dough into balls and freeze on a tray before transferring to a freezer bag. Bake from frozen with an extra minute or two added to the baking time.

    Why are my cookies spreading too much?

    Warm dough or too little flour can cause cookies to spread. Chilling the dough before baking helps keep them thick and chewy.

    Can I make these cookies without brown butter?

    Yes, but the cookies will lose the rich caramel flavour that makes this recipe special.

    How do I keep chocolate chip cookies soft?

    Store them in an airtight container with a slice of bread to maintain moisture and softness.

    Brown Butter Chocolate Chip Cookies Recipe

    Recipe by Milli RoseCourse: DessertCuisine: AmericanDifficulty: Easy
    Servings

    18

    cookies
    Prep time

    20

    minutes
    Cooking time

    12

    minutes
    Total time

    60

    minutes
    Calories

    320

    kcal

    32

    minutes

    Rich and chewy brown butter chocolate chip cookies with crisp edges, soft centres, and deep caramel flavour in every bite.

    Ingredients

    • 170g unsalted butter

    • 150g light brown sugar

    • 100g caster sugar

    • 1 large egg

    • 1 egg yolk

    • 2 tsp vanilla extract

    • 250g plain flour

    • 1 tsp bicarbonate of soda

    • 1/2 tsp baking powder

    • 1/2 tsp fine sea salt

    • 200g dark chocolate chips

    • Flaky sea salt for topping

    Directions

    • Preheat oven to 180°C (160°C fan). Line two baking trays with baking parchment.
    • Melt the butter in a saucepan over medium heat until golden brown and nutty smelling. Cool for 10 minutes.
    • Whisk the browned butter with brown sugar and caster sugar until glossy.
    • Add egg, egg yolk and vanilla extract, whisking until smooth.
    • Fold in flour, bicarbonate of soda, baking powder and salt until combined.
    • Stir through the chocolate chips evenly.
    • Chill the cookie dough for 30 minutes for thicker cookies.
    • Scoop dough onto baking trays leaving space between each cookie.
    • Bake for 10 to 12 minutes until golden at the edges but soft in the middle.
    • Cool on trays for 10 minutes before transferring to a wire rack.

    Notes

    • Chilling the dough improves flavour and texture.
    • Use high-quality chocolate for the best taste.
    • Cookies can be frozen before or after baking.
  • Smoked Pork Tenderloin Recipe

    Smoked Pork Tenderloin Recipe

    If you are looking for a juicy, smoky, and incredibly flavorful dinner that feels impressive without being difficult, this smoked pork tenderloin recipe is exactly what you need. Pork tenderloin is naturally lean and tender, and when slowly smoked, it develops a rich smoky crust while staying beautifully moist inside. The combination of simple seasoning, gentle smoke, and proper cooking creates a restaurant-quality main dish with very little effort.

    This recipe is beginner-friendly and perfect for weekend cookouts, family dinners, or summer gatherings. The pork turns out tender enough to slice with a fork, with a balance of savory spices and subtle sweetness in every bite. Best of all, the entire recipe comes together in under two hours, making it practical for both special occasions and easy weeknight cooking.

    Ingredients

    For the Pork Tenderloin

    • 2 pork tenderloins (about 1 to 1.5 pounds each)
    • 2 tablespoons olive oil
    • 2 teaspoons kosher salt
    • 1 teaspoon black pepper
    • 1 tablespoon smoked paprika
    • 1 teaspoon garlic powder
    • 1 teaspoon onion powder
    • 1 tablespoon brown sugar
    • 1 teaspoon dried thyme
    • 1 teaspoon mustard powder
    • Wood chips or pellets for smoking
    • Fresh parsley for garnish

    How to Make Smoked Pork Tenderloin Recipe

    • Prepare the smoker: Preheat your smoker to 225°F (107°C). Add your preferred wood chips or pellets. Apple, cherry, or hickory wood all work beautifully with pork tenderloin.
    • Prepare the pork: Pat the pork tenderloins dry using paper towels. This helps the seasoning stick properly and encourages a better crust during smoking.
    • Mix the seasoning: In a small bowl, combine the kosher salt, black pepper, smoked paprika, garlic powder, onion powder, brown sugar, thyme, and mustard powder until evenly mixed.
    • Season the meat: Rub the pork tenderloins with olive oil, then coat all sides generously with the seasoning blend. Press the spices gently into the meat so they adhere well.
    • Smoke the pork: Place the seasoned pork tenderloins directly onto the smoker grates. Close the lid and smoke for 60 to 75 minutes, depending on thickness.
    • Check for doneness: Insert a meat thermometer into the thickest part of the pork. The pork is ready when the internal temperature reaches 145°F (63°C).
    • Rest before slicing: Remove the pork from the smoker and let it rest on a cutting board for 10 minutes. This helps the juices redistribute throughout the meat.
    • Slice and serve: Slice the smoked pork tenderloin into medallions and garnish with fresh parsley before serving warm.
    How to Make Smoked Pork Tenderloin Recipe

    Tips for the Best Smoked Pork Tenderloin

    How do I keep pork tenderloin from drying out?

    Use a meat thermometer and remove the pork once it reaches 145°F internally. Overcooking is the main reason pork tenderloin becomes dry.

    What wood works best for smoking pork?

    Apple and cherry wood provide a mild sweetness that pairs beautifully with pork, while hickory gives a deeper smoky flavor.

    Should I marinate the pork first?

    You can marinate the pork for extra flavor, but this dry rub recipe already creates a delicious crust and juicy interior.

    Can I make this recipe on a pellet grill?

    Yes, pellet grills work perfectly for smoked pork tenderloin and provide steady heat with excellent smoky flavor.

    Serving Suggestions

    • Serve with roasted potatoes and grilled vegetables
    • Pair with creamy coleslaw or potato salad
    • Add sliced pork to sandwiches or wraps
    • Serve alongside cornbread and baked beans
    • Pair with a fresh green salad for a lighter meal

    Storage

    Room Temperature

    Do not leave smoked pork tenderloin at room temperature for more than 2 hours after cooking.

    Refrigerator

    Store leftovers in an airtight container in the refrigerator for up to 4 days. Reheat gently to avoid drying out the meat.

    Freezing

    Wrap sliced pork tightly in foil or freezer-safe bags and freeze for up to 3 months. Thaw overnight in the refrigerator before reheating.

    Nutrition

    • Calories: 320 kcal
    • Carbohydrates: 4g
    • Protein: 38g
    • Fat: 16g
    • Saturated Fat: 3g
    • Sodium: 720mg

    Nutrition values are estimates and may vary depending on ingredients used.

    FAQs

    How long does it take to smoke pork tenderloin?

    Most pork tenderloins take between 60 and 75 minutes at 225°F, depending on thickness and smoker temperature consistency.

    What temperature should smoked pork tenderloin be cooked to?

    Pork tenderloin should reach an internal temperature of 145°F for safe and juicy results.

    Can I smoke pork tenderloin ahead of time?

    Yes, smoked pork tenderloin reheats very well and can be made a day ahead for easy meal prep.

    Do I need to wrap pork tenderloin while smoking?

    No, wrapping is not necessary for pork tenderloin because it cooks quickly and stays naturally tender.

    Smoked Pork Tenderloin Recipe

    Recipe by Milli RoseCourse: DinnerCuisine: AmericanDifficulty: Easy
    Servings

    6

    servings
    Prep time

    15

    minutes
    Cooking time

    1

    hour 

    15

    minutes
    Total time

    90

    minutes
    Calories

    320

    kcal

    1

    hour 

    30

    minutes

    Juicy smoked pork tenderloin with a flavorful spice rub and rich smoky finish. Tender, easy to prepare, and perfect for family dinners or summer cookouts.

    Ingredients

    • 2 pork tenderloins (about 1 to 1.5 pounds each)

    • 2 tablespoons olive oil

    • 2 teaspoons kosher salt

    • 1 teaspoon black pepper

    • 1 tablespoon smoked paprika

    • 1 teaspoon garlic powder

    • 1 teaspoon onion powder

    • 1 tablespoon brown sugar

    • 1 teaspoon dried thyme

    • 1 teaspoon mustard powder

    • Wood chips or pellets for smoking

    • Fresh parsley for garnish

    Directions

    • Preheat your smoker to 225°F (107°C) and prepare wood chips or pellets.
    • Pat the pork tenderloins dry with paper towels and rub with olive oil.
    • Mix salt, pepper, smoked paprika, garlic powder, onion powder, brown sugar, thyme, and mustard powder in a small bowl.
    • Coat the pork tenderloins evenly with the seasoning mixture.
    • Place the pork directly onto the smoker grates and smoke for 60 to 75 minutes.
    • Cook until the internal temperature reaches 145°F (63°C).
    • Remove the pork from the smoker and rest for 10 minutes before slicing.
    • Slice into medallions, garnish with parsley, and serve warm.

    Notes

    • Use apple or cherry wood for a mild smoky flavor.
    • Always rest the pork before slicing to keep it juicy.
    • A meat thermometer gives the most accurate results.
  • Pan Roasted Sweet Potatoes Recipe

    Pan Roasted Sweet Potatoes Recipe

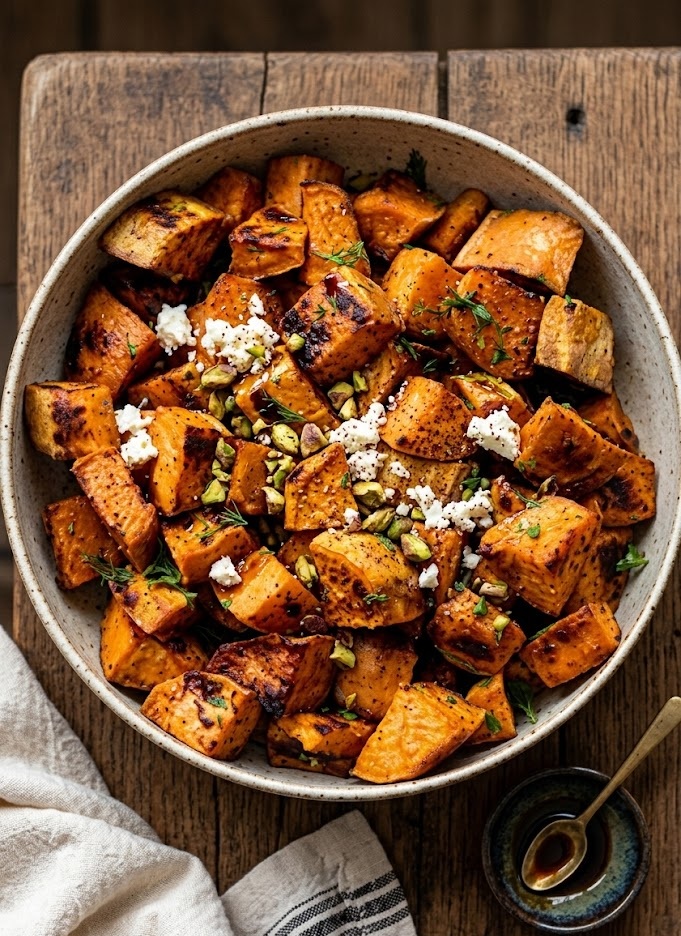
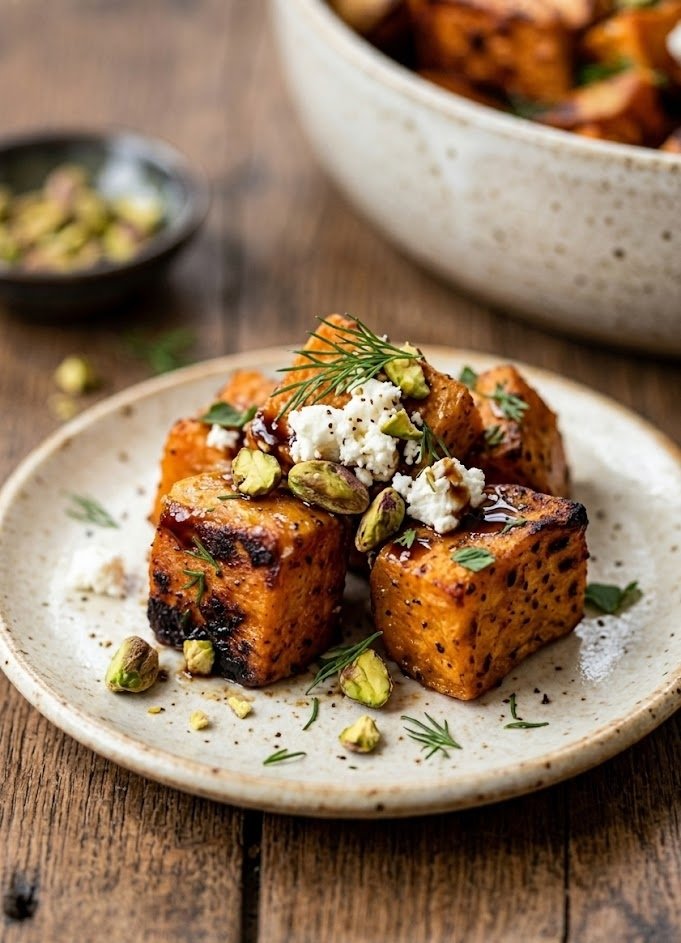
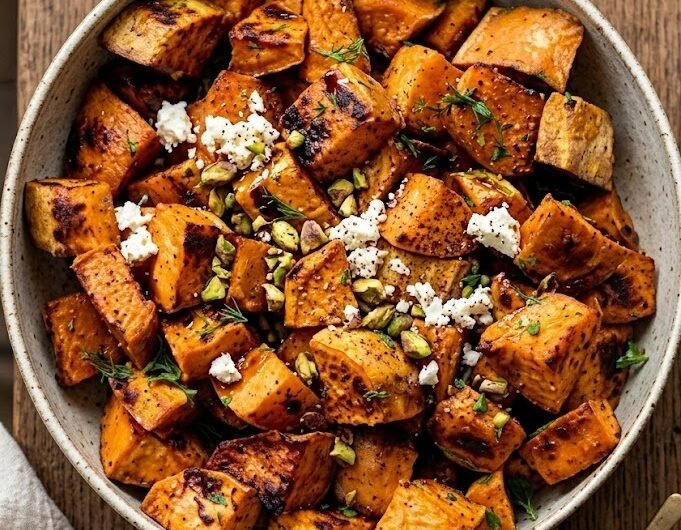
    If you are looking for a simple side dish packed with flavour, this pan roasted sweet potatoes recipe is one you will make again and again. These sweet potatoes are crispy and golden on the outside with a soft, fluffy centre and a naturally sweet, caramelised flavour. Made with simple pantry ingredients, this easy recipe is perfect for busy weeknights, holiday dinners, or healthy meal prep. Best of all, it comes together quickly with very little effort and delivers restaurant-quality results right from your stovetop.

    Ingredients

    For the Pan Roasted Sweet Potatoes

    • 2 medium sweet potatoes, peeled and diced into small cubes
    • 2 tablespoons olive oil
    • 1 tablespoon butter
    • 1 teaspoon garlic powder
    • 1 teaspoon smoked paprika
    • 1 teaspoon dried thyme
    • ½ teaspoon salt
    • ¼ teaspoon black pepper
    • Fresh parsley, chopped, for garnish

    How to Make Pan Roasted Sweet Potatoes

    • Prepare the sweet potatoes: Wash, peel, and dice the sweet potatoes into evenly sized cubes. Keeping the pieces similar in size helps them cook evenly and become perfectly tender.
    • Heat the skillet: Place a large skillet or frying pan over medium heat. Add the olive oil and butter and allow them to heat until the butter is melted and slightly bubbling.
    • Add the sweet potatoes: Carefully add the diced sweet potatoes to the hot skillet in a single layer. Avoid overcrowding the pan so the potatoes roast properly instead of steaming.
    • Season the potatoes: Sprinkle over the garlic powder, smoked paprika, dried thyme, salt, and black pepper. Stir gently so all the pieces are evenly coated with seasoning.
    • Cook until golden: Allow the sweet potatoes to cook for 15 to 20 minutes, stirring every few minutes. The edges should become crisp and golden while the centres turn soft and fluffy.
    • Adjust the heat if needed: If the potatoes begin browning too quickly before becoming tender, lower the heat slightly and continue cooking until fork tender.
    • Finish and serve: Remove the skillet from the heat and sprinkle with freshly chopped parsley. Serve warm as a delicious side dish with your favourite meals.
    How to Make Pan Roasted Sweet Potatoes

    Tips for the Best Pan Roasted Sweet Potatoes

    How do I get crispy sweet potatoes in a pan?

    Make sure the pan is fully heated before adding the potatoes and avoid overcrowding. A large skillet or cast iron pan works best for crisp edges.

    Should I peel sweet potatoes first?

    You can leave the skin on for extra texture and nutrients, but peeling gives a softer and smoother finish.

    Why are my sweet potatoes sticking to the pan?

    Use enough oil or butter and allow the potatoes to cook undisturbed for a few minutes before stirring.

    Can I add extra seasoning?

    Yes, sweet potatoes pair beautifully with chilli flakes, cumin, cinnamon, rosemary, or even a drizzle of honey.

    Serving Suggestions

    • Serve alongside grilled chicken or steak
    • Pair with roasted vegetables and salad bowls
    • Add to breakfast plates with eggs and bacon
    • Use as a filling for tacos or wraps
    • Top with feta cheese or avocado for extra flavour

    Storage

    Room Temperature

    Leave the sweet potatoes at room temperature for no longer than 2 hours before storing.

    Refrigerator

    Store leftovers in an airtight container in the refrigerator for up to 4 days. Reheat in a skillet for the best texture.

    Freezing

    Freeze cooled sweet potatoes in a freezer-safe container for up to 2 months. Thaw overnight in the refrigerator before reheating.

    Nutrition

    • Calories: 210 kcal
    • Carbohydrates: 29g
    • Protein: 2g
    • Fat: 10g
    • Saturated Fat: 3g
    • Sodium: 320mg

    Nutrition values are estimates and may vary depending on ingredients used.

    FAQs

    Can I roast sweet potatoes without peeling them?

    Yes, the skin becomes slightly crisp during cooking and adds extra texture and nutrients.

    What pan works best for pan roasted sweet potatoes?

    A large cast iron skillet or heavy frying pan gives the best caramelisation and crispy edges.

    Can I make pan roasted sweet potatoes ahead of time?

    Yes, they can be cooked ahead and reheated in a skillet or oven before serving.

    How do I know when sweet potatoes are fully cooked?

    The potatoes should be golden brown outside and easily pierced with a fork in the centre.

    Pan Roasted Sweet Potatoes Recipe

    Recipe by Milli RoseCourse: Side DishCuisine: AmericanDifficulty: Easy
    Servings

    4

    servings
    Prep time

    10

    minutes
    Cooking time

    20

    minutes
    Total time

    30

    minutes
    Calories

    210

    kcal

    30

    minutes

    Crispy pan roasted sweet potatoes with caramelised edges and a soft, fluffy centre. An easy and flavourful side dish perfect for any meal.

    Ingredients

    • 2 medium sweet potatoes, peeled and diced

    • 2 tablespoons olive oil

    • 1 tablespoon butter

    • 1 teaspoon garlic powder

    • 1 teaspoon smoked paprika

    • 1 teaspoon dried thyme

    • ½ teaspoon salt

    • ¼ teaspoon black pepper

    • Fresh parsley, chopped, for garnish

    Directions

    • Wash, peel, and dice the sweet potatoes into even bite-sized cubes.
    • Heat olive oil and butter in a large skillet over medium heat until melted and hot.
    • Add the sweet potatoes to the pan in a single layer.
    • Season with garlic powder, smoked paprika, thyme, salt, and black pepper.
    • Cook for 15–20 minutes, stirring occasionally, until golden brown and fork tender.
    • Reduce heat slightly if the potatoes brown too quickly before softening.
    • Remove from heat and garnish with chopped parsley before serving.

    Notes

    • Cut the potatoes into equal sizes for even cooking.
    • A cast iron skillet gives the crispiest edges.
    • Add chilli flakes for extra heat and flavour.
  • BBq Ribs in the Oven Recipe

    BBq Ribs in the Oven Recipe

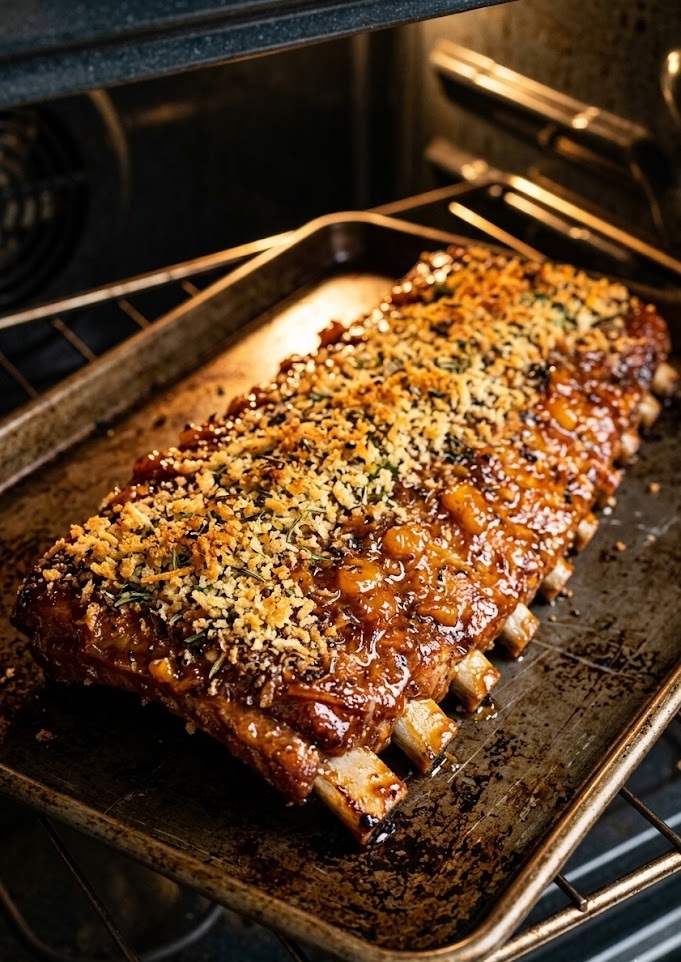
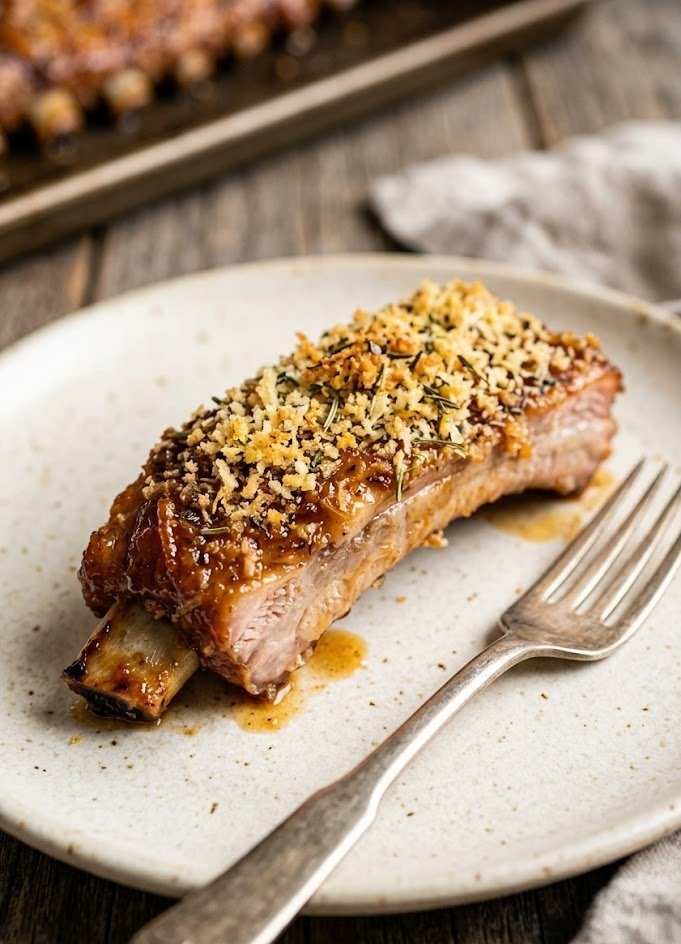
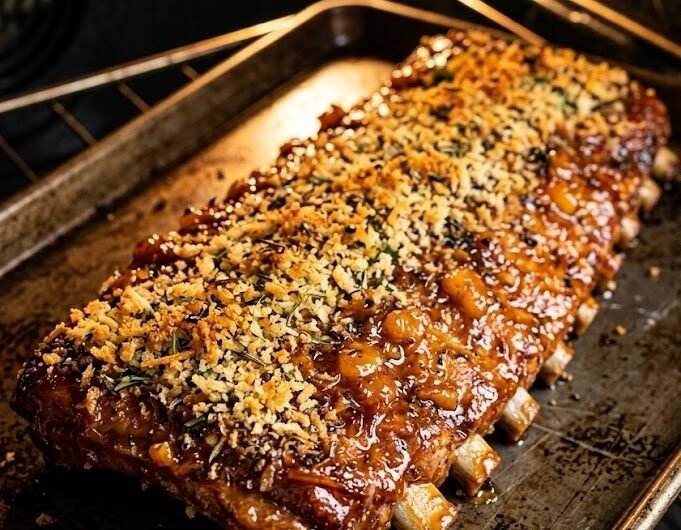
    If you love tender, juicy ribs coated in sticky barbecue sauce, this BBq ribs in the oven recipe is guaranteed to become a family favourite. These slow-cooked pork ribs are packed with smoky, sweet flavour and baked until perfectly tender before being finished with a rich homemade glaze. The meat becomes soft enough to pull apart easily while still keeping a delicious caramelised crust on the outside.

    This recipe is surprisingly simple to make at home and requires very little hands-on work. Whether you are preparing a weekend dinner, game-day feast, or summer-style comfort meal, these oven-baked ribs deliver restaurant-quality flavour without needing a smoker or grill.

    What Are BBq Ribs in the Oven?

    BBq ribs in the oven are slow-cooked pork ribs seasoned with spices, baked gently until tender, then brushed with barbecue sauce and roasted until beautifully sticky and caramelised. Unlike grilled ribs, oven-baked ribs are incredibly easy to control, making them ideal for beginners.

    The texture is melt-in-the-mouth tender with crispy edges and a rich smoky coating. The combination of paprika, garlic, brown sugar, and barbecue sauce creates layers of sweet, savoury, and smoky flavour that make every bite irresistible.

    BBq Ribs in the Oven Recipe Ingredients

    For the Ribs

    • 2 racks pork baby back ribs
    • 2 tablespoons olive oil
    • 1 tablespoon smoked paprika
    • 2 teaspoons garlic powder
    • 2 teaspoons onion powder
    • 1 teaspoon black pepper
    • 1 teaspoon salt
    • 1 teaspoon chilli powder
    • 2 tablespoons brown sugar

    For the BBQ Sauce

    • 1 cup barbecue sauce
    • 2 tablespoons honey
    • 1 tablespoon Worcestershire sauce
    • 1 tablespoon apple cider vinegar

    Kitchen Equipment

    • Large baking tray
    • Aluminium foil
    • Baking parchment
    • Small mixing bowl
    • Basting brush
    • Sharp knife

    Preparation and Cooking Time

    • Prep Time: 15 minutes
    • Cook Time: 2 hours 30 minutes
    • Total Time: 2 hours 45 minutes
    • Servings: 6 servings

    How to Make BBq Ribs in the Oven Recipe

    • Prepare the oven: Preheat the oven to 160°C fan or 180°C conventional. Line a large baking tray with baking parchment and aluminium foil to make cleanup easier.
    • Prepare the ribs: Remove the thin membrane from the back of the ribs using a knife and paper towel. This helps the ribs become more tender while baking.
    • Season the ribs: In a small bowl, mix the smoked paprika, garlic powder, onion powder, salt, pepper, chilli powder, and brown sugar. Rub the olive oil over the ribs, then coat generously with the seasoning mixture.
    • Wrap for baking: Place the ribs meat-side up on the prepared tray. Cover tightly with foil so the steam stays inside during cooking.
    • Bake slowly: Bake the ribs for 2 hours until the meat feels tender when pierced with a knife. The ribs should begin pulling slightly away from the bones.
    • Prepare the sauce: While the ribs bake, combine the barbecue sauce, honey, Worcestershire sauce, and apple cider vinegar in a bowl. Stir until smooth.
    • Glaze the ribs: Remove the foil carefully and brush the ribs generously with the BBQ sauce mixture.
    • Finish baking: Return the ribs to the oven uncovered for 20 to 25 minutes. Brush with extra sauce halfway through cooking so the coating becomes sticky and caramelised.
    • Rest and serve: Remove the ribs from the oven and let them rest for 5 minutes before slicing between the bones. Serve hot with extra barbecue sauce.
    How to Make BBq Ribs in the Oven Recipe

    Best Tips for Perfect Oven-Baked Ribs

    How do I make ribs extra tender?

    Slow cooking at a lower temperature is the secret. Keeping the ribs tightly covered with foil traps steam and prevents the meat from drying out.

    Should I remove the membrane?

    Yes, removing the membrane from the back of the ribs helps improve texture and allows the seasoning to soak into the meat more evenly.

    Can I make the ribs spicy?

    Add cayenne pepper, hot sauce, or extra chilli powder to the seasoning mix for a spicier finish.

    Why are my ribs dry?

    Overcooking uncovered can dry the ribs out. Keep them wrapped for most of the cooking time and uncover only at the end for glazing.

    Can I use beef ribs instead?

    Yes, but beef ribs may require slightly longer cooking depending on thickness.

    Serving Suggestions

    • Creamy mashed potatoes
    • Coleslaw
    • Corn on the cob
    • Baked beans
    • Garlic bread
    • Potato wedges

    Storage Instructions

    Room Temperature

    Do not leave cooked ribs at room temperature for more than 2 hours.

    Refrigerator

    Store cooled ribs in an airtight container for up to 4 days. Reheat covered in the oven until hot.

    Freezing

    Wrap portions tightly in foil and freeze for up to 3 months. Defrost overnight in the refrigerator before reheating.

    Nutrition Information

    • Calories: 520 kcal
    • Carbohydrates: 18g
    • Protein: 34g
    • Fat: 34g
    • Saturated Fat: 11g
    • Sodium: 980mg

    Nutrition values are approximate and may vary depending on ingredients used.

    FAQs

    Can I cook BBQ ribs in the oven without foil?

    Yes, but wrapping the ribs in foil helps trap moisture and creates much more tender results.

    What temperature should ribs be cooked at in the oven?

    Low and slow cooking works best. Bake ribs at around 160°C fan or 180°C conventional for tender meat.

    Can I make BBQ ribs ahead of time?

    Yes, you can bake the ribs ahead and reheat them with extra sauce before serving.

    How do I know when ribs are done?

    The meat should be tender and start pulling away from the bones slightly when fully cooked.

    BBq Ribs in the Oven Recipe

    Recipe by Milli RoseCourse: DinnerCuisine: AmericanDifficulty: Easy
    Servings

    6

    servings
    Prep time

    15

    minutes
    Cooking time

    2

    hours 

    30

    minutes
    Total time

    165

    minutes
    Calories

    520

    kcal

    Tender oven-baked BBQ ribs coated in a smoky seasoning and sticky homemade barbecue glaze. Slow-cooked until perfectly juicy and caramelised.

    Ingredients

    • 2 racks pork baby back ribs

    • 2 tablespoons olive oil

    • 1 tablespoon smoked paprika

    • 2 teaspoons garlic powder

    • 2 teaspoons onion powder

    • 1 teaspoon black pepper

    • 1 teaspoon salt

    • 1 teaspoon chilli powder

    • 2 tablespoons brown sugar

    • 1 cup barbecue sauce

    • 2 tablespoons honey

    • 1 tablespoon Worcestershire sauce

    • 1 tablespoon apple cider vinegar

    Directions

    • Preheat oven to 180°C conventional or 160°C fan. Line a baking tray with parchment and foil.
    • Remove the membrane from the ribs and pat dry.
    • Mix spices and brown sugar together in a bowl.
    • Rub olive oil over the ribs and coat generously with the seasoning mix.
    • Wrap the ribs tightly in foil and place on the prepared tray.
    • Bake for 2 hours until tender.
    • Mix barbecue sauce, honey, Worcestershire sauce and vinegar together.
    • Brush ribs generously with sauce and bake uncovered for another 20 to 25 minutes.
    • Rest for 5 minutes before slicing and serving.

    Notes

    • Remove the membrane for the most tender ribs.
    • Keep the ribs covered during slow cooking to prevent drying out.
    • Brush with extra sauce during the final bake for a sticky glaze.

slot depo

sicbo online