Author: Rose Melton

  • James Martin Chicken Kiev

    James Martin Chicken Kiev

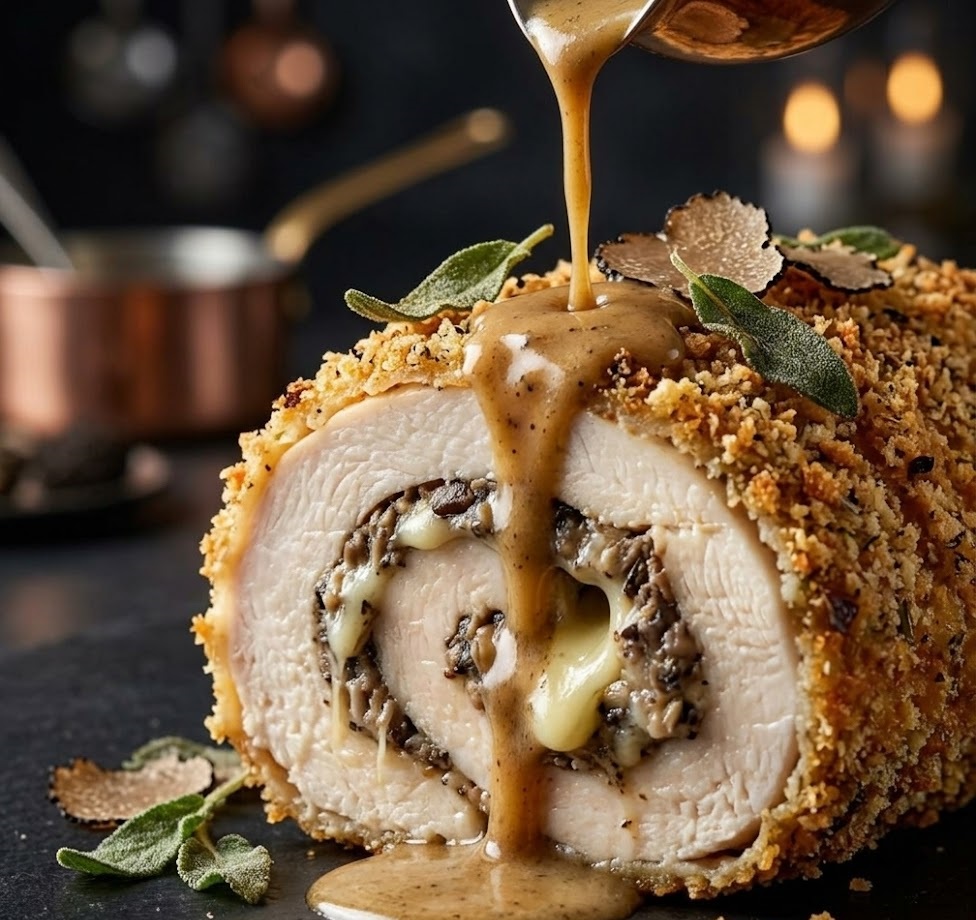
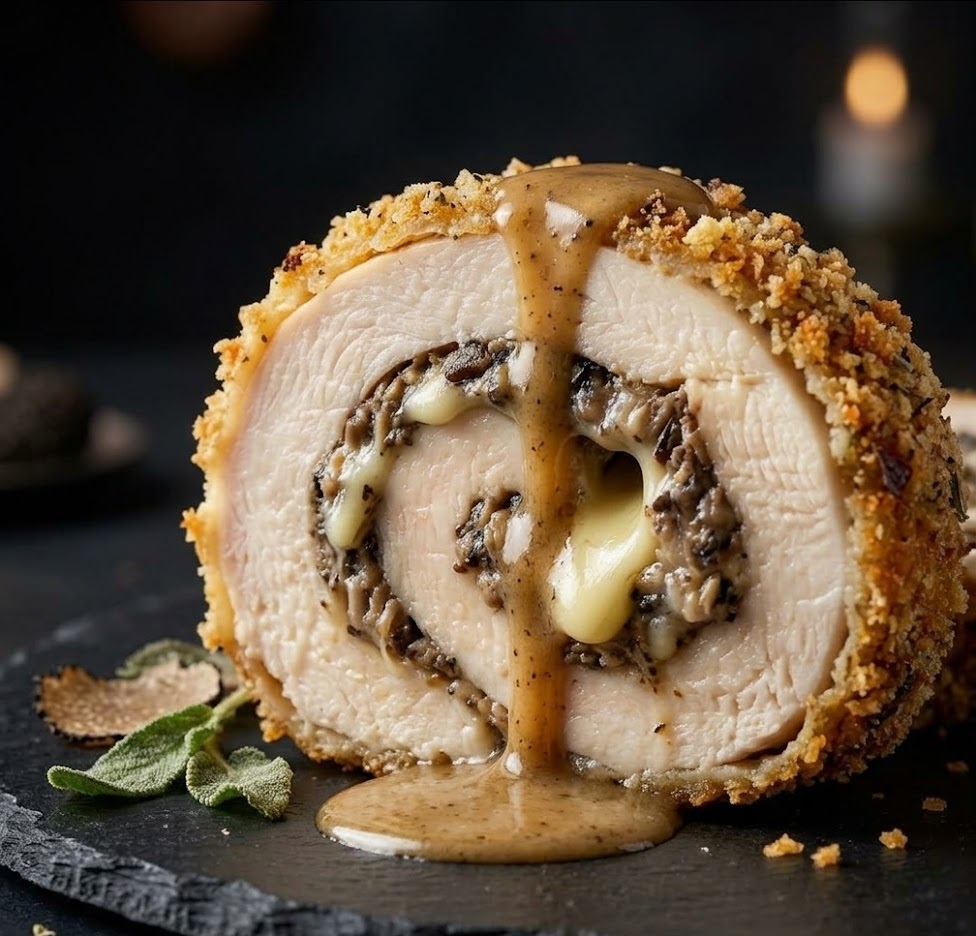
    James Martin Chicken Kiev is a classic comfort dish featuring tender chicken breasts filled with rich garlic herb butter, then coated in crisp golden breadcrumbs. When cut open, the buttery filling melts out beautifully, creating a rich, savoury flavour with every bite. Despite its restaurant reputation, this recipe is surprisingly simple to prepare at home. From preparation to serving, it takes around 45 minutes and delivers a satisfying main course perfect for family dinners.

    Ingredients

    For the Garlic Butter Filling

    • 100g unsalted butter, softened
    • 2 cloves garlic, finely minced
    • 2 tbsp fresh parsley, finely chopped
    • ½ tsp lemon juice
    • Salt and freshly ground black pepper

    For the Chicken

    • 4 skinless chicken breasts
    • Salt and freshly ground black pepper
    • 50g plain flour
    • 2 large eggs, beaten
    • 120g fresh breadcrumbs
    • 50g panko breadcrumbs for extra crispness
    • Vegetable oil, for shallow frying
    • 30g butter

    How to Make James Martin Chicken Kiev

    • Prepare the garlic butter: In a bowl, mix the softened butter with minced garlic, chopped parsley, lemon juice, salt and pepper until well combined. Shape the butter into a small log using cling film and chill in the freezer for about 20 minutes until firm.
    • Prepare the oven: Preheat the oven to 200°C or 180°C fan. Place a shelf in the middle of the oven so the chicken cooks evenly and the coating becomes crisp and golden.
    • Prepare the chicken: Place each chicken breast between two sheets of baking parchment and gently flatten with a rolling pin until about 1cm thick. Season both sides lightly with salt and pepper.
    • Add the filling: Cut the chilled garlic butter into four pieces. Place one piece in the centre of each flattened chicken breast, fold the sides over the butter, then roll tightly to enclose the filling completely.
    • Coat the chicken: Place flour, beaten eggs and breadcrumbs in three separate bowls. Dip each chicken parcel into flour, then egg, then breadcrumbs. Repeat the egg and breadcrumb step for a thicker, crisp coating.
    • Brown the chicken: Heat vegetable oil and butter in a large frying pan over medium heat. Cook the chicken for 3 to 4 minutes on each side until lightly golden.
    • Finish in the oven: Transfer the browned chicken to a baking tray and bake for 18 to 20 minutes until fully cooked through and crisp on the outside.
    • Rest and serve: Allow the Chicken Kiev to rest for 3 to 5 minutes before serving so the butter settles slightly inside.
    How to Make James Martin Chicken Kiev

    Tips

    How do I stop the butter leaking out?

    Make sure the butter is well chilled before filling the chicken and seal the edges tightly when rolling. Double coating with breadcrumbs also helps keep the filling inside.

    Why double coat the breadcrumbs?

    Coating the chicken twice creates a thicker crust which becomes extra crisp during cooking and helps prevent the butter from escaping.

    Can I prepare Chicken Kiev in advance?

    Yes. Assemble the chicken and store it covered in the refrigerator for up to 24 hours before cooking.

    How do I know the chicken is fully cooked?

    The chicken should be golden brown outside and reach an internal temperature of 75°C. The juices should run clear when pierced.

    Serving Suggestions

    • Serve with buttery mashed potatoes
    • Pair with steamed green beans or peas
    • Add a crisp garden salad
    • Serve with roasted new potatoes

    Storage

    Room Temperature

    Chicken Kiev can sit at room temperature for up to 2 hours before it should be refrigerated.

    Refrigerator

    Store leftovers in an airtight container in the refrigerator for up to 3 days. Reheat in the oven at 180°C until hot throughout.

    Freezing

    Uncooked Chicken Kiev freezes well for up to 2 months. Freeze individually on a tray first, then store in freezer bags. Cook from frozen, adding an extra 10 minutes to the baking time.

    Nutrition

    • Calories: 520 kcal
    • Carbohydrates: 18g
    • Protein: 38g
    • Fat: 32g
    • Saturated Fat: 14g
    • Sodium: 480mg

    Nutrition values are estimates and may vary depending on ingredients used.

    FAQs

    Can I bake Chicken Kiev instead of frying it?

    Yes, you can bake it entirely in the oven. Brush the coated chicken lightly with oil and bake at 200°C for about 25 to 30 minutes until golden and cooked through.

    What breadcrumbs work best for Chicken Kiev?

    A mixture of fresh breadcrumbs and panko breadcrumbs works best. The panko adds extra crunch while the fresh crumbs help the coating stick well.

    Can I use chicken thighs instead of breasts?

    Yes, boneless chicken thighs can be used. Flatten them gently and follow the same filling and coating method.

    Why is my Chicken Kiev dry?

    Chicken can become dry if overcooked. Bake only until the internal temperature reaches 75°C and allow the chicken to rest briefly before cutting.
    James Martin Chicken Kiev

    Recipe by Milli RoseCourse: Main CourseCuisine: EuropeanDifficulty: Medium
    Servings

    4

    servings
    Prep time

    30

    minutes
    Cooking time

    40

    minutes
    Calories

    300

    kcal
    Total time

    1

    hour 

    10

    minutes

    Crispy golden chicken breasts filled with rich garlic herb butter. A classic Chicken Kiev recipe inspired by James Martin, perfect for a comforting homemade dinner.

    Ingredients

    • 100g unsalted butter, softened

    • 2 cloves garlic, minced

    • 2 tbsp fresh parsley, chopped

    • ½ tsp lemon juice

    • 4 skinless chicken breasts

    • Salt and black pepper

    • 50g plain flour

    • 2 eggs, beaten

    • 120g fresh breadcrumbs

    • 50g panko breadcrumbs

    • Vegetable oil for frying

    • 30g butter

    Directions

    • Mix butter, garlic, parsley and lemon juice. Shape into a log and chill until firm.
    • Flatten chicken breasts between parchment sheets until about 1cm thick.
    • Place a piece of chilled garlic butter in the centre of each chicken breast.
    • Roll the chicken tightly to enclose the butter.
    • Coat chicken in flour, then egg, then breadcrumbs. Repeat egg and breadcrumbs for a thicker coating.
    • Fry in oil and butter until lightly golden on both sides.
    • Transfer to a baking tray and bake at 200°C for 18 to 20 minutes until cooked through.
    • Rest for 3 minutes before serving so the butter settles slightly.

    Notes

    • Chill the butter well before filling the chicken.
    • Double breadcrumb coating helps prevent butter leakage.
    • Serve immediately while the butter centre is hot and flowing.

  • James Martin Prawn Cocktail

    James Martin Prawn Cocktail

    James Martin’s prawn cocktail is a timeless British starter that feels both elegant and comforting. Juicy prawns are coated in a creamy, tangy Marie Rose style sauce and served over crisp lettuce for a refreshing contrast in texture. The flavour is rich yet balanced, with a gentle sweetness from the prawns and a light sharpness from lemon and tomato ketchup. This recipe is very easy to prepare and takes around 15 minutes from start to finish.

    Ingredients

    For the Prawn Cocktail

    • 300g cooked king prawns, peeled
    • 4 handfuls iceberg lettuce, finely shredded
    • Lemon wedges, for serving
    • Fresh chives, finely chopped

    For the Marie Rose Sauce

    • 4 tbsp mayonnaise
    • 2 tbsp tomato ketchup
    • 1 tsp Worcestershire sauce
    • 1 tsp lemon juice
    • 1 tsp horseradish sauce
    • Salt and freshly ground black pepper

    How to Make James Martin Prawn Cocktail

    • Prepare the serving dishes: Wash and finely shred the iceberg lettuce. Divide it between four serving glasses or small bowls to create a crisp base for the prawns.
    • Make the sauce: In a mixing bowl, combine the mayonnaise, tomato ketchup, Worcestershire sauce, lemon juice and horseradish. Stir until the mixture is smooth and evenly blended.
    • Add the prawns: Place the cooked king prawns into the bowl and gently fold them through the sauce so each prawn is lightly coated.
    • Season the mixture: Taste the sauce and add a pinch of salt and freshly ground black pepper if needed.
    • Assemble the cocktail: Spoon the prawn mixture over the prepared lettuce in each serving dish.
    • Garnish and serve: Sprinkle with chopped chives and place a lemon wedge on the side. Serve immediately for the freshest flavour.
    How to Make James Martin Prawn Cocktail

    Tips for the Best Prawn Cocktail

    How do I keep the prawns juicy?

    Use good quality cooked king prawns and avoid overmixing them in the sauce. Gentle folding keeps their texture firm and tender.

    Can I make the sauce ahead of time?

    Yes, the sauce can be prepared a few hours in advance and kept chilled in the refrigerator. Add the prawns just before serving for the best texture.

    What lettuce works best?

    Iceberg lettuce is traditional because it stays crisp and refreshing, which balances the creamy sauce perfectly.

    How can I make the sauce richer?

    Add a little extra mayonnaise or a small spoonful of crème fraîche for a slightly richer and smoother dressing.

    Serving Suggestions

    • Serve in chilled cocktail glasses for a classic presentation
    • Pair with buttered brown bread or toast
    • Add slices of avocado for extra richness
    • Serve as a light starter before a seafood main course

    Storage

    Room Temperature

    Prawn cocktail should not be left out for more than 1 hour as seafood spoils quickly.

    Refrigerator

    Store the prawn mixture in an airtight container for up to 24 hours. Keep the lettuce separate to maintain its crisp texture.

    Freezing

    This recipe is not suitable for freezing because the mayonnaise based sauce separates when thawed.

    Nutrition

    • Calories: 240 kcal
    • Carbohydrates: 5g
    • Protein: 22g
    • Fat: 15g
    • Saturated Fat: 2g
    • Sodium: 620mg

    Nutrition values are estimates and may vary depending on the ingredients used.

    FAQs

    Can I use frozen prawns for prawn cocktail?

    Yes, frozen cooked prawns work well. Thaw them fully in the refrigerator and pat them dry before mixing with the sauce.

    What is Marie Rose sauce made of?

    Marie Rose sauce is typically made with mayonnaise, tomato ketchup, Worcestershire sauce, lemon juice and sometimes horseradish for a little extra kick.

    Can I prepare prawn cocktail in advance?

    You can prepare the sauce a few hours ahead and store it chilled. Mix with the prawns just before serving so the seafood stays fresh and firm.

    What can I serve with prawn cocktail?

    It pairs well with buttered brown bread, toasted baguette slices or a light green salad.

    James Martin Prawn Cocktail

    Recipe by Milli RoseCourse: StarterCuisine: BritishDifficulty: Easy
    Servings

    4

    servings
    Prep time

    15

    minutes
    Cooking timeminutes
    Total time

    15

    minutes
    Calories

    240

    kcal

    A classic prawn cocktail with juicy prawns tossed in a creamy Marie Rose sauce and served on crisp lettuce. A quick and elegant British starter.

    Ingredients

    • 300g cooked king prawns, peeled

    • 4 handfuls crisp iceberg lettuce, shredded

    • 4 tbsp mayonnaise

    • 2 tbsp tomato ketchup

    • 1 tsp Worcestershire sauce

    • 1 tsp lemon juice

    • 1 tsp horseradish sauce

    • Salt and black pepper to taste

    • Lemon wedges, to serve

    • Fresh chives, finely chopped

    Directions

    • Place the mayonnaise, tomato ketchup, Worcestershire sauce, lemon juice and horseradish in a bowl.
    • Stir well until smooth and evenly blended to create the classic Marie Rose sauce.
    • Add the cooked prawns to the bowl and gently fold them through the sauce until well coated.
    • Season lightly with salt and freshly ground black pepper.
    • Divide the shredded lettuce between serving glasses or bowls.
    • Spoon the prawn mixture neatly over the lettuce.
    • Finish with chopped chives and a lemon wedge before serving.

    Notes

    • Use good quality cooked king prawns for the best flavour.
    • Chill the sauce before serving for a classic restaurant-style starter.
    • Serve in glasses for the traditional prawn cocktail presentation.
  • James Martin Pan Fried Pork Chops

    James Martin Pan Fried Pork Chops

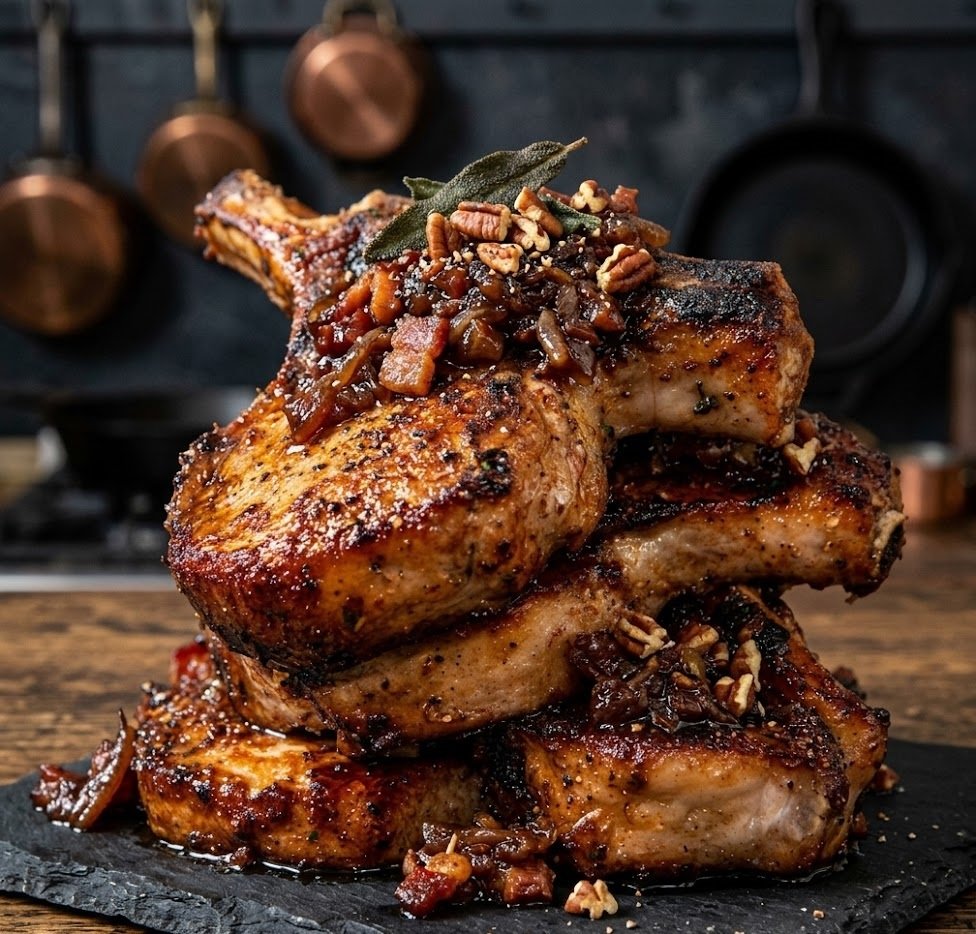
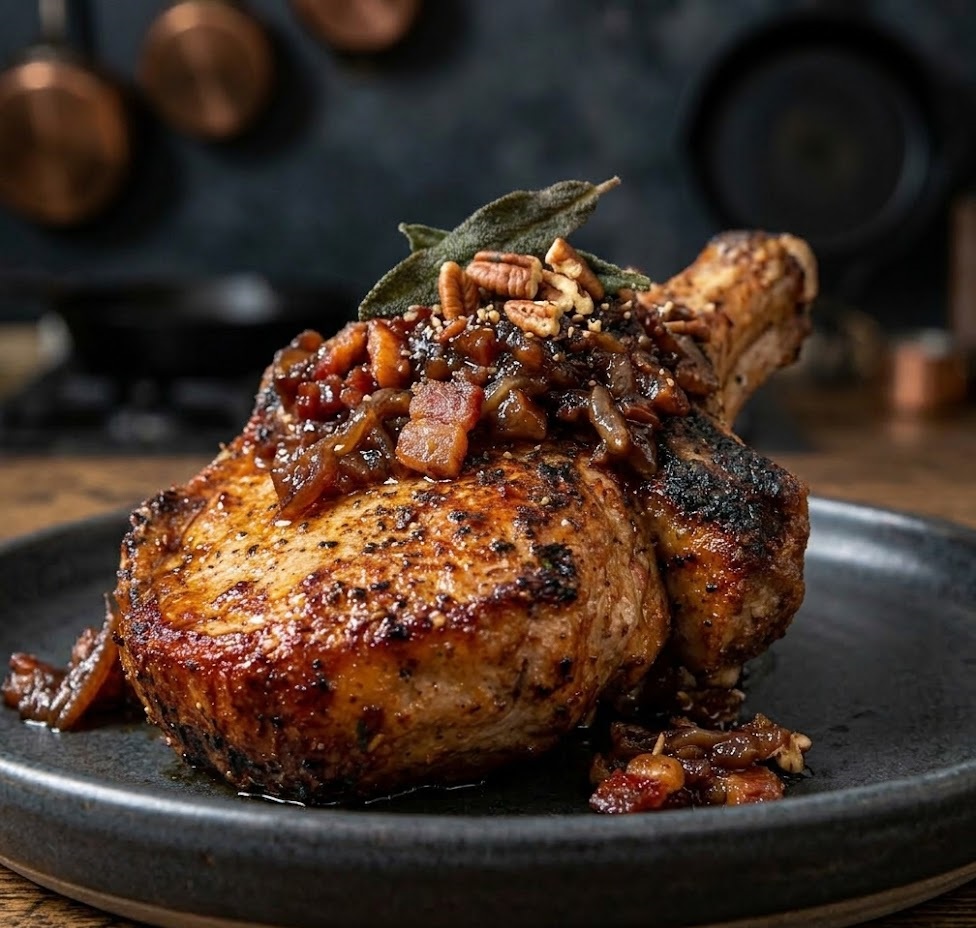
    These James Martin pan fried pork chops are a simple, satisfying dish that delivers crisp golden edges and juicy, tender meat. The pork is seasoned well and cooked in a hot pan to create a beautifully caramelised crust while keeping the centre succulent. It is a straightforward recipe that works well for both weeknight dinners and relaxed weekend meals. The recipe is easy to prepare and takes about 25 minutes from start to finish.

    Ingredients

    For the Pork Chops

    • 4 thick pork chops (bone-in preferred)
    • 2 tbsp olive oil
    • 30g unsalted butter
    • 2 garlic cloves, lightly crushed
    • 2 sprigs fresh thyme
    • Salt, to taste
    • Freshly ground black pepper

    Optional Pan Sauce

    • 100ml chicken stock
    • 1 tsp Dijon mustard
    • 1 tbsp double cream
    • 1 tsp lemon juice

    How to Make James Martin Pan Fried Pork Chops

    • Prepare the pork: Remove the pork chops from the refrigerator about 15 minutes before cooking so they come to room temperature. Pat them dry with kitchen paper and season generously with salt and freshly ground black pepper.
    • Heat the pan: Place a large frying pan over medium-high heat and add the olive oil. Allow the oil to heat until it shimmers but is not smoking.
    • Sear the pork chops: Place the pork chops into the hot pan. Cook for about 3 to 4 minutes on the first side without moving them so a golden crust develops.
    • Turn and add flavour: Flip the pork chops and add the butter, crushed garlic, and thyme to the pan. Continue cooking for another 3 to 4 minutes while spooning the melted butter over the chops.
    • Check doneness: The pork should be golden on the outside and cooked through but still juicy. The internal temperature should reach about 63°C.
    • Rest the meat: Transfer the pork chops to a plate and allow them to rest for 5 minutes. This helps the juices settle and keeps the meat tender.
    • Make the optional sauce: Add chicken stock to the same pan and scrape up the browned bits. Stir in Dijon mustard and cream, simmer for a minute, then finish with lemon juice.
    • Serve: Spoon the warm pan sauce over the pork chops and serve immediately.
    How to Make James Martin Pan Fried Pork Chops

    Tips for the Best Pan Fried Pork Chops

    How do I keep pork chops juicy?

    Allow the meat to rest after cooking. Resting for at least 5 minutes keeps the juices inside the pork instead of running out when sliced.

    Why are my pork chops tough?

    Pork chops can become tough if overcooked. Use medium-high heat for a quick sear and avoid cooking them for too long.

    Should pork chops be at room temperature before cooking?

    Yes, letting them sit out for 10 to 15 minutes helps them cook more evenly and prevents the centre from staying cold.

    Can I use boneless pork chops?

    Yes, boneless chops work well but may cook slightly faster. Keep an eye on them so they do not dry out.

    Serving Suggestions

    • Creamy mashed potatoes
    • Buttered green beans
    • Roasted seasonal vegetables
    • A simple garden salad
    • Warm crusty bread

    Storage

    Room Temperature

    Cooked pork chops can sit at room temperature for up to 2 hours before they should be refrigerated.

    Refrigerator

    Store leftover pork chops in an airtight container in the refrigerator for up to 3 days. Reheat gently in a frying pan or microwave.

    Freezing

    Allow the pork chops to cool completely, then wrap well and freeze for up to 2 months. Thaw overnight in the refrigerator before reheating.

    Nutrition

    • Calories: 420 kcal
    • Carbohydrates: 2 g
    • Protein: 36 g
    • Fat: 29 g
    • Saturated Fat: 9 g
    • Sodium: 420 mg

    Nutrition values are estimates and may vary depending on ingredients used.

    FAQs

    How long should pork chops be pan fried?

    Most thick pork chops need about 3 to 4 minutes per side in a hot pan. The exact time depends on thickness, but they should reach an internal temperature of 63°C for safe and juicy results.

    Do I need to marinate pork chops before frying?

    No marinade is necessary for this recipe. Simple seasoning with salt and pepper works perfectly because the hot pan and butter create excellent flavour.

    What pan is best for frying pork chops?

    A heavy frying pan or cast iron skillet works best because it holds heat well and creates a deep golden crust on the meat.

    Can I cook pork chops without butter?

    Yes, you can cook them using only olive oil. However, adding butter during cooking gives extra flavour and helps create a richer pan sauce.

    James Martin Pan Fried Pork Chops

    Recipe by Milli RoseCourse: Main CourseCuisine: BritishDifficulty: Easy
    Servings

    4

    servings
    Prep time

    30

    minutes
    Cooking time

    40

    minutes
    Calories

    300

    kcal
    Total time

    1

    hour 

    10

    minutes

    Juicy James Martin pan fried pork chops with a golden crust, cooked in butter with garlic and thyme. A quick and flavourful dish perfect for an easy dinner.

    Ingredients

    • 4 thick pork chops

    • 2 tbsp olive oil

    • 30g unsalted butter

    • 2 garlic cloves, crushed

    • 2 sprigs fresh thyme

    • Salt, to taste

    • Freshly ground black pepper

    • 100ml chicken stock

    • 1 tsp Dijon mustard

    Directions

    • Remove pork chops from the refrigerator 15 minutes before cooking and season well with salt and pepper.
    • Heat olive oil in a large frying pan over medium-high heat.
    • Add pork chops and cook for 3 to 4 minutes until golden brown.
    • Turn the chops and add butter, garlic and thyme to the pan.
    • Cook another 3 to 4 minutes while spooning melted butter over the pork.
    • Transfer pork chops to a plate and rest for 5 minutes.
    • Add chicken stock and Dijon mustard to the pan and simmer briefly to create a quick sauce.
    • Serve the pork chops with the warm sauce spooned over the top.

    Notes

    • Choose thick pork chops for the juiciest results.
    • Allow the meat to rest after cooking to retain moisture.
    • Cook in a hot pan to develop a golden crust.
  • James Martin Coq Au Vin

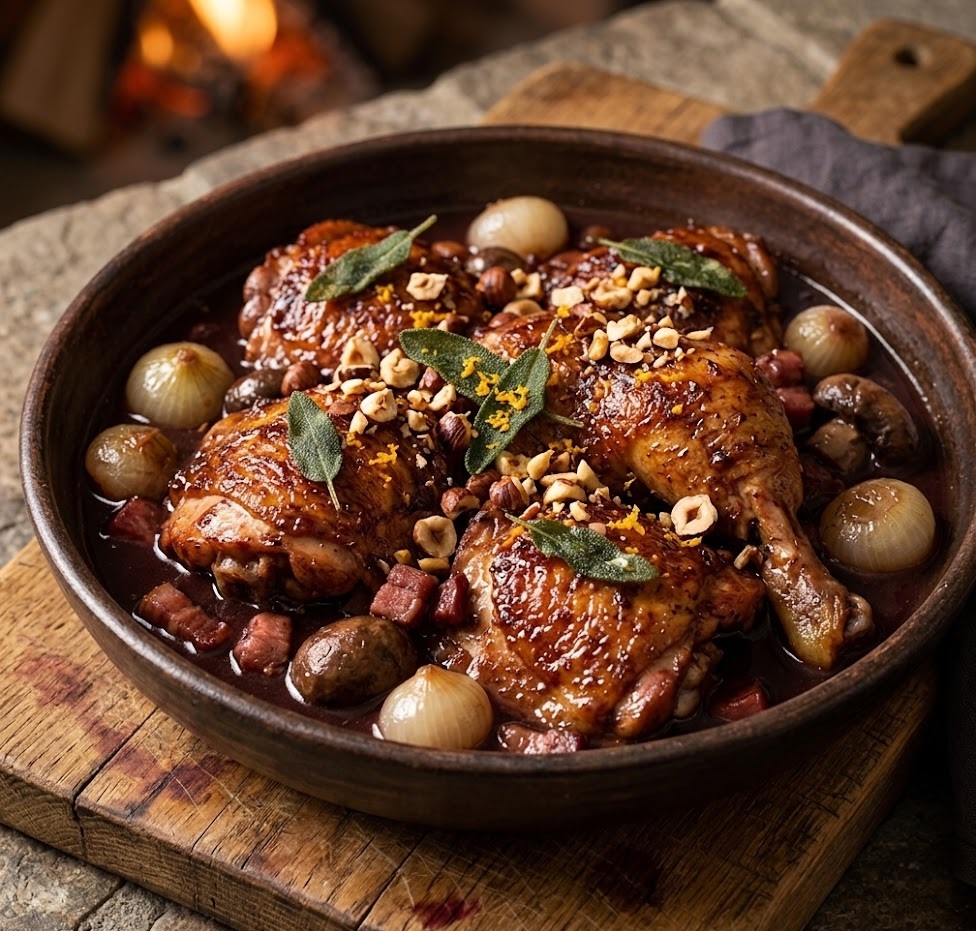
    James Martin Coq Au Vin

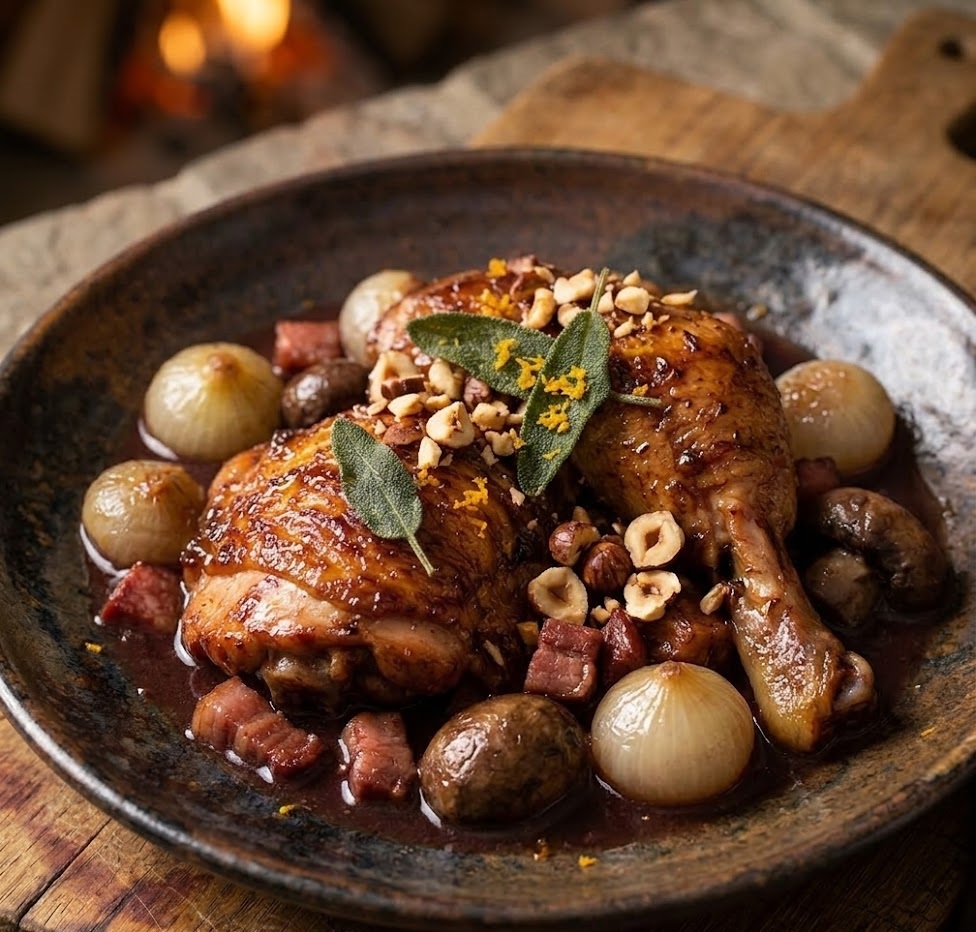
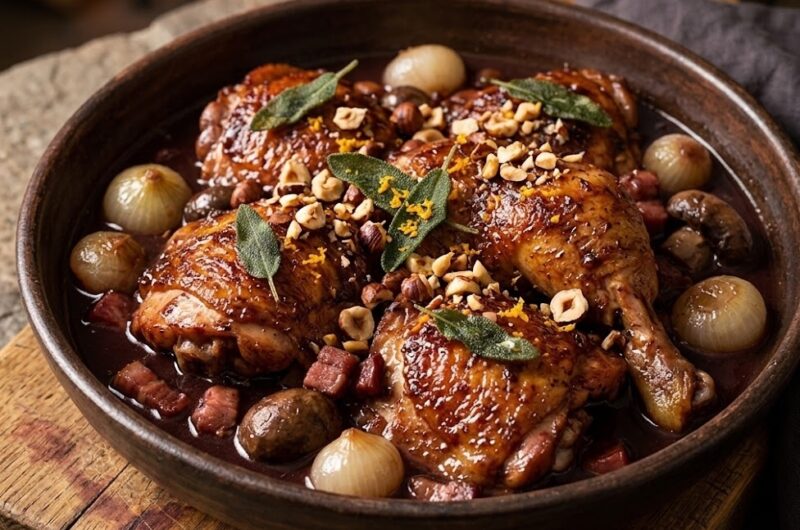
    James Martin’s Coq Au Vin is a rich and comforting French classic where chicken is slowly braised in red wine with smoky bacon, mushrooms, and aromatic herbs. The sauce becomes beautifully glossy and deeply savoury, coating tender chicken pieces with bold flavour. While it looks impressive, the recipe is straightforward and perfect for home cooks who enjoy slow, rewarding dishes. Preparation takes about 20 minutes and the total cooking time is around 1 hour 30 minutes.

    Ingredients

    For the Chicken and Marinade

    • 1 whole chicken, jointed into 6–8 pieces
    • 500ml good quality red wine
    • 2 cloves garlic, crushed
    • 2 bay leaves
    • 1 sprig fresh thyme
    • 1 onion, sliced
    • Salt and freshly ground black pepper

    For the Stew

    • 150g smoked streaky bacon, cut into small pieces
    • 2 tbsp olive oil
    • 25g butter
    • 2 shallots, finely chopped
    • 2 carrots, sliced
    • 200g chestnut mushrooms, halved
    • 2 tbsp plain flour
    • 250ml chicken stock
    • 1 tbsp tomato purée
    • 1 small bunch fresh thyme
    • 1 bay leaf

    For Garnish

    • Fresh parsley, finely chopped

    How to Make James Martin Coq Au Vin

    • Prepare the marinade: Place the chicken pieces in a large bowl. Pour over the red wine and add garlic, onion, bay leaves and thyme. Cover and refrigerate for at least 2 hours or overnight for deeper flavour.
    • Remove and dry the chicken: Take the chicken from the marinade and pat dry with kitchen paper. Strain and reserve the wine marinade, discarding the solids.
    • Brown the bacon: Heat a large casserole dish over medium heat. Add the bacon pieces and cook until lightly crisp. Remove and set aside.
    • Brown the chicken: Add olive oil and butter to the pan. Season the chicken and brown it on all sides until golden. Remove and set aside.
    • Cook the vegetables: Add the shallots, carrots and mushrooms to the same pan. Cook for 5 minutes until slightly softened and lightly coloured.
    • Add flour and tomato purée: Stir in the flour and cook for 1 minute. Add tomato purée and mix well to coat the vegetables.
    • Build the sauce: Pour in the reserved red wine marinade and chicken stock. Stir well, scraping the bottom of the pan to release flavour.
    • Simmer the stew: Return the chicken and bacon to the casserole. Add thyme and bay leaf. Bring to a gentle simmer, cover, and cook for about 1 hour until the chicken is tender and the sauce thickens.
    • Finish and serve: Taste and adjust seasoning if needed. Sprinkle with fresh parsley and serve hot.
    How to Make James Martin Coq Au Vin

    Tips for the Best Coq Au Vin

    Which wine works best for this dish?

    A medium-bodied red wine such as Burgundy or Pinot Noir works beautifully. Choose something you would happily drink, as the flavour concentrates during cooking.

    How do I keep the chicken tender?

    Cook the stew gently on a low simmer rather than boiling it. Slow cooking keeps the chicken juicy and prevents it from becoming tough.

    Why coat the vegetables in flour?

    The flour helps thicken the sauce as the dish cooks, giving the stew its classic silky texture.

    Can I make this dish ahead of time?

    Yes. Coq Au Vin often tastes even better the next day as the flavours deepen overnight.

    Serving Suggestions

    • Serve with creamy mashed potatoes
    • Crusty French bread to soak up the sauce
    • Buttered egg noodles
    • Steamed green beans or peas

    Storage

    Room Temperature

    This dish should not be left out for more than 2 hours after cooking. Allow it to cool slightly before refrigerating.

    Refrigerator

    Store in an airtight container for up to 3 days. Reheat gently on the stove until piping hot.

    Freezing

    Coq Au Vin freezes well for up to 3 months. Cool completely before freezing and thaw overnight in the refrigerator before reheating.

    Nutrition

    • Calories: 420 kcal
    • Carbohydrates: 10 g
    • Protein: 38 g
    • Fat: 22 g
    • Saturated Fat: 7 g
    • Sodium: 620 mg

    Nutrition values are estimates and may vary depending on ingredient brands and portion sizes.

    FAQs

    What does Coq Au Vin mean?

    Coq Au Vin is a traditional French dish that means chicken cooked in wine. It is slowly braised with vegetables, herbs and bacon to create a rich, savoury stew.

    Can I use chicken thighs instead of a whole chicken?

    Yes, bone-in chicken thighs work very well for this recipe and stay tender during the slow cooking process.

    Do I have to marinate the chicken first?

    Marinating adds deeper flavour, but if you are short on time you can skip this step and simply cook the chicken directly in the wine sauce.

    Can I make Coq Au Vin without alcohol?

    Yes, you can replace the wine with additional chicken stock and a splash of balsamic vinegar to mimic the depth of flavour.

    James Martin Coq Au Vin

    Recipe by Milli RoseCourse: Main CourseCuisine: FrenchDifficulty: Medium
    Servings

    4

    servings
    Prep time

    30

    minutes
    Cooking time

    40

    minutes
    Calories

    300

    kcal
    Total time

    1

    hour 

    10

    minutes

    A classic French chicken stew braised in red wine with bacon, mushrooms and herbs. Rich, comforting and full of deep savoury flavour.

    Ingredients

    • 1 whole chicken, jointed

    • 500ml red wine

    • 150g smoked streaky bacon

    • 200g chestnut mushrooms

    • 2 shallots, chopped

    • 2 carrots, sliced

    • 2 cloves garlic, crushed

    • 2 tbsp olive oil

    • 25g butter

    • 2 tbsp plain flour

    • 250ml chicken stock

    • 1 tbsp tomato puree

    • 1 bay leaf

    • Fresh thyme

    • Salt and black pepper

    • Fresh parsley, chopped

    Directions

    • Marinate chicken in red wine with garlic, onion and herbs for several hours or overnight.
    • Remove chicken and pat dry. Reserve the wine marinade.
    • Cook bacon in a large casserole until crisp then remove.
    • Brown chicken pieces in olive oil and butter until golden.
    • Add shallots, carrots and mushrooms and cook until slightly softened.
    • Stir in flour and tomato puree.
    • Pour in reserved wine marinade and chicken stock.
    • Return chicken and bacon to the pot with herbs and simmer for about 1 hour.
    • Finish with chopped parsley and serve hot.

    Notes

    • Use a good quality red wine for the best flavour.
    • The stew tastes even better the next day.
    • Serve with mashed potatoes or crusty bread.
  • James Martin Butternut Squash Soup

    James Martin Butternut Squash Soup

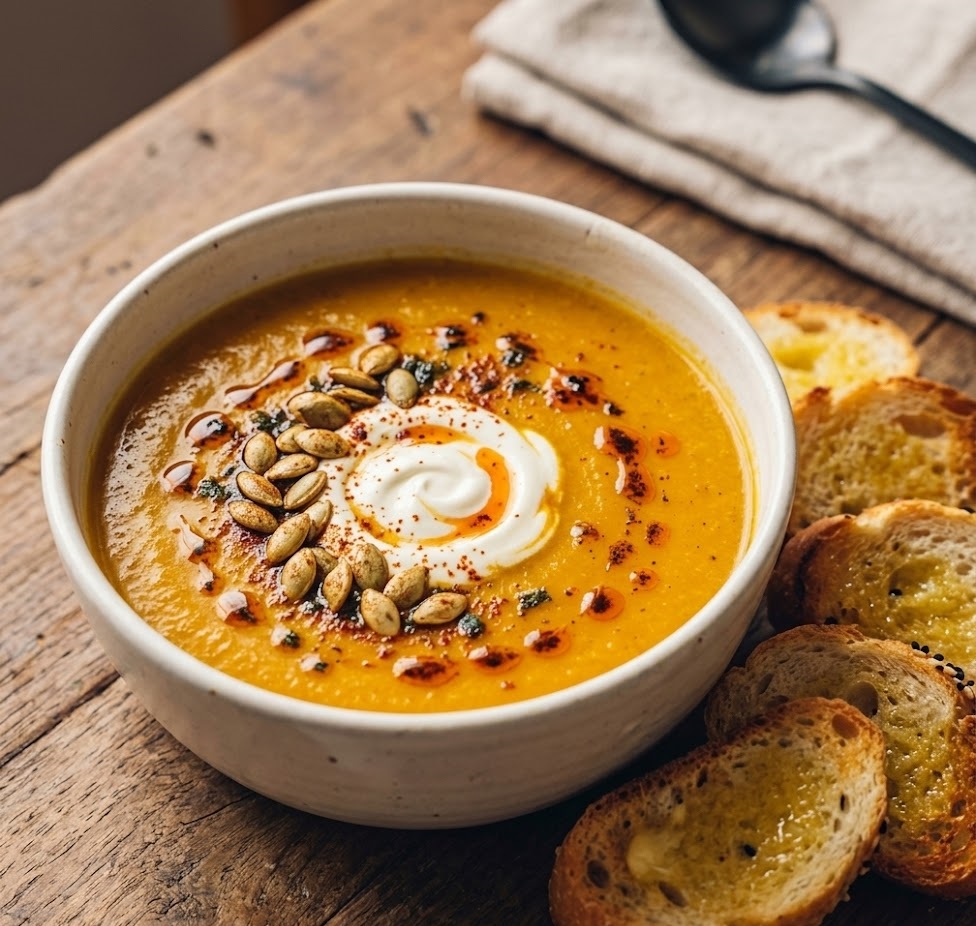
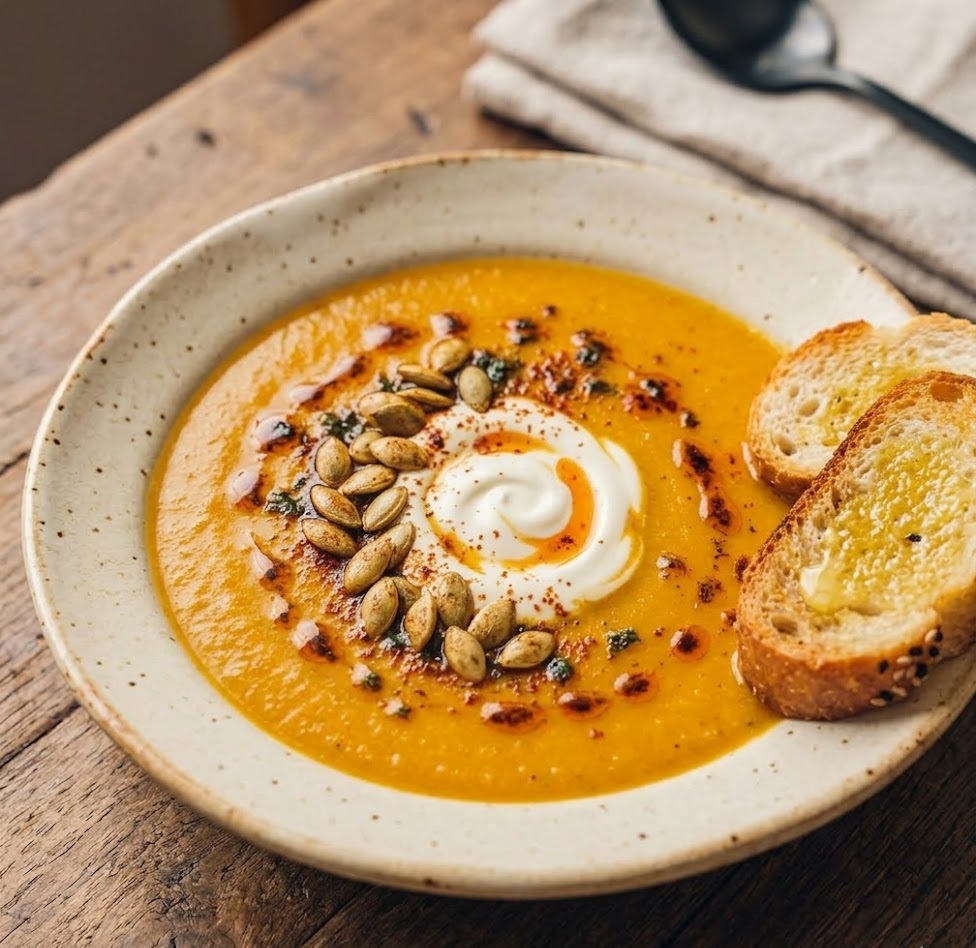
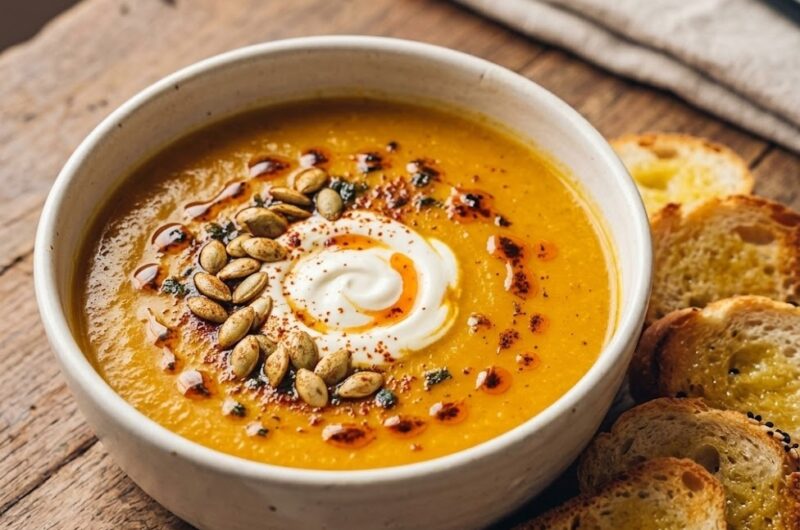
    This James Martin Butternut Squash Soup is a smooth, comforting bowl of warmth that brings out the natural sweetness of roasted squash. The texture is velvety and creamy, balanced with gentle savoury notes from onion, garlic, and stock. It is an easy recipe that suits both beginners and experienced home cooks. From start to finish, the soup takes about 40 minutes and makes a nourishing lunch or light dinner.

    Ingredients

    For the Soup

    • 1 large butternut squash, peeled, seeded and cut into cubes (about 900g)
    • 1 tbsp olive oil
    • 1 medium onion, finely chopped
    • 2 garlic cloves, crushed
    • 750ml vegetable stock
    • 100ml double cream
    • Salt and freshly ground black pepper

    For Serving (Optional)

    • Extra double cream for drizzling
    • Fresh parsley or chives, finely chopped
    • Crusty bread

    How to Make James Martin Butternut Squash Soup

    • Prepare the oven: Preheat the oven to 200°C or 180°C fan. Line a baking tray with parchment paper so the squash roasts evenly without sticking.
    • Roast the squash: Spread the cubed butternut squash over the tray, drizzle with olive oil, and season with salt and pepper. Roast for about 25 minutes until tender and lightly caramelised.
    • Cook the base: While the squash roasts, heat a saucepan over medium heat and add a little oil. Gently cook the chopped onion for about 5 minutes until soft and translucent, then stir in the garlic.
    • Add the roasted squash: Transfer the roasted squash into the saucepan with the onion mixture and pour in the vegetable stock.
    • Simmer the soup: Bring the mixture to a gentle simmer and cook for about 10 minutes so the flavours combine.
    • Blend until smooth: Use a stick blender or transfer the soup carefully to a blender. Blend until completely smooth and creamy.
    • Finish with cream: Stir in the double cream and adjust the seasoning with salt and pepper. Warm gently for a minute before serving.
    • Serve: Ladle the soup into bowls and finish with a drizzle of cream and fresh herbs if desired.
    How to Make James Martin Butternut Squash Soup

    Tips for the Best Butternut Squash Soup

    How do I get a deeper flavour?

    Roasting the squash rather than boiling it develops natural sweetness and adds a slightly caramelised flavour that makes the soup richer.

    Can I make the soup thicker?

    If you prefer a thicker texture, reduce the amount of stock slightly or simmer the soup for a few extra minutes after blending.

    What if my soup tastes too sweet?

    Add a pinch of salt or a squeeze of lemon juice to balance the sweetness of the squash.

    Can I make it dairy free?

    Yes. Replace the cream with coconut milk or simply omit it for a lighter, dairy free soup.

    Serving Suggestions

    • Serve with warm crusty bread or toasted sourdough.
    • Add a swirl of cream and cracked black pepper on top.
    • Pair with a simple green salad for a light meal.
    • Top with roasted pumpkin seeds for extra texture.

    Storage

    Room Temperature

    The soup can sit at room temperature for up to 2 hours. After that, it should be refrigerated.

    Refrigerator

    Store in an airtight container in the fridge for up to 3 days. Reheat gently on the stove, stirring occasionally.

    Freezing

    This soup freezes well. Cool completely and freeze in sealed containers for up to 3 months. Defrost overnight in the refrigerator before reheating.

    Nutrition

    • Calories: 210 kcal
    • Carbohydrates: 22 g
    • Protein: 4 g
    • Fat: 12 g
    • Saturated Fat: 6 g
    • Sodium: 520 mg

    Nutrition values are estimates and may vary depending on ingredients used.

    FAQs

    Can I make butternut squash soup ahead of time?

    Yes. The soup can be made a day or two in advance and stored in the refrigerator. Reheat gently on the stove before serving.

    Do I have to roast the butternut squash first?

    Roasting gives the soup a deeper flavour, but you can also simmer the squash directly in the stock if you prefer a quicker method.

    Can I freeze butternut squash soup?

    Yes, it freezes very well. Allow the soup to cool completely before storing in airtight containers for up to three months.

    What herbs go well with butternut squash soup?

    Fresh parsley, thyme, sage, and chives all complement the sweetness of butternut squash beautifully.

    James Martin Butternut Squash Soup

    Recipe by Milli RoseCourse: SoupCuisine: BritishDifficulty: Easy
    Servings

    4

    servings
    Prep time

    30

    minutes
    Cooking time

    40

    minutes
    Calories

    300

    kcal
    Total time

    1

    hour 

    10

    minutes

    A smooth and comforting butternut squash soup inspired by James Martin. Roasted squash blended with onion, garlic and cream creates a rich, velvety soup perfect for lunch or a light dinner.

    Ingredients

    • 1 large butternut squash, peeled and cubed

    • 1 tbsp olive oil

    • 1 onion, chopped

    • 2 garlic cloves, crushed

    • 750ml vegetable stock

    • 100ml double cream

    • Salt and black pepper to taste

    • Fresh parsley or chives for garnish

    Directions

    • Preheat the oven to 200°C (180°C fan) and line a baking tray with parchment.
    • Spread the cubed butternut squash on the tray, drizzle with olive oil and season.
    • Roast for about 25 minutes until tender and lightly caramelised.
    • Meanwhile sauté onion in a saucepan until soft, then add the garlic.
    • Add roasted squash and vegetable stock, then simmer for 10 minutes.
    • Blend until completely smooth using a stick blender.
    • Stir in double cream and adjust seasoning.
    • Serve hot with herbs and a swirl of cream if desired.

    Notes

    • Roasting the squash adds deeper flavour to the soup.
    • For a dairy free version, replace cream with coconut milk.
    • The soup can be frozen for up to 3 months.

    James Martin Butternut Squash Soup

    This James Martin Butternut Squash Soup is a smooth, comforting bowl of warmth that brings out the natural sweetness of roasted squash. The texture is velvety and creamy, balanced with gentle savoury notes from onion, garlic, and stock. It is an easy recipe that suits both beginners and experienced home cooks. From start to finish, the soup takes about 40 minutes and makes a nourishing lunch or light dinner.

    Ingredients

    For the Soup

    • 1 large butternut squash, peeled, seeded and cut into cubes (about 900g)
    • 1 tbsp olive oil
    • 1 medium onion, finely chopped
    • 2 garlic cloves, crushed
    • 750ml vegetable stock
    • 100ml double cream
    • Salt and freshly ground black pepper

    For Serving (Optional)

    • Extra double cream for drizzling
    • Fresh parsley or chives, finely chopped
    • Crusty bread

    How to Make James Martin Butternut Squash Soup

    • Prepare the oven: Preheat the oven to 200°C or 180°C fan. Line a baking tray with parchment paper so the squash roasts evenly without sticking.
    • Roast the squash: Spread the cubed butternut squash over the tray, drizzle with olive oil, and season with salt and pepper. Roast for about 25 minutes until tender and lightly caramelised.
    • Cook the base: While the squash roasts, heat a saucepan over medium heat and add a little oil. Gently cook the chopped onion for about 5 minutes until soft and translucent, then stir in the garlic.
    • Add the roasted squash: Transfer the roasted squash into the saucepan with the onion mixture and pour in the vegetable stock.
    • Simmer the soup: Bring the mixture to a gentle simmer and cook for about 10 minutes so the flavours combine.
    • Blend until smooth: Use a stick blender or transfer the soup carefully to a blender. Blend until completely smooth and creamy.
    • Finish with cream: Stir in the double cream and adjust the seasoning with salt and pepper. Warm gently for a minute before serving.
    • Serve: Ladle the soup into bowls and finish with a drizzle of cream and fresh herbs if desired.

    Tips for the Best Butternut Squash Soup

    How do I get a deeper flavour?

    Roasting the squash rather than boiling it develops natural sweetness and adds a slightly caramelised flavour that makes the soup richer.

    Can I make the soup thicker?

    If you prefer a thicker texture, reduce the amount of stock slightly or simmer the soup for a few extra minutes after blending.

    What if my soup tastes too sweet?

    Add a pinch of salt or a squeeze of lemon juice to balance the sweetness of the squash.

    Can I make it dairy free?

    Yes. Replace the cream with coconut milk or simply omit it for a lighter, dairy free soup.

    Serving Suggestions

    • Serve with warm crusty bread or toasted sourdough.
    • Add a swirl of cream and cracked black pepper on top.
    • Pair with a simple green salad for a light meal.
    • Top with roasted pumpkin seeds for extra texture.

    Storage

    Room Temperature

    The soup can sit at room temperature for up to 2 hours. After that, it should be refrigerated.

    Refrigerator

    Store in an airtight container in the fridge for up to 3 days. Reheat gently on the stove, stirring occasionally.

    Freezing

    This soup freezes well. Cool completely and freeze in sealed containers for up to 3 months. Defrost overnight in the refrigerator before reheating.

    Nutrition

    • Calories: 210 kcal
    • Carbohydrates: 22 g
    • Protein: 4 g
    • Fat: 12 g
    • Saturated Fat: 6 g
    • Sodium: 520 mg

    Nutrition values are estimates and may vary depending on ingredients used.

    FAQs

    Can I make butternut squash soup ahead of time?

    Yes. The soup can be made a day or two in advance and stored in the refrigerator. Reheat gently on the stove before serving.

    Do I have to roast the butternut squash first?

    Roasting gives the soup a deeper flavour, but you can also simmer the squash directly in the stock if you prefer a quicker method.

    Can I freeze butternut squash soup?

    Yes, it freezes very well. Allow the soup to cool completely before storing in airtight containers for up to three months.

    What herbs go well with butternut squash soup?

    Fresh parsley, thyme, sage, and chives all complement the sweetness of butternut squash beautifully.

    James Martin Butternut Squash Soup

    Recipe by Milli RoseCourse: SoupCuisine: BritishDifficulty: Easy
    Servings

    4

    servings
    Prep time

    30

    minutes
    Cooking time

    40

    minutes
    Calories

    300

    kcal
    Total time

    1

    hour 

    10

    minutes

    A smooth and comforting butternut squash soup inspired by James Martin. Roasted squash blended with onion, garlic and cream creates a rich, velvety soup perfect for lunch or a light dinner.

    Ingredients

    • 1 large butternut squash, peeled and cubed

    • 1 tbsp olive oil

    • 1 onion, chopped

    • 2 garlic cloves, crushed

    • 750ml vegetable stock

    • 100ml double cream

    • Salt and black pepper to taste

    • Fresh parsley or chives for garnish

    Directions

    • Preheat the oven to 200°C (180°C fan) and line a baking tray with parchment.
    • Spread the cubed butternut squash on the tray, drizzle with olive oil and season.
    • Roast for about 25 minutes until tender and lightly caramelised.
    • Meanwhile sauté onion in a saucepan until soft, then add the garlic.
    • Add roasted squash and vegetable stock, then simmer for 10 minutes.
    • Blend until completely smooth using a stick blender.
    • Stir in double cream and adjust seasoning.
    • Serve hot with herbs and a swirl of cream if desired.

    Notes

    • Roasting the squash adds deeper flavour to the soup.
    • For a dairy free version, replace cream with coconut milk.
    • The soup can be frozen for up to 3 months.
  • James Martin Homemade Beef Burgers

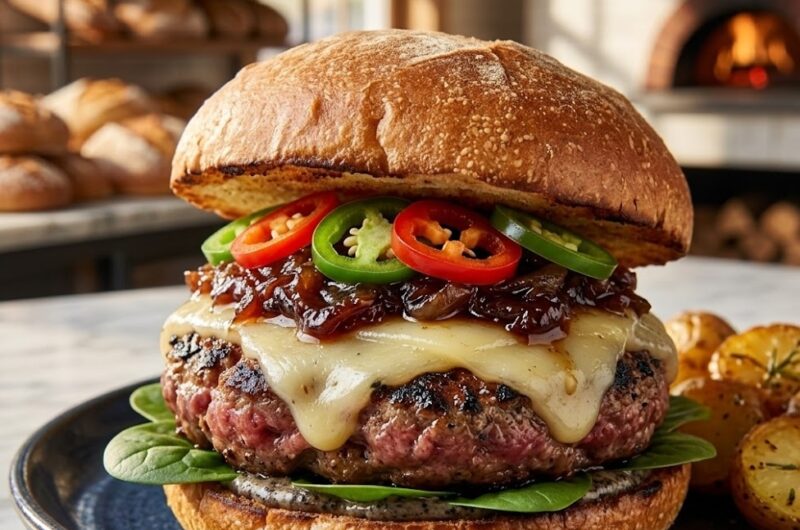
    James Martin Homemade Beef Burgers

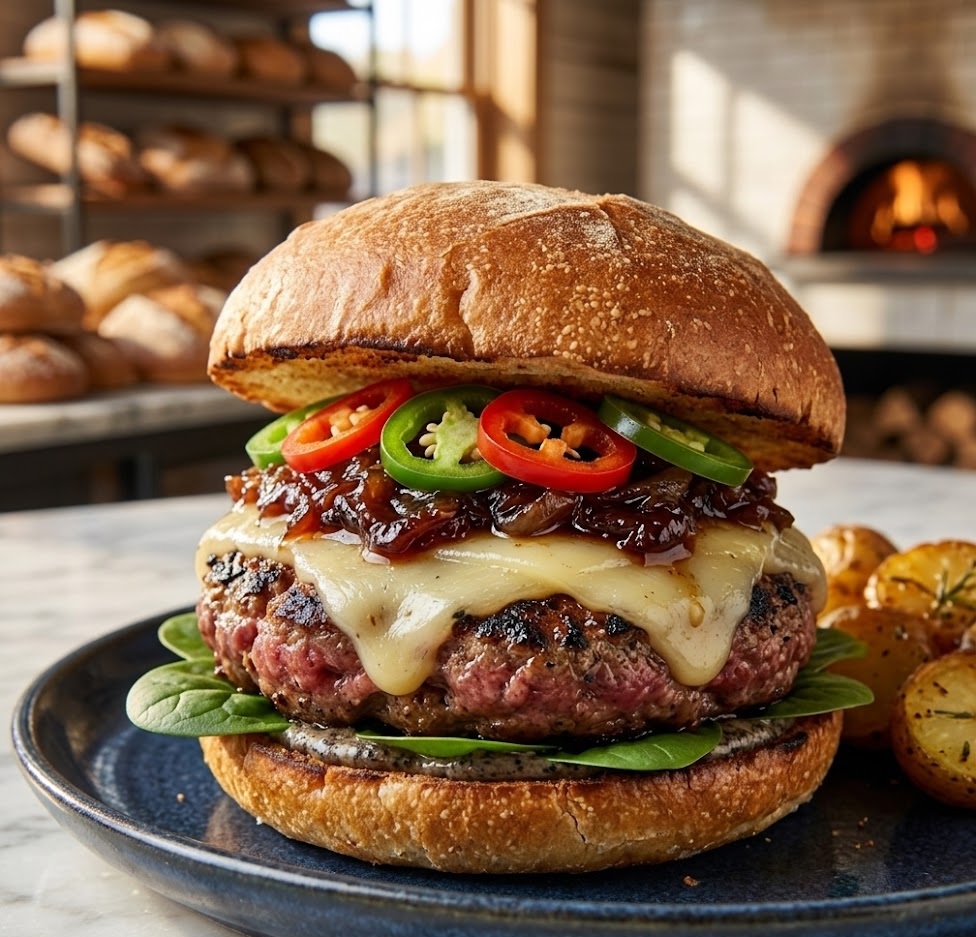
    These James Martin Homemade Beef Burgers are juicy, rich, and packed with flavour, making them a brilliant choice for a relaxed family meal or weekend barbecue. The burgers are made with good-quality minced beef and simple seasonings that let the natural flavour shine through. Crisp on the outside and tender in the centre, they are easy to prepare and cook quickly in a pan or on the grill. This is a straightforward recipe suitable for beginners and takes about 30 minutes from start to finish.

    Ingredients

    For the Beef Burgers

    • 500g good-quality minced beef (around 15–20% fat)
    • 1 small onion, very finely chopped
    • 1 garlic clove, crushed
    • 1 tbsp Worcestershire sauce
    • 1 tsp Dijon mustard
    • Salt and freshly ground black pepper
    • 1 tbsp chopped fresh parsley (optional)
    • 1 tbsp olive oil, for cooking

    For the Burger Buns

    • 4 burger buns
    • Butter, for lightly toasting

    Suggested Toppings

    • 4 slices mature cheddar cheese
    • Lettuce leaves
    • 1 large tomato, sliced
    • 1 small red onion, thinly sliced
    • Gherkins or pickles
    • Ketchup, mayonnaise, or burger sauce

    How to Make James Martin Homemade Beef Burgers

    • Prepare the ingredients: Finely chop the onion and parsley and crush the garlic. Place the minced beef in a large mixing bowl so it is easy to combine everything evenly.
    • Mix the burger mixture: Add the chopped onion, garlic, Worcestershire sauce, Dijon mustard, parsley, salt, and pepper to the minced beef. Mix gently with your hands until just combined. Avoid overmixing as this can make the burgers dense.
    • Shape the burgers: Divide the mixture into four equal portions. Shape each portion into a round burger about 2cm thick. Press a small indentation in the centre of each patty to help them cook evenly.
    • Prepare the buns: Slice the burger buns in half and lightly butter the cut sides. Toast them briefly in a hot pan or under a grill until golden and crisp.
    • Cook the burgers: Heat the olive oil in a large frying pan over medium-high heat. Add the burgers and cook for about 4–5 minutes on each side until browned and cooked to your preferred level.
    • Add the cheese: If using cheese, place a slice on each burger during the final minute of cooking so it melts gently.
    • Assemble the burgers: Place lettuce on the base of each bun, followed by the cooked burger. Add tomato slices, red onion, pickles, and your preferred sauces, then top with the bun lid.
    How to Make James Martin Homemade Beef Burgers

    Tips for the Best Homemade Burgers

    How do I keep burgers juicy?

    Use minced beef with at least 15% fat and avoid pressing the burgers while they cook. This keeps the juices inside the patty.

    Why do my burgers fall apart?

    If the mixture is too loose, chill the shaped patties in the fridge for 15 minutes before cooking. This helps them hold their shape.

    How thick should the burgers be?

    A thickness of about 2cm works well. Thicker burgers stay juicy while still cooking through evenly.

    Can I cook these on a barbecue?

    Yes, they work beautifully on a barbecue. Cook over medium heat for about 4–5 minutes per side.

    Serving Suggestions

    • Serve with crispy oven chips or thick-cut fries
    • Add a side of homemade coleslaw
    • Pair with corn on the cob for a classic barbecue meal
    • Serve alongside a fresh green salad

    Storage

    Room Temperature

    Cooked burgers can sit at room temperature for up to 2 hours before they should be refrigerated.

    Refrigerator

    Store cooked burgers in an airtight container in the fridge for up to 3 days. Reheat gently in a pan or oven.

    Freezing

    Uncooked burger patties freeze very well. Wrap them individually and freeze for up to 3 months. Thaw in the refrigerator before cooking.

    Nutrition

    • Calories: 480 kcal
    • Carbohydrates: 28g
    • Protein: 32g
    • Fat: 26g
    • Saturated Fat: 10g
    • Sodium: 620mg

    Nutrition values are estimates and may vary depending on the exact ingredients used.

    FAQs

    What beef is best for homemade burgers?

    Minced beef with around 15–20% fat is ideal. The fat keeps the burgers juicy and full of flavour while cooking.

    Can I make the burger mixture ahead of time?

    Yes, you can prepare and shape the patties up to 24 hours in advance. Keep them covered in the refrigerator until ready to cook.

    Do I need to add breadcrumbs or egg?

    No, good-quality minced beef usually holds together well on its own. Gentle mixing and proper shaping are enough.

    How do I know when the burgers are cooked?

    The burgers should be browned on the outside and cooked through in the centre. For safety, ensure the internal temperature reaches about 75°C.

    James Martin Homemade Beef Burgers

    Recipe by Milli RoseCourse: Main CourseCuisine: BritishDifficulty: Easy
    Servings

    4

    servings
    Prep time

    30

    minutes
    Cooking time

    40

    minutes
    Calories

    300

    kcal
    Total time

    1

    hour 

    10

    minutes

    Juicy homemade beef burgers made with minced beef, onion, garlic and classic seasonings. Simple, flavourful and perfect for a quick family meal or barbecue.

    Ingredients

    • 500g minced beef (15–20% fat)

    • 1 small onion, finely chopped

    • 1 garlic clove, crushed

    • 1 tbsp Worcestershire sauce

    • 1 tsp Dijon mustard

    • Salt and black pepper

    • 1 tbsp chopped fresh parsley

    • 1 tbsp olive oil

    • 4 burger buns

    • Butter for toasting buns

    • 4 slices cheddar cheese

    • Lettuce leaves

    • 1 tomato, sliced

    • Pickles and burger sauce

    Directions

    • Place minced beef in a bowl with onion, garlic, Worcestershire sauce, mustard, parsley, salt and pepper.
    • Mix gently with your hands until just combined.
    • Divide into four portions and shape into burger patties.
    • Heat olive oil in a frying pan over medium-high heat.
    • Cook burgers for 4–5 minutes on each side until browned and cooked through.
    • Add cheese slices during the final minute so they melt.
    • Toast buttered burger buns until golden.
    • Assemble burgers with lettuce, tomato, pickles and sauce.

    Notes

    • Use beef with some fat for juicier burgers.
    • Chill patties before cooking if the mixture feels soft.
    • Cook on a barbecue for a smoky flavour.
  • James Martin Yorkshire Pudding Recipe For 6 Persons

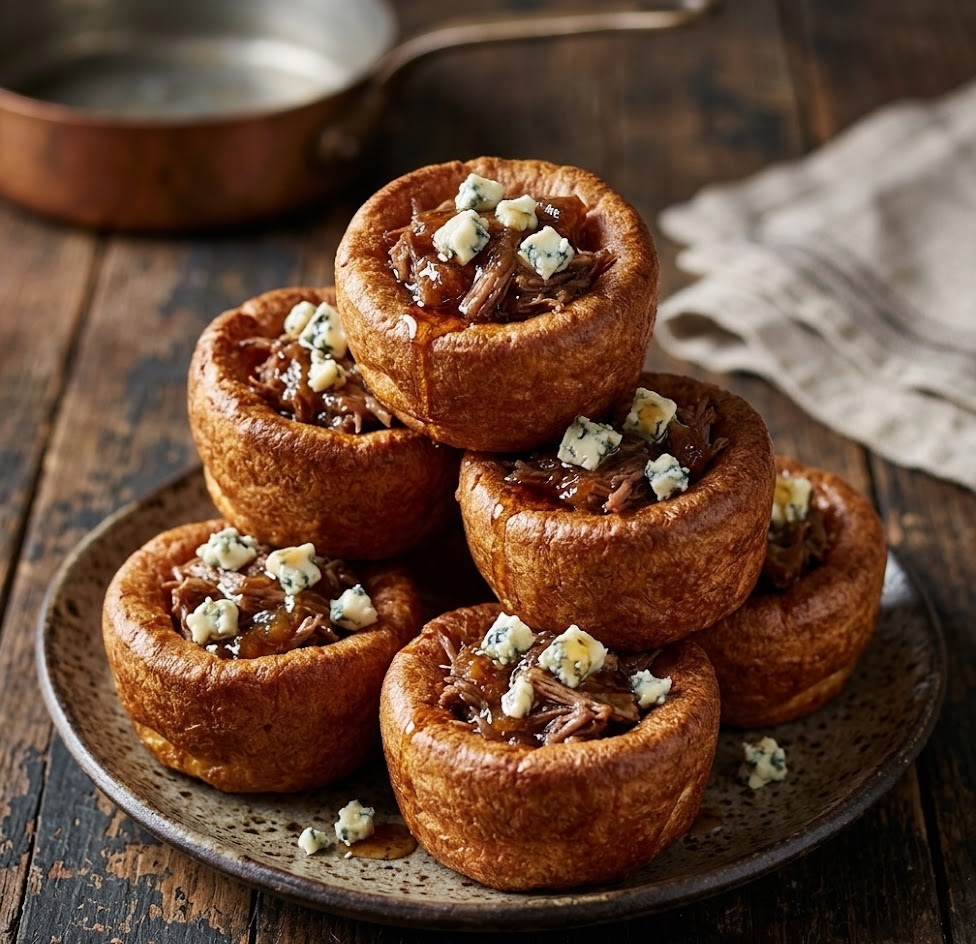
    James Martin Yorkshire Pudding Recipe For 6 Persons

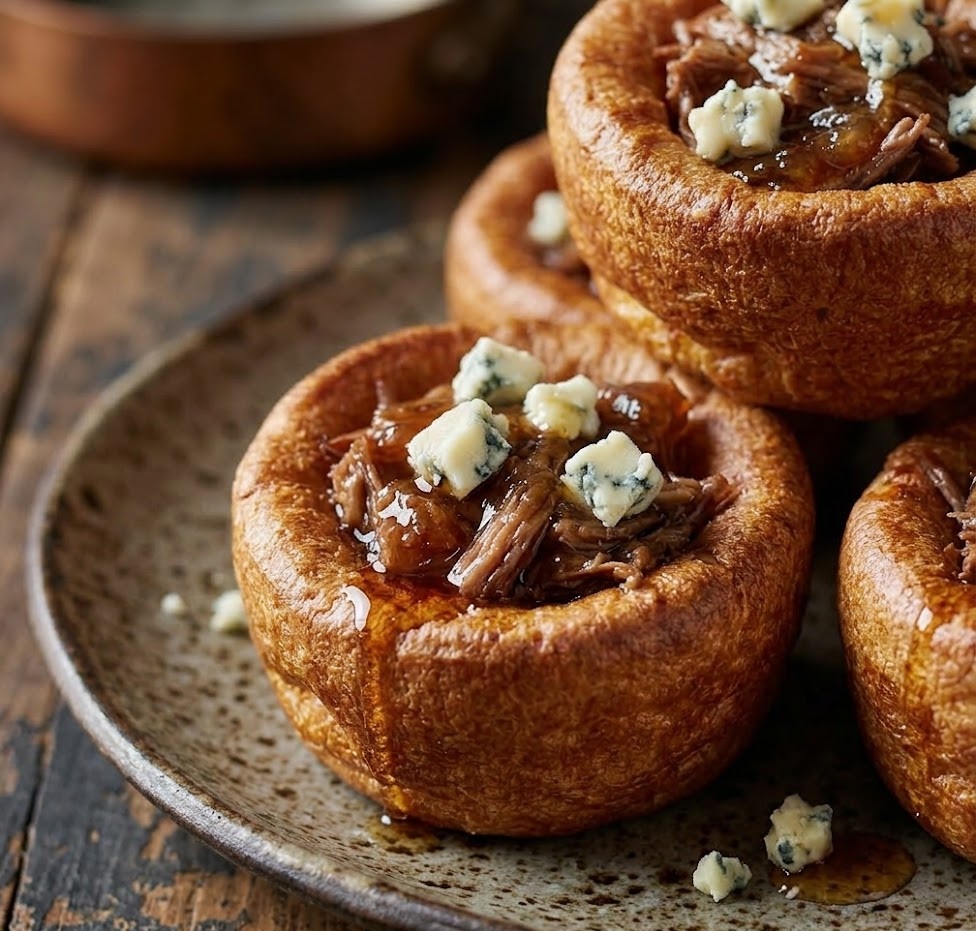
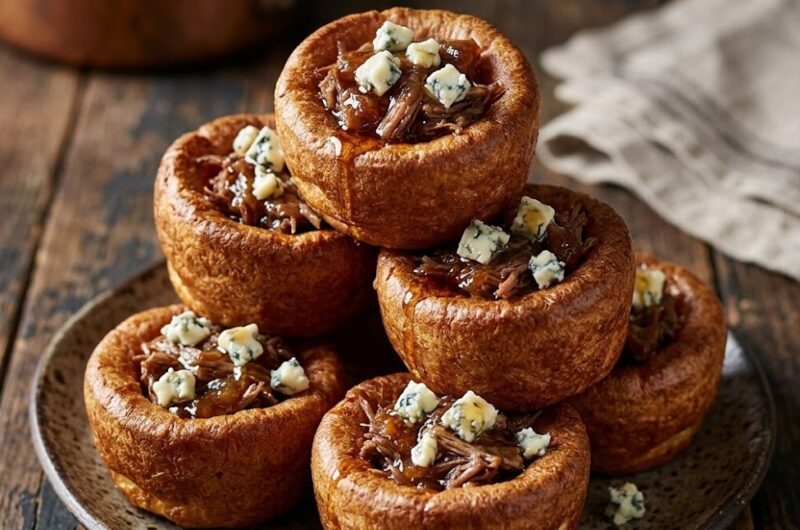
    Yorkshire pudding is a beloved British classic, known for its crisp golden edges and soft, airy centre. This James Martin version produces beautifully risen puddings with a light texture that is perfect for soaking up rich gravy. The batter is simple and quick to prepare, making it a reliable side dish for Sunday roasts. It is an easy recipe that takes about 35 minutes from start to finish.

    Ingredients

    For the Yorkshire Pudding Batter

    • 200g plain flour
    • 4 large eggs
    • 300ml whole milk
    • ½ tsp fine salt

    For the Tin

    • 4–6 tbsp vegetable oil or beef dripping

    How to Make James Martin Yorkshire Pudding Recipe For 6 Persons

    • Prepare the oven: Preheat the oven to 220°C or 200°C fan. Place a sturdy Yorkshire pudding tin or muffin tin in the oven with a little oil in each hole so it becomes very hot.
    • Mix the batter: In a large bowl, whisk the eggs, milk, and salt together until well combined. Gradually whisk in the plain flour until the batter is smooth and lump free.
    • Rest the batter: Let the batter rest for 10 to 15 minutes while the oven and oil heat up. This helps the puddings rise better.
    • Fill the hot tin: Carefully remove the hot tin from the oven. Quickly pour the batter evenly into the hot oil, filling each section about halfway.
    • Bake the puddings: Return the tin to the oven immediately and bake for 20 to 25 minutes until the puddings are tall, crisp, and deeply golden.
    • Serve immediately: Remove from the oven and serve straight away while they are puffed and crispy.
    How to Make James Martin Yorkshire Pudding Recipe For 6 Persons

    Tips for the Best Yorkshire Puddings

    Why did my Yorkshire puddings not rise?

    The oil must be very hot before the batter is added. If the oil is not sizzling, the puddings will struggle to rise properly.

    Should the batter be thick or thin?

    The batter should be similar in consistency to single cream. If it feels too thick, whisk in a tablespoon of milk.

    Can I make the batter ahead of time?

    Yes. The batter can be prepared up to 4 hours in advance and kept covered in the refrigerator. Bring it back to room temperature before baking.

    Which fat works best?

    Beef dripping gives the most traditional flavour, but vegetable oil or sunflower oil also works well.

    Serving Suggestions

    • Serve alongside roast beef and rich onion gravy.
    • Fill with sausages and gravy for a classic toad in the hole style meal.
    • Serve with roast chicken, potatoes, and vegetables.
    • Enjoy with slow-cooked stews or casseroles.

    Storage

    Room Temperature

    Yorkshire puddings are best eaten fresh from the oven. They can sit at room temperature for up to 2 hours before serving.

    Refrigerator

    Store leftover puddings in an airtight container in the refrigerator for up to 2 days. Reheat in a hot oven for 5 minutes to crisp them again.

    Freezing

    Once completely cooled, freeze Yorkshire puddings in a sealed container for up to 2 months. Reheat directly from frozen in a hot oven for about 8 minutes.

    Nutrition

    • Calories: 210 kcal
    • Carbohydrates: 21g
    • Protein: 8g
    • Fat: 10g
    • Saturated Fat: 2.5g
    • Sodium: 230mg

    Nutrition values are approximate and may vary depending on ingredients used.

    FAQs

    Why must the oil be very hot for Yorkshire pudding?

    Very hot oil creates an immediate burst of heat when the batter is added, which helps the puddings rise quickly and develop crisp edges.

    Can I make Yorkshire pudding batter in advance?

    Yes, the batter can be prepared several hours ahead and kept in the refrigerator. Let it come to room temperature before baking for the best rise.

    Can I bake this as one large Yorkshire pudding?

    Yes, pour the batter into a hot roasting tin and bake for around 25 minutes until puffed and golden.

    Why did my Yorkshire puddings collapse after baking?

    They can deflate slightly as they cool, which is normal. Make sure they are fully cooked and golden before removing them from the oven.

    James Martin Yorkshire Pudding Recipe For 6 Persons

    Recipe by Milli RoseCourse: Side DishCuisine: BritishDifficulty: Easy
    Servings

    4

    servings
    Prep time

    30

    minutes
    Cooking time

    40

    minutes
    Calories

    300

    kcal
    Total time

    1

    hour 

    10

    minutes

    Light, crisp and airy Yorkshire puddings made with a simple batter of eggs, milk and flour. Perfect alongside roast beef and gravy.

    Ingredients

    • 200g plain flour

    • 4 large eggs

    • 300ml whole milk

    • ½ tsp fine salt

    • 4–6 tbsp vegetable oil or beef dripping

    Directions

    • Preheat the oven to 220°C (200°C fan) and place a Yorkshire pudding tin with oil in the oven to heat.
    • Whisk eggs, milk and salt together in a bowl until smooth.
    • Gradually whisk in the flour until the batter is smooth and lump free.
    • Let the batter rest for about 10–15 minutes.
    • Carefully pour the batter into the hot oil filled tin.
    • Bake for 20–25 minutes until risen, crisp and golden brown.
    • Serve immediately while hot and puffed.

    Notes

    • Always use very hot oil for the best rise.
    • A rested batter produces lighter puddings.
    • Avoid opening the oven door during baking.
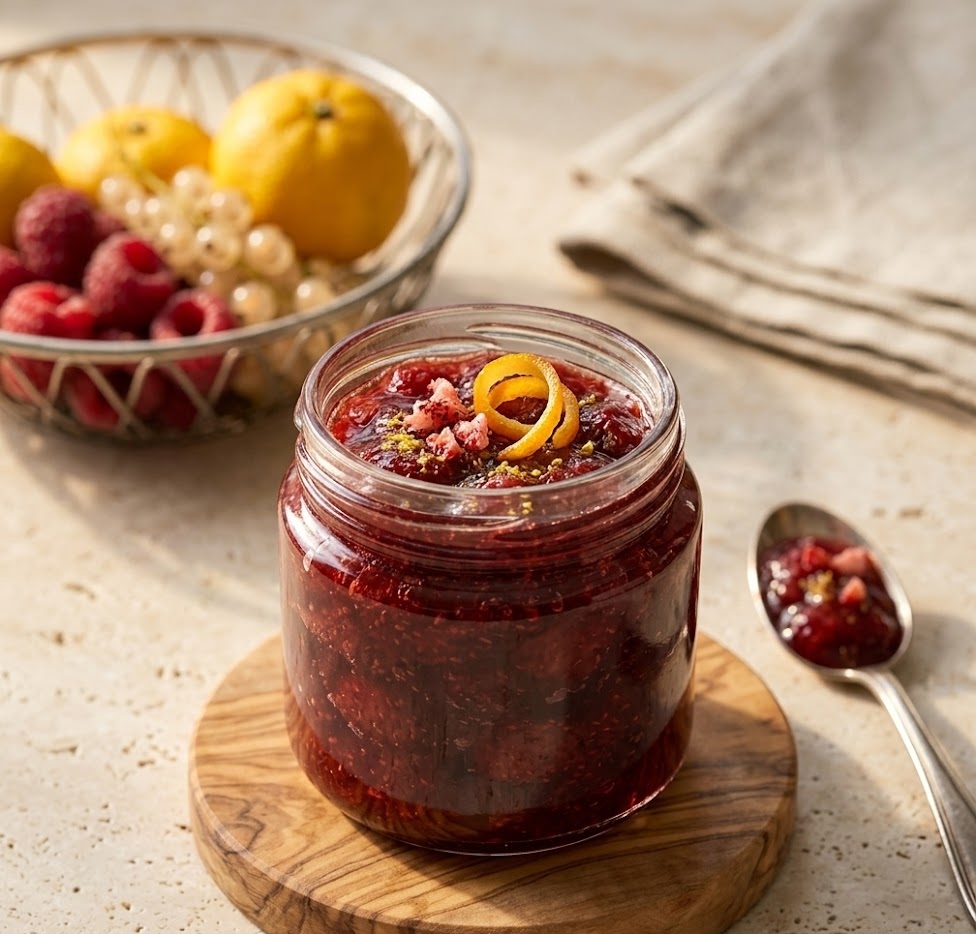
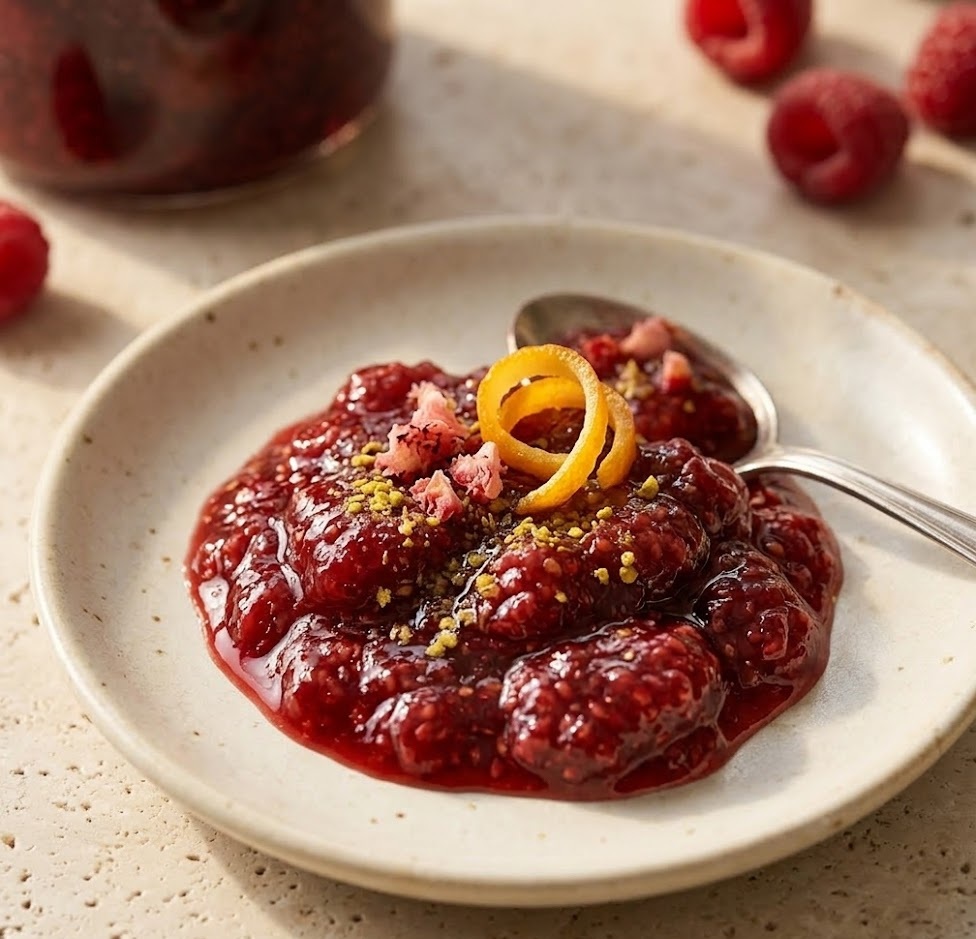
  • James Martin Strawberry Jam

    James Martin Strawberry Jam

    James Martin Strawberry Jam is a classic homemade preserve made with fresh strawberries, sugar, and lemon juice. It has a soft, glossy texture with a bright, sweet flavour that captures the taste of summer in every spoonful. This recipe is simple and beginner friendly, making it perfect for anyone new to jam making. The total time is about 40 minutes, including cooking and setting.

    Ingredients

    For the Strawberry Jam

    • 1kg fresh strawberries, hulled
    • 1kg granulated sugar
    • Juice of 1 lemon

    How to Make James Martin Strawberry Jam

    • Prepare the jars: Wash jam jars and lids in hot soapy water. Rinse well and place them in a low oven at 120°C for about 10 minutes to sterilise. This helps the jam keep safely for longer.
    • Prepare the strawberries: Place the hulled strawberries in a large heavy-based saucepan. Lightly crush some of the berries with a potato masher to release their juices while leaving some pieces whole for texture.
    • Add sugar and lemon: Stir in the granulated sugar and lemon juice. Place the pan over low heat and stir gently until the sugar has completely dissolved.
    • Bring to a boil: Increase the heat and bring the mixture to a rolling boil. Boil rapidly for about 8 to 10 minutes, stirring occasionally to prevent sticking.
    • Check the setting point: Spoon a little jam onto a chilled plate. Leave for a few seconds then push it with your finger. If it wrinkles slightly, the jam is ready. If not, boil for another 1 to 2 minutes and test again.
    • Skim and jar: Remove any foam from the surface with a spoon. Carefully pour the hot jam into the warm sterilised jars.
    • Seal and cool: Seal the jars immediately and allow them to cool completely at room temperature. The jam will thicken further as it cools.
    How to Make James Martin Strawberry Jam

    Tips for the Best Strawberry Jam

    How do I stop my jam from being too runny?

    Make sure the jam reaches the proper setting point. If it remains runny, return it to the pan and boil for a few more minutes before testing again.

    Why add lemon juice to strawberry jam?

    Lemon juice provides natural pectin and acidity, which helps the jam set properly while balancing the sweetness.

    Can I reduce the sugar?

    Sugar helps preserve the jam and affects the texture. Reducing it too much can prevent the jam from setting and shorten its shelf life.

    How do I keep strawberries from floating in the jar?

    Allow the jam to cool for about 5 minutes before pouring into jars and stir gently. This helps distribute the fruit evenly.

    Serving Suggestions

    • Spread on warm toast or buttered bread
    • Serve with scones and clotted cream
    • Use as a filling for sponge cakes
    • Stir into yogurt or porridge
    • Swirl through cheesecake or desserts

    Storage

    Room Temperature

    Unopened jars can be stored in a cool, dark cupboard for up to 12 months.

    Refrigerator

    Once opened, keep the jar in the refrigerator and use within 3 to 4 weeks.

    Freezing

    Strawberry jam can be frozen for up to 6 months in freezer safe containers. Leave a little space at the top for expansion.

    Nutrition

    • Calories: 50 kcal
    • Carbohydrates: 13g
    • Protein: 0.1g
    • Fat: 0g
    • Saturated Fat: 0g
    • Sodium: 1mg

    Nutrition values are estimates and may vary depending on ingredients used.

    FAQs

    How long does homemade strawberry jam last?

    Unopened jars stored in a cool dark cupboard can last up to 12 months. Once opened, the jam should be kept in the refrigerator and used within 3 to 4 weeks.

    Do I need pectin for strawberry jam?

    No. Strawberries combined with lemon juice contain enough natural pectin for this recipe to set properly.

    Can I use frozen strawberries?

    Yes, frozen strawberries work well. Thaw them first and include any juices when cooking the jam.

    Why did my jam crystallise?

    Crystallisation can happen if the sugar does not fully dissolve before boiling. Always heat gently and stir until the sugar is completely dissolved.

    James Martin Strawberry Jam

    Recipe by Milli RoseCourse: CondimentCuisine: BritishDifficulty: Easy
    Servings

    4

    servings
    Prep time

    30

    minutes
    Cooking time

    40

    minutes
    Calories

    300

    kcal
    Total time

    1

    hour 

    10

    minutes

    A simple homemade strawberry jam made with fresh strawberries, sugar and lemon juice. Sweet, glossy and full of fresh fruit flavour.

    Ingredients

    • 1kg fresh strawberries, hulled

    • 1kg granulated sugar

    • Juice of 1 lemon

    Directions

    • Sterilise jam jars in a low oven at 120°C after washing them thoroughly.
    • Place strawberries in a large saucepan and lightly crush some of them to release juices.
    • Add sugar and lemon juice and heat gently until the sugar dissolves.
    • Bring the mixture to a rolling boil and cook for about 8 to 10 minutes.
    • Test the setting point using a chilled plate and boil a little longer if needed.
    • Skim off any foam and pour the hot jam into warm sterilised jars.
    • Seal jars and leave to cool completely before storing.

    Notes

    • Use ripe strawberries for the best flavour.
    • Always dissolve sugar fully before boiling.
    • Sterilised jars help the jam keep safely for longer.
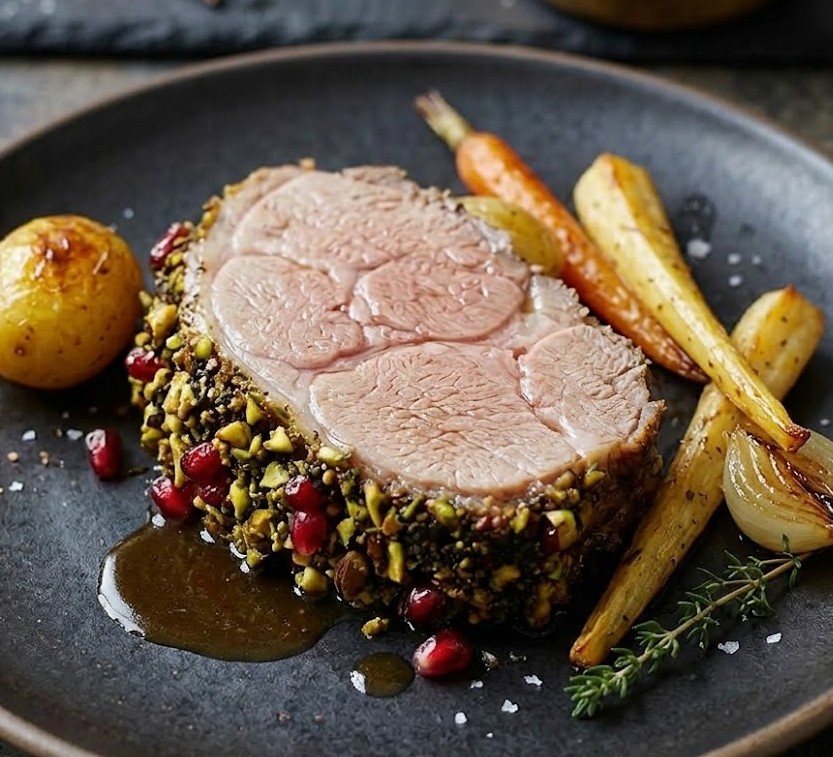
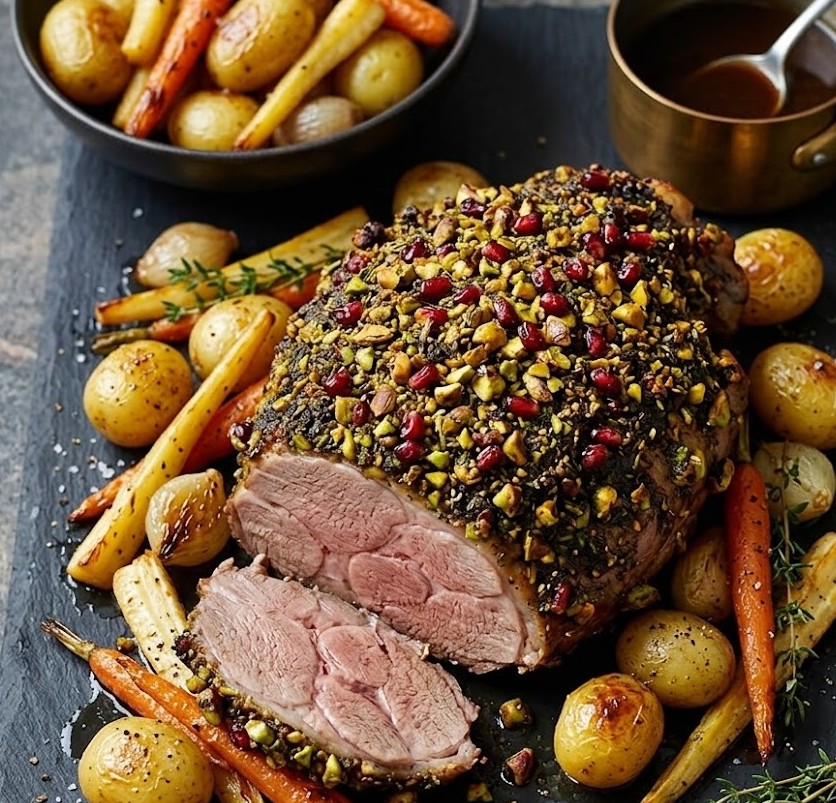
  • James Martin Slow Cooked Lamb

    James Martin Slow Cooked Lamb

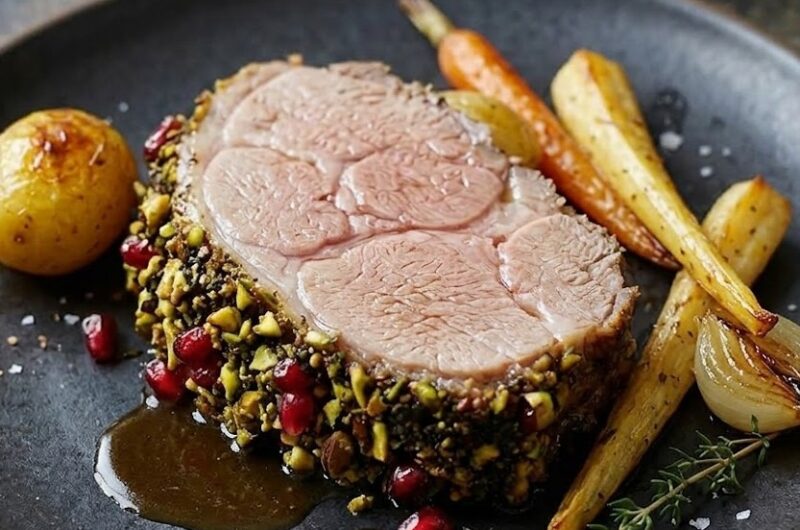
    James Martin’s slow cooked lamb is a wonderfully comforting dish that delivers tender, pull-apart meat with rich, savoury flavour. The lamb cooks gently in the oven with herbs, garlic, and stock until it becomes meltingly soft and beautifully aromatic. It is an easy recipe that requires very little hands-on work, making it perfect for relaxed weekend cooking. Total time is around 3 hours, most of which is slow roasting in the oven.

    Ingredients

    For the Lamb

    • 1.8–2kg lamb shoulder, bone-in
    • 2 tbsp olive oil
    • 4 garlic cloves, sliced
    • 2 tbsp fresh rosemary, chopped
    • 1 tbsp fresh thyme leaves
    • 1 tsp sea salt
    • 1 tsp freshly ground black pepper
    • 250ml lamb or chicken stock
    • 150ml dry white wine
    • 1 large onion, sliced
    • 2 carrots, roughly chopped
    • 2 bay leaves

    Optional Gravy Finish

    • 1 tbsp plain flour
    • 150ml extra stock
    • Salt and pepper to taste
    James Martin Slow Cooked Lamb

    How to Make James Martin Slow Cooked Lamb

    • Prepare the oven: Preheat the oven to 160°C or 140°C fan. Place a shelf in the middle of the oven so the lamb cooks evenly and slowly develops a rich flavour.
    • Prepare the lamb: Pat the lamb shoulder dry with kitchen paper. Rub the olive oil all over the meat, then season well with sea salt and black pepper.
    • Add the flavourings: Cut small slits in the lamb and insert the sliced garlic. Sprinkle the chopped rosemary and thyme evenly over the surface.
    • Prepare the roasting base: Place the sliced onion, carrots, and bay leaves into a large roasting tin. Set the lamb shoulder on top of the vegetables.
    • Add the liquid: Pour the white wine and stock into the roasting tin around the lamb. This keeps the meat moist and forms the base for a rich gravy.
    • Slow roast: Cover the tin tightly with foil and place it in the oven. Cook for about 2½ to 3 hours until the lamb is very tender and easily pulls away from the bone.
    • Crisp the top: Remove the foil for the final 20 minutes of cooking so the top becomes lightly golden and slightly crisp.
    • Rest the lamb: Take the lamb out of the oven and allow it to rest for 15 minutes before carving or pulling apart.
    • Make the gravy (optional): Strain the cooking juices into a saucepan. Whisk in the flour and extra stock, then simmer for a few minutes until slightly thickened.

    Tips for the Best James Martin Slow Cooked Lamb

    How do I keep the lamb from drying out?

    Always cook the lamb covered for most of the cooking time. The foil traps moisture and keeps the meat tender while it slowly breaks down.

    Which cut of lamb works best?

    Lamb shoulder is ideal because it contains enough fat and connective tissue to become soft and succulent during slow cooking.

    How do I know when the lamb is ready?

    The meat should easily pull apart with a fork and feel very tender. If it still feels firm, return it to the oven for another 20 to 30 minutes.

    Can I add extra vegetables?

    Yes, potatoes, parsnips, or chunks of celery can be added to the roasting tin to cook alongside the lamb.

    Serving Suggestions

    • Serve with roasted potatoes and seasonal vegetables
    • Pair with creamy mashed potatoes
    • Add buttered green beans or peas
    • Serve with crusty bread to soak up the juices

    Storage

    Room Temperature

    The lamb can sit at room temperature for up to 2 hours after cooking before it should be refrigerated.

    Refrigerator

    Store leftover lamb in an airtight container for up to 3 days. Reheat gently in the oven or in a covered pan with a splash of stock.

    Freezing

    Cooked lamb freezes well for up to 3 months. Wrap portions tightly and thaw overnight in the refrigerator before reheating.

    Nutrition

    • Calories: 420 kcal
    • Carbohydrates: 6g
    • Protein: 36g
    • Fat: 27g
    • Saturated Fat: 10g
    • Sodium: 480mg

    Nutrition values are approximate and may vary depending on ingredients used.

    FAQs

    What cut of lamb is best for slow cooking?

    Lamb shoulder is the best choice because it contains enough fat and connective tissue to become extremely tender when cooked slowly.

    Can I cook the lamb in a slow cooker instead of the oven?

    Yes, place all ingredients in a slow cooker and cook on low for 6 to 8 hours until the meat is very tender.

    Should I cover the lamb while roasting?

    Yes, covering the lamb for most of the cooking time helps trap moisture and keeps the meat soft and juicy.

    Can I prepare the lamb ahead of time?

    Yes, the lamb can be cooked a day ahead and reheated gently with some of the cooking juices for extra flavour.

    James Martin Slow Cooked Lamb

    Recipe by Milli RoseCourse: Main CourseCuisine: BritishDifficulty: Easy
    Servings

    4

    servings
    Prep time

    30

    minutes
    Cooking time

    40

    minutes
    Calories

    300

    kcal
    Total time

    1

    hour 

    10

    minutes

    Tender, slow roasted lamb shoulder cooked with garlic, herbs and stock until meltingly soft. A comforting British-style roast perfect for a relaxed weekend meal.

    Ingredients

    • 1.8–2kg lamb shoulder, bone-in

    • 2 tbsp olive oil

    • 4 garlic cloves, sliced

    • 2 tbsp fresh rosemary, chopped

    • 1 tbsp fresh thyme leaves

    • 1 tsp sea salt

    • 1 tsp black pepper

    • 250ml lamb or chicken stock

    • 150ml dry white wine

    • 1 large onion, sliced

    • 2 carrots, chopped

    • 2 bay leaves

    Directions

    • Preheat the oven to 160°C (140°C fan).
    • Rub the lamb shoulder with olive oil, salt and pepper.
    • Insert sliced garlic into small cuts in the lamb and sprinkle with rosemary and thyme.
    • Place onion, carrots and bay leaves in a roasting tin and set the lamb on top.
    • Pour the stock and white wine into the roasting tin.
    • Cover tightly with foil and roast for about 2½–3 hours.
    • Remove the foil for the final 20 minutes to brown the top.
    • Rest the lamb for 15 minutes before carving or pulling apart.

    Notes

    • Lamb shoulder works best for slow cooking.
    • Keep the lamb covered during most of the cooking time to retain moisture.
    • Leftover lamb can be used in sandwiches, pies, or wraps.
  • James Martin Tomato And Basil Soup

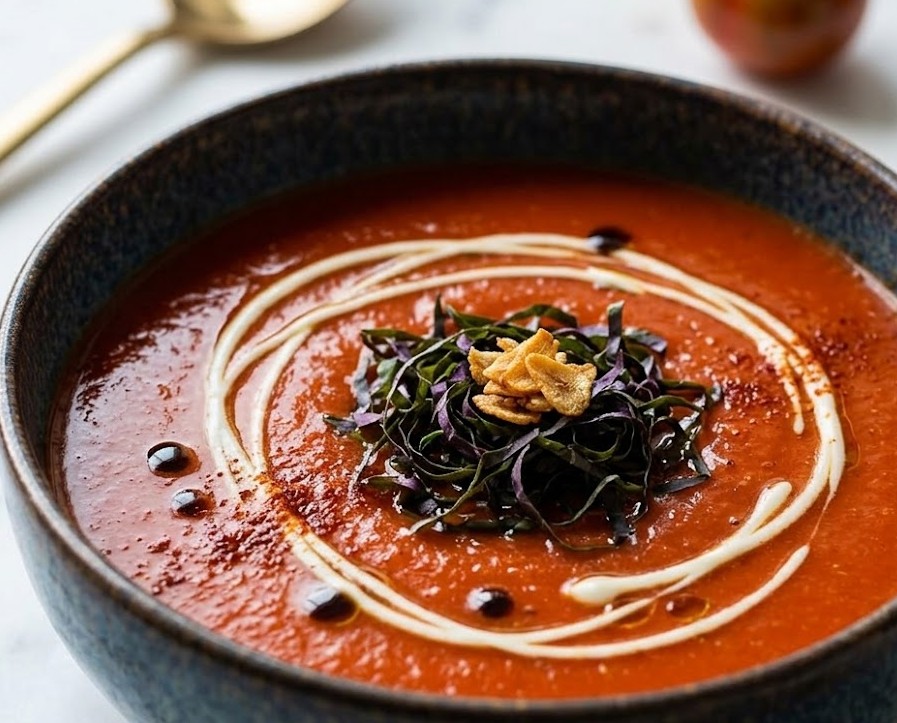
    James Martin Tomato And Basil Soup

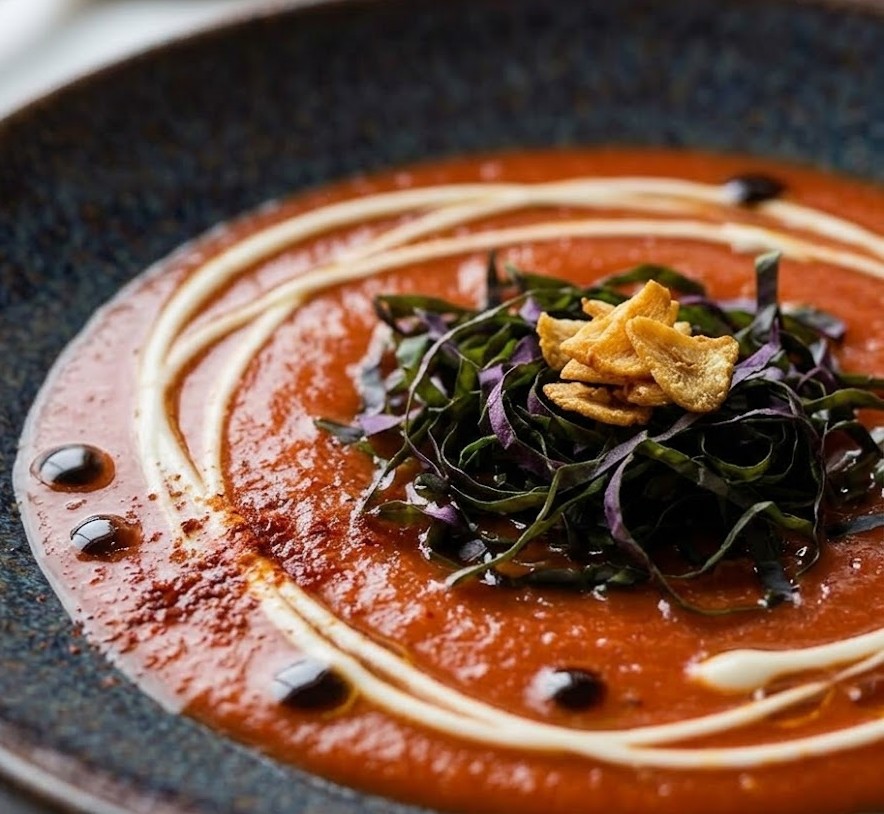
    This James Martin Tomato And Basil Soup is a classic, comforting bowl of soup that highlights the natural sweetness of ripe tomatoes and the fresh aroma of basil. It has a smooth, velvety texture with a light richness from olive oil and a gentle savoury depth from slowly cooked vegetables. The recipe is simple and approachable, making it perfect for beginners as well as experienced home cooks. From start to finish, the soup takes around 35 minutes to prepare.

    Ingredients

    For the Soup

    • 1 tbsp olive oil
    • 1 small onion, finely chopped
    • 1 garlic clove, crushed
    • 1 carrot, finely diced
    • 2 celery sticks, finely diced
    • 800g ripe tomatoes, chopped (or good quality tinned tomatoes)
    • 500ml vegetable stock
    • 1 tbsp tomato purée
    • 1 tsp caster sugar
    • Salt and freshly ground black pepper

    For Finishing

    • Small handful fresh basil leaves
    • 2 tbsp double cream (optional)
    • Extra basil leaves for garnish
    • Crusty bread for serving
    James Martin Tomato And Basil Soup

    How to Make James Martin Tomato And Basil Soup

    • Prepare the vegetables: Peel and finely chop the onion, carrot and celery. Crush the garlic and roughly chop the tomatoes if using fresh ones.
    • Cook the base: Heat the olive oil in a large saucepan over medium heat. Add the onion, carrot and celery and cook gently for 8 to 10 minutes until softened but not coloured.
    • Add the garlic and tomatoes: Stir in the crushed garlic and cook for 1 minute. Add the chopped tomatoes and tomato purée, stirring well so everything is evenly combined.
    • Simmer the soup: Pour in the vegetable stock and add the caster sugar. Bring to a gentle simmer and cook for about 15 minutes so the vegetables become tender and the flavours develop.
    • Blend until smooth: Add the fresh basil leaves, then blend the soup using a stick blender until smooth and silky. Season with salt and freshly ground black pepper.
    • Finish and serve: Stir in the double cream if using and warm the soup gently. Ladle into bowls and garnish with extra basil leaves before serving.

    Tips

    How can I make the soup extra smooth?

    Blend the soup thoroughly with a stick blender and pass it through a fine sieve if you prefer an ultra silky texture.

    How do I balance the acidity of tomatoes?

    If the soup tastes slightly sharp, add a pinch of sugar or a small splash of cream to soften the acidity.

    Can I roast the tomatoes first?

    Yes. Roasting the tomatoes in the oven with olive oil for 20 minutes before adding them to the soup will deepen the flavour.

    Which tomatoes are best for soup?

    Ripe plum tomatoes or vine tomatoes work particularly well because they have strong flavour and natural sweetness.

    Serving Suggestions

    • Serve with warm crusty bread or a buttered baguette
    • Pair with a classic grilled cheese sandwich
    • Top with extra cream and cracked black pepper
    • Add homemade croutons for texture

    Storage

    Room Temperature

    Allow the soup to cool slightly before serving, but do not leave it out for more than 2 hours.

    Refrigerator

    Store cooled soup in an airtight container in the fridge for up to 3 days. Reheat gently on the stove until piping hot.

    Freezing

    This soup freezes very well. Place cooled soup into freezer containers and freeze for up to 3 months. Defrost overnight in the refrigerator and reheat gently before serving.

    Nutrition

    • Calories: 160 kcal
    • Carbohydrates: 18 g
    • Protein: 4 g
    • Fat: 8 g
    • Saturated Fat: 2 g
    • Sodium: 540 mg

    Nutrition values are estimates and may vary depending on ingredients used.

    FAQs

    Can I use tinned tomatoes for this soup?

    Yes, good quality tinned plum tomatoes work very well and often give a deeper flavour, especially when fresh tomatoes are out of season.

    Can I make tomato and basil soup without cream?

    Absolutely. The soup is naturally smooth once blended and tastes fresh and light even without cream.

    How do I thicken tomato soup?

    Allow the soup to simmer uncovered for a few extra minutes so it reduces slightly, or add a small diced potato while cooking and blend it in.

    Can I add other vegetables to the soup?

    Yes, vegetables such as red peppers or a small potato can be added to create a slightly richer and more filling soup.

    James Martin Tomato And Basil Soup

    Recipe by Milli RoseCourse: SoupCuisine: BritishDifficulty: Easy
    Servings

    4

    servings
    Prep time

    30

    minutes
    Cooking time

    40

    minutes
    Calories

    300

    kcal
    Total time

    1

    hour 

    10

    minutes

    A smooth and comforting tomato and basil soup inspired by James Martin, made with ripe tomatoes, fresh basil and simple vegetables for a classic flavourful bowl.

    Ingredients

    • 1 tbsp olive oil

    • 1 small onion, finely chopped

    • 1 garlic clove, crushed

    • 1 carrot, finely diced

    • 2 celery sticks, finely diced

    • 800g ripe tomatoes, chopped

    • 500ml vegetable stock

    • 1 tbsp tomato puree

    • 1 tsp caster sugar

    • Salt and black pepper

    • Fresh basil leaves

    • 2 tbsp double cream (optional)

    Directions

    • Heat olive oil in a large saucepan and gently cook the onion, carrot and celery for about 8–10 minutes until softened.
    • Add the crushed garlic and cook briefly until fragrant.
    • Stir in the chopped tomatoes and tomato puree and mix well.
    • Pour in the vegetable stock and add the caster sugar.
    • Simmer gently for about 15 minutes until the vegetables are tender.
    • Add fresh basil leaves and blend the soup until smooth using a stick blender.
    • Season with salt and pepper and stir in the cream if using.
    • Serve hot with extra basil leaves and crusty bread.

    Notes

    • Roasting tomatoes first can deepen the flavour.
    • Add a splash of cream to balance acidity.
    • The soup freezes well for up to 3 months.

slot depo

sicbo online