Category: Dinner

  • empanada recipe

    empanada recipe

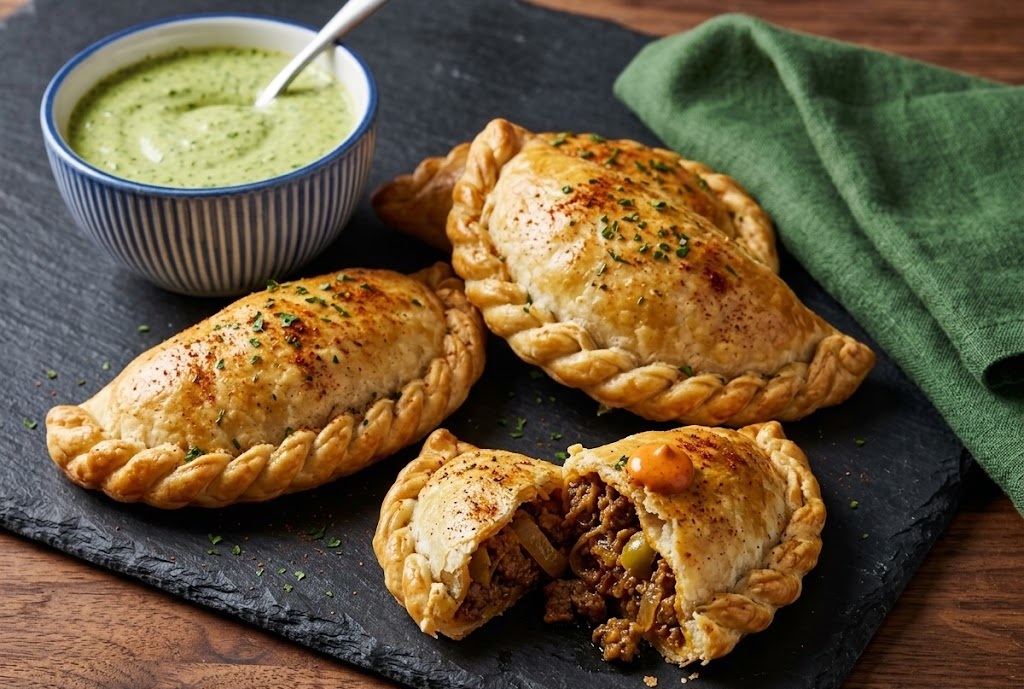
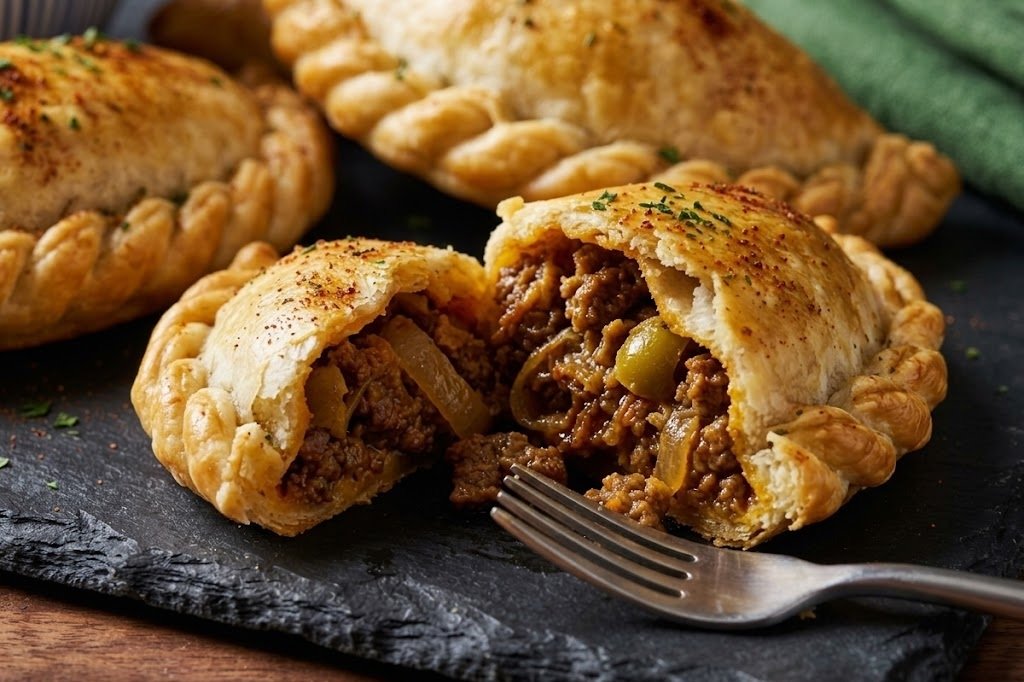
    These homemade empanadas are crisp and golden on the outside with a tender, buttery crust and a rich, savoury beef filling inside. The flavour is warm and gently spiced, with little pops of salty olive and creamy egg in every bite. I’d call this a confident beginner recipe: there are a few steps, but none are hard if you take them one at a time. Total time is about 1 hour 30 minutes, including chilling and cooling.

    Ingredients

    For the empanada dough

    • 360g plain flour (about 2 3/4 cups)
    • 1 tsp fine salt
    • 1 tsp caster sugar (optional, helps browning)
    • 170g unsalted butter, cold and cut into small cubes
    • 1 large egg
    • 1 tbsp white vinegar or cider vinegar
    • 120ml ice-cold water (add 1–2 tbsp more only if needed)

    For the beef filling

    • 1 tbsp olive oil
    • 1 medium onion, finely diced
    • 1 small red pepper, finely diced
    • 3 garlic cloves, finely chopped
    • 450g minced beef
    • 2 tbsp tomato purée
    • 1 1/2 tsp ground cumin
    • 1 tsp smoked paprika
    • 1 tsp dried oregano
    • 1/4 tsp chilli flakes (optional)
    • 120ml beef stock
    • 60g green olives, chopped
    • 30g raisins (optional)
    • Fine salt and black pepper, to taste
    • 2 hard-boiled eggs, chopped

    For assembling and baking

    • 1 egg
    • 1 tbsp milk
    • Plain flour, for rolling

    How to Make Empanadas

    • Prepare the oven: Preheat the oven to 200°C or 180°C fan. Place a shelf in the middle of the oven and line a large baking tray with baking parchment.
    • Mix the dough: Add the flour, salt and sugar (if using) to a large bowl. Tip in the cold butter and rub it in with your fingertips until the mixture looks like coarse crumbs with a few pea-sized bits of butter still visible.
    • Bring it together: Whisk the egg with the vinegar, then add it to the bowl. Drizzle in the ice-cold water and mix with a fork until the dough starts clumping. Use your hands to press it together. It should look smooth and hold its shape, not sticky.
    • Chill: Flatten the dough into a disc, wrap well, and chill for 30 minutes. This makes it easier to roll and helps the crust bake up flaky.
    • Cook the filling: Heat the olive oil in a large frying pan over medium heat. Add the onion and red pepper and cook for 6–8 minutes until soft. Stir in the garlic for 30 seconds, then add the minced beef and cook until browned.
    • Season and thicken: Stir in the tomato purée, cumin, smoked paprika, oregano and chilli flakes. Pour in the beef stock and simmer for 6–10 minutes, stirring often, until the mixture is thick and not watery. Stir in the olives and raisins (if using), then taste and season with salt and pepper.
    • Cool the filling: Tip the filling into a bowl and let it cool completely. Once cool, stir in the chopped hard-boiled eggs. This step matters because warm filling will melt the butter in the dough and make sealing harder.
    • Roll and cut: Lightly flour your work surface. Roll the chilled dough to about 2–3mm thick. Cut 12 circles, about 12–13cm wide (a side plate works well as a guide). Re-roll scraps as needed, keeping the dough as cool as you can.
    • Assemble: Spoon 1 to 1 1/2 tablespoons of filling onto one half of each circle, leaving a clean border around the edge. Dip a finger in water and moisten the border, then fold into a half-moon and press firmly to seal.
    • Crimp and finish: Crimp the edge with a fork or do a simple rope crimp. Place on the lined tray. Whisk the egg with the milk and brush lightly over the tops for a glossy, golden finish.
    • Bake: Bake for 20–25 minutes, or until deeply golden and crisp. If your oven runs cool, give them a couple more minutes. You want colour for the best flavour.
    • Cool and serve: Let the empanadas cool on the tray for 10 minutes so the filling settles. Serve warm, or let them cool to room temperature for picnics and lunch boxes.
    How to Make Empanadas

    Tips

    Why is my empanada dough tough?

    Tough dough usually comes from overworking or adding too much water. Mix just until it holds together, and stop. If you are unsure, slightly drier dough is better than sticky dough, and chilling helps the flour hydrate without extra mixing.

    How do I stop empanadas from leaking in the oven?

    Make sure the filling is thick and fully cool, and don’t overfill. Keep the rim of the dough clean, press firmly to seal, then crimp. If you spot a tiny tear, patch it with a small scrap of dough and a dab of water.

    What’s the secret to a crisp, golden crust?

    Use cold butter, keep the dough chilled, and bake hot. The egg wash adds shine and colour, but the real difference is a properly preheated oven and giving them enough time to brown.

    Can I make the filling ahead of time?

    Yes, and it actually makes assembly easier. Make it up to 2 days ahead, cool, cover, and refrigerate. Bring it back to room temperature for 15–20 minutes so it is easier to spoon.

    Serving Suggestions

    • Serve with chimichurri or a simple salsa verde
    • Add a side salad with citrusy dressing to cut through the richness
    • Dip in sour cream or garlicky yoghurt sauce
    • Pair with roasted corn, rice, or black beans for a fuller meal

    Storage

    Room Temperature

    Keep baked empanadas at room temperature for up to 2 hours. After that, refrigerate for food safety.

    Refrigerator

    Store cooled empanadas in an airtight container for up to 4 days. Reheat on a tray at 180°C fan for 8–12 minutes until hot and crisp again.

    Freezing

    Empanadas freeze beautifully. Freeze unbaked empanadas on a lined tray until solid, then transfer to a freezer bag for up to 3 months. Bake from frozen at 200°C (180°C fan) for 25–33 minutes, brushing with egg wash right before baking.

    Nutrition

    • Calories: 320 kcal
    • Carbohydrates: 26 g
    • Protein: 12 g
    • Fat: 19 g
    • Saturated Fat: 9 g
    • Sodium: 420 mg

    Nutrition values are estimates and will vary depending on the exact ingredients and brands you use.

    FAQs

    Can I use shop-bought pastry for empanadas?

    Yes. Ready-rolled shortcrust works in a pinch, and so do empanada discos if you can find them. Keep the filling thick and cool, and bake until deeply golden so the base cooks through.

    Can I fry these instead of baking?

    You can. Heat neutral oil to about 175°C, fry in batches for 2–4 minutes per side until golden, then drain well. Fried empanadas are richer, so keep the filling fairly dry to prevent splattering.

    Why did my empanadas open while baking?

    This usually happens when the edges are not sealed firmly, the rim has filling or grease on it, or the filling was still warm. Wipe the rim clean, moisten with water, press to seal, then crimp. Chilling assembled empanadas for 10 minutes also helps.

    Can I make empanadas ahead for a party?

    Yes. Assemble them up to 1 day ahead and refrigerate on a tray (covered). Brush with egg wash right before baking. You can also freeze them unbaked and bake straight from frozen with a few extra minutes in the oven.

    What other fillings work well?

    Shredded chicken with peppers, cheese and sweetcorn; spinach and feta; pulled pork; or a simple ham and cheese. Keep fillings thick, not saucy, so the pastry stays crisp and the seams stay sealed.

    Baked Beef Empanadas

    Recipe by Home Chef CooksCourse: MainCuisine: Latin AmericanDifficulty: Medium
    Servings

    12

    empanadas
    Prep time

    35

    minutes
    Cooking time

    25

    minutes
    Total time

    90

    minutes
    Calories

    320

    kcal

    1

    hour 

    Crisp, flaky baked beef empanadas with a buttery homemade dough and a richly seasoned filling. Perfect for parties, lunch boxes, or make-ahead dinners.

    Ingredients

    • 360g plain flour (about 2 3/4 cups)

    • 1 tsp fine salt

    • 1 tsp caster sugar (optional)

    • 170g unsalted butter, cold and cubed

    • 1 large egg

    • 1 tbsp white vinegar or cider vinegar

    • 120ml ice-cold water (add a splash more if needed)

    • 1 tbsp olive oil

    • 1 medium onion, finely diced

    • 1 small red pepper, finely diced

    • 3 garlic cloves, finely chopped

    • 450g minced beef (10–15% fat works well)

    • 2 tbsp tomato purée

    • 1 1/2 tsp ground cumin

    • 1 tsp smoked paprika

    • 1 tsp dried oregano

    • 1/4 tsp chilli flakes (optional)

    • 120ml beef stock

    • 60g green olives, chopped (about 1/2 cup)

    • 30g raisins (optional)

    • 2 hard-boiled eggs, chopped

    • 1 egg + 1 tbsp milk (egg wash)

    Directions

    • Make the dough: Mix flour, salt (and sugar if using). Rub in cold butter until crumbly, then mix in egg and vinegar. Add ice water just until a dough forms. Wrap and chill 30 minutes.
    • Cook the filling: Sauté onion and red pepper in olive oil until soft. Add garlic, then mince and cook until browned. Stir in tomato purée and spices, then add stock and simmer until thick. Stir in olives and raisins (if using). Cool completely, then mix in chopped egg.
    • Roll and fill: Roll chilled dough to about 2–3mm thick and cut 12–13cm circles. Add 1–1 1/2 tbsp filling to each, keeping edges clean.
    • Seal and crimp: Moisten edge with water, fold into a half-moon and press to seal. Crimp with a fork or do a rope crimp. Chill 10 minutes if the kitchen is warm.
    • Bake: Brush with egg wash and bake at 200°C (180°C fan) for 20–25 minutes until deep golden. Cool 10 minutes before serving.

    Notes

    • Cool the filling completely before assembling, otherwise the dough softens and is harder to seal.
    • Keep the dough cold for the flakiest texture. If it warms up, pop it back in the fridge for 10 minutes.
    • Freeze unbaked empanadas on a tray, then bag them up. Bake from frozen, adding 5–8 minutes.
  • fatayer recipe

    fatayer recipe

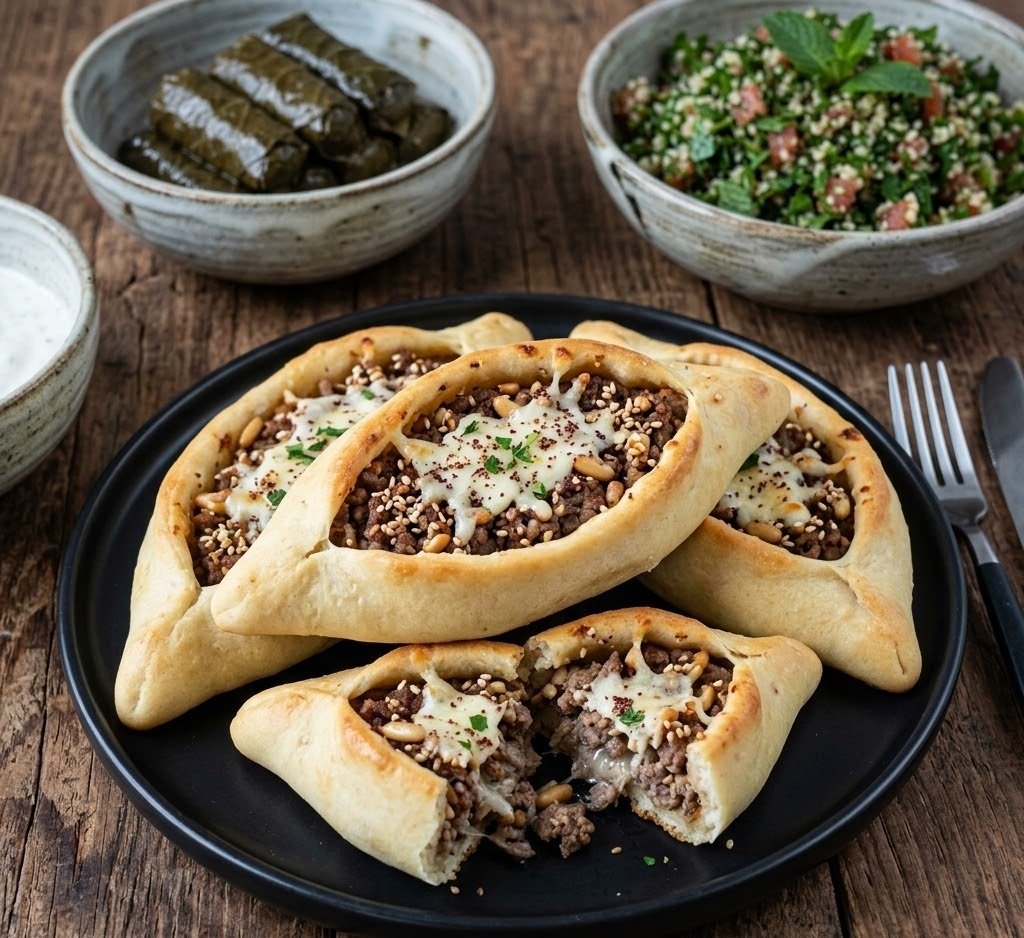
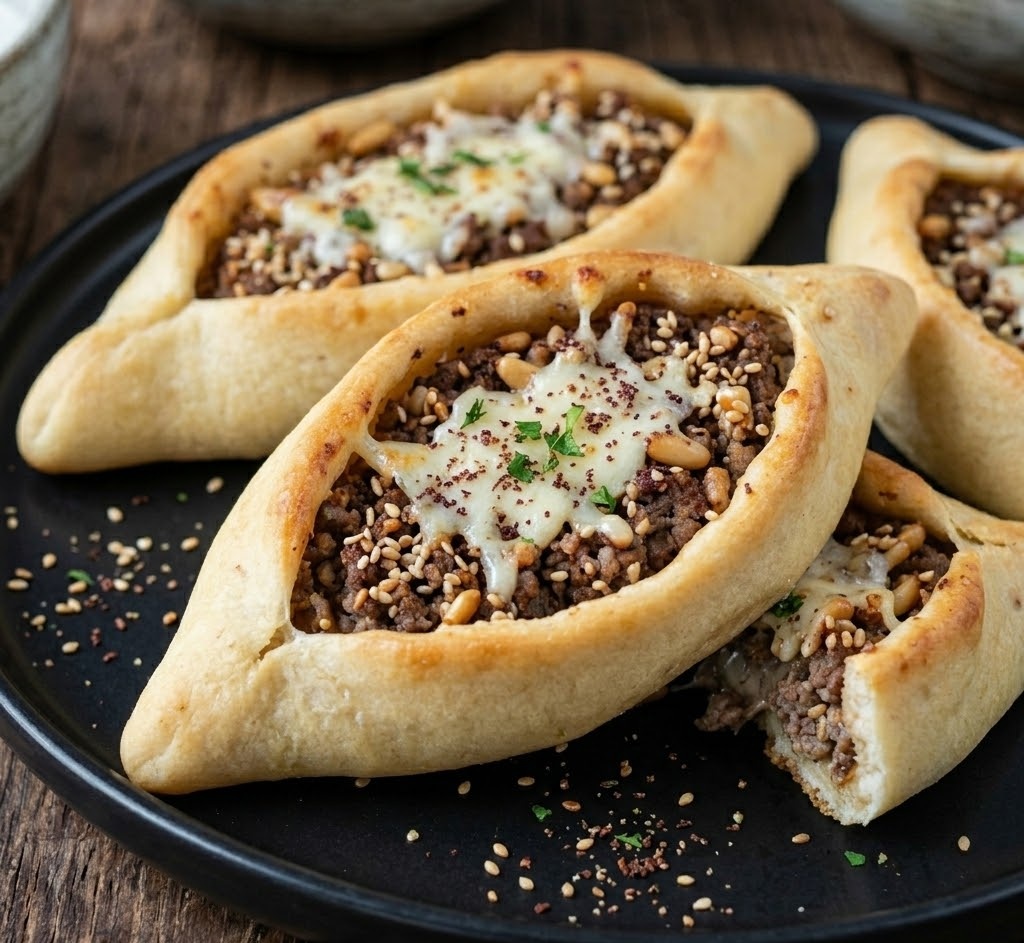
    If you love soft, pillowy bread wrapped around a bright, tangy filling, this fatayer recipe is one you will want to make on repeat. These classic Middle Eastern spinach fatayer bake up lightly golden with a tender, chewy dough and a savoury filling flavoured with lemon and sumac. The process is very doable for beginner bakers, with simple steps and forgiving dough. Total time is about 1 hour 35 minutes, including rising.

    Ingredients

    For the dough

    • 450g plain flour (about 3 1/2 cups), plus extra for dusting
    • 2 1/4 tsp instant yeast (1 x 7g sachet)
    • 1 tbsp granulated sugar
    • 1 1/2 tsp fine salt
    • 3 tbsp olive oil
    • 240ml warm water (1 cup), about 38–40°C
    • 120ml warm milk (1/2 cup)

    For the spinach filling

    • 450g fresh spinach (about 10–12 packed cups)
    • 1 small onion, very finely diced
    • 2 tbsp olive oil
    • 2 tbsp sumac
    • 2 tbsp lemon juice (about 1 lemon)
    • 1/2 tsp fine salt, plus more to taste
    • 1/4 tsp black pepper
    • 2 tbsp toasted pine nuts (optional)

    For finishing (optional)

    • 1 egg + 1 tbsp milk, whisked together (egg wash)
    • Sesame seeds or nigella seeds, for sprinkling

    How to Make Fatayer

    • Prepare the dough: In a large bowl, mix the flour, instant yeast, sugar, and salt. Add the olive oil, warm water, and warm milk. Mix until a shaggy dough forms, then knead for 8–10 minutes (by hand) or 6–7 minutes (stand mixer) until smooth and elastic.
    • Let it rise: Lightly oil the bowl, return the dough, cover, and leave to rise in a warm spot for 60 minutes, or until doubled in size.
    • Make the filling: Wilt the spinach in a large pan over medium heat (or microwave in batches) until just collapsed. Tip into a colander and cool for a few minutes, then squeeze very dry with your hands. Chop finely and mix with the onion, olive oil, sumac, lemon juice, salt, pepper, and pine nuts (if using). Taste and adjust lemon, salt, or sumac to your liking.
    • Prepare the oven: Preheat the oven to 200°C or 180°C fan (400°F or 350°F fan). Line 2 large baking trays with baking parchment and set a shelf in the middle of the oven for even baking.
    • Divide and roll: Punch down the dough and divide it into 12 equal pieces (about 70–75g each). Roll each piece into a ball, then roll into a 12–13cm circle on a lightly floured surface. Keep the rest covered so the dough does not dry out.
    • Fill and shape: Place 1 1/2 to 2 tbsp of filling in the centre of each circle, leaving a border. Bring up two sides and pinch, then bring up the third side to form a triangle. Pinch the three seams firmly so they are well sealed.
    • Finish: Transfer to the trays, leaving space between each. For a glossier finish, brush the tops lightly with egg wash and sprinkle with sesame or nigella seeds.
    • Bake: Bake for 12–15 minutes, rotating the trays halfway through, until the fatayer are lightly golden and the bottoms are set.
    • Cool and serve: Let the fatayer cool on the tray for 10 minutes, then move to a rack. Serve warm or at room temperature.
    How to Make Fatayer

    Tips

    Why did my fatayer open in the oven?

    This usually comes down to sealing or overfilling. Keep the filling to about 1 1/2 to 2 tablespoons per piece, leave a clear border, and pinch the seams firmly. If the dough feels floury and will not stick, wipe a tiny bit of water along the edge before pinching.

    How do I stop the filling from making the dough soggy?

    Squeeze the spinach aggressively. It should feel dry and fluffy, not damp. If you skip this, the liquid will steam inside the pastry and soften the dough.

    My dough is tight and keeps shrinking. What should I do?

    Let it rest. If the dough springs back when you roll, cover the pieces and rest for 10 minutes, then try again. Resting relaxes the gluten and makes shaping much easier.

    How do I get evenly golden fatayer without drying them out?

    Bake on the middle shelf at the right temperature and pull them as soon as they are lightly golden. Fatayer should be tender, not deeply browned. If your oven runs hot, drop the temperature by 10°C and bake a minute longer.

    Serving Suggestions

    • Serve with cucumber and yoghurt (or labneh) and a drizzle of olive oil.
    • Add a simple tomato and mint salad on the side.
    • Pair with lentil soup for a cosy, filling meal.
    • Pack into lunchboxes with olives and sliced peppers.

    Storage

    Room temperature

    Keep fatayer in an airtight container for up to 1 day. They are best the day they are baked, but still lovely slightly warmed.

    Refrigerator

    Store in an airtight container for up to 4 days. Reheat in a 180°C oven (160°C fan) for 6–8 minutes to bring back the soft bread texture.

    Freezing

    Freeze baked and fully cooled fatayer for up to 2 months. Freeze in a single layer first, then transfer to a freezer bag. Reheat from frozen at 180°C (160°C fan) for 10–12 minutes, or until hot through.

    Nutrition

    • Calories: 175 kcal
    • Carbohydrates: 26 g
    • Protein: 5 g
    • Fat: 6 g
    • Saturated fat: 1 g
    • Sodium: 260 mg

    Disclaimer: Nutrition values are estimates and will vary based on ingredients and portion sizes.

    FAQs

    What is fatayer made of?

    Fatayer is typically made from a soft yeasted dough filled with savoury mixtures like spinach with sumac and lemon, cheese, or spiced meat. The pastries are commonly shaped into triangles or little boats, then baked until lightly golden.

    Can I use frozen spinach for fatayer?

    Yes. Thaw it completely, then squeeze it extremely dry. Frozen spinach holds a lot of water, so be thorough. Once it is dry, mix it with onion, sumac, lemon, and olive oil as usual.

    How do I keep fatayer from getting soggy?

    The key is moisture control. Squeeze the spinach very well, avoid watery add-ins, and do not overload the filling. Also cool the baked fatayer on a rack so steam does not soften the bottoms.

    Can I make fatayer dough ahead of time?

    Yes. After the first rise, punch down the dough, cover tightly, and refrigerate overnight. Let it sit at room temperature for 30–45 minutes before dividing and shaping so it rolls easily.

    Why does my fatayer dough feel dry or stiff?

    Flour brands vary and measuring by cups can add extra flour. If the dough feels tight, add 1 teaspoon of warm water at a time while kneading until the dough is soft and smooth. It should feel slightly tacky, not sticky.

    Fatayer Recipe (Spinach Triangles)

    Recipe by Milli RoseCourse: Snack, AppetizerCuisine: Middle Eastern, LevantineDifficulty: Easy
    Servings

    12

    fatayer
    Prep time

    35

    minutes
    Cooking time

    15

    minutes
    Total time

    95

    minutes
    Calories

    175

    kcal

    50

    minutes

    Soft, chewy homemade fatayer stuffed with a lemony spinach and sumac filling, shaped into classic triangles and baked until golden.

    Ingredients

    • For the dough
    • 450g plain flour (about 3 1/2 cups), plus extra for dusting

    • 2 1/4 tsp instant yeast (7g sachet)

    • 1 tbsp granulated sugar

    • 1 1/2 tsp fine salt

    • 3 tbsp olive oil

    • 240ml warm water (1 cup), about 38–40°C

    • 120ml warm milk (1/2 cup)

    • For the spinach filling
    • 450g fresh spinach (about 10–12 packed cups)

    • 1 small onion, very finely diced

    • 2 tbsp olive oil

    • 2 tbsp sumac

    • 2 tbsp lemon juice (about 1 lemon)

    • 1/2 tsp fine salt, plus more to taste

    • 1/4 tsp black pepper

    • 2 tbsp toasted pine nuts (optional)

    • For finishing
    • 1 egg + 1 tbsp milk, for egg wash (optional)

    • Sesame seeds or nigella seeds, for sprinkling (optional)

    Directions

    • Make the dough: Mix flour, yeast, sugar and salt. Add olive oil, warm water and warm milk, then knead until smooth and elastic.
    • Let the dough rise: Cover and leave in a warm spot until doubled in size.
    • Prep the filling: Wilt spinach, squeeze it very dry, then chop. Mix with onion, olive oil, sumac, lemon juice, salt, pepper and pine nuts.
    • Preheat oven to 200°C (180°C fan). Line baking trays with parchment.
    • Divide and roll: Split dough into 12 pieces and roll into 12–13cm circles.
    • Fill and shape: Add filling, then pinch into triangles to seal well.
    • Egg wash (optional): Brush tops and sprinkle seeds.
    • Bake 12–15 minutes until lightly golden and set.
    • Cool 10 minutes, then serve warm or at room temperature.

    Notes

    • Squeeze the spinach extremely well to prevent soggy fatayer.
    • Seal the corners firmly and avoid overfilling so they do not open in the oven.
    • If your kitchen is cool, let the dough rise in an oven turned off with just the light on.
    • Fatayer are best the day they are baked, but reheat beautifully.
  • Bubble and Squeak Recipe

    Bubble and Squeak Recipe

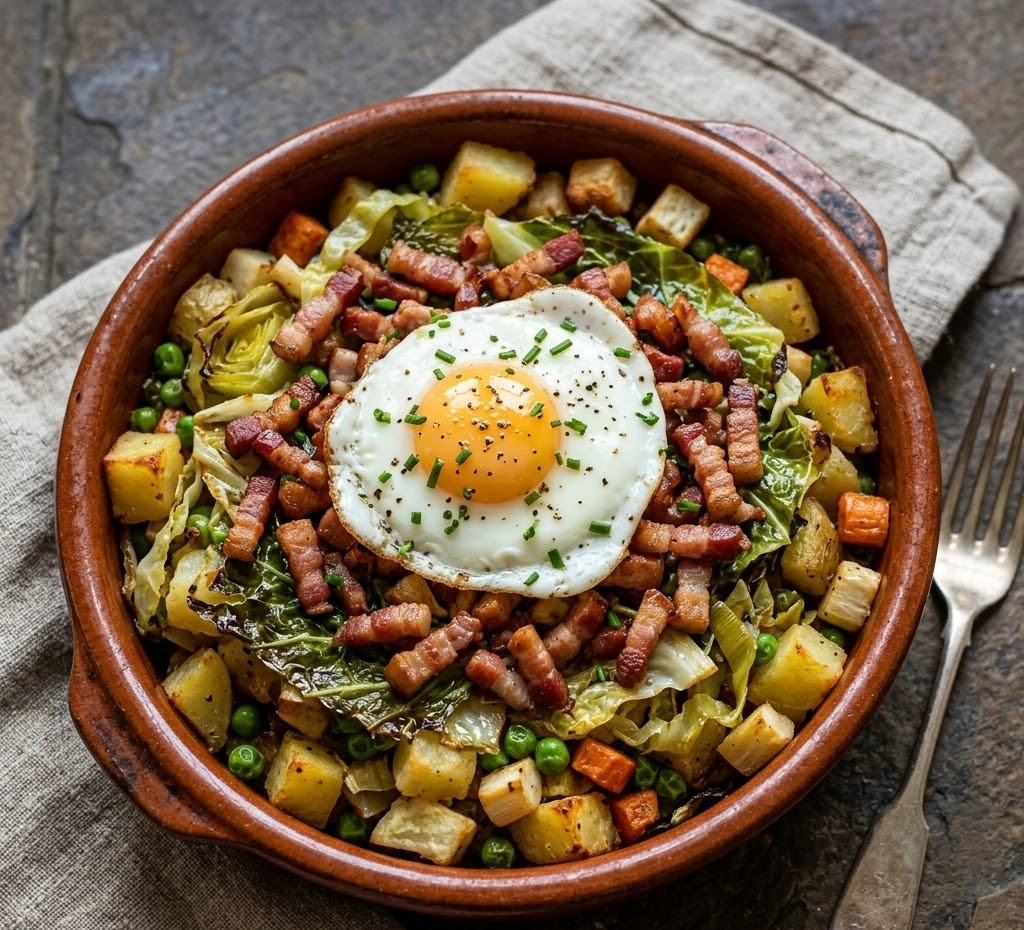
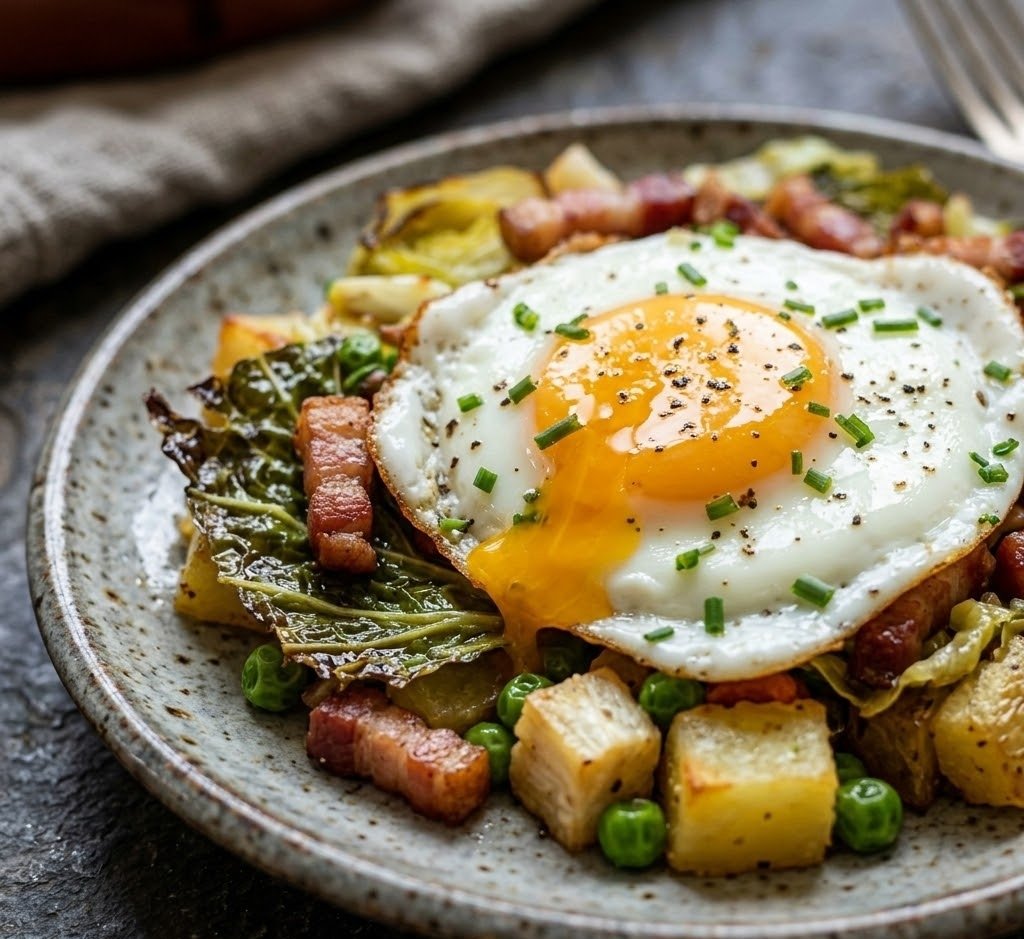
    Bubble and squeak is a classic British way to turn leftover potatoes and vegetables into crisp-edged, golden cakes with a soft, savoury middle. It’s full of comforting flavours, lightly peppery from cabbage, and rich from butter and a little frying oil. This is an easy, beginner-friendly recipe that’s hard to mess up and very forgiving with leftovers. Total time is about 35 minutes, depending on how cold your mash is to start.

    Ingredients

    For the bubble and squeak mix

    • 500g cold leftover mashed potatoes (or cooked potatoes, mashed and fully chilled)
    • 250g cooked cabbage (savoy/green), squeezed dry and finely chopped
    • 75g leftover cooked vegetables (sprouts, carrots, peas), finely chopped (optional)
    • 2 spring onions, finely sliced (optional)
    • 1 large egg, beaten (optional, helps binding)
    • 2 tbsp plain flour (plus extra if needed)
    • 1 tsp Dijon or English mustard (optional)
    • 3/4 tsp fine salt (adjust depending on how seasoned your leftovers are)
    • 1/2 tsp black pepper

    For crisping

    • 2 tbsp vegetable oil
    • 25g butter, melted

    To serve (optional)

    • Fried or poached eggs
    • Bacon, sausages, or leftover roast meat
    • Brown sauce or ketchup

    How to Make Bubble and Squeak

    Oven preparation

    • Prepare the oven: Preheat the oven to 220°C or 200°C fan. Place a shelf in the middle of the oven so the cakes crisp evenly.
    • Line the tray: Line a large baking tray with baking parchment, then brush the parchment lightly with a little oil to stop sticking and encourage browning.

    Mixing

    • Dry the cabbage: If your cabbage is at all wet, squeeze it well in clean kitchen paper or a tea towel. This keeps the mixture from turning soft and steamy in the oven.
    • Combine the mix: In a large bowl, mix the cold mashed potatoes, chopped cabbage, and any extra vegetables. Add spring onions, flour, mustard, salt, and pepper, then mix until evenly combined.
    • Bind if needed: If your leftovers are crumbly or the cakes don’t hold together when you squeeze a spoonful, mix in the beaten egg.

    Baking

    • Shape the cakes: With lightly floured hands, shape the mixture into 8 patties (about 2cm thick). If it feels sticky, sprinkle in 1–2 extra tablespoons of flour.
    • Brush for crisp edges: Place the patties on the tray. Brush the tops with melted butter and a little oil for a deeper golden crust.
    • Bake and flip: Bake for 15 minutes, then carefully flip each cake with a spatula. Bake for another 8–10 minutes, until golden and crisp at the edges.

    Cooling

    • Rest before serving: Let the cakes sit on the tray for 5 minutes. This helps them firm up so they don’t break when you lift them.

    Assembling

    • Plate up: Serve two cakes per person for a light meal, or one as a side.
    • Add toppings: Top with a fried egg, or serve alongside bacon or sausages. A little brown sauce is very traditional.
    How to Make Bubble and Squeak

    Tips

    Why are my cakes turning out soft instead of crispy?

    This usually comes down to moisture and heat. Make sure the cabbage is squeezed dry, use cold mash, and bake hot (220°C/200°C fan). Brushing with butter and oil helps the surface crisp rather than dry out.

    How do I stop bubble and squeak from falling apart?

    Use cold potatoes, don’t skip the resting time after baking, and add the egg if your leftovers are crumbly. If the mixture still feels loose, add a little more flour a teaspoon at a time.

    Can I make it more flavourful if my leftovers are bland?

    Mustard, spring onions, a pinch of garlic powder, or a small handful of grated cheddar all work well. Taste the mixture before shaping and adjust salt and pepper carefully.

    What’s the best way to get an extra-crisp finish?

    Bake as written, then pan-fry the cakes in a hot frying pan with a thin slick of oil for 1–2 minutes per side. It’s a small extra step that gives you that classic crackly crust.

    Serving Suggestions

    • Top with a fried egg and a grind of black pepper
    • Serve with bacon or sausages for a hearty breakfast
    • Pair with baked beans and grilled tomatoes
    • Add a spoonful of chutney or brown sauce on the side
    • Serve with a simple green salad for lunch

    Storage

    Room temperature

    Best eaten fresh. If you need to hold them briefly, keep them out for up to 2 hours, then refrigerate.

    Refrigerator

    Cool completely, then store in an airtight container for up to 3 days. Reheat on a baking tray at 200°C/180°C fan for 8–12 minutes until hot and crisp again (microwaving works, but softens the crust).

    Freezing

    Freeze baked cakes in a single layer on a tray until solid, then transfer to a freezer bag or container. Freeze for up to 2 months. Reheat from frozen at 200°C/180°C fan for 15–20 minutes, flipping once, until piping hot.

    Nutrition

    • Calories: 250 kcal
    • Carbohydrates: 34 g
    • Protein: 6 g
    • Fat: 10 g
    • Saturated fat: 3 g
    • Sodium: 420 mg

    Disclaimer: Nutrition values are estimates and will vary depending on your leftovers and exact ingredients used.

    FAQs

    Can I make bubble and squeak without cabbage?

    Yes. Cabbage is traditional, but you can swap it for chopped Brussels sprouts, kale, spinach (squeezed very dry), or extra mixed veg. Aim for similar volume and keep the veg as dry as possible so the cakes crisp up.

    Can I pan-fry instead of baking?

    Absolutely. Heat a thin layer of oil in a frying pan over medium heat and cook the patties for 4–5 minutes per side until deeply golden. Work in batches and don’t move them too early or they can break.

    Why is my bubble and squeak mixture sticky?

    Sticky mixture usually means the mash is warm or the vegetables are wet. Chill the mash, squeeze the cabbage dry, and add a little extra flour if needed. A beaten egg can also help the patties hold their shape.

    Can I make it ahead for breakfast?

    Yes. Shape the patties, cover, and refrigerate for up to 24 hours before baking. You can also bake them in advance and reheat in a hot oven to bring back the crisp edges.

    What potatoes work best for bubble and squeak?

    Floury potatoes (like Maris Piper or King Edward) make a drier mash that crisps beautifully. If your mash is very buttery or creamy, add a bit more flour and make sure the oven is hot.

    Crispy Bubble and Squeak Cakes

    Recipe by Milli RoseCourse: Breakfast, Brunch, SideCuisine: BritishDifficulty: Easy
    Servings

    8

    cakes (approx.)
    Prep time

    10

    minutes
    Cooking time

    25

    minutes
    Total time

    35

    minutes
    Calories

    250

    kcal

    35

    minutes

    Crisp on the outside, soft in the middle, these bubble and squeak cakes are the perfect way to use up leftover mashed potatoes and cabbage. Bake them for an easy, hands-off crisp, then serve with fried eggs or bacon.

    Ingredients

    • 500g cold leftover mashed potatoes (or cooked, mashed potatoes), well chilled

    • 250g cooked cabbage (savoy/green), squeezed dry and finely chopped

    • 75g leftover cooked veg (carrot, sprouts, peas), finely chopped (optional)

    • 2 spring onions, finely sliced (optional)

    • 1 large egg, beaten (optional, helps binding)

    • 2 tbsp plain flour (plus extra for shaping if needed)

    • 1 tsp Dijon or English mustard (optional)

    • 3/4 tsp fine salt (adjust to taste, depending on leftovers)

    • 1/2 tsp black pepper

    • 2 tbsp vegetable oil

    • 25g butter, melted

    Directions

    • Preheat the oven to 220°C (200°C fan) and line a large tray with baking parchment. Brush the parchment lightly with a little of the oil.
    • In a large bowl, mix the cold mashed potatoes, chopped cabbage, any extra veg, and spring onions. Add the egg (if using), flour, mustard, salt, and pepper, then mix until evenly combined.
    • With lightly floured hands, shape into 8 patties (about 2cm thick). If the mixture feels sticky, add 1–2 more tablespoons of flour.
    • Place on the tray. Brush the tops with melted butter and a little oil for extra crisping.
    • Bake for 15 minutes, then carefully flip and bake for 8–10 minutes more until deep golden and crisp at the edges.
    • Rest for 5 minutes before serving so the cakes firm up. Serve as-is, or top with fried eggs, bacon, or sausages.

    Notes

    • Cold mash works best. Warm potatoes make the mixture soft and harder to crisp.
    • Squeeze cooked cabbage dry to avoid soggy cakes.
    • For an extra-crisp finish, pan-fry the baked cakes for 1–2 minutes per side in a hot frying pan.
    • Freeze baked cakes on a tray, then bag up for quick breakfasts.
  • chili con carne recipe

    chili con carne recipe

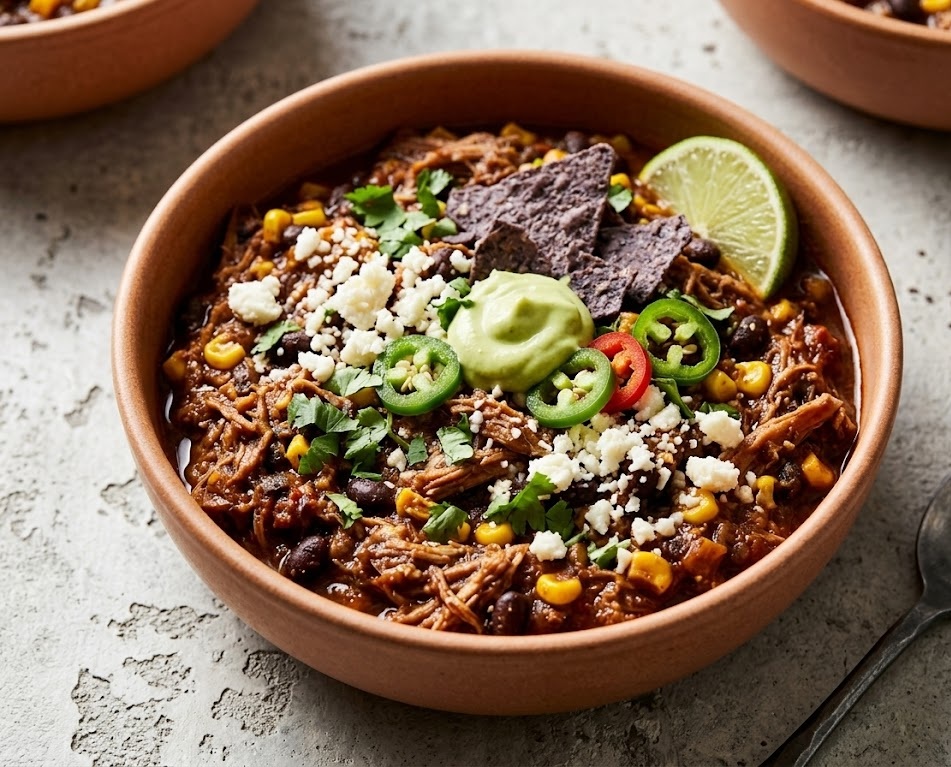
    This chili con carne is a rich, hearty bowl of slow-cooked comfort made with beef, beans, tomatoes, and warm spices. It’s thick and spoonable with a deep, smoky flavour and a gentle heat you can easily adjust. The method is straightforward and beginner-friendly, with most of the time being hands-off while it simmers. Total time is about 1 hour 45 minutes, and it tastes even better the next day.

    Ingredients

    For the chili base

    • 1 tbsp olive oil
    • 1 large onion, finely diced
    • 1 red pepper, diced
    • 2 carrots, finely diced (optional, but great for sweetness)
    • 4 garlic cloves, minced
    • 500g beef mince (10–15% fat gives the best flavour)

    Spices and seasoning

    • 2 tsp ground cumin
    • 2 tsp smoked paprika
    • 1 tsp chilli powder (plus more to taste)
    • 1 tsp dried oregano
    • 1/2 tsp ground coriander (optional)
    • 1/2 tsp fine salt, plus more to taste
    • 1/2 tsp black pepper

    Liquids and beans

    • 2 tbsp tomato purée
    • 1 x 400g tin chopped tomatoes
    • 250ml beef stock
    • 1 x 400g tin kidney beans, drained and rinsed
    • 1 x 400g tin black beans, drained and rinsed (or use another tin of kidney beans)
    • 1 tsp unsweetened cocoa powder (optional, adds a subtle richness)
    • 1 tbsp lime juice (to finish)

    Optional toppings (for serving)

    • Sour cream or Greek yoghurt
    • Grated cheddar
    • Sliced jalapeños
    • Fresh coriander
    • Diced avocado

    How to Make Chili Con Carne

    • Prepare the oven: Preheat the oven to 160°C or 140°C fan. Place a shelf in the middle of the oven so the pot cooks evenly and the chilli gently thickens without catching.
    • Soften the vegetables: Heat the olive oil in a large oven-safe pot (a Dutch oven is ideal) over medium heat. Add the onion, pepper, and carrots. Cook for 8 to 10 minutes, stirring now and then, until softened. Stir in the garlic and cook for 1 minute.
    • Brown the beef: Add the mince and cook for 6 to 8 minutes, breaking it up with a spoon, until well browned. Browning properly here gives you a deeper, meatier chilli.
    • Mix in the flavour base: Stir in the tomato purée, cumin, smoked paprika, chilli powder, oregano, coriander (if using), salt, and pepper. Cook for 1 to 2 minutes, stirring constantly, so the spices toast and become fragrant.
    • Bake (oven simmer) to develop flavour: Add the chopped tomatoes, beef stock, and cocoa powder (if using). Bring to a gentle simmer on the hob, then cover with a lid and transfer to the oven for 1 hour 15 minutes.
    • Thicken and add the beans: Carefully remove the pot from the oven and place it back on the hob over low heat. Stir in the kidney beans and black beans. Simmer uncovered for 10 to 15 minutes, stirring occasionally, until thick and glossy.
    • Cool and rest: Turn off the heat and let the chilli stand for 10 minutes. This short rest makes it thicker and helps the flavours settle.
    • Assemble and serve: Stir in the lime juice, then taste and adjust seasoning. Serve hot with your favourite sides and toppings.
    How to Make Chili Con Carne

    Tips

    Why is my chili con carne watery?

    It usually just needs a bit more uncovered simmering. Remove the lid and simmer on low for 10 to 20 minutes, stirring occasionally. If you want it thicker still, mash a small spoonful of beans against the side of the pot and stir them back in.

    How do I stop chili from tasting bitter or harsh?

    Burnt garlic or over-toasted spices are the common culprits. Keep the heat moderate, add garlic after the onions have softened, and toast the spices for only 1 to 2 minutes. If it still tastes sharp, a squeeze of lime at the end and a small pinch of sugar can balance it.

    What’s the best beef for chili con carne?

    Beef mince with a little fat (around 10 to 15%) gives the best flavour and texture. Very lean mince can taste dry, so you may need a touch more oil and a little extra simmering time to get it rich.

    How can I make it hotter or milder without ruining the flavour?

    For hotter chilli, add extra chilli powder a little at a time, or finish with sliced jalapeños or hot sauce at the table. For milder chilli, reduce the chilli powder and lean into smoked paprika and cumin for warmth without heat. Sour cream on top also softens spice nicely.

    Serving Suggestions

    • Steamed rice with grated cheddar and coriander
    • Nachos with melted cheese, jalapeños, and sour cream
    • Jacket potatoes with chilli and a spoon of Greek yoghurt
    • Soft tortillas with avocado and a squeeze of lime
    • Mac and cheese topped with a ladle of chilli

    Storage

    Room temperature

    Cool the chilli quickly, then do not leave it out for more than 2 hours (or 1 hour in very warm weather). Transfer to containers once it has stopped steaming heavily.

    Refrigerator

    Store in an airtight container for up to 4 days. Reheat in a saucepan over medium-low heat until piping hot, stirring often. Add a splash of water or stock if it has thickened too much.

    Freezing

    Chili con carne freezes beautifully for up to 3 months. Cool completely, portion into freezer-safe tubs, and label with the date. Defrost overnight in the fridge, then reheat thoroughly on the hob until bubbling hot all the way through.

    Nutrition

    • Calories: 520 kcal
    • Carbohydrates: 38 g
    • Protein: 36 g
    • Fat: 24 g
    • Saturated fat: 8 g
    • Sodium: 980 mg

    Disclaimer: Nutrition values are estimates and will vary depending on the mince, stock, and toppings you use.

    FAQs

    What is the secret to really good chili con carne?

    Brown the mince properly, toast the spices briefly, and give it time to simmer. That combination builds layers of flavour and takes the chilli from flat to rich and rounded.

    Can I make chili con carne without beans?

    Yes. Simply leave the beans out and simmer a little longer uncovered to thicken. You can also add extra peppers or a diced courgette for bulk.

    How do I thicken chili con carne quickly?

    Simmer it uncovered until it reduces, or mash a few spoonfuls of beans and stir them back in. If you are in a hurry, mix 1 tsp cornflour with 1 tbsp cold water and stir it in, then simmer for 2 to 3 minutes.

    Can I make chili con carne in a slow cooker?

    Yes. Brown the onion and mince first for best flavour, then add everything except the beans and cook on LOW for 6 to 8 hours (or HIGH for 3 to 4). Stir in the beans for the final 30 minutes.

    Is chili con carne better the next day?

    It often is. Resting overnight lets the spices mellow and the sauce thicken. Cool it quickly, refrigerate, then reheat gently with a splash of stock if needed.

    Chili Con Carne Recipe

    Recipe by Milli RoseCourse: DinnerCuisine: Tex-MexDifficulty: Easy
    Servings

    6

    bowls
    Prep time

    15

    minutes
    Cooking time

    1

    hour 

    30

    minutes
    Total time

    105

    minutes
    Calories

    520

    kcal

    1

    hour 

    45

    minutes

    A thick, hearty chili con carne made with beef mince, beans, tomatoes, and warm spices. Easy to make, freezer-friendly, and perfect for rice, nachos, or jacket potatoes.

    Ingredients

    • 1 tbsp olive oil

    • 1 large onion, finely diced

    • 1 red pepper, diced

    • 2 carrots, finely diced (optional)

    • 4 garlic cloves, minced

    • 500g beef mince (10–15% fat works well)

    • 2 tbsp tomato purée

    • 2 tsp ground cumin

    • 2 tsp smoked paprika

    • 1 tsp chilli powder (plus more to taste)

    • 1 tsp dried oregano

    • 1/2 tsp ground coriander (optional)

    • 1/2 tsp fine salt, plus more to taste

    • 1/2 tsp black pepper

    • 1 x 400g tin chopped tomatoes

    • 250ml beef stock

    • 1 x 400g tin kidney beans, drained and rinsed

    • 1 x 400g tin black beans, drained and rinsed (or use another tin of kidney beans)

    • 1 tsp unsweetened cocoa powder (optional, for depth)

    • 1 tbsp lime juice (to finish)

    Directions

    • Preheat the oven to 160°C (140°C fan). Place a shelf in the middle of the oven.
    • Soften the onion and pepper in olive oil, then add garlic.
    • Brown the beef mince well, then stir in tomato purée and spices.
    • Add tomatoes and stock, bring to a simmer, then cover and cook in the oven for 75 minutes.
    • Stir in beans and cook uncovered for 10–15 minutes to thicken.
    • Rest for 10 minutes, then finish with lime juice and adjust seasoning.

    Notes

    • For a thicker chili, simmer uncovered for the final 10–15 minutes.
    • For a milder chili, use less chilli powder and add a spoon of sour cream when serving.
    • Chili tastes even better the next day and freezes beautifully.
  • Spanish Omelette Recipe

    Spanish Omelette Recipe

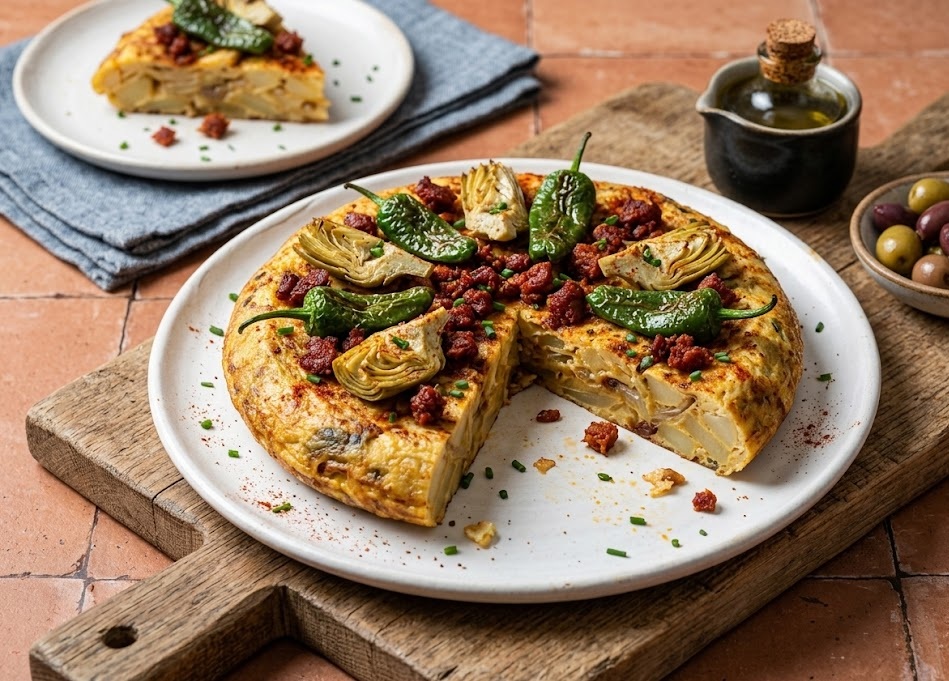
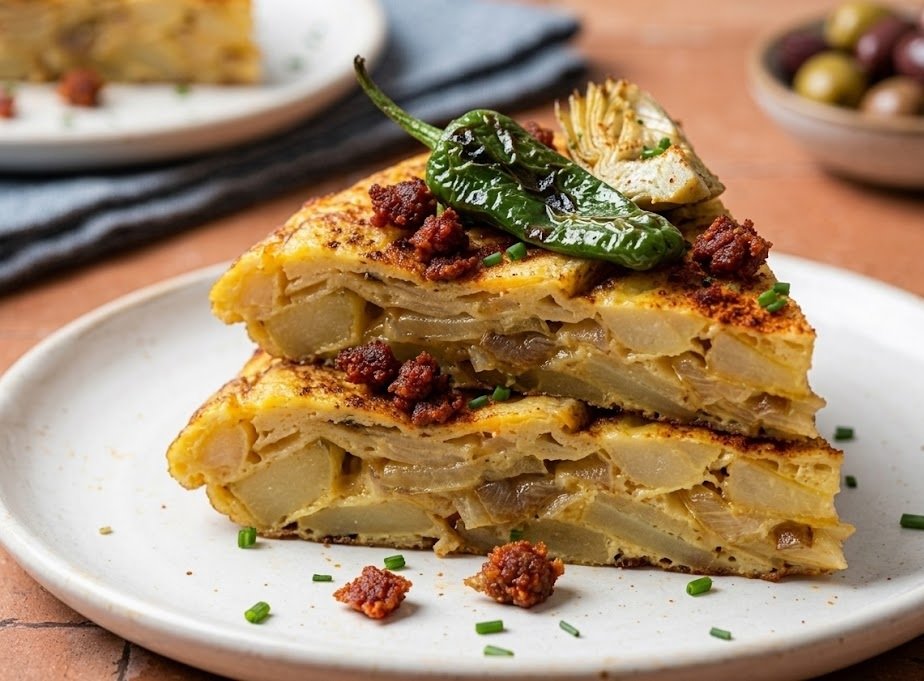
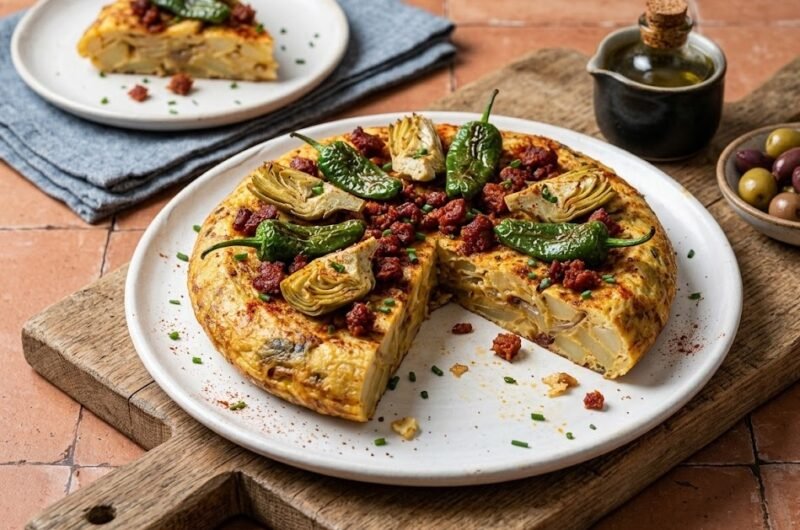
    This Spanish omelette recipe is a classic dish made with tender potatoes, onions, and eggs cooked gently until soft, golden, and full of flavour. Known in Spain as tortilla española, it has a rich, creamy centre with lightly crisp edges that make every slice incredibly satisfying. It is simple enough for beginners yet impressive enough for brunch, lunch, or tapas-style dinners. This comforting recipe takes about 50 minutes from start to finish and uses everyday ingredients you probably already have in your kitchen.

    Ingredients

    For the Spanish Omelette

    • 6 large eggs
    • 500g potatoes, peeled and thinly sliced
    • 1 medium onion, thinly sliced
    • 150ml olive oil
    • 1 teaspoon salt
    • ½ teaspoon black pepper

    For Serving

    • Fresh parsley, chopped
    • Extra olive oil for drizzling
    • Mixed salad or crusty bread

    Kitchen Equipment

    • Large non-stick frying pan
    • Mixing bowl
    • Sharp knife
    • Spatula
    • Large plate for flipping

    Preparation and Cooking Time

    • Prep Time: 15 minutes
    • Cook Time: 35 minutes
    • Total Time: 50 minutes
    • Servings: 6 slices

    How to Make Spanish Omelette Recipe

    • Prepare the potatoes and onions: Peel the potatoes and slice them thinly into small rounds. Slice the onion into thin strips so it softens evenly while cooking.
    • Heat the oil: Pour the olive oil into a large non-stick frying pan and place over medium heat. Allow the oil to warm gently before adding the potatoes and onions.
    • Cook the vegetables slowly: Add the sliced potatoes and onions to the pan. Stir gently so everything is coated in oil. Cook over medium-low heat for about 20 minutes until the potatoes are soft but not crispy.
    • Drain excess oil: Using a slotted spoon, transfer the cooked potatoes and onions to a large bowl. Leave behind most of the oil in the pan. Allow the mixture to cool slightly.
    • Whisk the eggs: Crack the eggs into a separate bowl and whisk until smooth. Add the salt and black pepper.
    • Combine the filling: Pour the beaten eggs over the potatoes and onions. Mix gently until everything is evenly coated.
    • Cook the omelette: Add 1 tablespoon of the reserved oil back into the frying pan over medium heat. Pour in the egg mixture and spread it evenly with a spatula. Cook for 5 to 6 minutes until the bottom is golden and the edges begin to set.
    • Flip carefully: Place a large plate over the pan. Carefully flip the omelette onto the plate, then slide it back into the pan to cook the other side.
    • Finish cooking: Cook the second side for another 4 to 5 minutes until lightly golden and fully set but still soft in the centre.
    • Cool and serve: Transfer the Spanish omelette to a serving plate and allow it to rest for 5 minutes before slicing. Sprinkle with parsley and serve warm or at room temperature.
    How to Make Spanish Omelette Recipe

    Tips for the Best Spanish Omelette Recipe

    Why should the potatoes cook slowly?

    Cooking the potatoes slowly helps them become soft and creamy instead of crisp. This creates the traditional texture that makes Spanish omelette so delicious.

    How do I stop the omelette from breaking when flipping?

    Use a large flat plate that completely covers the pan. Hold the plate firmly against the pan before turning quickly and confidently.

    Can I add extra ingredients?

    Yes, you can add chorizo, spinach, roasted peppers, or cheese. Keep additions small so the omelette still holds together properly.

    How do I know when the omelette is cooked?

    The centre should feel just set with a slight softness. Overcooking can make the texture dry instead of creamy.

    Serving Suggestions

    • Serve with a fresh green salad
    • Pair with crusty bread and olives
    • Cut into cubes for tapas platters
    • Enjoy warm or cold for lunchboxes
    • Serve with roasted tomatoes or grilled vegetables

    Storage

    Room Temperature

    The omelette can sit at room temperature for up to 2 hours before serving.

    Refrigerator

    Store leftovers in an airtight container in the refrigerator for up to 3 days. Serve chilled or reheat gently in a pan or microwave.

    Freezing

    Wrap slices tightly in cling film and freeze for up to 2 months. Thaw overnight in the refrigerator before reheating.

    Nutrition

    • Calories: 320 kcal
    • Carbohydrates: 18g
    • Protein: 12g
    • Fat: 22g
    • Saturated Fat: 4g
    • Sodium: 380mg

    Nutrition values are estimates and may vary depending on ingredients and portion sizes.

    FAQs

    Can I make Spanish omelette ahead of time?

    Yes, Spanish omelette is excellent made ahead and can be served warm, cold, or at room temperature.

    Do I need to boil the potatoes first?

    No, the potatoes cook slowly in olive oil until tender, which gives the omelette its classic flavour and texture.

    Can I bake Spanish omelette in the oven?

    Yes, after starting it on the hob you can finish it in the oven at 180°C until fully set.

    Can I eat Spanish omelette cold?

    Yes, it is traditionally enjoyed both warm and cold, making it perfect for picnics and packed lunches.

    Spanish Omelette Recipe

    Recipe by Milli RoseCourse: BreakfastCuisine: SpanishDifficulty: Easy
    Servings

    4

    servings
    Prep time

    30

    minutes
    Cooking time

    40

    minutes
    Calories

    300

    kcal
    Total time

    1

    hour 

    10

    minutes

    Traditional Spanish omelette made with tender potatoes, onions, and eggs cooked until golden and creamy. Perfect for breakfast, lunch, tapas, or light dinners.

    Ingredients

    • 6 large eggs

    • 500g potatoes, peeled and thinly sliced

    • 1 medium onion, thinly sliced

    • 150ml olive oil

    • 1 tsp salt

    • 1/2 tsp black pepper

    • Fresh parsley, chopped

    • Crusty bread or salad, for serving

    Directions

    • Peel and thinly slice the potatoes and onion.
    • Heat olive oil in a non-stick frying pan over medium heat.
    • Cook the potatoes and onions gently for about 20 minutes until soft.
    • Drain the vegetables and allow them to cool slightly.
    • Whisk the eggs with salt and pepper in a large bowl.
    • Mix the potatoes and onions into the eggs until evenly coated.
    • Pour the mixture into the frying pan and cook until golden underneath.
    • Flip carefully using a large plate and cook the second side until set.
    • Rest for 5 minutes before slicing and serving.

    Notes

    • Cook potatoes slowly for the best creamy texture.
    • Use a non-stick pan to make flipping easier.
    • Spanish omelette tastes delicious warm or cold.
  • Gazpacho Recipe

    Gazpacho Recipe

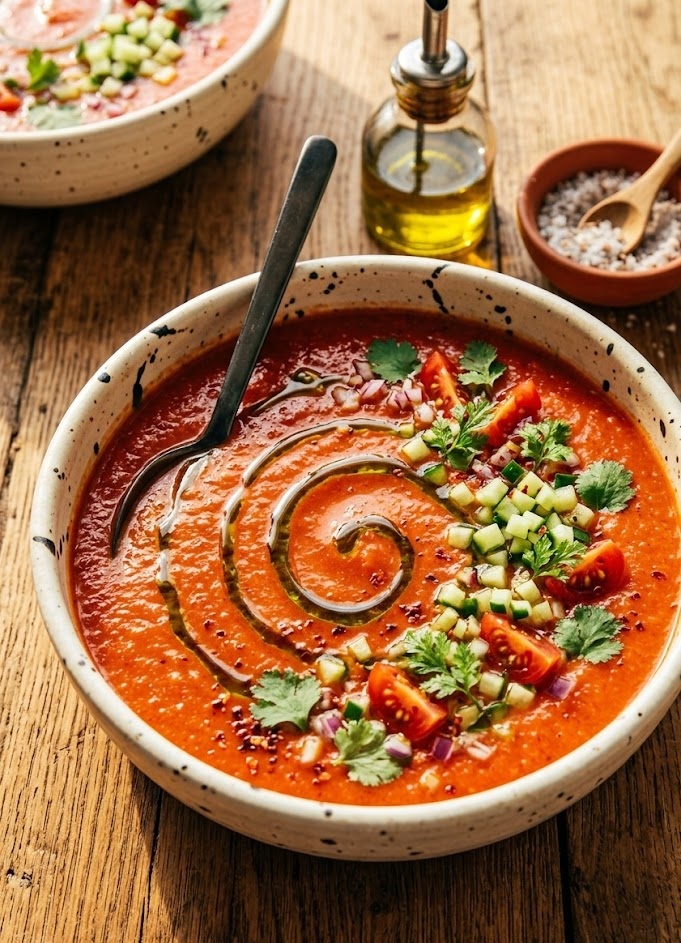
    This gazpacho recipe is the perfect chilled soup for warm days when you want something fresh, light, and full of vibrant flavour. Made with ripe tomatoes, crisp cucumber, sweet peppers, garlic, and olive oil, this classic Spanish dish has a smooth, silky texture with a refreshing bite. It is incredibly easy to prepare with no cooking required, making it ideal for beginners and busy home cooks alike. From start to finish, this refreshing homemade gazpacho takes about 20 minutes to prepare, plus chilling time for the best flavour.

    Ingredients

    For the Gazpacho

    • 1kg ripe tomatoes, roughly chopped
    • 1 medium cucumber, peeled and chopped
    • 1 red bell pepper, deseeded and chopped
    • 1 small red onion, chopped
    • 2 garlic cloves, peeled
    • 2 slices stale white bread, crusts removed
    • 3 tablespoons extra virgin olive oil
    • 2 tablespoons red wine vinegar
    • 250ml cold water
    • 1 teaspoon sea salt
    • ½ teaspoon freshly ground black pepper

    For Garnishing

    • Extra chopped cucumber
    • Diced tomatoes
    • Chopped red pepper
    • Fresh basil leaves
    • Extra virgin olive oil for drizzling
    • Crusty bread or croutons

    How to Make Gazpacho Recipe

    • Prepare the vegetables: Wash the tomatoes, cucumber, and pepper thoroughly. Roughly chop all the vegetables into medium-sized pieces so they blend evenly.
    • Soak the bread: Tear the stale bread into small pieces and soak it in a little cold water for 2 to 3 minutes. This helps create the traditional creamy texture.
    • Add ingredients to the blender: Place the tomatoes, cucumber, red pepper, onion, garlic, soaked bread, olive oil, vinegar, salt, pepper, and cold water into a large blender or food processor.
    • Blend until smooth: Blend the mixture for 1 to 2 minutes until completely smooth and silky. Scrape down the sides if needed to ensure everything blends evenly.
    • Taste and adjust: Taste the gazpacho and adjust the seasoning with extra salt, pepper, or vinegar if needed. If the soup feels too thick, add a little extra cold water.
    • Chill the soup: Transfer the gazpacho to a large bowl or jug, cover, and refrigerate for at least 2 hours. Chilling allows the flavours to develop fully.
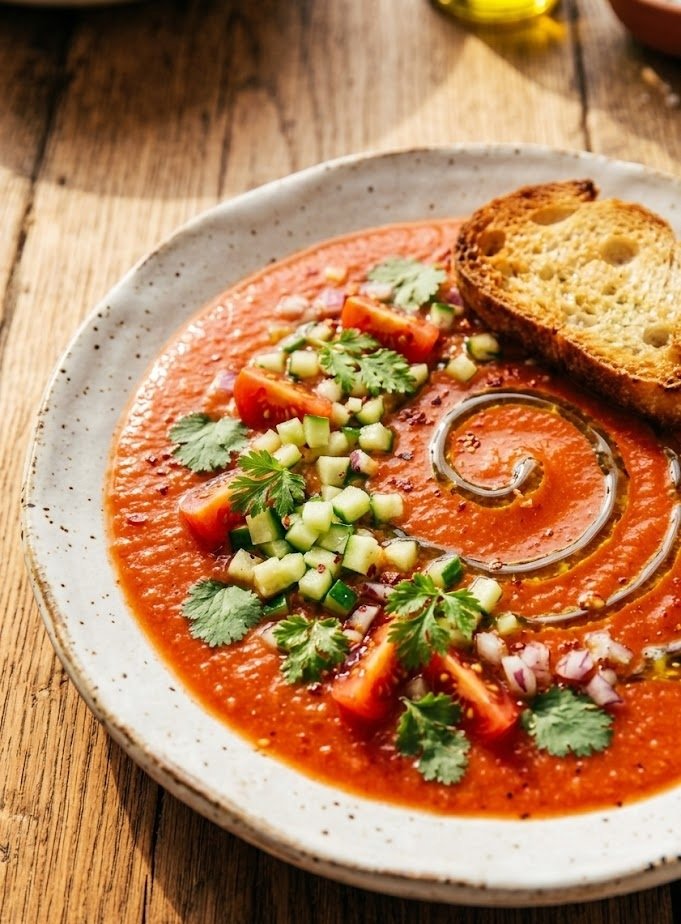
    • Serve and garnish: Pour the chilled gazpacho into bowls or glasses. Top with diced vegetables, fresh basil, a drizzle of olive oil, and croutons before serving.
    How to Make Gazpacho Recipe

    Tips for the Best Gazpacho Recipe

    How do I make gazpacho smoother?

    Blend the soup for a little longer and strain it through a fine sieve for an ultra-silky texture.

    Can I make gazpacho ahead of time?

    Yes, gazpacho actually tastes better after a few hours in the refrigerator because the flavours have time to deepen and blend together.

    Why is my gazpacho too acidic?

    If your tomatoes are very acidic, add a small pinch of sugar to balance the flavour naturally.

    What are the best tomatoes for gazpacho?

    Use ripe, juicy tomatoes such as Roma or vine-ripened tomatoes for the richest flavour and colour.

    Can I make gazpacho without bread?

    Yes, you can leave out the bread for a lighter and gluten-free version, although the soup will be slightly thinner.

    Serving Suggestions

    • Serve with warm crusty bread
    • Pair with grilled chicken or seafood
    • Top with homemade croutons
    • Enjoy alongside a fresh green salad
    • Serve in small glasses as a summer starter

    Storage

    Room Temperature

    Gazpacho should not be left at room temperature for more than 1 hour, especially during warm weather.

    Refrigerator

    Store the soup in an airtight container in the refrigerator for up to 4 days. Stir well before serving.

    Freezing

    Freeze gazpacho in freezer-safe containers for up to 2 months. Thaw overnight in the refrigerator and blend briefly before serving for the best texture.

    Nutrition

    • Calories: 165 kcal
    • Carbohydrates: 14g
    • Protein: 3g
    • Fat: 11g
    • Saturated Fat: 2g
    • Sodium: 420mg

    Nutrition values are estimates and may vary depending on ingredients used.

    FAQs

    Can I make gazpacho without a blender?

    Yes, you can finely chop all the vegetables by hand for a chunkier traditional texture, although blending creates a smoother soup.

    How long should gazpacho chill before serving?

    For the best flavour, chill gazpacho for at least 2 hours before serving.

    Can I freeze homemade gazpacho?

    Yes, gazpacho freezes well for up to 2 months in airtight containers.

    Is gazpacho served hot or cold?

    Traditional gazpacho is always served cold, making it perfect for warm weather meals.

    Gazpacho Recipe

    Recipe by Milli RoseCourse: SoupCuisine: SpanishDifficulty: Easy
    Servings

    6

    servings
    Prep time

    20

    minutes
    Cooking timeminutes
    Total time

    140

    minutes
    Calories

    165

    kcal

    A refreshing chilled Spanish tomato soup made with fresh vegetables, olive oil, and bread for a smooth and vibrant summer dish.

    Ingredients

    • 1kg ripe tomatoes, roughly chopped

    • 1 medium cucumber, peeled and chopped

    • 1 red bell pepper, deseeded and chopped

    • 1 small red onion, chopped

    • 2 garlic cloves

    • 2 slices stale white bread

    • 3 tablespoons extra virgin olive oil

    • 2 tablespoons red wine vinegar

    • 250ml cold water

    • 1 teaspoon sea salt

    • ½ teaspoon black pepper

    • Extra chopped cucumber

    • Diced tomatoes

    • Fresh basil leaves

    • Crusty bread or croutons

    Directions

    • Wash and roughly chop all vegetables.
    • Soak the bread in cold water for a few minutes.
    • Add vegetables, bread, olive oil, vinegar, seasoning, and water to a blender.
    • Blend until completely smooth and silky.
    • Taste and adjust seasoning if needed.
    • Chill the gazpacho in the refrigerator for at least 2 hours.
    • Serve cold with fresh garnishes and crusty bread.

    Notes

    • Use ripe tomatoes for the best flavour and colour.
    • Chilling the soup improves the taste significantly.
    • Blend longer for an extra smooth texture.
  • Simple pizza recipe

    Simple pizza recipe

    This simple pizza recipe is perfect for anyone who wants homemade pizza with a crisp golden crust, rich tomato sauce, and bubbling melted cheese without complicated steps. The dough is soft on the inside with lightly crisp edges, while the topping combination delivers classic comforting flavour in every bite. It is an easy beginner-friendly recipe that works beautifully for family dinners, weekend cooking, or casual gatherings. From start to finish, this homemade pizza takes around 1 hour and 30 minutes including dough rising time.

    What Is Simple Pizza and How Does It Taste?

    Simple pizza is a classic homemade yeast dough pizza topped with tomato sauce, mozzarella cheese, and your favourite toppings. The crust bakes into a beautifully balanced texture with a crisp bottom and soft chewy centre. The tomato sauce brings a rich savoury flavour while melted mozzarella creates that irresistible stretchy finish.

    This recipe keeps everything approachable and beginner-friendly while still delivering authentic homemade pizza flavour. It is versatile, easy to customise, and far more satisfying than takeaway pizza.

    Simple Pizza Recipe Ingredients

    For the Pizza Dough

    • 500g strong bread flour
    • 1 tsp salt
    • 1 tsp caster sugar
    • 7g fast-action dried yeast
    • 2 tbsp olive oil
    • 325ml warm water

    For the Pizza Sauce

    • 200ml passata
    • 1 tbsp olive oil
    • 1 garlic clove, minced
    • 1 tsp dried oregano
    • ½ tsp salt
    • ¼ tsp black pepper

    For the Topping

    • 250g mozzarella cheese, grated
    • 1 small red onion, thinly sliced
    • 1 small green pepper, sliced
    • 12 pepperoni slices
    • Extra oregano for sprinkling
    • Olive oil for brushing

    Preparation and Cooking Time

    • Prep Time: 20 minutes
    • Rising Time: 45 minutes
    • Cook Time: 15 minutes
    • Total Time: 1 hour 20 minutes
    • Servings: 4 pizzas slices portions

    How to Make Simple Pizza Recipe

    • Prepare the dough: Add the bread flour, salt, sugar, and dried yeast to a large mixing bowl. Stir everything together evenly. Pour in the olive oil and warm water, then mix until a soft dough forms.
    • Knead the dough: Transfer the dough onto a lightly floured surface and knead for 8 to 10 minutes until smooth, elastic, and soft. If the dough feels sticky, add a small dusting of flour.
    • Leave the dough to rise: Place the dough into a lightly oiled bowl and cover with a clean tea towel. Leave it in a warm place for about 45 minutes or until doubled in size.
    • Prepare the sauce: In a small bowl, combine the passata, olive oil, garlic, oregano, salt, and black pepper. Stir until fully mixed.
    • Prepare the oven: Preheat the oven to 220°C or 200°C fan. Place a baking tray or pizza stone inside the oven while it heats so the base becomes crisp during baking.
    • Shape the pizza: Punch down the risen dough and place it onto a lightly floured surface. Roll or stretch it into a large round pizza shape around 30cm wide.
    • Add the toppings: Transfer the dough onto baking parchment. Spread the tomato sauce evenly over the base, leaving a small border around the edges. Sprinkle over the mozzarella cheese, then add onion slices, green pepper, and pepperoni.
    • Bake the pizza: Carefully slide the pizza onto the hot tray or pizza stone. Bake for 12 to 15 minutes until the crust is golden and the cheese is bubbling.
    • Finish and serve: Remove the pizza from the oven and leave it to cool for 2 minutes before slicing. Sprinkle with extra oregano and serve warm.
    Simple pizza recipe

    Tips for the Best Homemade Pizza

    Why is my pizza dough too sticky?

    Pizza dough should feel soft but manageable. If it sticks heavily to your hands, add a little extra flour during kneading, but avoid adding too much or the crust may become dry.

    How do I make the crust crispier?

    Preheating the baking tray or pizza stone makes a huge difference. A hot surface helps the bottom cook quickly and creates a crisp golden crust.

    Can I make the dough ahead of time?

    Yes. You can prepare the dough the night before and keep it covered in the refrigerator. Allow it to come back to room temperature before shaping.

    What cheese works best for homemade pizza?

    Mozzarella gives the best melt and stretch. You can also mix it with cheddar or parmesan for extra flavour.

    How do I stop the pizza becoming soggy?

    Use a moderate amount of sauce and avoid overly wet toppings. Preheating the tray also helps prevent a soft base.

    Serving Suggestions

    • Serve with garlic bread and fresh salad
    • Pair with homemade coleslaw
    • Add chilli flakes for extra heat
    • Enjoy with roasted vegetables
    • Serve with dipping sauces like garlic mayo or ranch

    Storage Instructions

    Room Temperature

    Pizza can sit at room temperature for up to 2 hours before refrigeration is needed.

    Refrigerator

    Store leftover pizza slices in an airtight container in the refrigerator for up to 3 days. Reheat in the oven for the best texture.

    Freezing

    Wrap individual pizza slices tightly in cling film and freeze for up to 2 months. Reheat directly from frozen in a hot oven until heated through.

    Nutrition Information

    • Calories: 420 kcal
    • Carbohydrates: 48g
    • Protein: 18g
    • Fat: 17g
    • Saturated Fat: 7g
    • Sodium: 760mg

    Nutrition values are estimates and may vary depending on ingredients used.

    FAQs

    Can I make pizza dough without a mixer?

    Yes, this dough can easily be mixed and kneaded by hand using a large bowl and a lightly floured surface.

    What flour is best for homemade pizza?

    Strong bread flour works best because it creates a chewy and elastic pizza crust.

    Can I freeze pizza dough?

    Yes, wrap the dough tightly after the first rise and freeze for up to 2 months. Thaw overnight before using.

    How do I reheat leftover pizza?

    Reheat pizza in a hot oven for 5 to 7 minutes to keep the crust crisp and the cheese melted.

    WP Recipe Card Code


    Simple Pizza Recipe

    Recipe by Milli RoseCourse: Main CourseCuisine: ItalianDifficulty: Easy
    Servings

    4

    servings
    Prep time

    30

    minutes
    Cooking time

    40

    minutes
    Calories

    300

    kcal
    Total time

    1

    hour 

    10

    minutes

    Easy homemade pizza with a crisp crust, rich tomato sauce, bubbling mozzarella, and classic toppings. Perfect for beginners and family dinners.

    Ingredients

    • 500g strong bread flour

    • 1 tsp salt

    • 1 tsp caster sugar

    • 7g fast-action dried yeast

    • 2 tbsp olive oil

    • 325ml warm water

    • 200ml passata

    • 1 garlic clove, minced

    • 1 tsp dried oregano

    • 250g mozzarella cheese, grated

    • 1 small red onion, sliced

    • 1 small green pepper, sliced

    • 12 pepperoni slices

    • Extra oregano

    • Olive oil for brushing

    • Baking parchment

    Directions

    • Combine flour, salt, sugar, and yeast in a bowl.
    • Add olive oil and warm water and mix into a soft dough.
    • Knead the dough for 8 to 10 minutes until smooth and elastic.
    • Place in an oiled bowl, cover, and leave to rise until doubled.
    • Mix passata, garlic, oregano, salt, and pepper to make the sauce.
    • Preheat oven to 220°C and heat a baking tray or pizza stone.
    • Shape the dough into a pizza base and spread with sauce.
    • Add mozzarella, onion, peppers, and pepperoni.
    • Bake for 12 to 15 minutes until golden and bubbling.
    • Cool slightly, slice, and serve warm.

    Notes

    • Preheat the tray for a crispier base.
    • Do not overload with toppings.
    • Pizza dough can be frozen for up to 2 months.
  • Chicken Marsala Recipe

    Chicken Marsala Recipe

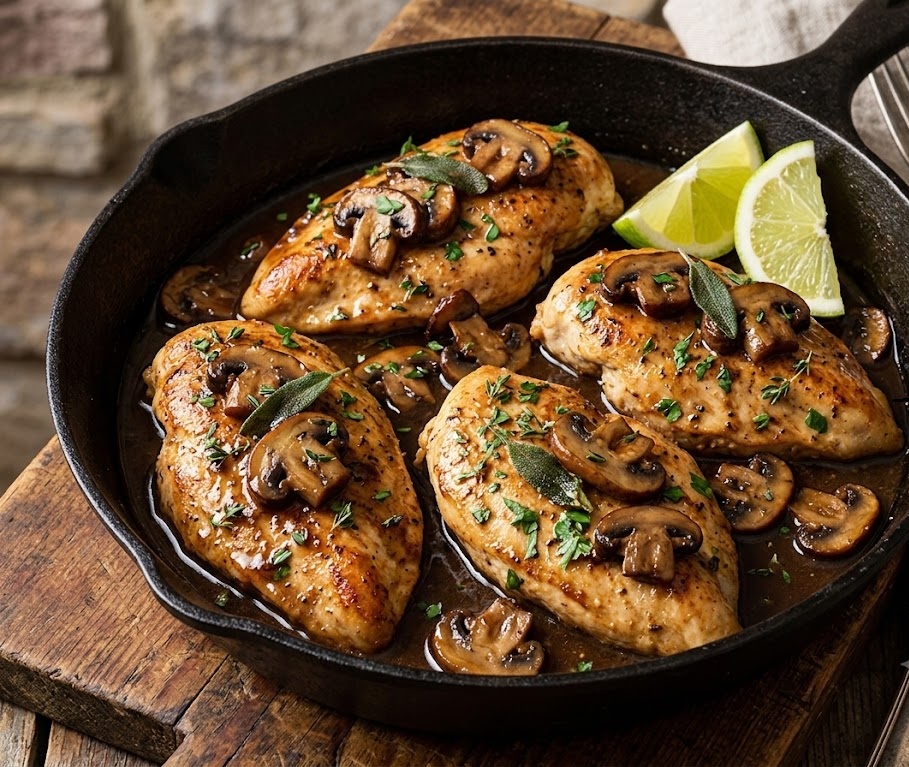
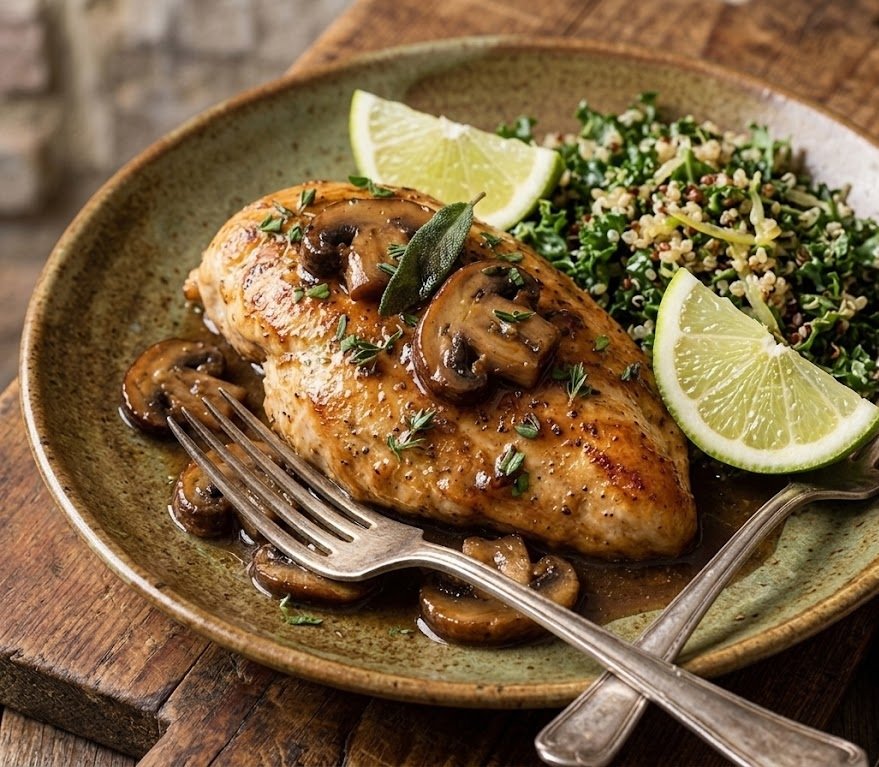
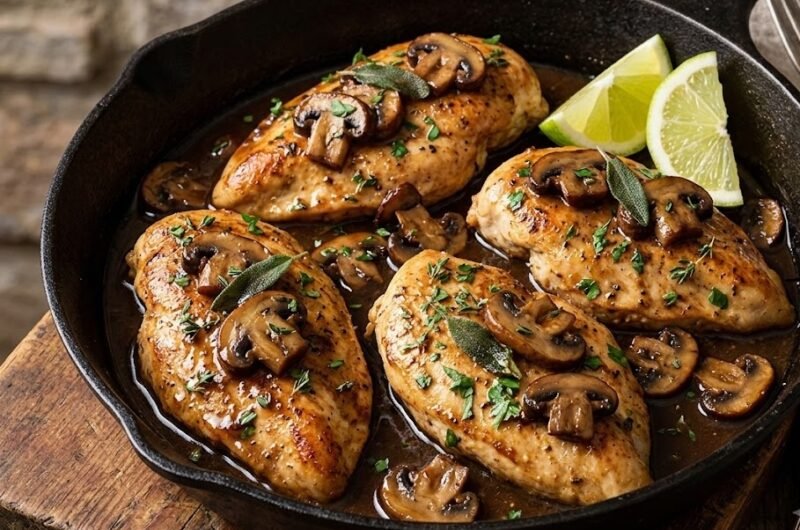
    If you love rich, comforting Italian-American dinners that feel restaurant-worthy without being difficult to make, this chicken marsala recipe is exactly what you need. Tender pan-fried chicken cutlets are coated in a silky mushroom and Marsala wine sauce that’s savory, buttery, and packed with deep flavor. The chicken stays juicy while the sauce turns glossy and smooth, making every bite incredibly satisfying. Best of all, this easy chicken marsala comes together in about 40 minutes, making it perfect for both weeknight dinners and special occasions.

    What Is Chicken Marsala?

    Chicken Marsala is a classic Italian-American dish made with lightly floured chicken cutlets simmered in a rich mushroom and Marsala wine sauce. The sauce develops a deep savory flavor from caramelized mushrooms, chicken stock, butter, and sweet Marsala wine. The result is a beautifully balanced dish that tastes rich without feeling heavy.

    The chicken becomes tender and flavorful while the sauce turns silky and glossy. Mushrooms add earthy depth, and the Marsala wine brings subtle sweetness that perfectly complements the savory ingredients. This dish is elegant enough for dinner parties but simple enough for beginner home cooks.

    Chicken Marsala Recipe Ingredients

    Main Ingredients

    • 4 boneless skinless chicken breasts
    • 1 teaspoon salt
    • ½ teaspoon black pepper
    • ½ cup plain flour
    • 3 tablespoons olive oil
    • 2 tablespoons unsalted butter
    • 300g cremini or button mushrooms, sliced
    • 3 garlic cloves, minced
    • 180ml Marsala wine
    • 180ml chicken stock
    • 120ml heavy cream
    • 1 tablespoon chopped fresh parsley

    For Serving

    • Mashed potatoes
    • Buttered pasta
    • Steamed vegetables
    • Extra parsley for garnish

    Kitchen Equipment

    • Large frying pan or skillet
    • Tongs
    • Sharp knife
    • Cutting board
    • Measuring cups and spoons
    • Shallow dish for flour

    Preparation and Cooking Time

    • Prep Time: 15 minutes
    • Cook Time: 25 minutes
    • Total Time: 40 minutes
    • Servings: 4 servings

    How to Make Chicken Marsala Recipe

    • Prepare the chicken: Slice each chicken breast horizontally to create thin cutlets. Place the chicken between sheets of baking parchment and gently pound to an even thickness. Season both sides with salt and black pepper.
    • Coat the chicken: Add the flour to a shallow bowl. Lightly dredge each chicken piece in flour, shaking off any excess. This coating helps create a golden crust and thickens the sauce slightly while cooking.
    • Cook the chicken: Heat the olive oil in a large skillet over medium-high heat. Add the chicken and cook for about 4 minutes per side until golden brown and cooked through. Transfer the chicken to a plate and keep warm.
    • Cook the mushrooms: Reduce the heat to medium. Add the butter and sliced mushrooms to the same pan. Cook for 6 to 8 minutes until the mushrooms release their moisture and become golden brown.
    • Add the garlic: Stir the minced garlic into the mushrooms and cook for 30 seconds until fragrant. Avoid letting the garlic brown too much.
    • Deglaze the pan: Pour in the Marsala wine and gently scrape the bottom of the pan to lift all the flavorful browned bits. Simmer for about 3 minutes until the wine reduces slightly.
    • Make the sauce: Add the chicken stock and heavy cream. Stir well and simmer for 5 minutes until the sauce thickens slightly and becomes smooth.
    • Return the chicken: Place the cooked chicken back into the skillet and spoon the sauce over the top. Simmer for 2 to 3 minutes so the chicken absorbs the flavor of the sauce.
    • Finish and serve: Sprinkle with chopped parsley and serve immediately with mashed potatoes, pasta, or vegetables.
    How to Make Chicken Marsala Recipe

    Helpful Tips for the Best Chicken Marsala

    How do I keep the chicken tender?

    Pounding the chicken to an even thickness helps it cook evenly and prevents dryness. Avoid overcooking the chicken once it turns golden and cooked through.

    What type of mushrooms work best?

    Cremini mushrooms give the richest flavor, but white button mushrooms also work well. Slice them evenly so they cook consistently.

    Can I make chicken marsala without cream?

    Yes, you can leave out the cream for a lighter sauce. The dish will still taste delicious with just Marsala wine and chicken stock.

    Why is my sauce too thin?

    Allow the sauce to simmer gently for a few extra minutes so it reduces properly. The flour coating on the chicken also helps naturally thicken the sauce.

    What is the best Marsala wine to use?

    Dry Marsala wine creates the most balanced flavor for savory dishes. Sweet Marsala can be used if you prefer a slightly sweeter sauce.

    Serving Suggestions

    • Serve with creamy mashed potatoes
    • Pair with buttered fettuccine or spaghetti
    • Add roasted asparagus or green beans
    • Enjoy with crusty bread for soaking up the sauce
    • Serve alongside a fresh green salad

    Storage Instructions

    Room Temperature

    Chicken Marsala should not sit out for more than 2 hours. Serve immediately for the best texture and flavor.

    Refrigerator

    Store leftovers in an airtight container in the refrigerator for up to 3 days. Reheat gently on the stovetop or in the microwave until hot.

    Freezing

    Freeze cooled chicken marsala in a freezer-safe container for up to 2 months. Thaw overnight in the refrigerator before reheating.

    Nutrition Information

    • Calories: 480 kcal
    • Carbohydrates: 14g
    • Protein: 39g
    • Fat: 26g
    • Saturated Fat: 10g
    • Sodium: 720mg

    Nutrition values are estimates and may vary depending on ingredients used.

    FAQs

    Can I make chicken marsala ahead of time?

    Yes, you can prepare the dish a day ahead and gently reheat it before serving. The flavors become even richer after resting.

    What can I use instead of Marsala wine?

    You can substitute dry sherry or white wine if needed, though the flavor will be slightly different from traditional chicken marsala.

    Can I use chicken thighs instead of chicken breasts?

    Yes, boneless skinless chicken thighs work very well and stay especially juicy during cooking.

    How do I thicken chicken marsala sauce?

    Allow the sauce to simmer longer to reduce naturally, or stir in a small slurry of cornflour and water if needed.

    Chicken Marsala Recipe

    Recipe by Milli RoseCourse: DinnerCuisine: Italian-AmericanDifficulty: Easy
    Servings

    4

    servings
    Prep time

    30

    minutes
    Cooking time

    40

    minutes
    Calories

    300

    kcal
    Total time

    1

    hour 

    10

    minutes

    Tender chicken cutlets simmered in a rich mushroom and Marsala wine sauce. An easy Italian-American classic perfect for weeknight dinners or special occasions.

    Ingredients

    • 4 boneless skinless chicken breasts

    • 1 tsp salt

    • 1/2 tsp black pepper

    • 1/2 cup plain flour

    • 3 tbsp olive oil

    • 2 tbsp unsalted butter

    • 300g mushrooms, sliced

    • 3 garlic cloves, minced

    • 180ml Marsala wine

    • 180ml chicken stock

    • 120ml heavy cream

    Directions

    • Slice and pound the chicken cutlets evenly. Season with salt and pepper.
    • Dredge the chicken lightly in flour and shake off excess.
    • Heat olive oil in a skillet and cook chicken until golden and cooked through.
    • Transfer chicken to a plate and cook mushrooms in butter until browned.
    • Add garlic and cook briefly until fragrant.
    • Pour in Marsala wine and simmer until slightly reduced.
    • Add chicken stock and cream, then simmer until the sauce thickens.
    • Return chicken to the skillet and coat with sauce.
    • Garnish with parsley and serve warm.

    Notes

    • Use dry Marsala wine for the best balanced flavor.
    • Do not overcrowd the pan while browning the chicken.
    • The sauce thickens more as it cools slightly.
  • Easy Sirloin Steak Recipe

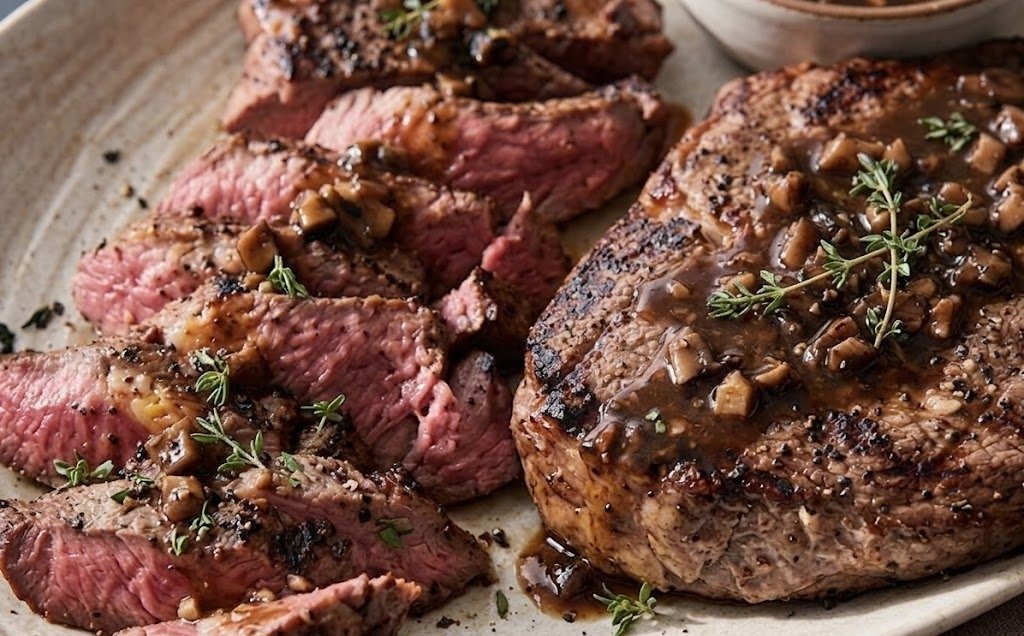
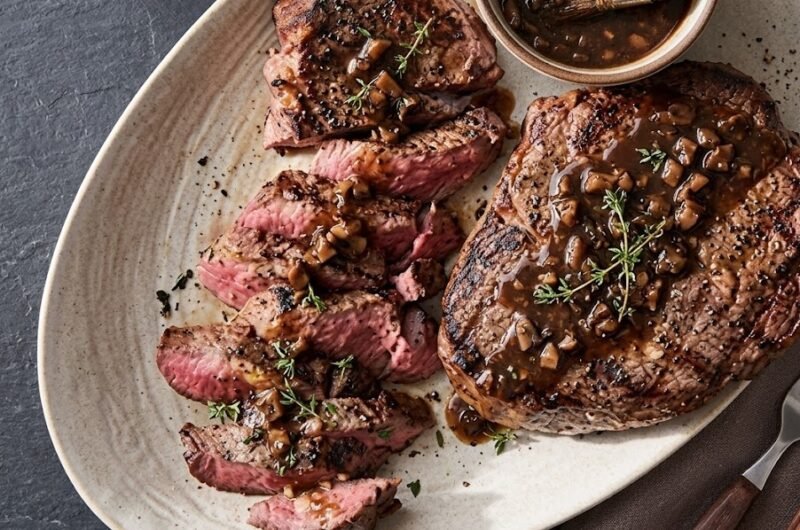
    Easy Sirloin Steak Recipe

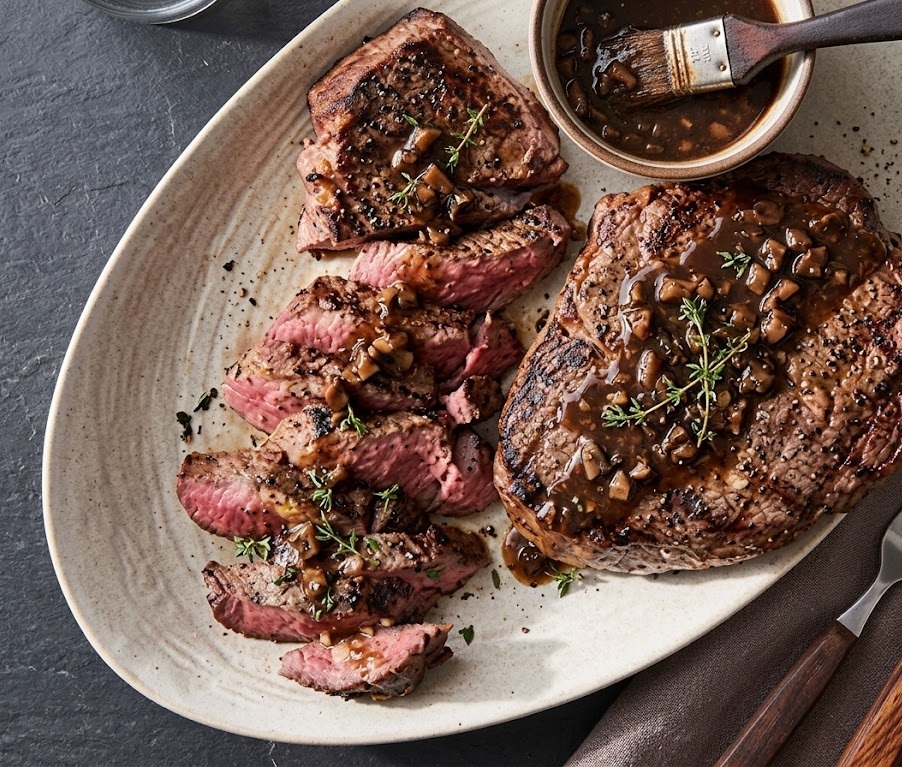
    If you’re looking for a simple, juicy, and flavour-packed dinner that feels restaurant-quality without the fuss, this easy sirloin steak recipe is exactly what you need. Perfectly seared on the outside with a tender, buttery centre, this steak delivers rich beefy flavour with minimal ingredients and effort. It’s an ideal beginner-friendly recipe that comes together quickly, making it perfect for busy weeknights or relaxed weekend dinners. With a crisp golden crust, garlic butter finish, and perfectly cooked interior, this steak recipe proves that great steak at home can be incredibly easy.

    Ingredients

    For the Steak

    • 2 sirloin steaks, about 250g each
    • 1 tablespoon olive oil
    • 1 teaspoon sea salt
    • 1 teaspoon freshly ground black pepper

    For the Garlic Butter

    • 2 tablespoons unsalted butter
    • 2 garlic cloves, crushed
    • 2 sprigs fresh rosemary
    • 1 sprig fresh thyme
    • Extra butter for serving, optional

    How to Make Easy Sirloin Steak Recipe

    • Prepare the steaks: Remove the sirloin steaks from the refrigerator about 30 minutes before cooking. Letting the steaks come to room temperature helps them cook evenly and stay tender.
    • Season well: Pat the steaks dry with paper towels to remove excess moisture. Season both sides generously with sea salt and freshly ground black pepper.
    • Heat the pan: Place a heavy frying pan or cast iron skillet over high heat. Allow it to become very hot before adding the oil. A properly heated pan creates the perfect golden crust.
    • Sear the steaks: Add the olive oil and place the steaks carefully into the pan. Cook without moving them for 2 to 3 minutes to develop a rich caramelised crust.
    • Flip and add butter: Turn the steaks over using tongs. Add the butter, crushed garlic, rosemary, and thyme to the pan.
    • Baste continuously: Tilt the pan slightly and spoon the melted garlic butter over the steaks repeatedly while they cook for another 2 to 3 minutes. This keeps the steaks juicy and full of flavour.
    • Rest before serving: Transfer the steaks to a warm plate and allow them to rest for 5 minutes. Resting helps the juices redistribute throughout the meat.
    • Slice and serve: Slice against the grain for maximum tenderness and serve immediately with extra garlic butter if desired.
    How to Make Easy Sirloin Steak Recipe

    Tips for the Best Sirloin Steak

    How do I get a good crust on steak?

    Make sure the pan is very hot before adding the steaks. Patting the meat dry also helps create a crisp golden crust instead of steaming.

    Should I cook steak straight from the fridge?

    No. Letting the steak sit at room temperature for around 30 minutes helps it cook more evenly and prevents a cold centre.

    How do I know when sirloin steak is done?

    For medium-rare, cook until the internal temperature reaches around 54°C. Medium is closer to 60°C. A meat thermometer gives the most accurate results.

    Why should steak rest after cooking?

    Resting allows the juices to settle back into the meat, keeping the steak tender and juicy when sliced.

    Serving Suggestions

    • Serve with mashed potatoes and green beans
    • Pair with crispy fries and garlic aioli
    • Add a fresh green salad on the side
    • Serve with roasted vegetables and herb butter
    • Pair with creamy peppercorn sauce

    Storage

    Room Temperature

    Cooked steak can sit at room temperature for up to 2 hours before it should be refrigerated.

    Refrigerator

    Store leftover steak in an airtight container in the refrigerator for up to 3 days. Reheat gently in a skillet to avoid drying it out.

    Freezing

    Wrap cooked steak tightly in foil or freezer-safe bags and freeze for up to 2 months. Thaw overnight in the refrigerator before reheating.

    Nutrition

    • Calories: 420 kcal
    • Carbohydrates: 2g
    • Protein: 38g
    • Fat: 29g
    • Saturated Fat: 11g
    • Sodium: 640mg

    Nutrition values are estimates and may vary depending on ingredients used.

    FAQs

    What is the best pan for cooking sirloin steak?

    A heavy cast iron skillet works best because it holds heat well and creates a beautiful golden crust.

    Can I cook sirloin steak in the oven?

    Yes, you can finish thicker steaks in the oven after searing them in a hot pan for a few minutes on each side.

    How long should I rest steak after cooking?

    Rest the steak for at least 5 minutes before slicing to keep it juicy and tender.

    Can I use dried herbs instead of fresh?

    Yes, but fresh herbs provide better aroma and flavour. Use a smaller amount of dried herbs as they are more concentrated.

    Easy Sirloin Steak Recipe

    Recipe by Milli RoseCourse: DinnerCuisine: AmericanDifficulty: Easy
    Servings

    2

    steaks
    Prep time

    10

    minutes
    Cooking time

    10

    minutes
    Total time

    20

    minutes
    Calories

    420

    kcal

    20

    minutes

    Juicy and tender sirloin steak cooked in a hot skillet with garlic butter and fresh herbs. A quick and easy steak dinner perfect for weeknights or special occasions.

    Ingredients

    • 2 sirloin steaks, about 250g each

    • 1 tablespoon olive oil

    • 1 teaspoon sea salt

    • 1 teaspoon freshly ground black pepper

    • 2 tablespoons unsalted butter

    • 2 garlic cloves, crushed

    • 2 sprigs fresh rosemary

    • 1 sprig fresh thyme

    • Extra butter for serving, optional

    Directions

    • Remove the steaks from the refrigerator 30 minutes before cooking to allow them to come to room temperature.
    • Pat the steaks dry with paper towels and season generously with salt and black pepper on both sides.
    • Heat a heavy frying pan or cast iron skillet over high heat until very hot.
    • Add olive oil and carefully place the steaks into the pan.
    • Cook for 2 to 3 minutes on the first side without moving them to create a golden crust.
    • Flip the steaks and add butter, garlic, rosemary, and thyme to the pan.
    • Spoon the melted garlic butter over the steaks continuously for another 2 to 3 minutes until cooked to your preferred doneness.
    • Transfer the steaks to a plate and rest for 5 minutes before slicing.
    • Serve warm with extra butter if desired.

    Notes

    • Always rest steak before slicing to keep it juicy.
    • Use a hot pan for the best crust and flavour.
    • Fresh herbs add incredible aroma and richness.
  • Canned Chicken Salad Recipe

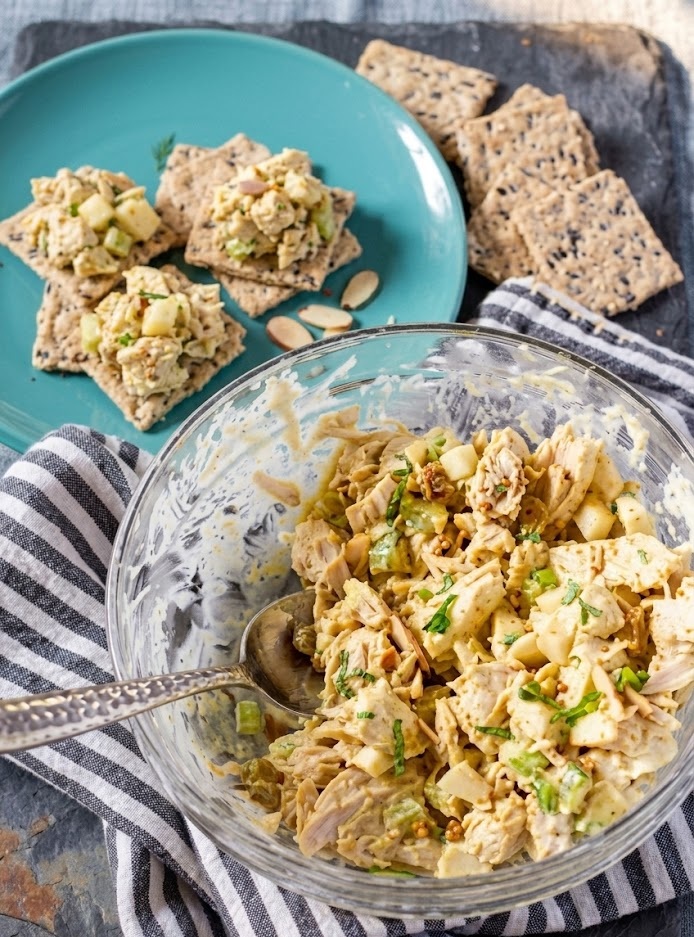
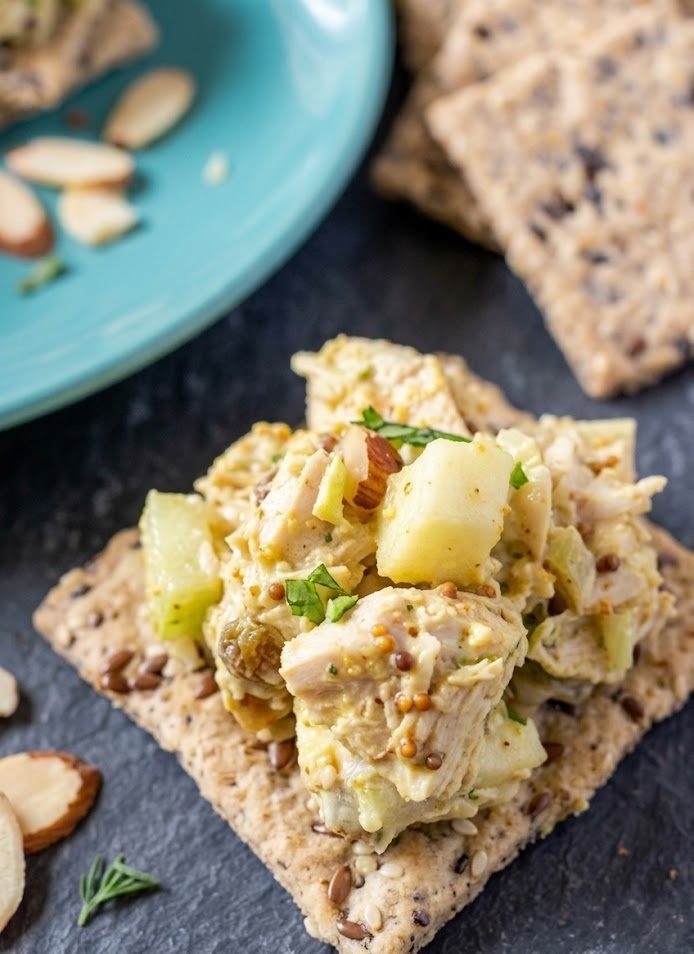
    Canned Chicken Salad Recipe

    If you need a quick, satisfying lunch that tastes fresh and homemade, this canned chicken salad recipe is the perfect solution. It combines tender canned chicken with crisp vegetables, creamy dressing, and simple pantry staples for a salad that is rich, crunchy, and full of flavor. This easy recipe comes together in minutes, making it ideal for busy weekdays, meal prep, or light family dinners. With its creamy texture, balanced seasoning, and versatile serving options, this chicken salad is one of those dependable recipes you will make again and again.

    What Is Canned Chicken Salad?

    Canned chicken salad is a quick and creamy cold salad made with canned chicken, mayonnaise, crunchy vegetables, and simple seasonings. It has a smooth and creamy base balanced by crisp celery, onion, and fresh herbs for texture and freshness.

    The flavor is savory, slightly tangy, and perfectly seasoned, making it delicious for sandwiches, wraps, crackers, or lettuce cups. Unlike heavier deli salads, this homemade version tastes lighter and fresher while still being hearty and satisfying.

    One of the best things about this recipe is how convenient it is. Since canned chicken is already cooked, there is no need for roasting or poaching chicken beforehand. Everything mixes together in one bowl in about 10 minutes, making it one of the easiest homemade lunches you can prepare.

    Ingredients

    For the Chicken Salad

    • 2 cans chicken breast, drained well (12.5 oz each)
    • ½ cup mayonnaise
    • 1 teaspoon Dijon mustard
    • 2 celery stalks, finely diced
    • ¼ small red onion, finely diced
    • 2 tablespoons chopped fresh parsley
    • 1 tablespoon lemon juice
    • ½ teaspoon garlic powder
    • ½ teaspoon salt
    • ¼ teaspoon black pepper

    Optional Add-Ins

    • ¼ cup chopped grapes
    • 2 tablespoons chopped walnuts or pecans
    • 1 tablespoon sweet pickle relish
    • 1 chopped hard-boiled egg

    For Serving

    • Bread or croissants
    • Crackers
    • Lettuce leaves
    • Sliced tomatoes

    Preparation and Total Time

    • Prep Time: 10 minutes
    • Cook Time: 0 minutes
    • Total Time: 10 minutes
    • Servings: 4

    How to Make Canned Chicken Salad

    • Drain the chicken: Open the canned chicken and drain it thoroughly. Press lightly with a fork to remove excess liquid so the salad stays creamy rather than watery.
    • Prepare the vegetables: Finely dice the celery and red onion. Chop the parsley into small pieces for even flavor throughout the salad.
    • Mix the dressing: In a medium mixing bowl, combine the mayonnaise, Dijon mustard, lemon juice, garlic powder, salt, and black pepper. Stir until smooth and creamy.
    • Add the chicken: Flake the canned chicken with a fork and add it to the bowl. Stir gently until the chicken is fully coated with the dressing mixture.
    • Fold in the vegetables: Add the celery, onion, and parsley. Mix until evenly distributed. If using optional add-ins like grapes, nuts, or relish, stir them in now.
    • Chill before serving: Cover the bowl and refrigerate the chicken salad for at least 20 minutes if possible. This helps the flavors blend together and improves the texture.
    • Serve and enjoy: Spoon the chicken salad onto bread, croissants, lettuce leaves, or crackers and serve cold.
    How to Make Canned Chicken Salad

    Helpful Tips

    How do I keep canned chicken salad from becoming watery?

    Drain the canned chicken very well before mixing. Excess liquid is the main reason chicken salad becomes runny. Press the chicken gently with paper towels if needed.

    Can I make this recipe healthier?

    Yes. Replace part or all of the mayonnaise with plain Greek yogurt for a lighter version with extra protein and less fat.

    What is the best canned chicken to use?

    Use high-quality canned chicken breast packed in water for the best flavor and texture. Chunk-style chicken works especially well in salads.

    How can I add more flavor?

    Fresh herbs, diced pickles, chopped bacon, paprika, or a little hot sauce can easily boost the flavor without making the salad complicated.

    Can I prepare chicken salad ahead of time?

    Yes. This recipe is excellent for meal prep and actually tastes even better after chilling for a few hours.

    Serving Suggestions

    • Serve in toasted sandwich bread or croissants
    • Spoon into lettuce wraps for a lighter meal
    • Pair with crackers for a quick snack plate
    • Serve with sliced tomatoes and cucumber salad
    • Add to wraps with spinach and avocado

    Storage Instructions

    Room Temperature

    Because this recipe contains mayonnaise, it should not sit at room temperature for more than 2 hours.

    Refrigerator

    Store the chicken salad in an airtight container in the refrigerator for up to 4 days. Stir before serving if any liquid separates slightly.

    Freezing

    Freezing is not recommended because mayonnaise can separate and become grainy once thawed.

    Nutrition Information

    • Calories: 320 kcal
    • Carbohydrates: 3g
    • Protein: 28g
    • Fat: 21g
    • Saturated Fat: 4g
    • Sodium: 690mg

    Nutrition values are estimates and may vary depending on the exact ingredients used.

    FAQs

    Can I use fresh chicken instead of canned chicken?

    Yes, cooked shredded chicken breast or rotisserie chicken works perfectly in this recipe.

    How long does canned chicken salad last in the fridge?

    Properly stored in an airtight container, chicken salad stays fresh for up to 4 days in the refrigerator.

    Can I make canned chicken salad without mayonnaise?

    Yes, you can substitute plain Greek yogurt, sour cream, or mashed avocado for mayonnaise.

    What can I serve with chicken salad?

    Chicken salad pairs well with sandwiches, crackers, lettuce wraps, pasta salad, chips, or fresh vegetables.

    Canned Chicken Salad Recipe

    Recipe by Milli RoseCourse: LunchCuisine: AmericanDifficulty: Easy
    Servings

    4

    servings
    Prep time

    10

    minutes
    Cooking timeminutes
    Total time

    10

    minutes
    Calories

    320

    kcal

    Creamy, quick, and flavorful canned chicken salad made with simple pantry ingredients and crisp vegetables. Perfect for sandwiches, wraps, or light lunches.

    Ingredients

    • 2 cans chicken breast, drained well

    • ½ cup mayonnaise

    • 1 teaspoon Dijon mustard

    • 2 celery stalks, finely diced

    • ¼ small red onion, finely diced

    • 2 tablespoons chopped fresh parsley

    • 1 tablespoon lemon juice

    • ½ teaspoon garlic powder

    • ½ teaspoon salt

    • ¼ teaspoon black pepper

    • ¼ cup chopped grapes (optional)

    • 2 tablespoons chopped walnuts (optional)

    • 1 tablespoon sweet pickle relish (optional)

    • Bread, crackers, or lettuce leaves for serving

    Directions

    • Drain the canned chicken thoroughly and flake with a fork.
    • Dice the celery, onion, and parsley into small even pieces.
    • In a mixing bowl, stir together mayonnaise, Dijon mustard, lemon juice, garlic powder, salt, and black pepper.
    • Add the chicken to the bowl and stir until fully coated.
    • Fold in celery, onion, parsley, and any optional add-ins.
    • Cover and chill the salad for at least 20 minutes before serving for best flavor.
    • Serve cold in sandwiches, wraps, lettuce cups, or with crackers.

    Notes

    • Drain the canned chicken well to prevent watery salad.
    • Chill before serving for the best flavor and texture.
    • Store leftovers in the refrigerator for up to 4 days.

slot depo

sicbo online