Category: Dinner

  • Smoked Pork Tenderloin Recipe

    Smoked Pork Tenderloin Recipe

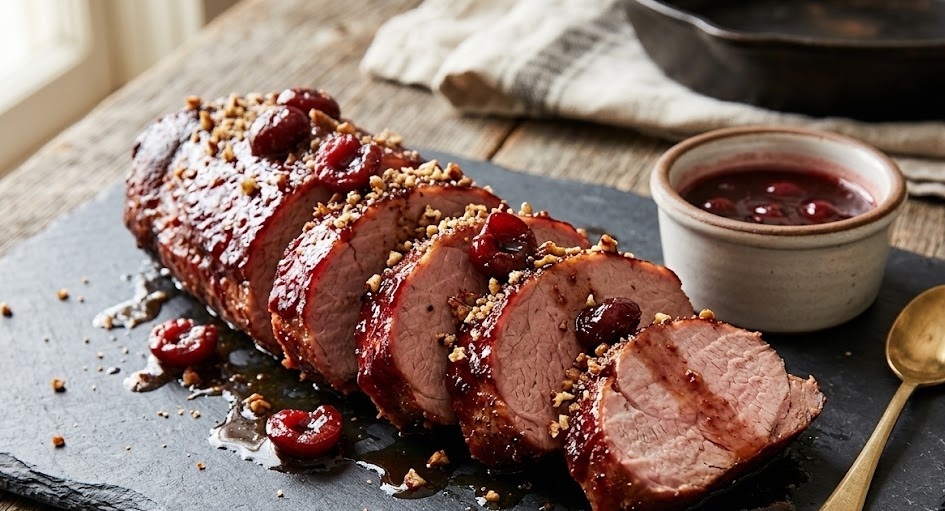
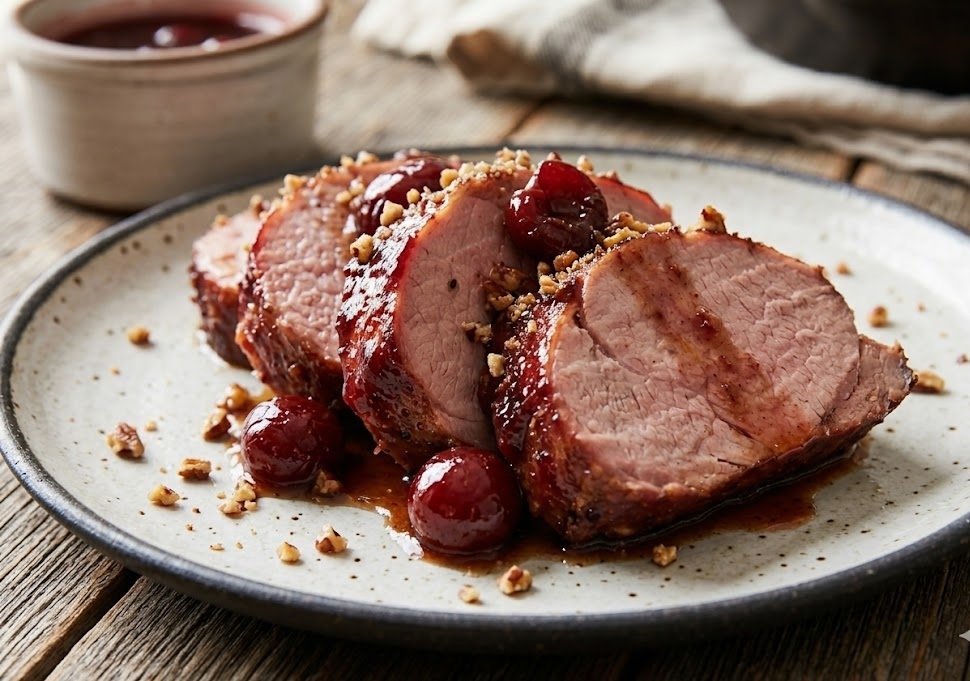
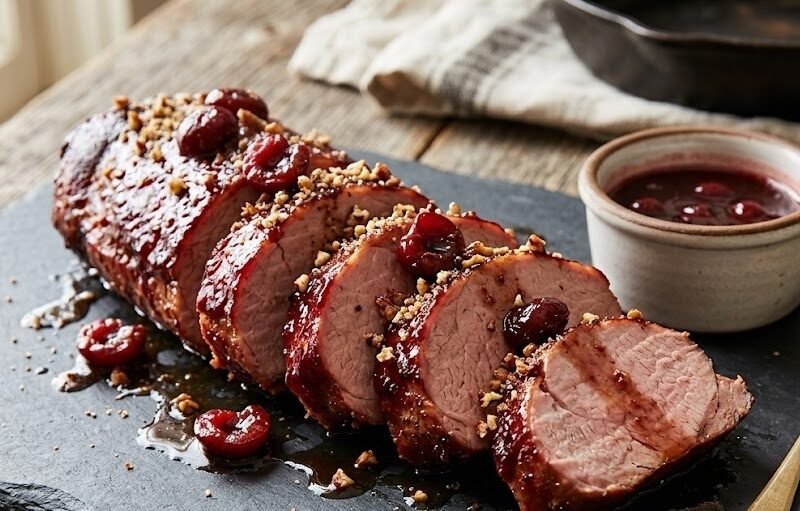
    If you are looking for a juicy, smoky, and incredibly flavorful dinner that feels impressive without being difficult, this smoked pork tenderloin recipe is exactly what you need. Pork tenderloin is naturally lean and tender, and when slowly smoked, it develops a rich smoky crust while staying beautifully moist inside. The combination of simple seasoning, gentle smoke, and proper cooking creates a restaurant-quality main dish with very little effort.

    This recipe is beginner-friendly and perfect for weekend cookouts, family dinners, or summer gatherings. The pork turns out tender enough to slice with a fork, with a balance of savory spices and subtle sweetness in every bite. Best of all, the entire recipe comes together in under two hours, making it practical for both special occasions and easy weeknight cooking.

    Ingredients

    For the Pork Tenderloin

    • 2 pork tenderloins (about 1 to 1.5 pounds each)
    • 2 tablespoons olive oil
    • 2 teaspoons kosher salt
    • 1 teaspoon black pepper
    • 1 tablespoon smoked paprika
    • 1 teaspoon garlic powder
    • 1 teaspoon onion powder
    • 1 tablespoon brown sugar
    • 1 teaspoon dried thyme
    • 1 teaspoon mustard powder
    • Wood chips or pellets for smoking
    • Fresh parsley for garnish

    How to Make Smoked Pork Tenderloin Recipe

    • Prepare the smoker: Preheat your smoker to 225°F (107°C). Add your preferred wood chips or pellets. Apple, cherry, or hickory wood all work beautifully with pork tenderloin.
    • Prepare the pork: Pat the pork tenderloins dry using paper towels. This helps the seasoning stick properly and encourages a better crust during smoking.
    • Mix the seasoning: In a small bowl, combine the kosher salt, black pepper, smoked paprika, garlic powder, onion powder, brown sugar, thyme, and mustard powder until evenly mixed.
    • Season the meat: Rub the pork tenderloins with olive oil, then coat all sides generously with the seasoning blend. Press the spices gently into the meat so they adhere well.
    • Smoke the pork: Place the seasoned pork tenderloins directly onto the smoker grates. Close the lid and smoke for 60 to 75 minutes, depending on thickness.
    • Check for doneness: Insert a meat thermometer into the thickest part of the pork. The pork is ready when the internal temperature reaches 145°F (63°C).
    • Rest before slicing: Remove the pork from the smoker and let it rest on a cutting board for 10 minutes. This helps the juices redistribute throughout the meat.
    • Slice and serve: Slice the smoked pork tenderloin into medallions and garnish with fresh parsley before serving warm.
    How to Make Smoked Pork Tenderloin Recipe

    Tips for the Best Smoked Pork Tenderloin

    How do I keep pork tenderloin from drying out?

    Use a meat thermometer and remove the pork once it reaches 145°F internally. Overcooking is the main reason pork tenderloin becomes dry.

    What wood works best for smoking pork?

    Apple and cherry wood provide a mild sweetness that pairs beautifully with pork, while hickory gives a deeper smoky flavor.

    Should I marinate the pork first?

    You can marinate the pork for extra flavor, but this dry rub recipe already creates a delicious crust and juicy interior.

    Can I make this recipe on a pellet grill?

    Yes, pellet grills work perfectly for smoked pork tenderloin and provide steady heat with excellent smoky flavor.

    Serving Suggestions

    • Serve with roasted potatoes and grilled vegetables
    • Pair with creamy coleslaw or potato salad
    • Add sliced pork to sandwiches or wraps
    • Serve alongside cornbread and baked beans
    • Pair with a fresh green salad for a lighter meal

    Storage

    Room Temperature

    Do not leave smoked pork tenderloin at room temperature for more than 2 hours after cooking.

    Refrigerator

    Store leftovers in an airtight container in the refrigerator for up to 4 days. Reheat gently to avoid drying out the meat.

    Freezing

    Wrap sliced pork tightly in foil or freezer-safe bags and freeze for up to 3 months. Thaw overnight in the refrigerator before reheating.

    Nutrition

    • Calories: 320 kcal
    • Carbohydrates: 4g
    • Protein: 38g
    • Fat: 16g
    • Saturated Fat: 3g
    • Sodium: 720mg

    Nutrition values are estimates and may vary depending on ingredients used.

    FAQs

    How long does it take to smoke pork tenderloin?

    Most pork tenderloins take between 60 and 75 minutes at 225°F, depending on thickness and smoker temperature consistency.

    What temperature should smoked pork tenderloin be cooked to?

    Pork tenderloin should reach an internal temperature of 145°F for safe and juicy results.

    Can I smoke pork tenderloin ahead of time?

    Yes, smoked pork tenderloin reheats very well and can be made a day ahead for easy meal prep.

    Do I need to wrap pork tenderloin while smoking?

    No, wrapping is not necessary for pork tenderloin because it cooks quickly and stays naturally tender.
    Smoked Pork Tenderloin Recipe

    Recipe by Milli RoseCourse: DinnerCuisine: AmericanDifficulty: Easy
    Servings

    6

    servings
    Prep time

    15

    minutes
    Cooking time

    1

    hour 

    15

    minutes
    Total time

    90

    minutes
    Calories

    320

    kcal

    1

    hour 

    30

    minutes

    Juicy smoked pork tenderloin with a flavorful spice rub and rich smoky finish. Tender, easy to prepare, and perfect for family dinners or summer cookouts.

    Ingredients

    • 2 pork tenderloins (about 1 to 1.5 pounds each)

    • 2 tablespoons olive oil

    • 2 teaspoons kosher salt

    • 1 teaspoon black pepper

    • 1 tablespoon smoked paprika

    • 1 teaspoon garlic powder

    • 1 teaspoon onion powder

    • 1 tablespoon brown sugar

    • 1 teaspoon dried thyme

    • 1 teaspoon mustard powder

    • Wood chips or pellets for smoking

    • Fresh parsley for garnish

    Directions

    • Preheat your smoker to 225°F (107°C) and prepare wood chips or pellets.
    • Pat the pork tenderloins dry with paper towels and rub with olive oil.
    • Mix salt, pepper, smoked paprika, garlic powder, onion powder, brown sugar, thyme, and mustard powder in a small bowl.
    • Coat the pork tenderloins evenly with the seasoning mixture.
    • Place the pork directly onto the smoker grates and smoke for 60 to 75 minutes.
    • Cook until the internal temperature reaches 145°F (63°C).
    • Remove the pork from the smoker and rest for 10 minutes before slicing.
    • Slice into medallions, garnish with parsley, and serve warm.

    Notes

    • Use apple or cherry wood for a mild smoky flavor.
    • Always rest the pork before slicing to keep it juicy.
    • A meat thermometer gives the most accurate results.
  • Pan Roasted Sweet Potatoes Recipe

    Pan Roasted Sweet Potatoes Recipe

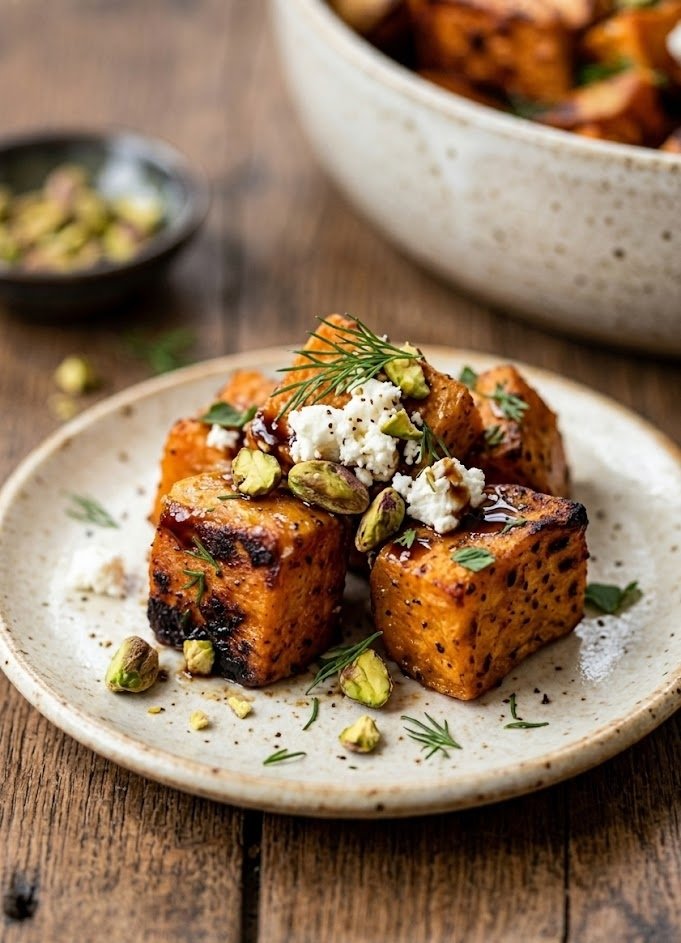
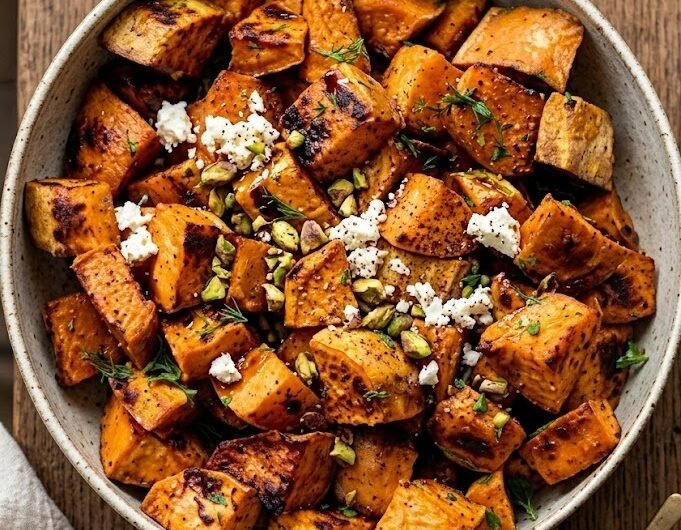
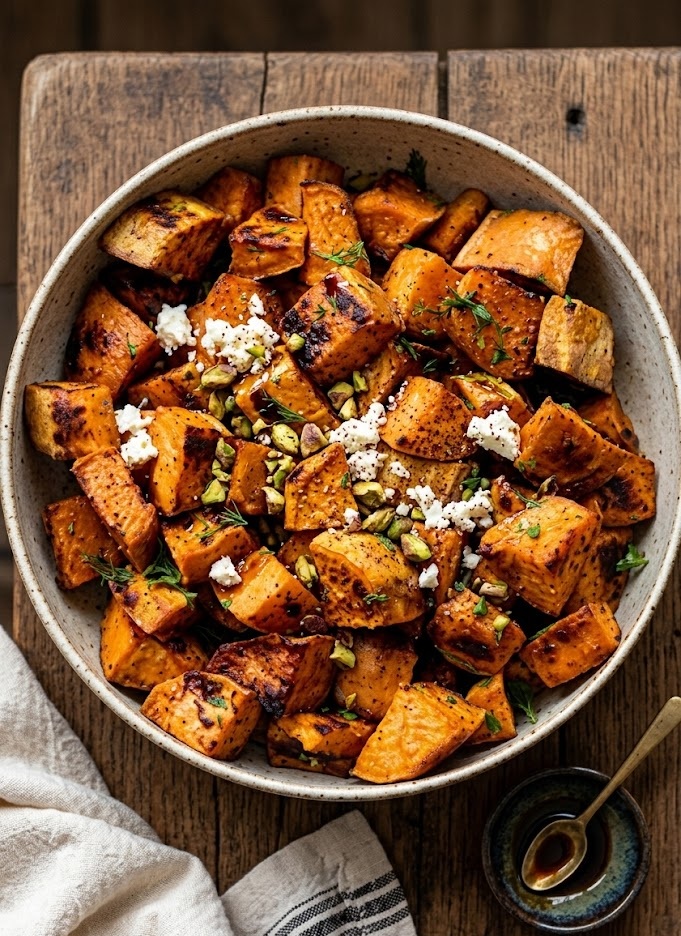
    If you are looking for a simple side dish packed with flavour, this pan roasted sweet potatoes recipe is one you will make again and again. These sweet potatoes are crispy and golden on the outside with a soft, fluffy centre and a naturally sweet, caramelised flavour. Made with simple pantry ingredients, this easy recipe is perfect for busy weeknights, holiday dinners, or healthy meal prep. Best of all, it comes together quickly with very little effort and delivers restaurant-quality results right from your stovetop.

    Ingredients

    For the Pan Roasted Sweet Potatoes

    • 2 medium sweet potatoes, peeled and diced into small cubes
    • 2 tablespoons olive oil
    • 1 tablespoon butter
    • 1 teaspoon garlic powder
    • 1 teaspoon smoked paprika
    • 1 teaspoon dried thyme
    • ½ teaspoon salt
    • ¼ teaspoon black pepper
    • Fresh parsley, chopped, for garnish

    How to Make Pan Roasted Sweet Potatoes

    • Prepare the sweet potatoes: Wash, peel, and dice the sweet potatoes into evenly sized cubes. Keeping the pieces similar in size helps them cook evenly and become perfectly tender.
    • Heat the skillet: Place a large skillet or frying pan over medium heat. Add the olive oil and butter and allow them to heat until the butter is melted and slightly bubbling.
    • Add the sweet potatoes: Carefully add the diced sweet potatoes to the hot skillet in a single layer. Avoid overcrowding the pan so the potatoes roast properly instead of steaming.
    • Season the potatoes: Sprinkle over the garlic powder, smoked paprika, dried thyme, salt, and black pepper. Stir gently so all the pieces are evenly coated with seasoning.
    • Cook until golden: Allow the sweet potatoes to cook for 15 to 20 minutes, stirring every few minutes. The edges should become crisp and golden while the centres turn soft and fluffy.
    • Adjust the heat if needed: If the potatoes begin browning too quickly before becoming tender, lower the heat slightly and continue cooking until fork tender.
    • Finish and serve: Remove the skillet from the heat and sprinkle with freshly chopped parsley. Serve warm as a delicious side dish with your favourite meals.
    How to Make Pan Roasted Sweet Potatoes

    Tips for the Best Pan Roasted Sweet Potatoes

    How do I get crispy sweet potatoes in a pan?

    Make sure the pan is fully heated before adding the potatoes and avoid overcrowding. A large skillet or cast iron pan works best for crisp edges.

    Should I peel sweet potatoes first?

    You can leave the skin on for extra texture and nutrients, but peeling gives a softer and smoother finish.

    Why are my sweet potatoes sticking to the pan?

    Use enough oil or butter and allow the potatoes to cook undisturbed for a few minutes before stirring.

    Can I add extra seasoning?

    Yes, sweet potatoes pair beautifully with chilli flakes, cumin, cinnamon, rosemary, or even a drizzle of honey.

    Serving Suggestions

    • Serve alongside grilled chicken or steak
    • Pair with roasted vegetables and salad bowls
    • Add to breakfast plates with eggs and bacon
    • Use as a filling for tacos or wraps
    • Top with feta cheese or avocado for extra flavour

    Storage

    Room Temperature

    Leave the sweet potatoes at room temperature for no longer than 2 hours before storing.

    Refrigerator

    Store leftovers in an airtight container in the refrigerator for up to 4 days. Reheat in a skillet for the best texture.

    Freezing

    Freeze cooled sweet potatoes in a freezer-safe container for up to 2 months. Thaw overnight in the refrigerator before reheating.

    Nutrition

    • Calories: 210 kcal
    • Carbohydrates: 29g
    • Protein: 2g
    • Fat: 10g
    • Saturated Fat: 3g
    • Sodium: 320mg

    Nutrition values are estimates and may vary depending on ingredients used.

    FAQs

    Can I roast sweet potatoes without peeling them?

    Yes, the skin becomes slightly crisp during cooking and adds extra texture and nutrients.

    What pan works best for pan roasted sweet potatoes?

    A large cast iron skillet or heavy frying pan gives the best caramelisation and crispy edges.

    Can I make pan roasted sweet potatoes ahead of time?

    Yes, they can be cooked ahead and reheated in a skillet or oven before serving.

    How do I know when sweet potatoes are fully cooked?

    The potatoes should be golden brown outside and easily pierced with a fork in the centre.

    Pan Roasted Sweet Potatoes Recipe

    Recipe by Milli RoseCourse: Side DishCuisine: AmericanDifficulty: Easy
    Servings

    4

    servings
    Prep time

    10

    minutes
    Cooking time

    20

    minutes
    Total time

    30

    minutes
    Calories

    210

    kcal

    30

    minutes

    Crispy pan roasted sweet potatoes with caramelised edges and a soft, fluffy centre. An easy and flavourful side dish perfect for any meal.

    Ingredients

    • 2 medium sweet potatoes, peeled and diced

    • 2 tablespoons olive oil

    • 1 tablespoon butter

    • 1 teaspoon garlic powder

    • 1 teaspoon smoked paprika

    • 1 teaspoon dried thyme

    • ½ teaspoon salt

    • ¼ teaspoon black pepper

    • Fresh parsley, chopped, for garnish

    Directions

    • Wash, peel, and dice the sweet potatoes into even bite-sized cubes.
    • Heat olive oil and butter in a large skillet over medium heat until melted and hot.
    • Add the sweet potatoes to the pan in a single layer.
    • Season with garlic powder, smoked paprika, thyme, salt, and black pepper.
    • Cook for 15–20 minutes, stirring occasionally, until golden brown and fork tender.
    • Reduce heat slightly if the potatoes brown too quickly before softening.
    • Remove from heat and garnish with chopped parsley before serving.

    Notes

    • Cut the potatoes into equal sizes for even cooking.
    • A cast iron skillet gives the crispiest edges.
    • Add chilli flakes for extra heat and flavour.
  • BBq Ribs in the Oven Recipe

    BBq Ribs in the Oven Recipe

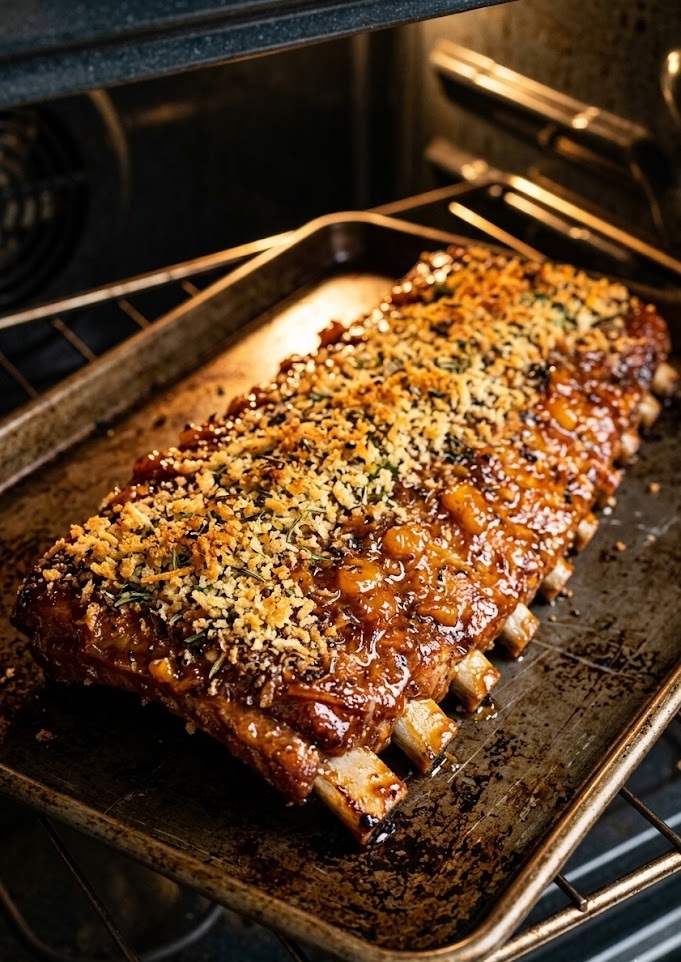
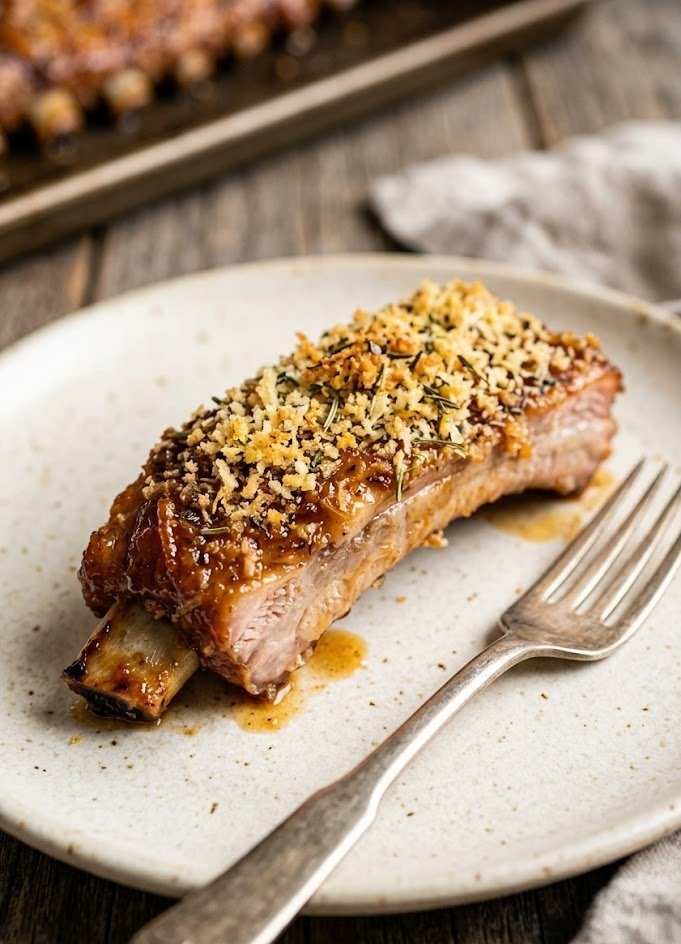
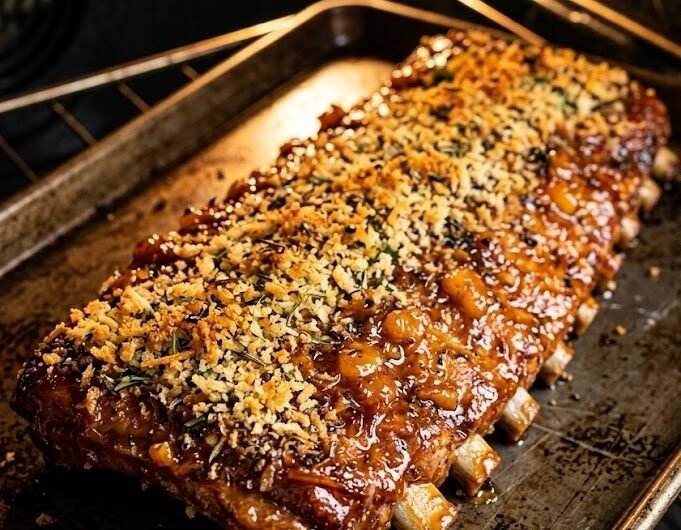
    If you love tender, juicy ribs coated in sticky barbecue sauce, this BBq ribs in the oven recipe is guaranteed to become a family favourite. These slow-cooked pork ribs are packed with smoky, sweet flavour and baked until perfectly tender before being finished with a rich homemade glaze. The meat becomes soft enough to pull apart easily while still keeping a delicious caramelised crust on the outside.

    This recipe is surprisingly simple to make at home and requires very little hands-on work. Whether you are preparing a weekend dinner, game-day feast, or summer-style comfort meal, these oven-baked ribs deliver restaurant-quality flavour without needing a smoker or grill.

    What Are BBq Ribs in the Oven?

    BBq ribs in the oven are slow-cooked pork ribs seasoned with spices, baked gently until tender, then brushed with barbecue sauce and roasted until beautifully sticky and caramelised. Unlike grilled ribs, oven-baked ribs are incredibly easy to control, making them ideal for beginners.

    The texture is melt-in-the-mouth tender with crispy edges and a rich smoky coating. The combination of paprika, garlic, brown sugar, and barbecue sauce creates layers of sweet, savoury, and smoky flavour that make every bite irresistible.

    BBq Ribs in the Oven Recipe Ingredients

    For the Ribs

    • 2 racks pork baby back ribs
    • 2 tablespoons olive oil
    • 1 tablespoon smoked paprika
    • 2 teaspoons garlic powder
    • 2 teaspoons onion powder
    • 1 teaspoon black pepper
    • 1 teaspoon salt
    • 1 teaspoon chilli powder
    • 2 tablespoons brown sugar

    For the BBQ Sauce

    • 1 cup barbecue sauce
    • 2 tablespoons honey
    • 1 tablespoon Worcestershire sauce
    • 1 tablespoon apple cider vinegar

    Kitchen Equipment

    • Large baking tray
    • Aluminium foil
    • Baking parchment
    • Small mixing bowl
    • Basting brush
    • Sharp knife

    Preparation and Cooking Time

    • Prep Time: 15 minutes
    • Cook Time: 2 hours 30 minutes
    • Total Time: 2 hours 45 minutes
    • Servings: 6 servings

    How to Make BBq Ribs in the Oven Recipe

    • Prepare the oven: Preheat the oven to 160°C fan or 180°C conventional. Line a large baking tray with baking parchment and aluminium foil to make cleanup easier.
    • Prepare the ribs: Remove the thin membrane from the back of the ribs using a knife and paper towel. This helps the ribs become more tender while baking.
    • Season the ribs: In a small bowl, mix the smoked paprika, garlic powder, onion powder, salt, pepper, chilli powder, and brown sugar. Rub the olive oil over the ribs, then coat generously with the seasoning mixture.
    • Wrap for baking: Place the ribs meat-side up on the prepared tray. Cover tightly with foil so the steam stays inside during cooking.
    • Bake slowly: Bake the ribs for 2 hours until the meat feels tender when pierced with a knife. The ribs should begin pulling slightly away from the bones.
    • Prepare the sauce: While the ribs bake, combine the barbecue sauce, honey, Worcestershire sauce, and apple cider vinegar in a bowl. Stir until smooth.
    • Glaze the ribs: Remove the foil carefully and brush the ribs generously with the BBQ sauce mixture.
    • Finish baking: Return the ribs to the oven uncovered for 20 to 25 minutes. Brush with extra sauce halfway through cooking so the coating becomes sticky and caramelised.
    • Rest and serve: Remove the ribs from the oven and let them rest for 5 minutes before slicing between the bones. Serve hot with extra barbecue sauce.
    How to Make BBq Ribs in the Oven Recipe

    Best Tips for Perfect Oven-Baked Ribs

    How do I make ribs extra tender?

    Slow cooking at a lower temperature is the secret. Keeping the ribs tightly covered with foil traps steam and prevents the meat from drying out.

    Should I remove the membrane?

    Yes, removing the membrane from the back of the ribs helps improve texture and allows the seasoning to soak into the meat more evenly.

    Can I make the ribs spicy?

    Add cayenne pepper, hot sauce, or extra chilli powder to the seasoning mix for a spicier finish.

    Why are my ribs dry?

    Overcooking uncovered can dry the ribs out. Keep them wrapped for most of the cooking time and uncover only at the end for glazing.

    Can I use beef ribs instead?

    Yes, but beef ribs may require slightly longer cooking depending on thickness.

    Serving Suggestions

    • Creamy mashed potatoes
    • Coleslaw
    • Corn on the cob
    • Baked beans
    • Garlic bread
    • Potato wedges

    Storage Instructions

    Room Temperature

    Do not leave cooked ribs at room temperature for more than 2 hours.

    Refrigerator

    Store cooled ribs in an airtight container for up to 4 days. Reheat covered in the oven until hot.

    Freezing

    Wrap portions tightly in foil and freeze for up to 3 months. Defrost overnight in the refrigerator before reheating.

    Nutrition Information

    • Calories: 520 kcal
    • Carbohydrates: 18g
    • Protein: 34g
    • Fat: 34g
    • Saturated Fat: 11g
    • Sodium: 980mg

    Nutrition values are approximate and may vary depending on ingredients used.

    FAQs

    Can I cook BBQ ribs in the oven without foil?

    Yes, but wrapping the ribs in foil helps trap moisture and creates much more tender results.

    What temperature should ribs be cooked at in the oven?

    Low and slow cooking works best. Bake ribs at around 160°C fan or 180°C conventional for tender meat.

    Can I make BBQ ribs ahead of time?

    Yes, you can bake the ribs ahead and reheat them with extra sauce before serving.

    How do I know when ribs are done?

    The meat should be tender and start pulling away from the bones slightly when fully cooked.

    BBq Ribs in the Oven Recipe

    Recipe by Milli RoseCourse: DinnerCuisine: AmericanDifficulty: Easy
    Servings

    6

    servings
    Prep time

    15

    minutes
    Cooking time

    2

    hours 

    30

    minutes
    Total time

    165

    minutes
    Calories

    520

    kcal

    Tender oven-baked BBQ ribs coated in a smoky seasoning and sticky homemade barbecue glaze. Slow-cooked until perfectly juicy and caramelised.

    Ingredients

    • 2 racks pork baby back ribs

    • 2 tablespoons olive oil

    • 1 tablespoon smoked paprika

    • 2 teaspoons garlic powder

    • 2 teaspoons onion powder

    • 1 teaspoon black pepper

    • 1 teaspoon salt

    • 1 teaspoon chilli powder

    • 2 tablespoons brown sugar

    • 1 cup barbecue sauce

    • 2 tablespoons honey

    • 1 tablespoon Worcestershire sauce

    • 1 tablespoon apple cider vinegar

    Directions

    • Preheat oven to 180°C conventional or 160°C fan. Line a baking tray with parchment and foil.
    • Remove the membrane from the ribs and pat dry.
    • Mix spices and brown sugar together in a bowl.
    • Rub olive oil over the ribs and coat generously with the seasoning mix.
    • Wrap the ribs tightly in foil and place on the prepared tray.
    • Bake for 2 hours until tender.
    • Mix barbecue sauce, honey, Worcestershire sauce and vinegar together.
    • Brush ribs generously with sauce and bake uncovered for another 20 to 25 minutes.
    • Rest for 5 minutes before slicing and serving.

    Notes

    • Remove the membrane for the most tender ribs.
    • Keep the ribs covered during slow cooking to prevent drying out.
    • Brush with extra sauce during the final bake for a sticky glaze.
  • Chicken Quesadilla Recipe

    Chicken Quesadilla Recipe

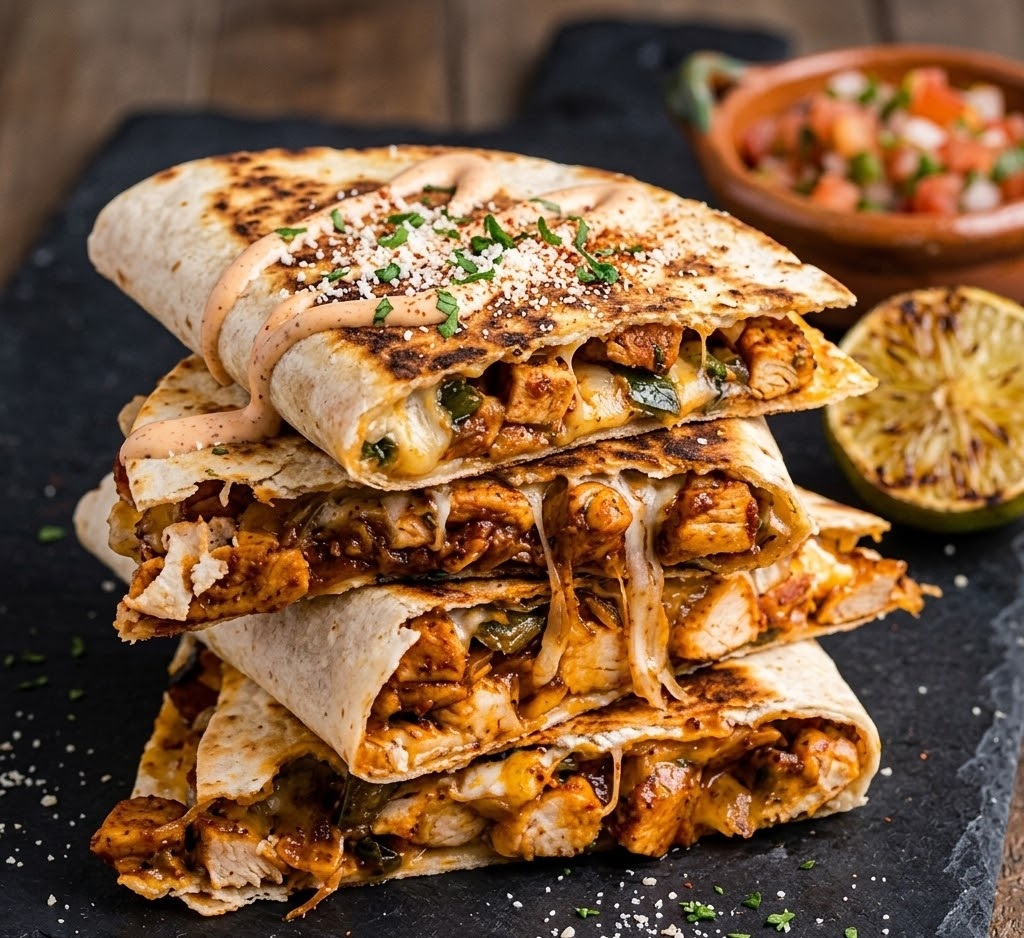
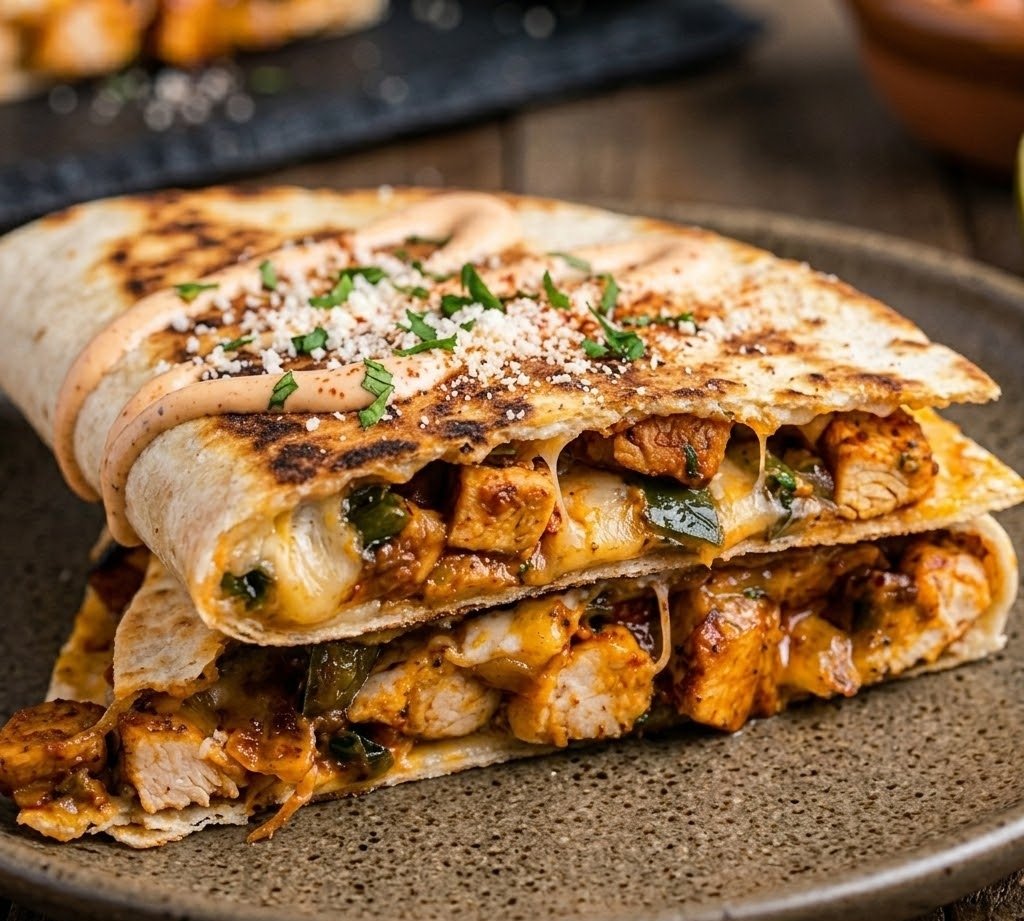
    If you’re craving something crispy, cheesy, and packed with bold Tex-Mex flavour, this chicken quesadilla recipe is exactly what you need. Golden toasted tortillas are filled with juicy seasoned chicken, melted cheese, and colourful vegetables for a quick meal that tastes restaurant-quality straight from your own kitchen. The outside turns perfectly crisp while the inside stays gooey, savoury, and satisfying. Best of all, this easy chicken quesadilla recipe comes together in under 35 minutes, making it ideal for busy weeknights, lunches, or casual family dinners

    What Is a Chicken Quesadilla?

    A chicken quesadilla is a classic Mexican-inspired dish made by filling tortillas with seasoned chicken, cheese, and other flavourful ingredients before cooking until crispy and golden. The tortillas become lightly toasted while the cheese melts into a rich, gooey filling that holds everything together beautifully.

    This recipe combines tender chicken, smoky spices, peppers, onions, and melted cheese for a perfectly balanced bite every time. It’s beginner-friendly, highly customizable, and perfect for serving as a quick dinner, game-day snack, or easy lunch.

    Chicken Quesadilla Recipe Ingredients

    For the Chicken Filling

    • 2 large chicken breasts, sliced into thin strips
    • 1 tablespoon olive oil
    • 1 teaspoon paprika
    • 1 teaspoon ground cumin
    • ½ teaspoon garlic powder
    • ½ teaspoon onion powder
    • ½ teaspoon chilli powder
    • ½ teaspoon salt
    • ¼ teaspoon black pepper
    • 1 small red bell pepper, thinly sliced
    • 1 small green bell pepper, thinly sliced
    • 1 small onion, thinly sliced

    For the Quesadillas

    • 4 large flour tortillas
    • 2 cups grated cheddar cheese
    • 1 cup grated mozzarella cheese
    • 2 tablespoons butter

    For Serving

    • Sour cream
    • Salsa
    • Guacamole
    • Fresh coriander
    • Lime wedges

    Preparation and Cooking Time

    • Prep Time: 15 minutes
    • Cook Time: 18 minutes
    • Total Time: 33 minutes
    • Servings: 4 quesadillas

    How to Make Chicken Quesadilla Recipe

    • Prepare the chicken: Place the sliced chicken into a bowl and add paprika, cumin, garlic powder, onion powder, chilli powder, salt, black pepper, and olive oil. Toss well until the chicken is evenly coated with seasoning.
    • Cook the filling: Heat a large frying pan over medium-high heat. Add the seasoned chicken and cook for 5 to 6 minutes until lightly golden and fully cooked. Add the sliced peppers and onion, then cook for another 4 to 5 minutes until softened but still slightly crisp.
    • Prepare the tortillas: Lay the flour tortillas on a clean surface. Sprinkle cheddar and mozzarella cheese over one half of each tortilla.
    • Add the filling: Spoon the cooked chicken mixture evenly over the cheese layer. Add a little extra cheese on top so the filling stays together perfectly while cooking.
    • Fold the quesadillas: Fold each tortilla in half to create a semi-circle shape. Press down gently to keep the filling evenly spread inside.
    • Cook until crispy: Melt a little butter in a clean frying pan over medium heat. Place the quesadilla into the pan and cook for 2 to 3 minutes per side until deeply golden and crisp with fully melted cheese inside.
    • Slice and serve: Transfer the cooked quesadillas to a chopping board and let them rest for 1 minute before slicing into wedges. Serve warm with sour cream, salsa, guacamole, and fresh lime wedges.
    How to Make Chicken Quesadilla Recipe

    Tips for the Best Chicken Quesadillas

    How do you keep quesadillas crispy?

    Cook them over medium heat instead of high heat. This allows the tortilla to crisp gradually while the cheese melts properly inside without burning.

    What cheese works best in quesadillas?

    A combination of cheddar and mozzarella creates the perfect balance of flavour and meltiness. Monterey Jack or Mexican cheese blends also work beautifully.

    Can I use leftover chicken?

    Absolutely. Rotisserie chicken or leftover grilled chicken makes this recipe even quicker. Simply warm the chicken with the spices before assembling.

    Why are my quesadillas falling apart?

    Overfilling is usually the problem. Use a moderate amount of filling and always include enough cheese to help hold everything together.

    Can I make them spicy?

    Yes. Add sliced jalapeños, extra chilli powder, hot sauce, or pepper jack cheese for more heat.

    Serving Suggestions

    • Serve with fresh salsa and sour cream
    • Pair with Mexican rice or seasoned fries
    • Add a crisp green salad on the side
    • Enjoy with guacamole and tortilla chips
    • Serve alongside sweetcorn salad or black beans

    Storage Instructions

    Room Temperature

    Chicken quesadillas can sit at room temperature for up to 2 hours before they should be refrigerated.

    Refrigerator

    Store cooled quesadillas in an airtight container in the refrigerator for up to 3 days. Reheat in a frying pan or air fryer for the crispiest texture.

    Freezing

    Wrap individual quesadilla slices tightly in cling film and freeze for up to 2 months. Reheat directly from frozen in a frying pan or oven until heated through.

    Nutrition Information

    • Calories: 520 kcal
    • Carbohydrates: 32g
    • Protein: 36g
    • Fat: 28g
    • Saturated Fat: 12g
    • Sodium: 780mg

    Nutrition values are estimates and may vary depending on ingredients used.

    FAQs

    Can I make chicken quesadillas ahead of time?

    Yes, you can prepare the filling in advance and refrigerate it for up to 2 days. Assemble and cook the quesadillas fresh for the best texture.

    Can I bake quesadillas instead of frying them?

    Yes, place assembled quesadillas on a baking tray and bake at 200°C for about 10 minutes, flipping halfway through until crisp and golden.

    What tortillas work best for quesadillas?

    Large flour tortillas are best because they become crisp while staying flexible enough to fold without cracking.

    Can I use different fillings?

    Absolutely. You can add mushrooms, sweetcorn, black beans, jalapeños, or different cheeses depending on your preference.

    Chicken Quesadilla Recipe

    Recipe by Milli RoseCourse: Main CourseCuisine: MexicanDifficulty: Easy
    Servings

    4

    servings
    Prep time

    30

    minutes
    Cooking time

    40

    minutes
    Calories

    300

    kcal
    Total time

    1

    hour 

    10

    minutes

    Crispy golden tortillas filled with juicy seasoned chicken, peppers, onions, and melted cheese for an easy and satisfying family meal.

    Ingredients

    • 2 large chicken breasts, sliced into strips

    • 1 tablespoon olive oil

    • 1 teaspoon paprika

    • 1 teaspoon ground cumin

    • ½ teaspoon garlic powder

    • ½ teaspoon onion powder

    • ½ teaspoon chilli powder

    • 1 small red bell pepper, sliced

    • 1 small green bell pepper, sliced

    • 1 small onion, sliced

    • 4 large flour tortillas

    • 2 cups grated cheddar cheese

    • 1 cup grated mozzarella cheese

    • 2 tablespoons butter

    • Sour cream, for serving

    • Salsa and guacamole, for serving

    Directions

    • Slice the chicken and coat with olive oil, paprika, cumin, garlic powder, onion powder, chilli powder, salt, and black pepper.
    • Cook the chicken in a hot frying pan until golden and fully cooked through.
    • Add sliced peppers and onions to the pan and cook until softened.
    • Lay tortillas flat and sprinkle cheese over one half of each tortilla.
    • Add the chicken filling and top with more cheese.
    • Fold the tortillas over to create semi-circle quesadillas.
    • Cook each quesadilla in a buttered frying pan for 2–3 minutes per side until crisp and golden.
    • Slice into wedges and serve warm with sour cream, salsa, and guacamole.

    Notes

    • Do not overfill the tortillas or they may split while cooking.
    • Cook over medium heat for evenly melted cheese and crisp tortillas.
    • Quesadillas can be reheated in an air fryer for extra crispiness.
  • Mongolian Beef Recipe

    Mongolian Beef Recipe

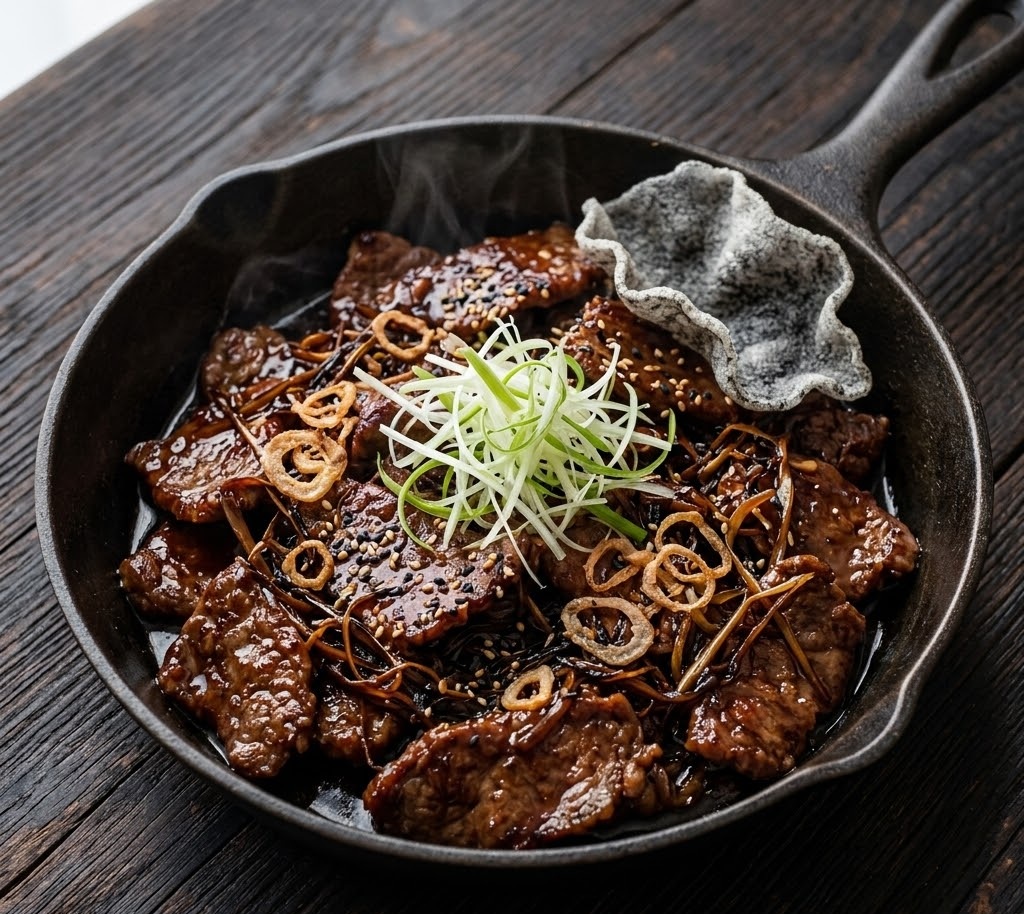
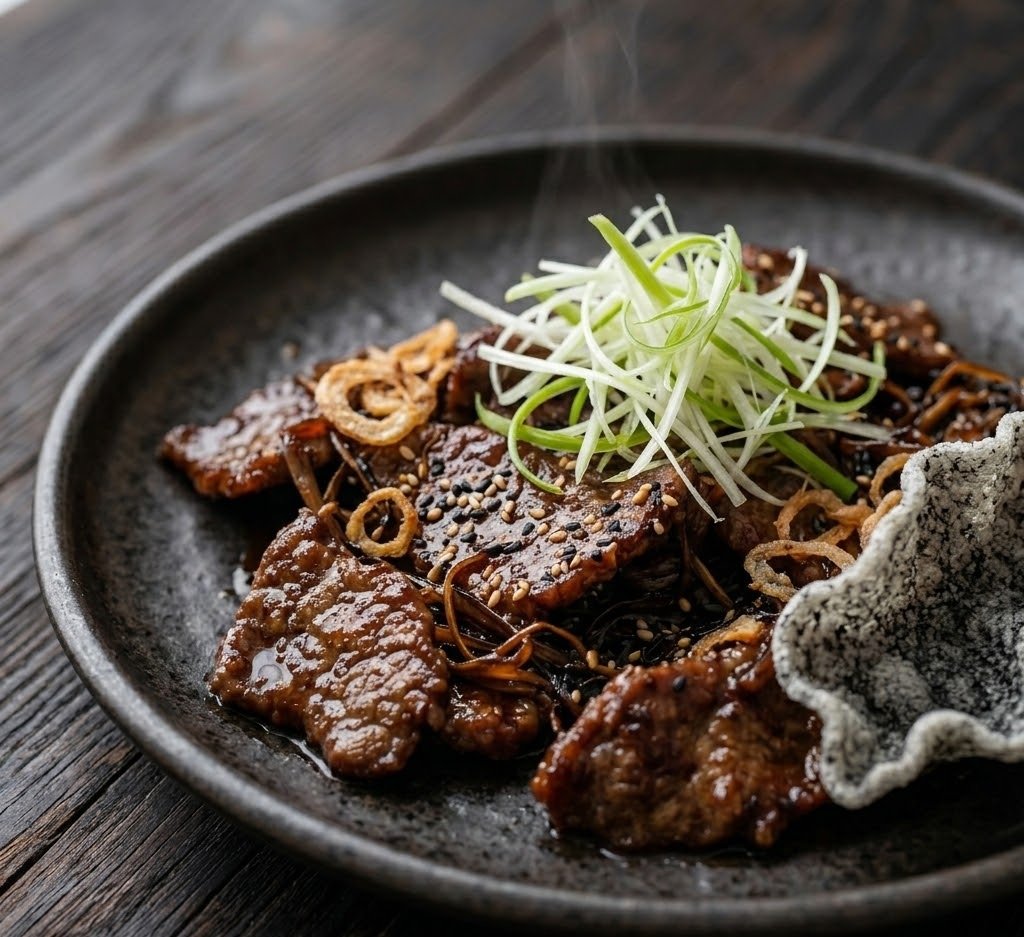
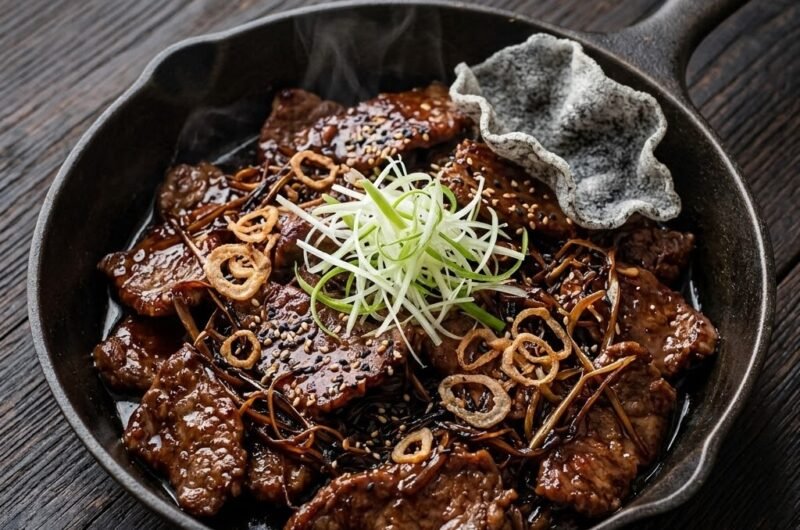
    If you love rich, savory takeout-style dinners, this Mongolian Beef Recipe is one you’ll want to make again and again. Tender slices of beef are coated in a glossy garlic and ginger sauce with the perfect balance of sweetness and soy flavor. The texture is wonderfully sticky and silky, while the beef stays juicy and flavorful in every bite. This recipe is beginner-friendly, comes together quickly, and is perfect for busy weeknights with a total time of around 30 minutes.

    Ingredients

    For the Beef

    • 500g flank steak or sirloin steak, thinly sliced against the grain
    • 3 tablespoons cornflour
    • 2 tablespoons vegetable oil
    • 1 tablespoon sesame oil

    For the Mongolian Sauce

    • 120ml low-sodium soy sauce
    • 80ml water
    • 100g soft brown sugar
    • 4 garlic cloves, finely minced
    • 1 tablespoon fresh ginger, grated
    • 1 tablespoon hoisin sauce
    • 1 teaspoon chilli flakes (optional)

    For Garnish and Serving

    • 4 spring onions, sliced
    • 1 teaspoon sesame seeds
    • Steamed jasmine rice
    • Steamed broccoli or pak choi

    How to Make Mongolian Beef Recipe

    • Prepare the beef: Slice the beef thinly against the grain and place it into a bowl. Sprinkle over the cornflour and toss until every piece is lightly coated. Leave for 10 minutes while preparing the sauce ingredients.
    • Make the sauce: In a small bowl, whisk together the soy sauce, water, brown sugar, garlic, ginger, hoisin sauce, and chilli flakes until smooth and fully combined.
    • Heat the pan: Place a large frying pan or wok over medium-high heat. Add the vegetable oil and sesame oil and allow them to heat until shimmering.
    • Cook the beef: Add the coated beef in batches so the pan does not overcrowd. Fry for 2 to 3 minutes until browned and crisp around the edges. Remove the beef and set aside on a plate.
    • Simmer the sauce: Pour the prepared sauce into the same pan and cook for 2 to 3 minutes, stirring often, until the sugar dissolves and the sauce thickens slightly.
    • Combine everything: Return the cooked beef to the pan and toss well so every piece is coated in the glossy sauce. Cook for another 1 to 2 minutes until hot and sticky.
    • Finish and serve: Stir in most of the sliced spring onions and remove from the heat. Spoon the Mongolian beef over steamed rice and garnish with the remaining spring onions and sesame seeds before serving.
    How to Make Mongolian Beef Recipe

    Tips for the Best Mongolian Beef

    How do I keep the beef tender?

    Always slice the beef thinly against the grain. This shortens the muscle fibres and keeps the meat tender after cooking.

    Why is my sauce too thin?

    Allow the sauce to simmer for a few minutes before adding the beef back into the pan. The sugar and cornflour coating will help it thicken naturally.

    Can I make this recipe less sweet?

    Yes, reduce the brown sugar slightly if you prefer a more savoury sauce. Start by removing 1 to 2 tablespoons.

    What vegetables work well with Mongolian beef?

    Broccoli, peppers, pak choi, sugar snap peas, and onions all pair beautifully with the rich sauce.

    Can I use chicken instead of beef?

    Absolutely. Thinly sliced chicken breast or thigh meat works very well with the same sauce and cooking method.

    Serving Suggestions

    • Serve with steamed jasmine rice or egg fried rice
    • Pair with stir-fried vegetables
    • Add crispy noodles for extra texture
    • Serve with spring rolls or dumplings
    • Top with extra chilli flakes for added heat

    Storage

    Room Temperature

    Do not leave Mongolian beef at room temperature for more than 2 hours after cooking.

    Refrigerator

    Store leftovers in an airtight container in the refrigerator for up to 3 days. Reheat gently in a frying pan or microwave until piping hot.

    Freezing

    Freeze cooled Mongolian beef in a freezer-safe container for up to 2 months. Defrost overnight in the refrigerator before reheating.

    Nutrition

    • Calories: 420 kcal
    • Carbohydrates: 24g
    • Protein: 31g
    • Fat: 22g
    • Saturated Fat: 5g
    • Sodium: 980mg

    Nutrition values are approximate and may vary depending on ingredients used.

    FAQs

    What cut of beef is best for Mongolian beef?

    Flank steak is the most popular choice because it stays tender and cooks quickly. Sirloin also works very well.

    Can I make Mongolian beef ahead of time?

    Yes, you can prepare the sauce and slice the beef a day in advance. Cook everything fresh for the best texture.

    Is Mongolian beef spicy?

    Traditional Mongolian beef is more sweet and savoury than spicy. You can add chilli flakes or fresh chillies if you like extra heat.

    Can I make this recipe gluten-free?

    Yes, use gluten-free soy sauce and gluten-free hoisin sauce to make the recipe suitable for a gluten-free diet.

    Mongolian Beef Recipe

    Recipe by Milli RoseCourse: DinnerCuisine: AsianDifficulty: Easy
    Servings

    4

    servings
    Prep time

    30

    minutes
    Cooking time

    40

    minutes
    Calories

    300

    kcal
    Total time

    1

    hour 

    10

    minutes

    Tender beef cooked in a rich sweet and savoury garlic soy sauce with spring onions. A quick and easy takeout-style dinner perfect for busy weeknights.

    Ingredients

    • 500g flank steak or sirloin steak, thinly sliced

    • 3 tablespoons cornflour

    • 2 tablespoons vegetable oil

    • 1 tablespoon sesame oil

    • 120ml low-sodium soy sauce

    • 80ml water

    • 100g soft brown sugar

    • 4 garlic cloves, minced

    • 1 tablespoon fresh ginger, grated

    • 1 tablespoon hoisin sauce

    • 1 teaspoon chilli flakes

    • 4 spring onions, sliced

    • 1 teaspoon sesame seeds

    • Steamed jasmine rice, for serving

    Directions

    • Slice the beef thinly against the grain and coat with cornflour.
    • Whisk together soy sauce, water, brown sugar, garlic, ginger, hoisin sauce and chilli flakes.
    • Heat vegetable oil and sesame oil in a wok or frying pan over medium-high heat.
    • Cook the beef in batches until browned and crisp around the edges.
    • Remove beef and pour the sauce into the pan. Simmer until slightly thickened.
    • Return the beef to the pan and toss well to coat in the sauce.
    • Stir in spring onions and cook briefly until everything is glossy and hot.
    • Serve over steamed rice and garnish with sesame seeds.

    Notes

    • Slice beef thinly against the grain for tenderness.
    • Cook the beef in batches so it crisps properly.
    • Leftovers can be refrigerated for up to 3 days.
  • Tatertot Casserole Beef Recipe

    Tatertot Casserole Beef Recipe

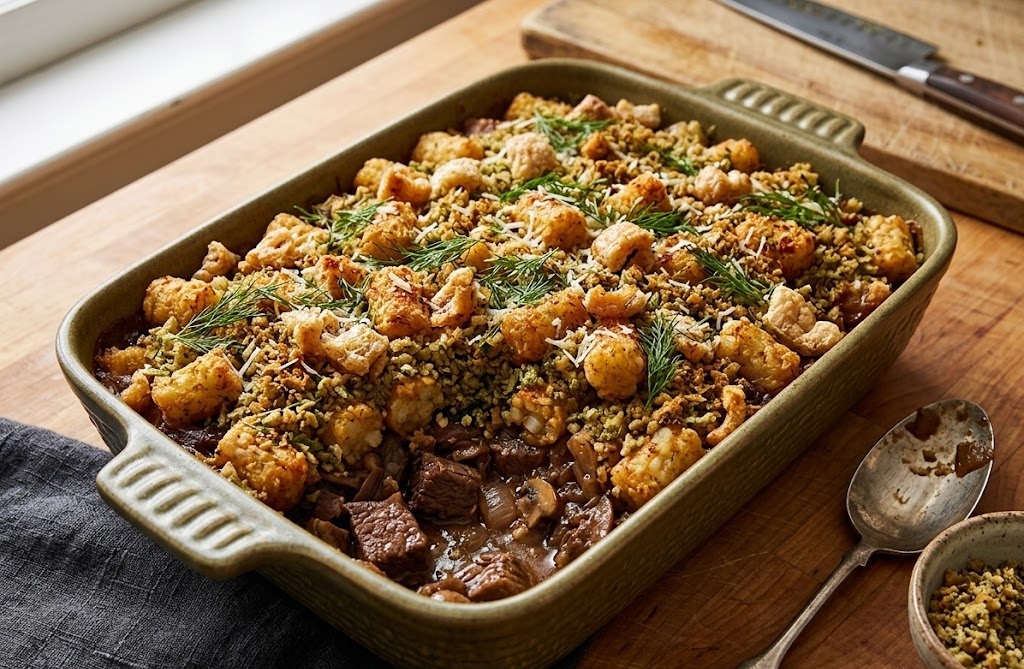
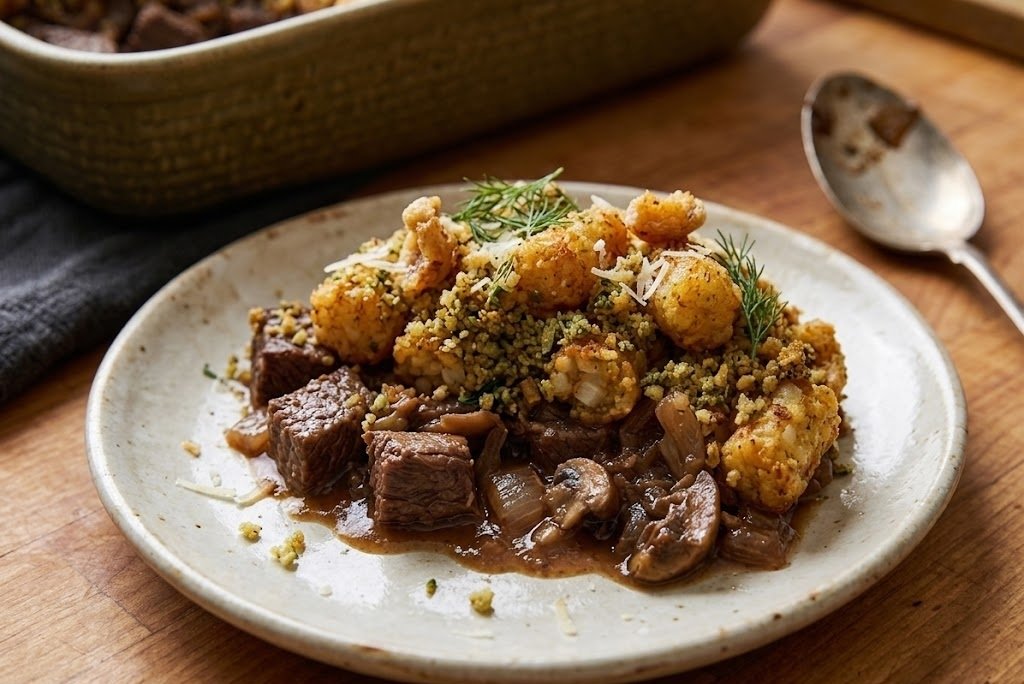
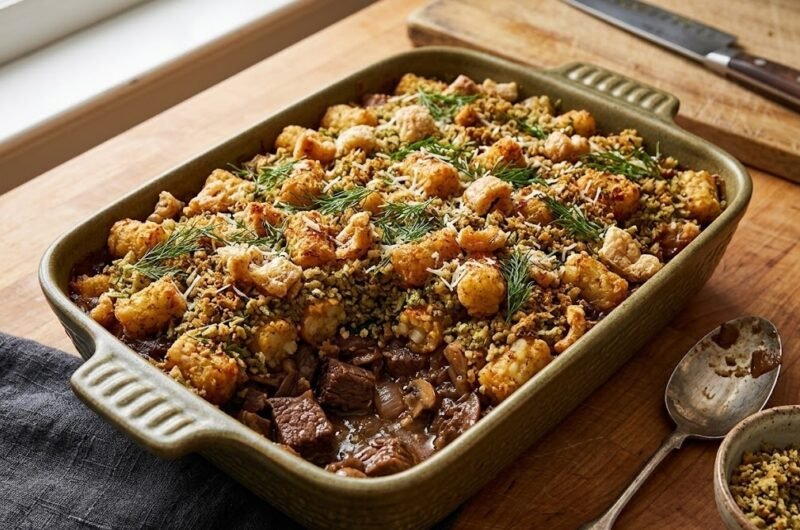
    If you are looking for a hearty, family-friendly dinner that is simple to prepare and packed with comforting flavor, this Tatertot Casserole Beef Recipe is the perfect choice. Layers of seasoned ground beef, creamy sauce, melted cheese, and crispy golden tater tots create a rich and satisfying casserole that everyone loves. The texture is wonderfully creamy underneath with a crunchy potato topping that bakes beautifully in the oven.

    This easy casserole recipe is ideal for busy weeknights because it requires minimal prep and uses everyday ingredients. Even beginner home cooks can make this comforting dish successfully. From start to finish, the entire recipe takes around 50 minutes, making it perfect for quick family dinners or casual gatherings.

    Ingredients

    For the Beef Filling

    • 500g ground beef
    • 1 small onion, finely chopped
    • 2 cloves garlic, minced
    • 1 tablespoon olive oil
    • 1 teaspoon salt
    • 1/2 teaspoon black pepper
    • 1 teaspoon paprika
    • 1 can condensed cream of mushroom soup
    • 120ml sour cream

    For the Topping

    • 750g frozen tater tots
    • 2 cups shredded cheddar cheese
    • 2 tablespoons chopped parsley

    How to Make Tatertot Casserole Beef Recipe

    • Prepare the oven: Preheat the oven to 200°C or 180°C fan. Lightly grease a large casserole dish and place a shelf in the middle of the oven for even baking.
    • Cook the onion: Heat the olive oil in a large frying pan over medium heat. Add the chopped onion and cook for 3 to 4 minutes until softened and lightly golden.
    • Brown the beef: Add the minced garlic and ground beef to the pan. Cook for 6 to 8 minutes, breaking the beef apart with a spoon until fully browned.
    • Season the filling: Stir in the salt, black pepper, and paprika. Add the cream of mushroom soup and sour cream, mixing until the filling becomes creamy and evenly combined.
    • Assemble the casserole: Spoon the beef mixture into the prepared baking dish and spread evenly. Sprinkle over half of the shredded cheddar cheese.
    • Add the tater tots: Arrange the frozen tater tots in a neat single layer over the top of the casserole so they crisp evenly while baking.
    • Bake the casserole: Place the dish into the oven and bake for 30 minutes until the tater tots are crispy and golden brown.
    • Add extra cheese: Remove the casserole from the oven and sprinkle the remaining cheddar cheese over the top. Return to the oven for 5 more minutes until melted and bubbling.
    • Cool and serve: Allow the casserole to rest for 5 minutes before serving. Sprinkle with chopped parsley and enjoy warm.
    How to Make Tatertot Casserole Beef Recipe

    Tips for the Best Tatertot Casserole Beef Recipe

    How do I keep the tater tots crispy?

    Arrange the tater tots in a single layer and avoid overcrowding. Baking uncovered also helps them become perfectly golden and crisp.

    Can I make the casserole ahead of time?

    Yes, you can assemble the casserole up to one day in advance and keep it covered in the refrigerator before baking.

    What cheese works best for this casserole?

    Sharp cheddar gives the richest flavor, but you can also use Monterey Jack, mozzarella, or a Mexican cheese blend.

    How do I make the casserole more flavorful?

    Add Worcestershire sauce, diced green peppers, or cooked bacon for extra depth and savory flavor.

    Serving Suggestions

    • Serve with a fresh green salad
    • Pair with steamed vegetables
    • Add garlic bread on the side
    • Top with sliced green onions or sour cream

    Storage

    Room Temperature

    Do not leave the casserole at room temperature for longer than 2 hours after baking.

    Refrigerator

    Store leftovers in an airtight container in the refrigerator for up to 4 days. Reheat in the oven for the best texture.

    Freezing

    The casserole freezes well for up to 3 months. Wrap tightly and thaw overnight in the refrigerator before reheating.

    Nutrition

    • Calories: 480 kcal
    • Carbohydrates: 28g
    • Protein: 24g
    • Fat: 31g
    • Saturated Fat: 12g
    • Sodium: 890mg

    Nutrition values are estimates and may vary depending on ingredients used.

    FAQs

    Can I use a different soup instead of cream of mushroom?

    Yes, cream of chicken or cream of celery soup both work very well in this casserole recipe.

    Can I prepare this casserole ahead of time?

    Yes, you can assemble the casserole up to 24 hours ahead and refrigerate it before baking.

    Can I freeze Tatertot Casserole Beef Recipe?

    Yes, the casserole freezes well for up to 3 months when wrapped tightly and stored properly.

    What vegetables can I add to the casserole?

    Peas, corn, mushrooms, and green beans all work wonderfully in this comforting casserole.

    Tatertot Casserole Beef Recipe

    Recipe by Milli RoseCourse: DinnerCuisine: AmericanDifficulty: Easy
    Servings

    6

    servings
    Prep time

    15

    minutes
    Cooking time

    35

    minutes
    Total time

    50

    minutes
    Calories

    480

    kcal

    50

    minutes

    Creamy, cheesy and comforting Tatertot Casserole Beef Recipe made with seasoned ground beef, crispy tater tots and melted cheddar cheese.

    Ingredients

    • 500g ground beef

    • 1 small onion, finely chopped

    • 2 cloves garlic, minced

    • 1 tsp salt

    • 1/2 tsp black pepper

    • 1 tsp paprika

    • 1 can condensed cream of mushroom soup

    • 120ml sour cream

    • 2 cups shredded cheddar cheese

    • 750g frozen tater tots

    • 2 tbsp chopped parsley

    • 1 tbsp olive oil

    Directions

    • Preheat the oven to 200°C (180°C fan). Lightly grease a large baking dish.
    • Heat olive oil in a large frying pan and cook the chopped onion for 3 to 4 minutes until softened.
    • Add garlic and ground beef. Cook until the beef is browned and fully cooked.
    • Season with salt, pepper and paprika, then stir in the cream of mushroom soup and sour cream.
    • Spread the beef mixture evenly into the prepared baking dish.
    • Sprinkle over 1 cup of cheddar cheese.
    • Arrange frozen tater tots evenly across the top in a single layer.
    • Bake for 30 minutes until the tater tots are crisp and golden.
    • Remove from the oven, sprinkle with remaining cheese and bake for another 5 minutes until melted.
    • Rest for 5 minutes before serving. Garnish with chopped parsley.

    Notes

    • Use freshly grated cheese for the best melting texture.
    • Arrange the tater tots in a single layer for even crispiness.
    • The casserole can be assembled ahead and refrigerated before baking.
  • Cheesy Garlic Chicken Wrap Recipe

    Cheesy Garlic Chicken Wrap Recipe

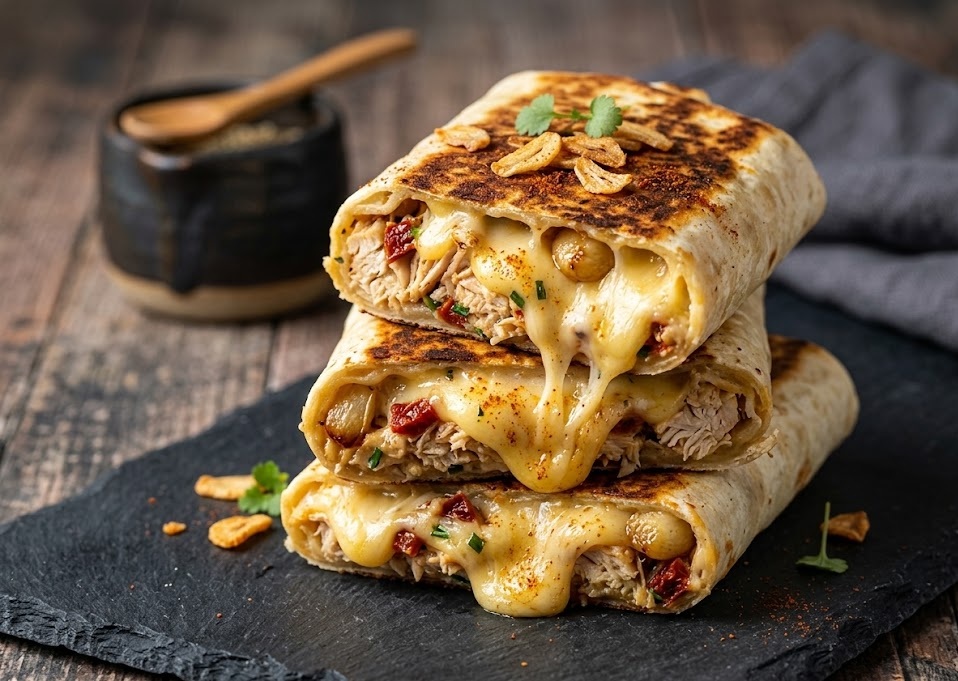
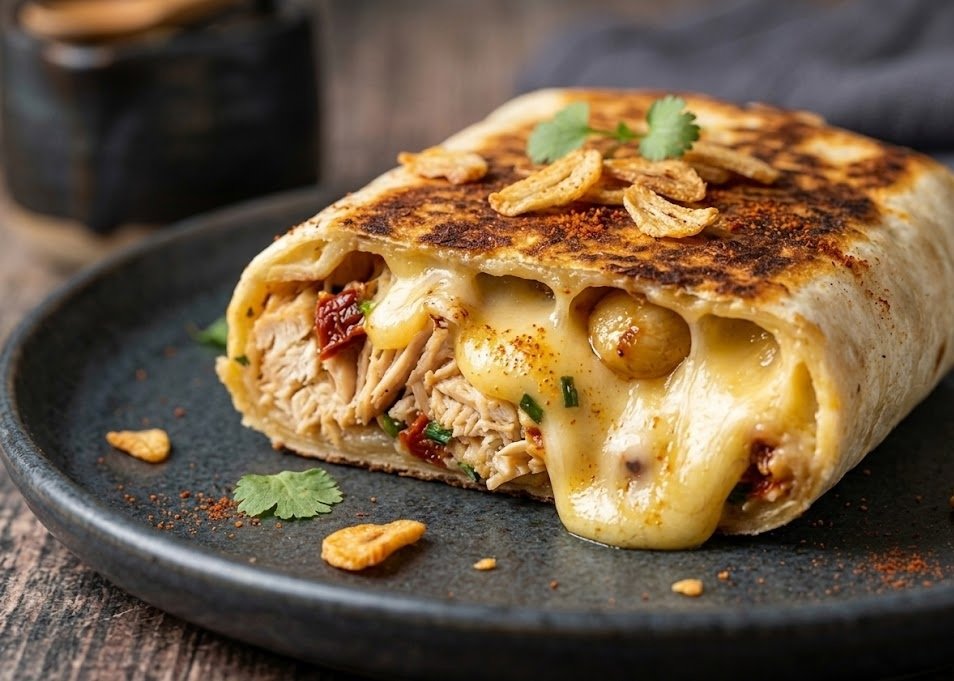
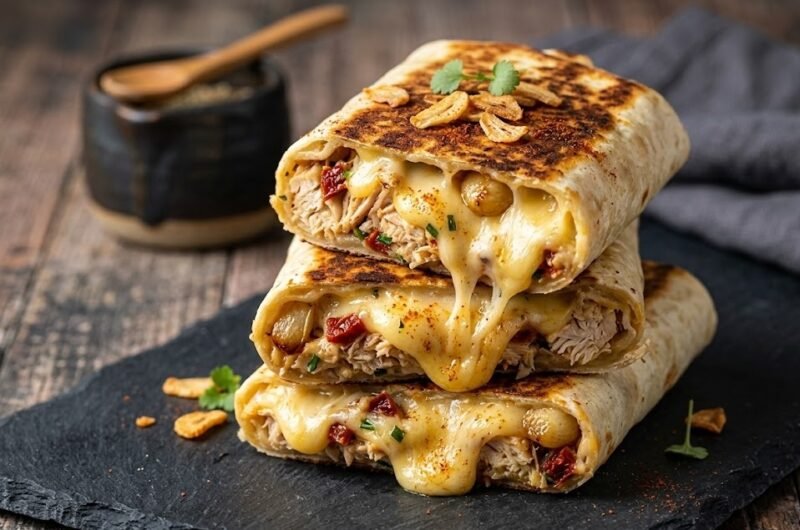
    If you love crispy toasted wraps packed with juicy chicken, melted cheese, and buttery garlic flavour, this cheesy garlic chicken wrap recipe is about to become a favourite in your kitchen. These wraps are golden on the outside, rich and creamy in the middle, and filled with tender seasoned chicken that makes every bite satisfying and comforting. They are simple enough for beginners, quick enough for busy weeknights, and delicious enough to serve for lunch, dinner, or casual gatherings. Best of all, this recipe comes together in around 30 minutes with easy ingredients you may already have at home.

    Ingredients

    For the Garlic Chicken

    • 2 large chicken breasts, sliced thinly
    • 1 tablespoon olive oil
    • 3 garlic cloves, minced
    • 1 teaspoon paprika
    • 1 teaspoon Italian seasoning
    • ½ teaspoon salt
    • ¼ teaspoon black pepper

    For the Creamy Filling

    • 3 tablespoons mayonnaise
    • 2 tablespoons cream cheese
    • 1 tablespoon chopped fresh parsley

    For the Wraps

    • 4 large flour tortillas
    • 1 cup shredded mozzarella cheese
    • 1 cup shredded cheddar cheese
    • 1 tablespoon butter
    • Extra garlic butter for brushing

    How to Make Cheesy Garlic Chicken Wrap Recipe

    • Prepare the chicken: Heat olive oil in a large frying pan over medium heat. Add the sliced chicken, minced garlic, paprika, Italian seasoning, salt, and black pepper. Cook for 8 to 10 minutes until the chicken is golden and fully cooked through.
    • Make the creamy filling: In a small bowl, mix together the mayonnaise, cream cheese, and chopped parsley until smooth and creamy.
    • Prepare the wraps: Lay the tortillas flat on a clean surface. Spread a spoonful of the creamy mixture over each tortilla.
    • Add the filling: Divide the cooked garlic chicken evenly between the wraps. Sprinkle generously with mozzarella and cheddar cheese.
    • Fold the wraps: Fold the sides inward, then roll each tortilla tightly into a wrap so the filling stays secure during cooking.
    • Toast the wraps: Melt butter in a clean frying pan over medium heat. Place the wraps seam-side down and cook for 2 to 3 minutes per side until golden brown and crisp.
    • Finish and serve: Brush the hot wraps lightly with garlic butter for extra flavour. Slice in half and serve immediately while the cheese is melted and stretchy.
    How to Make Cheesy Garlic Chicken Wrap Recipe

    Tips for the Best Cheesy Garlic Chicken Wraps

    How do I keep the wraps crispy?

    Cook the wraps over medium heat instead of high heat. This allows the tortillas to become golden and crisp without burning before the cheese melts.

    Can I use leftover chicken?

    Yes, leftover roast chicken or rotisserie chicken works very well in this recipe. Simply warm it with the garlic and seasoning before assembling the wraps.

    What cheese melts best in wraps?

    Mozzarella gives the best stretchy texture, while cheddar adds stronger flavour. Using both creates the perfect balance of creaminess and richness.

    How do I stop the wraps from opening while cooking?

    Place the wraps seam-side down first in the pan. This helps seal the tortilla as it crisps.

    Can I make these wraps spicy?

    Add chilli flakes, diced jalapeños, or a drizzle of hot sauce to the filling for extra heat.

    Serving Suggestions

    • Serve with crispy fries or potato wedges
    • Pair with a fresh green salad
    • Add garlic dip or ranch sauce on the side
    • Enjoy with tomato soup for a comforting meal
    • Serve alongside coleslaw for extra crunch

    Storage

    Room Temperature

    These wraps can sit at room temperature for up to 1 hour before serving.

    Refrigerator

    Store leftover wraps in an airtight container in the refrigerator for up to 3 days. Reheat in a frying pan or air fryer for the crispiest texture.

    Freezing

    Wrap each cooled wrap tightly in foil or freezer wrap and freeze for up to 2 months. Thaw overnight in the refrigerator before reheating.

    Nutrition

    • Calories: 520 kcal
    • Carbohydrates: 31g
    • Protein: 38g
    • Fat: 28g
    • Saturated Fat: 12g
    • Sodium: 890mg

    Nutrition values are estimates and may vary depending on ingredients used.

    FAQs

    Can I make cheesy garlic chicken wraps ahead of time?

    Yes, you can assemble the wraps several hours ahead and keep them refrigerated. Toast them just before serving for the best texture.

    What tortillas work best for this recipe?

    Large flour tortillas work best because they fold easily and crisp nicely during cooking.

    Can I cook these wraps in an air fryer?

    Yes, air fry the wraps at 190°C for 6 to 8 minutes, turning halfway through until golden and crisp.

    Can I add vegetables to the wraps?

    Absolutely. Bell peppers, onions, spinach, or mushrooms all work very well in these cheesy garlic chicken wraps.

    Cheesy Garlic Chicken Wrap Recipe

    Recipe by Milli RoseCourse: LunchCuisine: AmericanDifficulty: Easy
    Servings

    4

    wraps
    Prep time

    10

    minutes
    Cooking time

    20

    minutes
    Total time

    30

    minutes
    Calories

    520

    kcal

    30

    minutes

    Golden toasted wraps filled with juicy garlic chicken, melted cheese, and creamy sauce. A quick and easy homemade wrap recipe perfect for lunch or dinner.

    Ingredients

    • 2 large chicken breasts, sliced thinly

    • 1 tablespoon olive oil

    • 3 garlic cloves, minced

    • 1 teaspoon paprika

    • 1 teaspoon Italian seasoning

    • ½ teaspoon salt

    • ¼ teaspoon black pepper

    • 1 cup shredded mozzarella cheese

    • 1 cup shredded cheddar cheese

    • 4 large flour tortillas

    • 3 tablespoons mayonnaise

    • 2 tablespoons cream cheese

    • 1 tablespoon chopped parsley

    • 1 tablespoon butter

    • Extra garlic butter for brushing

    Directions

    • Heat olive oil in a frying pan over medium heat.
    • Add chicken, garlic, paprika, Italian seasoning, salt, and black pepper.
    • Cook for 8 to 10 minutes until the chicken is fully cooked and lightly golden.
    • Mix mayonnaise and cream cheese together in a small bowl until smooth.
    • Lay tortillas flat and spread with the creamy garlic mixture.
    • Add cooked chicken, mozzarella, cheddar, and parsley.
    • Fold the tortillas tightly into wraps.
    • Heat butter in a clean pan and toast wraps for 2 to 3 minutes per side until golden and crisp.
    • Brush with garlic butter and serve hot.

    Notes

    • Do not overfill the wraps or they may split while cooking.
    • Freshly grated cheese melts more smoothly than pre-shredded cheese.
    • Wraps can be prepared ahead and toasted just before serving.
  • Spicy Chicken Sandwich

    Spicy Chicken Sandwich

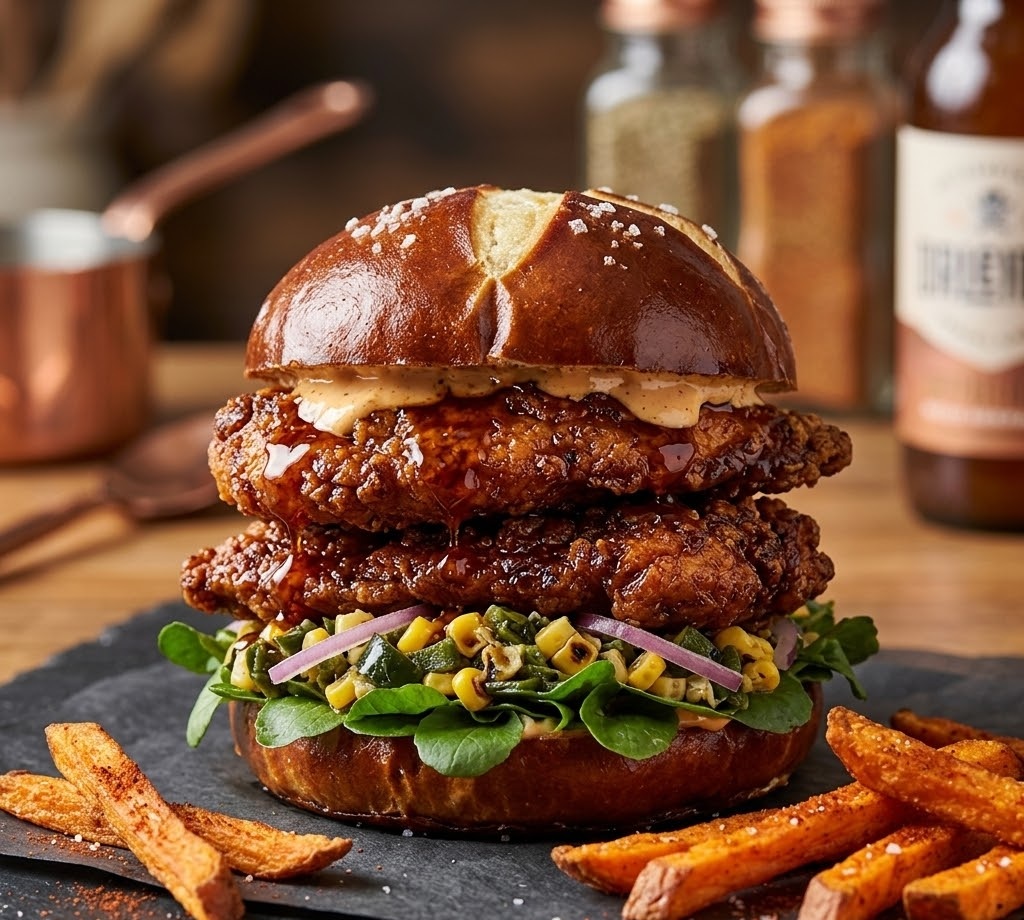
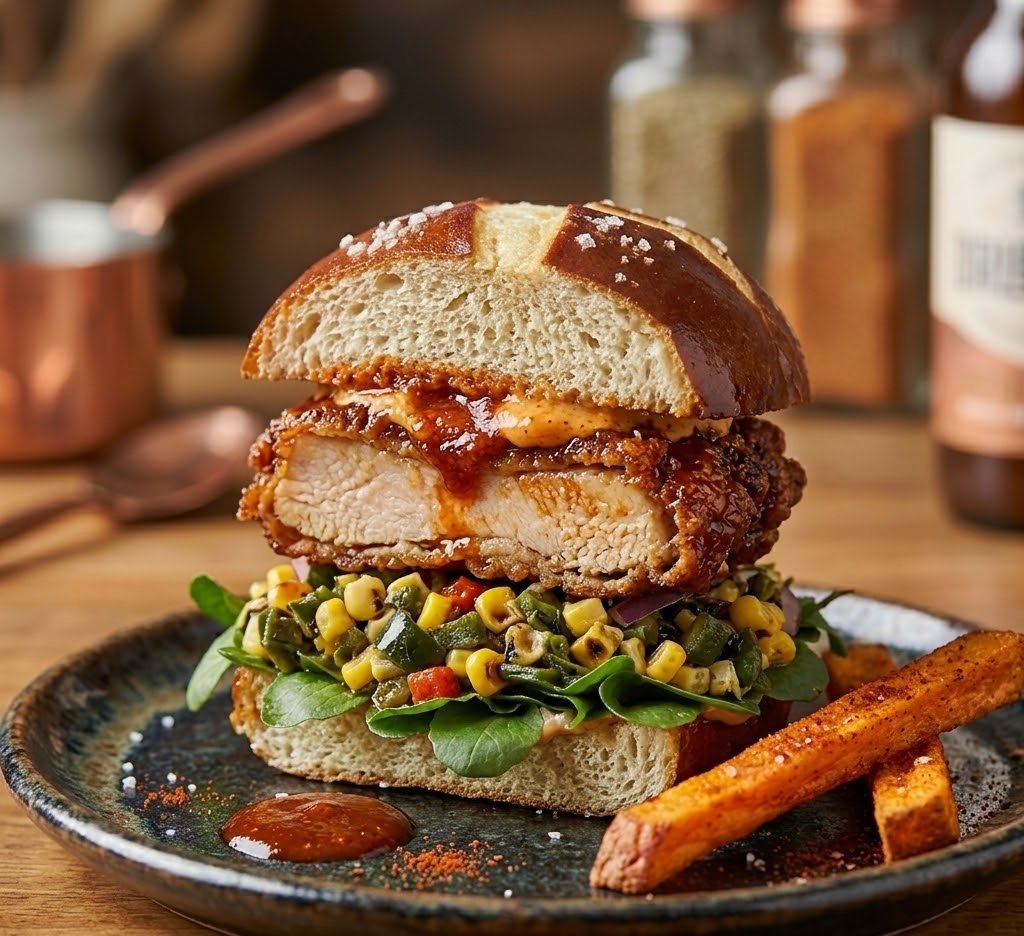
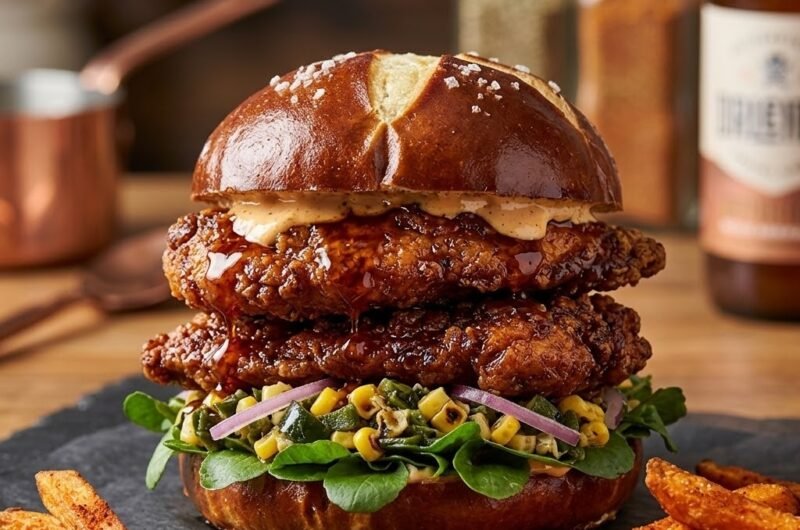
    If you love crispy chicken with bold heat and juicy flavor, this Spi’cy Chicken Sandwich Recipe is one you’ll want to make again and again. The chicken is tender on the inside, golden and crunchy on the outside, and layered with creamy sauce and fresh toppings inside a soft toasted bun. It delivers the perfect balance of spice, crunch, and richness in every bite. This recipe is beginner-friendly, easy to prepare at home, and ready in about 45 minutes from start to finish.

    Table of Contents

    • What Is a Spi’cy Chicken Sandwich?
    • Ingredients
    • How to Make Spi’cy Chicken Sandwich
    • Tips for the Best Chicken Sandwich
    • Serving Suggestions
    • Storage
    • Nutrition
    • FAQs

    What Is a Spicy Chicken Sandwich?

    A Spi’cy Chicken Sandwich is a crispy fried chicken sandwich packed with bold seasoning and layered with creamy sauce, crunchy lettuce, and pickles inside a soft toasted brioche bun. The chicken is marinated in seasoned buttermilk for tenderness, then coated in a crispy flour mixture that fries up beautifully golden and crunchy.

    The flavor is smoky, savory, slightly tangy, and perfectly spicy without being overwhelming. Every bite combines juicy chicken, crisp coating, creamy sauce, and soft bread for a satisfying homemade sandwich that rivals any restaurant version.

    Ingredients

    For the Chicken Marinade

    • 2 large chicken breasts, halved into 4 fillets
    • 1 cup buttermilk
    • 1 teaspoon salt
    • 1 teaspoon black pepper
    • 1 teaspoon paprika
    • 1 teaspoon garlic powder
    • 1 teaspoon cayenne pepper
    • 1 teaspoon hot sauce

    For the Crispy Coating

    • 2 cups plain flour
    • 1 tablespoon cornflour
    • 1 teaspoon paprika
    • 1 teaspoon garlic powder
    • 1 teaspoon onion powder
    • 1 teaspoon salt
    • 1 teaspoon black pepper
    • 1 teaspoon cayenne pepper

    For Frying

    • Vegetable oil, for deep frying

    For the Spicy Sauce

    • 1/2 cup mayonnaise
    • 1 tablespoon hot sauce
    • 1 teaspoon honey
    • 1/2 teaspoon smoked paprika
    • 1/2 teaspoon garlic powder

    For Assembling

    • 4 brioche burger buns
    • Butter, for toasting buns
    • 4 lettuce leaves
    • 8 pickle slices
    • 4 tomato slices

    Preparation and Cooking Time

    • Prep Time: 20 minutes
    • Marinating Time: 15 minutes
    • Cook Time: 10 minutes
    • Total Time: 45 minutes
    • Servings: 4 sandwiches

    How to Make Spicy Chicken Sandwich

    • Prepare the chicken: Slice each chicken breast horizontally to create thinner fillets. Place them into a large bowl with buttermilk, salt, black pepper, paprika, garlic powder, cayenne pepper, and hot sauce. Mix well until coated evenly. Cover and marinate for at least 15 minutes.
    • Prepare the coating: In a separate bowl, combine the plain flour, cornflour, paprika, garlic powder, onion powder, salt, black pepper, and cayenne pepper. Stir until evenly mixed.
    • Heat the oil: Fill a deep frying pan or heavy pot with vegetable oil and heat to 175°C. The oil should be hot enough for the chicken to sizzle immediately when added.
    • Coat the chicken: Remove each chicken fillet from the marinade and dredge thoroughly in the flour mixture. Press the coating firmly onto the chicken for an extra crispy texture.
    • Fry the chicken: Carefully place the coated chicken into the hot oil. Fry for 4 to 5 minutes per side until deeply golden, crispy, and fully cooked through. The internal temperature should reach 75°C.
    • Drain and rest: Transfer the cooked chicken onto a wire rack or paper towel-lined tray to remove excess oil while keeping the coating crisp.
    • Make the spicy sauce: In a small bowl, mix together mayonnaise, hot sauce, honey, smoked paprika, and garlic powder until smooth and creamy.
    • Toast the buns: Lightly butter the brioche buns and toast them in a pan until golden.
    • Assemble the sandwiches: Spread spicy sauce onto the buns. Add lettuce, crispy chicken, tomato slices, and pickles. Top with the other half of the bun and serve immediately.
    How to Make Spicy Chicken Sandwich

    Tips for the Best Spi’cy Chicken Sandwich

    How do I make the chicken extra crispy?

    Press the flour coating firmly onto the chicken and allow it to sit for a few minutes before frying. This helps create a thicker, crunchier crust.

    Can I make the sandwich less spicy?

    Reduce the cayenne pepper and hot sauce in both the marinade and sauce for a milder version that still has plenty of flavor.

    What oil works best for frying?

    Vegetable oil, sunflower oil, or canola oil are ideal because they have a high smoke point and neutral flavor.

    How do I keep fried chicken crispy?

    Place the cooked chicken on a wire rack instead of paper towels so air can circulate around it and prevent sogginess.

    Can I use chicken thighs instead?

    Yes, boneless chicken thighs work beautifully and stay especially juicy after frying.

    Serving Suggestions

    • Serve with crispy fries or potato wedges
    • Pair with coleslaw for extra crunch
    • Add onion rings for a restaurant-style meal
    • Serve with iced tea or lemonade
    • Enjoy with a side salad for a lighter option

    Storage

    Room Temperature

    The fried chicken can sit at room temperature for up to 2 hours before it should be refrigerated.

    Refrigerator

    Store leftover chicken in an airtight container in the refrigerator for up to 3 days. Keep the toppings and buns separate for the best texture.

    Freezing

    The fried chicken fillets can be frozen for up to 2 months. Cool completely before wrapping tightly and freezing. Reheat in the oven or air fryer until hot and crispy.

    Nutrition

    • Calories: 620 kcal
    • Carbohydrates: 42g
    • Protein: 36g
    • Fat: 34g
    • Saturated Fat: 7g
    • Sodium: 980mg

    Nutrition values are estimated and may vary depending on ingredients and portion sizes used.

    FAQs

    Can I air fry the chicken instead?

    Yes, cook the coated chicken in an air fryer at 200°C for about 16 to 18 minutes, flipping halfway through.

    What buns work best for chicken sandwiches?

    Soft brioche buns are ideal because they are slightly sweet, buttery, and sturdy enough to hold the crispy chicken.

    Can I prepare the chicken ahead of time?

    Yes, you can marinate the chicken up to 24 hours in advance for even more flavor and tenderness.

    How spicy is this sandwich?

    It has a medium level of heat, but you can easily adjust the spice by reducing or increasing the cayenne pepper and hot sauce.

    Spi’cy Chicken Sandwich Recipe

    Recipe by Milli RoseCourse: Main CourseCuisine: AmericanDifficulty: Easy
    Servings

    4

    servings
    Prep time

    30

    minutes
    Cooking time

    40

    minutes
    Calories

    300

    kcal
    Total time

    1

    hour 

    10

    minutes

    Crispy golden chicken fillets layered with spicy sauce, lettuce, pickles, and toasted brioche buns for the ultimate homemade spicy chicken sandwich.

    Ingredients

    • 2 large chicken breasts

    • 1 cup buttermilk

    • 1 tsp salt

    • 1 tsp black pepper

    • 1 tsp paprika

    • 1 tsp garlic powder

    • 1 tsp cayenne pepper

    • 2 cups plain flour

    • 1 tbsp cornflour

    • 1 tsp onion powder

    • Vegetable oil for frying

    • 1/2 cup mayonnaise

    • 1 tbsp hot sauce

    • 1 tsp honey

    • 4 brioche buns

    • Lettuce leaves

    • Pickle slices

    • Tomato slices

    Directions

    • Slice the chicken breasts into thinner fillets and marinate in buttermilk and spices.
    • Mix together the flour and seasoning ingredients in a separate bowl.
    • Heat vegetable oil in a deep pan to 175°C.
    • Coat the marinated chicken thoroughly in the seasoned flour mixture.
    • Fry the chicken for 4 to 5 minutes per side until crispy and cooked through.
    • Drain the chicken on a wire rack while preparing the sauce.
    • Mix mayonnaise, hot sauce, honey, smoked paprika, and garlic powder to make the spicy sauce.
    • Toast the brioche buns lightly with butter.
    • Assemble with spicy sauce, lettuce, chicken, tomato, and pickles before serving.

    Notes

    • Marinate the chicken longer for deeper flavor.
    • Use a wire rack to keep the chicken crispy after frying.
    • Adjust cayenne pepper to control the heat level.

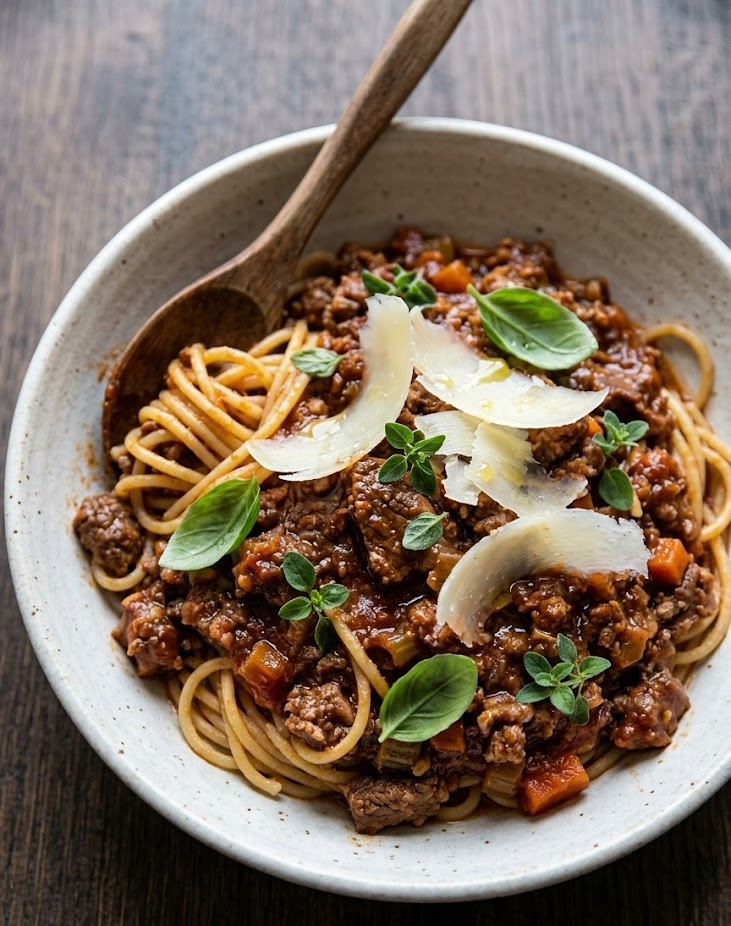
  • Bolognese Recipe

    Bolognese Recipe

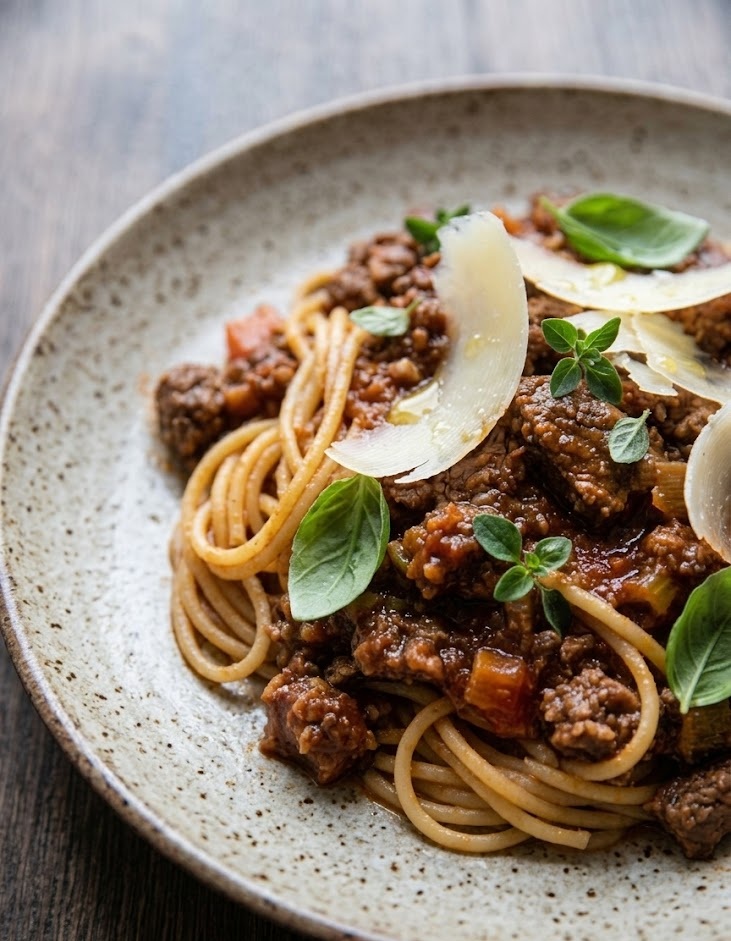
    If you are looking for a deeply comforting and authentic Italian meat sauce, this Bolognese recipe will quickly become a staple in your kitchen. This rich and savory sauce boasts a tender texture and complex flavor developed through slow simmering. While it requires a bit of patience, the difficulty level is low enough for any beginner to master with ease. You can expect to spend about twenty minutes on preparation and two hours of gentle cooking for a truly unforgettable meal.

    Ingredients

    The Aromatics and Base

    • 1 tablespoon olive oil
    • 2 tablespoons unsalted butter
    • 1 medium yellow onion, finely chopped
    • 1 medium carrot, finely chopped
    • 1 celery stalk, finely chopped
    • 3 cloves garlic, minced

    The Meat

    • 1 pound ground beef (80% lean)
    • 1/2 pound ground pork

    Liquids and Seasonings

    • 1/2 cup dry red wine
    • 1/2 cup whole milk
    • 2 tablespoons tomato paste
    • 1 can (28 ounces) crushed tomatoes
    • 1 teaspoon kosher salt
    • 1/2 teaspoon freshly ground black pepper
    • 1/4 teaspoon ground nutmeg

    How to Make Bolognese Recipe

    • Prepare the aromatics: Heat the olive oil and butter in a large heavy pot or Dutch oven over medium heat. Add the chopped onion, carrot, and celery. Cook for about 8 to 10 minutes until the vegetables are very soft and translucent. Add the minced garlic and cook for one more minute until fragrant.
    • Brown the meat: Increase the heat slightly and add the ground beef and ground pork to the pot. Break the meat apart with a wooden spoon as it cooks. Stir frequently until the meat is completely browned and no longer pink inside.
    • Incorporate the liquids: Pour the dry red wine into the pot and gently scrape any browned bits from the bottom. Let the wine simmer until it has almost entirely evaporated. Next, stir in the whole milk and the ground nutmeg, allowing the milk to bubble and reduce until the mixture looks thick.
    • Simmer the sauce: Stir in the tomato paste and cook for two minutes to deepen its flavor. Pour in the crushed tomatoes, then season the sauce with the kosher salt and black pepper. Bring the pot to a gentle boil, then immediately reduce the heat to the lowest setting.
    • Slow cook to perfection: Cover the pot with a lid, leaving it just slightly open to let steam escape. Let the sauce simmer gently for at least two hours, stirring occasionally. If the sauce looks too dry, you can add a small splash of water. Skim any excess fat from the top before serving.
    How to Make Bolognese Recipe

    Tips for Perfect Bolognese

    Why add milk to the meat sauce?

    Adding milk might seem unusual, but it is a traditional and vital step. The natural sugars in the milk help balance the acidity of the tomatoes, while the fat tenderizes the meat, giving the final dish a wonderfully rich and velvety texture.

    Can I speed up the cooking time?

    While you can eat the sauce after 30 minutes of simmering, the flavors will not be fully developed. Bolognese relies on a long, slow cooking process to break down the proteins and meld the ingredients together. Taking the full two hours is highly recommended for the best results.

    What type of pot works best?

    An enameled cast iron Dutch oven is the ideal vessel for this recipe. It holds heat evenly at low temperatures, preventing the sauce from burning during the long simmering phase.

    Serving Suggestions

    • Toss the warm sauce directly with freshly cooked wide pasta like tagliatelle or pappardelle.
    • Top generously with freshly grated Parmigiano Reggiano before serving.
    • Serve alongside warm crusty bread or garlic bread to soak up the leftover sauce.
    • Pair with a crisp, bitter green salad dressed in a simple lemon vinaigrette to cut through the richness of the meat.

    Storage

    Room Temperature

    Do not leave the Bolognese sauce at room temperature for more than two hours. Bacteria can grow rapidly in meat sauces left out on the counter.

    Refrigerator

    Allow the sauce to cool completely, then transfer it to an airtight container. It will keep perfectly in the refrigerator for up to four days. In fact, the flavor often improves on the second day as the ingredients continue to meld.

    Freezing

    This recipe freezes beautifully. Spoon the cooled sauce into freezer safe bags or containers, leaving a little room for expansion. Freeze for up to three months. Thaw overnight in the refrigerator and reheat gently on the stovetop when you are ready to eat.

    Nutrition

    • Calories: 350 kcal
    • Carbohydrates: 12g
    • Protein: 22g
    • Fat: 20g
    • Saturated Fat: 8g
    • Sodium: 450mg

    Disclaimer: These nutritional values are estimates based on standard measurements and ingredients. Actual values may vary depending on the specific brands and meat ratios used.

    FAQs

    Can I use only ground beef?

    Yes, while a traditional recipe uses a mix of beef and pork for depth of flavor and tender texture, using entirely ground beef will still yield a delicious and hearty sauce.

    Do I have to use wine in the sauce?

    The red wine adds wonderful acidity and complexity, but you can omit it. Substitute the wine with an equal amount of beef broth mixed with a teaspoon of red wine vinegar if you prefer cooking without alcohol.

    What is the best pasta for Bolognese?

    Wide, flat pasta shapes like tagliatelle, pappardelle, or fettuccine are the best choices because their broad surface area holds the thick, heavy meat sauce beautifully.

    Can I make this recipe in a slow cooker?

    Absolutely. Cook the aromatics, brown the meat, and reduce the wine and milk on the stovetop first. Then, transfer everything to your slow cooker along with the tomatoes and cook on low for six to eight hours.

    Bolognese Recipe

    Recipe by Home ChefCourse: Main Course, DinnerCuisine: ItalianDifficulty: Easy
    Servings

    4

    servings
    Prep time

    30

    minutes
    Cooking time

    40

    minutes
    Calories

    300

    kcal
    Total time

    1

    hour 

    10

    minutes

    A rich, slow cooked authentic Italian meat sauce with a melt in your mouth texture. The perfect comforting dinner to pair with your favorite pasta.

    Ingredients

    • 1 tbsp olive oil

    • 2 tbsp unsalted butter

    • 1 onion, finely chopped

    • 1 carrot, finely chopped

    • 1 celery stalk, finely chopped

    • 3 cloves garlic, minced

    • 1 lb ground beef (80% lean)

    • 1/2 lb ground pork

    • 1/2 cup dry red wine

    • 1/2 cup whole milk

    • 2 tbsp tomato paste

    • 28 oz crushed tomatoes

    • Salt, pepper, and nutmeg

    Directions

    • Heat olive oil and butter in a large pot. Sauté the chopped onion, carrot, and celery until soft. Add the garlic and cook for one minute.
    • Add the ground beef and ground pork. Break the meat apart and cook until browned and fully cooked through.
    • Pour in the dry red wine and simmer until evaporated. Stir in the milk and nutmeg, cooking until the liquid reduces.
    • Stir in the tomato paste, crushed tomatoes, salt, and pepper. Bring to a boil, then immediately turn heat to low.
    • Cover the pot slightly and let simmer gently for 2 hours, stirring occasionally. Toss with warm pasta and serve.

    Notes

    • Do not rush the simmering process; 2 hours yields the best flavor.
    • Using a mix of pork and beef creates a richer, more tender sauce.
    • Store leftovers in the fridge for up to 4 days.
  • Prime Rib Roast Recipe

    Prime Rib Roast Recipe

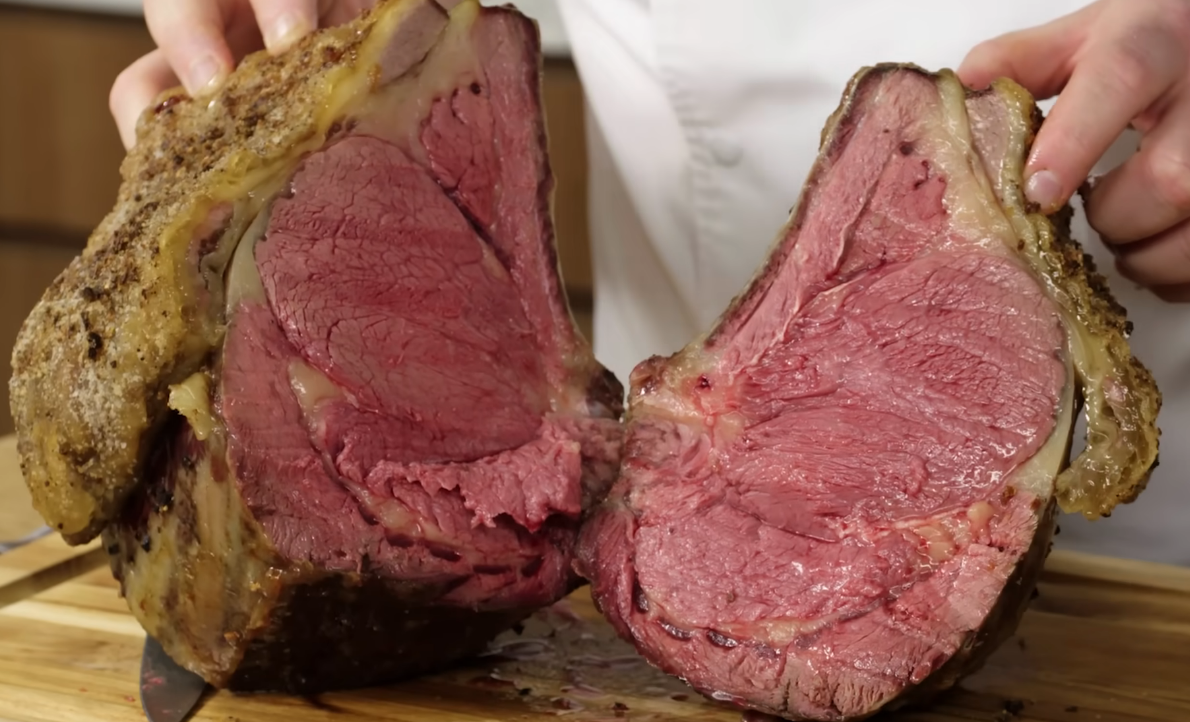
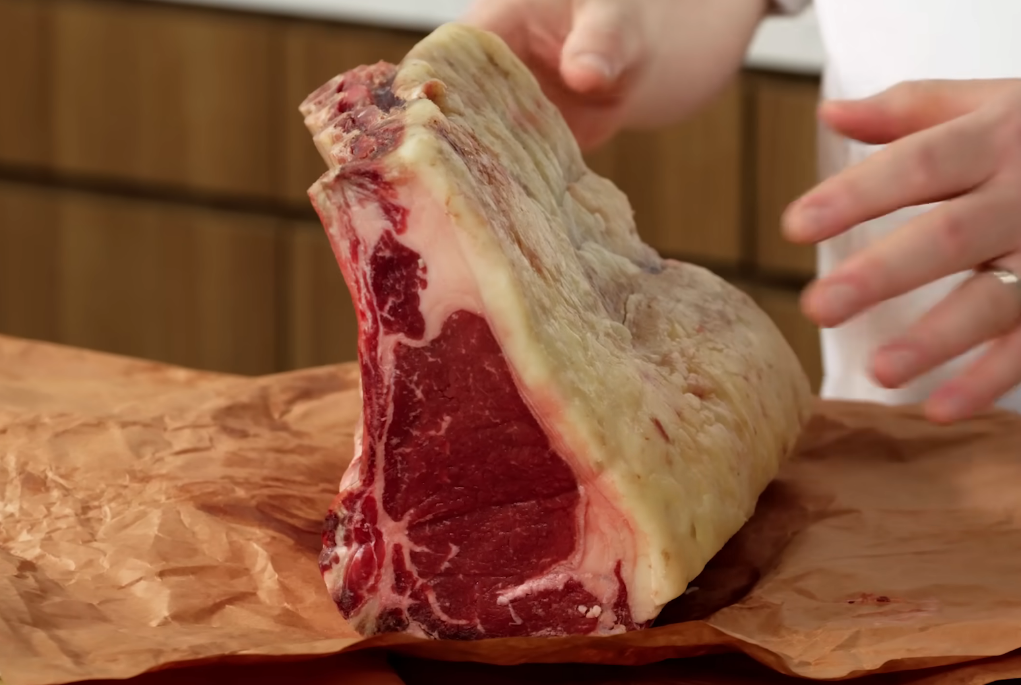
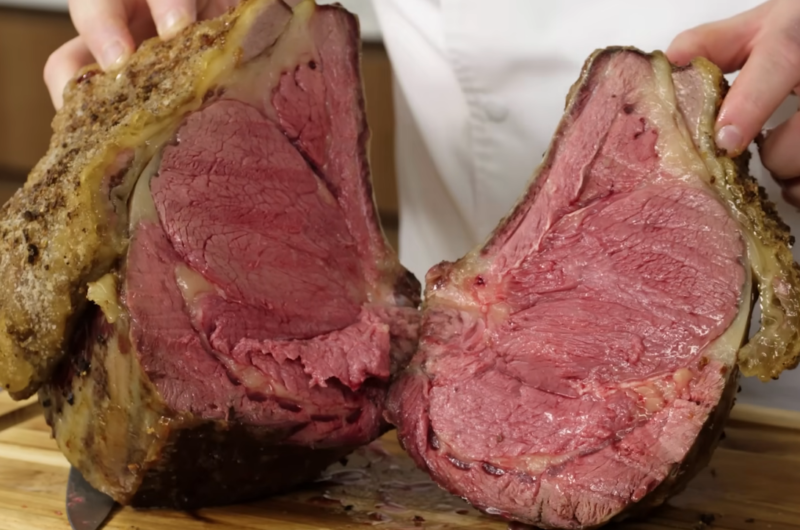
    If you want a show-stopping dinner that feels impressive yet surprisingly simple to make, this prime rib roast recipe is the perfect choice. The roast turns out incredibly juicy with a tender, buttery texture and a rich beefy flavor that melts in your mouth. A crisp herb crust on the outside adds the perfect balance to the succulent center. Although prime rib looks restaurant-worthy, this recipe is beginner-friendly and comes together with simple preparation and careful roasting.

    Prep Time: 20 minutes
    Cook Time: 2 hours 15 minutes
    Total Time: 2 hours 35 minutes
    Servings: 8 servings

    Ingredients

    For the Prime Rib Roast

    • 1 bone-in prime rib roast (5 to 6 pounds)
    • 2 tablespoons olive oil
    • 2 tablespoons unsalted butter, softened
    • 4 garlic cloves, minced
    • 2 teaspoons kosher salt
    • 1 teaspoon black pepper
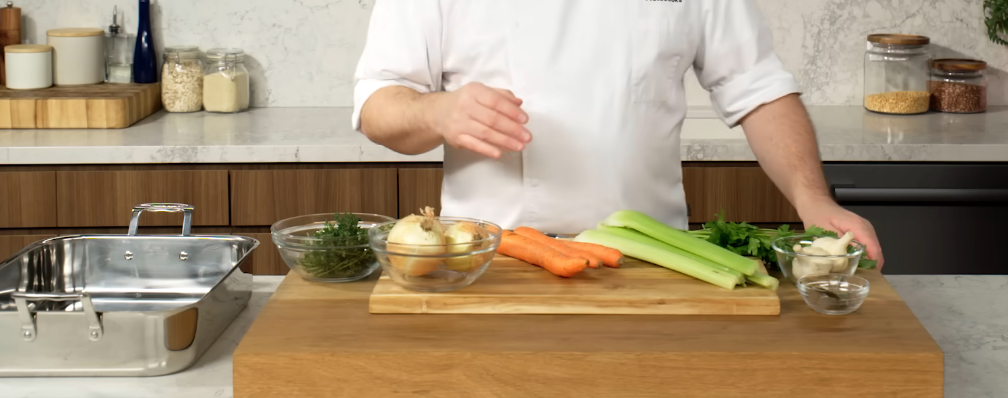
    • 1 tablespoon fresh rosemary, chopped
    • 1 tablespoon fresh thyme, chopped
    • 1 teaspoon onion powder
    • 1 teaspoon smoked paprika
    • Fresh parsley for garnish

    How to Make Prime Rib Roast Recipe

    • Prepare the oven: Preheat the oven to 230°C or 450°F. Place a rack in the center of the oven so the roast cooks evenly and develops a golden crust.
    • Prepare the roast: Pat the prime rib completely dry using paper towels. Removing excess moisture helps the exterior become crisp and flavorful during roasting.
    • Make the herb butter: In a small bowl, combine olive oil, softened butter, garlic, rosemary, thyme, kosher salt, black pepper, onion powder, and smoked paprika until fully mixed.
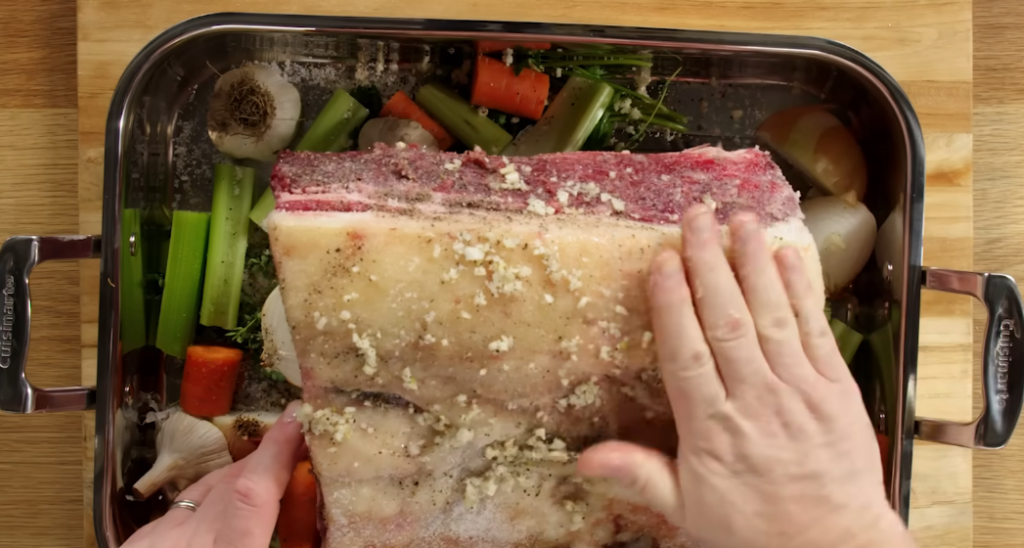
    • Season the meat: Rub the herb mixture generously over the entire roast, making sure every side is coated well.
    • Start roasting: Place the roast fat-side up on a roasting rack inside a roasting pan. Roast at 230°C or 450°F for 20 minutes to build a rich crust.
    • Lower the heat: Reduce the oven temperature to 160°C or 325°F and continue roasting for about 1 hour 45 minutes, or until the internal temperature reaches your preferred doneness.
    • Rest the roast: Remove the roast from the oven and loosely cover it with foil. Let it rest for 20 minutes before slicing so the juices stay inside the meat.
    • Slice and serve: Cut into thick slices and garnish with fresh parsley before serving warm.

    Tips for the Best Prime Rib Roast

    How do I keep prime rib juicy?

    Always let the roast rest after cooking. Cutting too early allows the juices to escape and can dry out the meat.

    Should prime rib be room temperature before roasting?

    Yes. Letting the roast sit at room temperature for about 1 hour helps it cook more evenly from edge to center.

    What is the best internal temperature for prime rib?

    For medium-rare, remove the roast at 52°C to 54°C or 125°F to 130°F. The temperature will continue rising slightly while resting.

    Do I need a roasting rack?

    A roasting rack helps air circulate around the meat and prevents the bottom from becoming soggy while roasting.

    Serving Suggestions

    • Serve with creamy mashed potatoes
    • Pair with roasted vegetables
    • Add Yorkshire pudding for a classic dinner
    • Serve alongside horseradish sauce or au jus
    • Pair with garlic butter green beans

    Storage

    Room Temperature

    Do not leave cooked prime rib at room temperature for more than 2 hours.

    Refrigerator

    Store leftovers in an airtight container in the refrigerator for up to 4 days.

    Freezing

    Wrap slices tightly in foil and place in freezer-safe bags. Freeze for up to 3 months. Thaw overnight in the refrigerator before reheating.

    Nutrition

    • Calories: 620 kcal
    • Carbohydrates: 2g
    • Protein: 48g
    • Fat: 46g
    • Saturated Fat: 18g
    • Sodium: 780mg

    Nutrition values are estimates and may vary depending on ingredients and portion sizes.

    FAQs

    How long should I cook prime rib roast per pound?

    Prime rib generally takes about 15 to 18 minutes per pound at 325°F for medium-rare doneness.

    Should prime rib be covered while roasting?

    No, roasting uncovered helps develop a crisp and flavorful crust on the outside of the meat.

    Can I prepare prime rib seasoning ahead of time?

    Yes, you can prepare the herb butter mixture up to 2 days in advance and store it in the refrigerator.

    What is the difference between ribeye and prime rib?

    Prime rib is a larger roast cut from the rib section, while ribeye is sliced into individual steaks from the same area.

    Prime Rib Roast Recipe

    Recipe by Milli RoseCourse: DinnerCuisine: AmericanDifficulty: Medium
    Servings

    8

    servings
    Prep time

    20

    minutes
    Cooking time

    2

    hours 

    15

    minutes
    Total time

    155

    minutes
    Calories

    620

    kcal

    2

    hours 

    35

    minutes

    Juicy and tender prime rib roast with garlic herb seasoning and a beautifully crisp crust. Perfect for holidays, special dinners, and family gatherings.

    Ingredients

    • 1 bone-in prime rib roast (5 to 6 pounds)

    • 2 tablespoons olive oil

    • 4 garlic cloves, minced

    • 2 teaspoons kosher salt

    • 1 teaspoon black pepper

    • 1 tablespoon fresh rosemary, chopped

    • 1 tablespoon fresh thyme, chopped

    • 1 teaspoon onion powder

    • 1 teaspoon smoked paprika

    • 2 tablespoons unsalted butter, softened

    • Fresh parsley for garnish

    Directions

    • Preheat oven to 230°C (450°F). Place the oven rack in the center position.
    • Pat the prime rib roast dry with paper towels to help the crust develop properly.
    • Mix olive oil, butter, garlic, rosemary, thyme, salt, pepper, onion powder, and smoked paprika in a bowl.
    • Rub the seasoning mixture all over the roast, coating every side evenly.
    • Place the roast fat-side up in a roasting pan fitted with a rack.
    • Roast at 230°C (450°F) for 20 minutes to create a flavorful crust.
    • Reduce oven temperature to 160°C (325°F) and continue roasting for 1 hour 45 minutes or until desired doneness.
    • Remove from the oven and tent loosely with foil. Rest for 20 minutes before slicing.
    • Slice and garnish with parsley before serving.

    Notes

    • Use a meat thermometer for accurate doneness.
    • Allowing the roast to rest keeps it juicy.
    • Leftovers make excellent sandwiches and wraps.

slot depo

sicbo online