Author: Rose Melton

  • Fondue Recipe

    Fondue Recipe

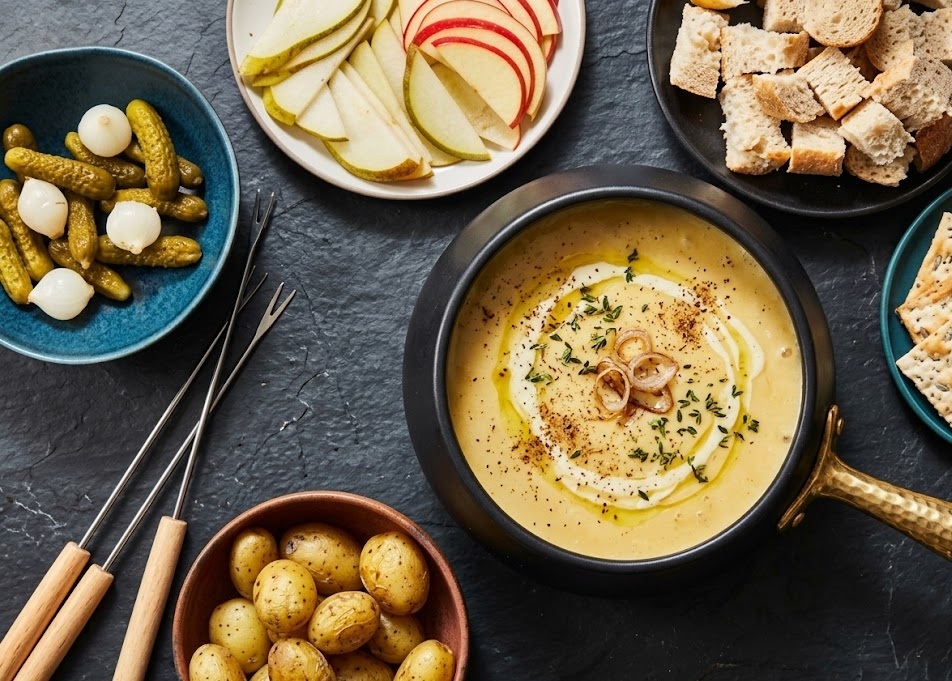
    Fondue is a rich, warming dish made with melted cheese and white wine, served bubbling hot for dipping bread, vegetables, and more. It has a silky, smooth texture with a savoury, nutty flavour that feels wonderfully indulgent yet simple to make. This classic recipe is easy enough for beginners and perfect for sharing. Total time is around 30 minutes from start to finish.

    Ingredients

    For the Fondue

    • 200g Gruyère cheese, grated
    • 200g Emmental cheese, grated
    • 300ml dry white wine
    • 1 garlic clove, halved
    • 1 tbsp cornflour
    • 2 tbsp kirsch (optional)
    • 1 tsp lemon juice
    • Freshly ground black pepper
    • Pinch of nutmeg

    For Serving

    • 1 crusty loaf, cut into cubes
    • Steamed broccoli florets
    • Cooked baby potatoes
    • Apple slices
    • Gherkins

    How to Make Fondue Recipe

    • Prepare the pot: Rub the inside of a fondue pot or medium saucepan with the cut sides of the garlic clove. This adds subtle flavour.
    • Heat the base: Pour in the white wine and lemon juice. Warm gently over medium heat until hot but not boiling.
    • Add the cheese: Add the grated cheeses by handfuls, stirring constantly after each addition until melted and smooth.
    • Mix and thicken: Stir the cornflour into the kirsch until smooth, then pour into the cheese mixture. Cook for 1 to 2 minutes, stirring, until silky and lightly thickened.
    • Season: Add black pepper and a pinch of nutmeg to taste.
    • Keep warm: Transfer to a fondue burner or keep over very low heat so the mixture stays melted.
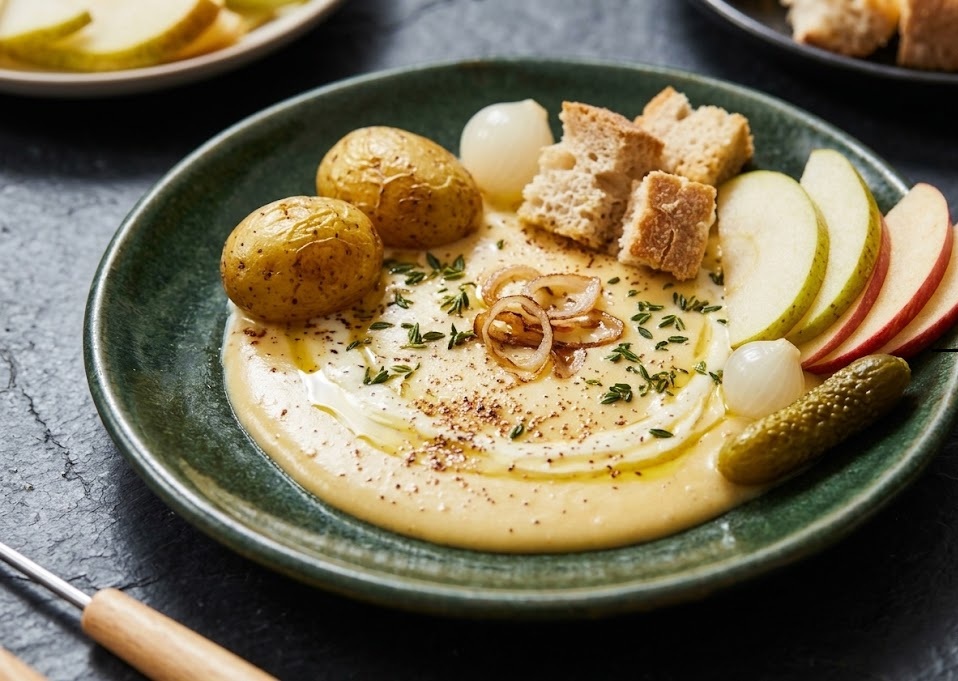
    • Serve: Place bread cubes and dipping sides around the table. Use fondue forks or skewers for dipping.
    How to Make Fondue Recipe

    Tips

    Why has my fondue turned grainy?

    This usually happens if the heat is too high. Melt the cheese gently and stir continuously.

    How do I keep fondue smooth while serving?

    Keep the burner on low and stir from time to time to stop the cheese settling.

    Can I make it without alcohol?

    Yes, replace the wine with vegetable stock and add a little extra lemon juice for balance.

    What bread works best?

    Use a firm crusty loaf such as sourdough or baguette so it holds together when dipped.

    Serving Suggestions

    • Serve with crusty bread cubes
    • Add steamed vegetables for colour and freshness
    • Offer apple or pear slices for a sweet contrast
    • Pair with a crisp green salad
    • Finish with pickles or gherkins on the side

    Storage

    Room Temperature

    Fondue should not be left out for more than 2 hours.

    Refrigerator

    Cool leftovers quickly and refrigerate in an airtight container for up to 2 days. Reheat gently with a splash of milk or stock.

    Freezing

    Freeze for up to 1 month. Thaw overnight in the fridge before reheating slowly.

    Nutrition

    • Calories: 520 kcal
    • Carbohydrates: 18g
    • Protein: 28g
    • Fat: 36g
    • Saturated Fat: 22g
    • Sodium: 760mg

    These values are estimates and may vary depending on ingredients used.

    FAQs

    What cheese is best for fondue?

    Gruyère and Emmental are traditional choices because they melt smoothly and give excellent flavour.

    Can I make fondue without a fondue pot?

    Yes, use a heavy saucepan on the hob over very low heat, then transfer to a warmed serving bowl.

    How do I stop bread falling into the fondue?

    Use firm cubes with crust attached and skewer them securely through the crust side.

    Can I prepare fondue in advance?

    You can grate the cheese and measure ingredients ahead, but cook the fondue fresh for best texture.
    Fondue Recipe

    Recipe by Milli RoseCourse: Main CourseCuisine: SwissDifficulty: Easy
    Servings

    4

    people
    Prep time

    10

    minutes
    Cooking time

    20

    minutes
    Total time

    30

    minutes
    Calories

    520

    kcal

    30

    minutes

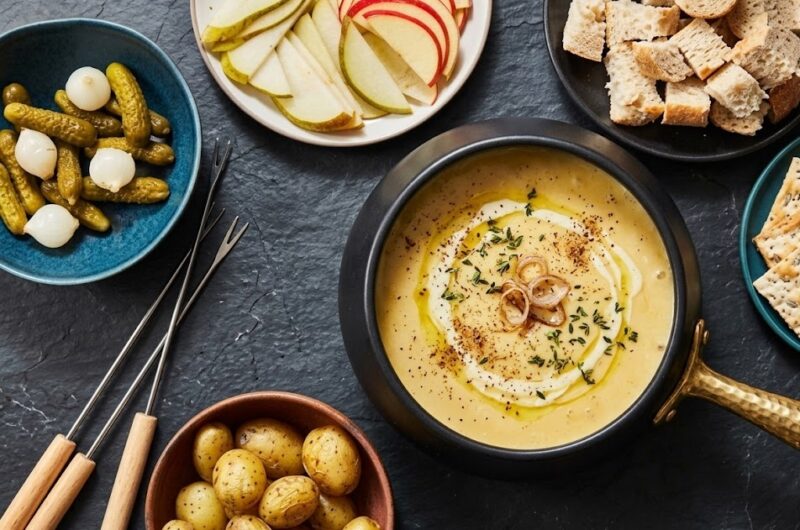
    A classic cheese fondue made with melted Gruyère and Emmental, blended with white wine and garlic for a rich and silky sharing dish.

    Ingredients

    • 200g Gruyère cheese, grated

    • 200g Emmental cheese, grated

    • 300ml dry white wine

    • 1 garlic clove, halved

    • 1 tbsp cornflour

    • 2 tbsp kirsch (optional)

    • 1 tsp lemon juice

    • Freshly ground black pepper

    • Pinch of nutmeg

    • Crusty bread cubes, for serving

    Directions

    • Rub the inside of a fondue pot or saucepan with the cut garlic clove.
    • Pour in the white wine and lemon juice, then warm gently until steaming.
    • Add the grated cheeses gradually, stirring constantly until melted.
    • Mix the cornflour with kirsch, then stir into the fondue until smooth and thickened.
    • Season with pepper and nutmeg.
    • Transfer to a fondue stand or keep warm over low heat.
    • Serve immediately with bread cubes and dipping sides.

    Notes

    • Grate the cheese finely so it melts evenly.
    • Keep the heat low to prevent splitting.
    • Stir often while serving for the smoothest texture.
  • How to Make Marinde

    How to Make Marinde

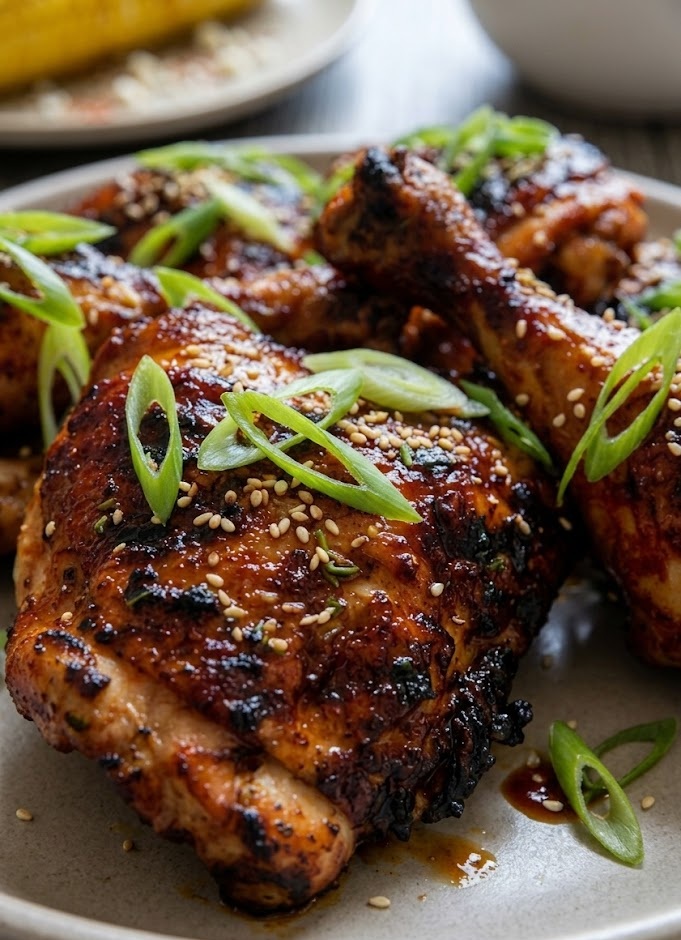
    Marinde is a simple, flavour-packed marinade used to tenderise meat, poultry, seafood, or vegetables before cooking. It combines savoury, tangy, and aromatic ingredients to create depth of flavour while keeping food moist and juicy. This easy homemade version takes just minutes to prepare and can be adapted to suit many dishes. Total time is 10 minutes to mix, plus marinating time.

    Ingredients

    For the Marinde

    • 4 tablespoons olive oil
    • 2 tablespoons lemon juice
    • 1 tablespoon soy sauce
    • 2 garlic cloves, crushed
    • 1 teaspoon honey
    • 1 teaspoon dried mixed herbs
    • 1/2 teaspoon salt
    • 1/4 teaspoon black pepper

    How to Make Marinde

    • Prepare the bowl: Use a medium mixing bowl or large jug so there is enough room to whisk the ingredients together properly.
    • Add the liquids: Pour in the olive oil, lemon juice, and soy sauce. These form the base of the marinde and help carry flavour into the food.
    • Mix in flavourings: Add the crushed garlic, honey, herbs, salt, and black pepper.
    • Whisk well: Whisk briskly for 1 minute until the mixture looks smooth and lightly blended.
    • Use or chill: Pour over chicken, fish, vegetables, or meat. Cover and refrigerate while marinating.
    • Cook and serve: Remove the food from the marinade and cook by grilling, roasting, frying, or baking until done.
    How to Make Marinde

    Tips

    How long should I marinate chicken?

    For the best flavour, marinate chicken for 2 to 8 hours in the refrigerator.

    Can I use fresh herbs instead?

    Yes, use 1 tablespoon finely chopped fresh herbs in place of dried herbs.

    Why is my marinde separating?

    Oil and acid naturally separate. Simply whisk again before using.

    How do I make it spicier?

    Add chilli flakes, cayenne pepper, or a little hot sauce.

    Serving Suggestions

    • Use with grilled chicken breasts
    • Toss with vegetables before roasting
    • Brush over salmon before baking
    • Coat lamb chops before grilling
    • Use as a quick flavour boost for tofu

    Storage

    Room Temperature

    Keep only while preparing. Do not leave out for more than 1 hour.

    Refrigerator

    Store unused marinde in a sealed jar for up to 5 days. Shake well before using.

    Freezing

    Freeze in portions for up to 2 months. Thaw overnight in the fridge before use.

    Nutrition

    • Calories: 75 kcal
    • Carbohydrates: 2g
    • Protein: 1g
    • Fat: 7g
    • Saturated Fat: 1g
    • Sodium: 320mg

    Nutrition values are estimates and may vary depending on ingredients used.

    FAQs

    How long should I marinate meat?

    Most meats benefit from 2 to 12 hours depending on thickness. Tougher cuts can marinate overnight.

    Can I use this marinde for vegetables?

    Yes, vegetables only need around 30 minutes to absorb flavour before roasting or grilling.

    Can I make marinde in advance?

    Yes, prepare it up to 5 days ahead and keep chilled in a sealed container.

    Can I reuse leftover marinde?

    Only if it has not touched raw meat. Used marinade should be discarded or boiled thoroughly before using as a sauce.

    How to Make Marinde

    Recipe by Milli RoseCourse: CondimentCuisine: InternationalDifficulty: Easy
    Servings

    6

    portions
    Prep time

    10

    minutes
    Cooking timeminutes
    Total time

    10

    minutes
    Calories

    75

    kcal

    A quick and versatile homemade marinde made with oil, lemon, garlic, and herbs. Perfect for chicken, fish, vegetables, or grilled meats.

    Ingredients

    • 4 tbsp olive oil

    • 2 tbsp lemon juice

    • 1 tbsp soy sauce

    • 2 garlic cloves, crushed

    • 1 tsp honey

    • 1 tsp dried mixed herbs

    • 1/2 tsp salt

    • 1/4 tsp black pepper

    Directions

    • Add olive oil, lemon juice, and soy sauce to a bowl or jug.
    • Stir in garlic, honey, herbs, salt, and pepper.
    • Whisk until fully blended and slightly thickened.
    • Pour over meat, fish, or vegetables and coat well.
    • Cover and chill before cooking as desired.

    Notes

    • Chicken benefits from 2 to 8 hours marinating.
    • Vegetables need only 30 minutes.
    • Always discard used marinade that touched raw meat.
  • How to Make vegan Cheese

    How to Make vegan Cheese

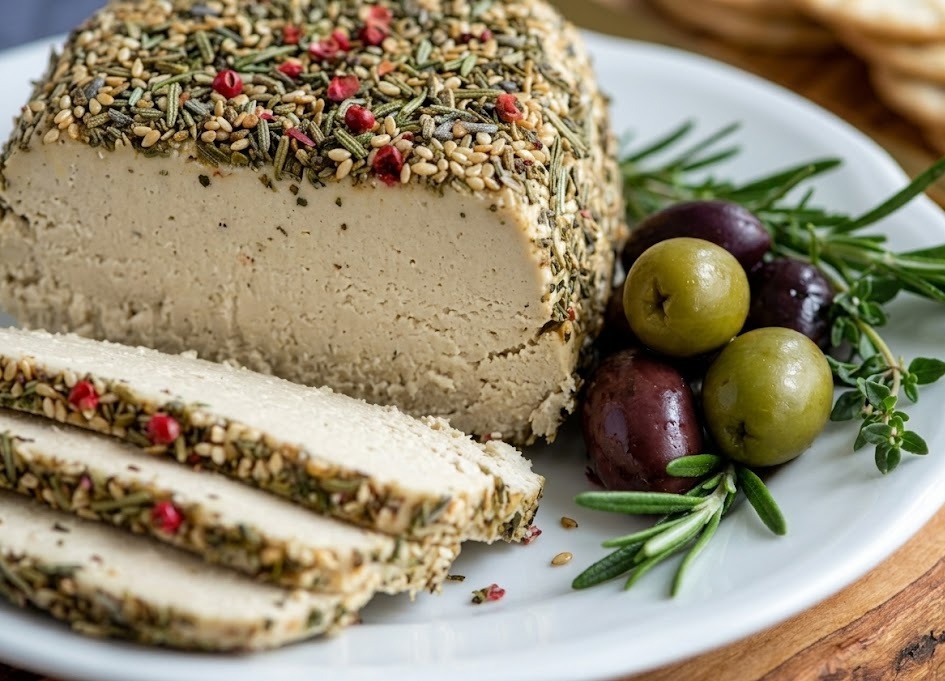
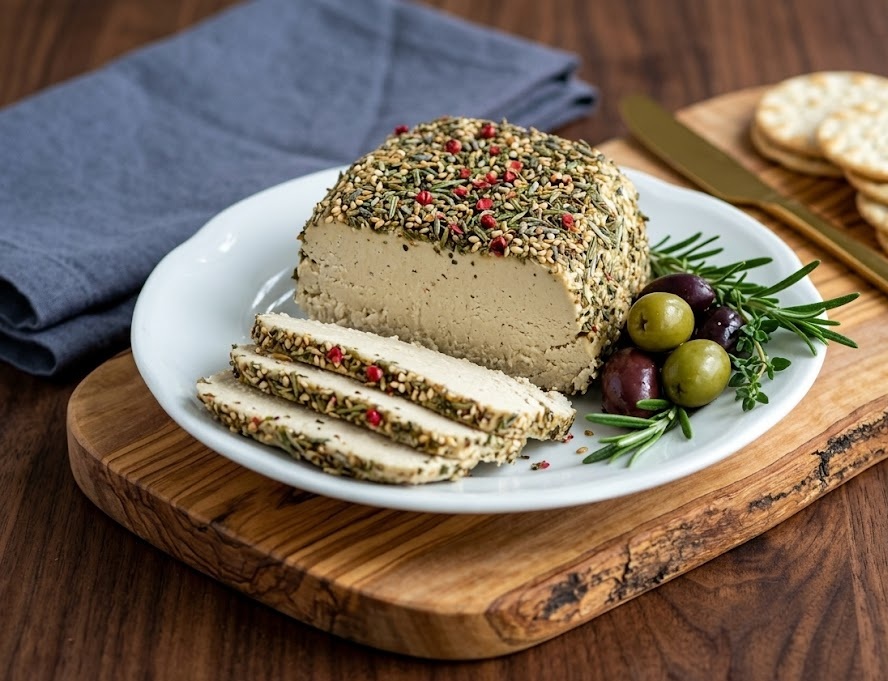
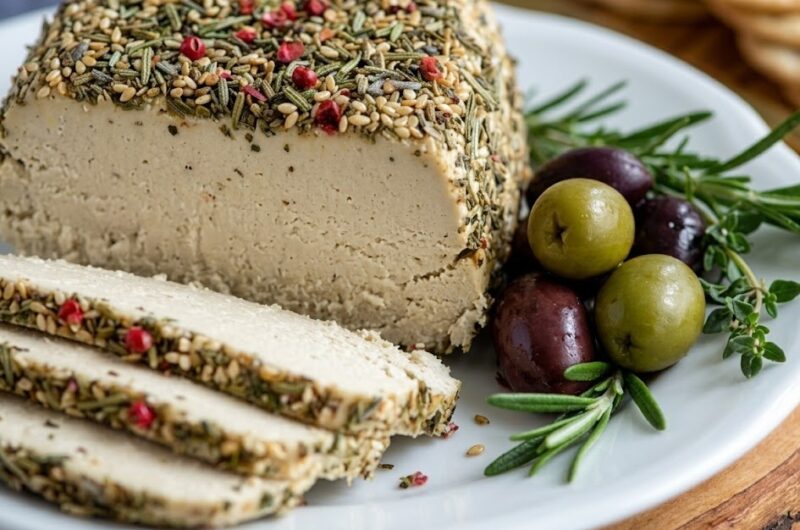
    Vegan cheese is a smooth, creamy dairy-free alternative made with wholesome ingredients and full savoury flavour. This version sets beautifully, slices well, and melts gently when warmed. It has a mild cheesy taste with a rich texture that works for sandwiches, crackers, pasta, and sauces. Easy to make at home, this recipe takes around 20 minutes to prepare plus chilling time.

    Ingredients

    For the Cheese Base

    • 150g raw cashews, soaked in hot water for 30 minutes
    • 250ml water
    • 60ml unsweetened plant milk
    • 3 tbsp nutritional yeast
    • 2 tbsp lemon juice
    • 1 tbsp apple cider vinegar
    • 1 tsp garlic powder
    • 1 tsp onion powder
    • 1 tsp fine salt
    • 1/2 tsp turmeric (optional, for colour)

    For Setting

    • 2 tbsp agar agar powder
    • 120ml water

    For Finishing

    • 1 tsp olive oil for greasing mould
    • Fresh herbs or cracked pepper, optional

    How to Make vegan Cheese

    • Prepare the mould: Lightly grease a small loaf tin, ramekin, or round bowl with olive oil. This helps the cheese release neatly once chilled.
    • Blend the base: Drain the soaked cashews and place them in a blender with water, plant milk, nutritional yeast, lemon juice, vinegar, garlic powder, onion powder, salt, and turmeric. Blend until completely smooth and silky.
    • Prepare the setting mixture: Add the agar agar powder and 120ml water to a saucepan. Whisk well and place over medium heat.
    • Cook gently: Bring to a gentle simmer and cook for 2 to 3 minutes, whisking constantly until fully dissolved.
    • Combine mixtures: Pour the blended cashew mixture into the saucepan and stir continuously for 4 to 5 minutes until thickened and glossy.
    • Fill the mould: Quickly pour the hot mixture into the prepared mould. Smooth the top with a spatula.
    • Cool and chill: Leave at room temperature for 20 minutes, then refrigerate for at least 3 hours until firm.
    • Unmould and serve: Turn the cheese out carefully onto a plate. Sprinkle with herbs or cracked pepper if liked, then slice and enjoy.
    How to Make vegan Cheese

    Tips

    Why is my vegan cheese too soft?

    It may need longer chilling time or the agar agar may not have simmered long enough. Agar needs heat to activate properly.

    How do I make it sharper in flavour?

    Add extra lemon juice, a little mustard powder, or another spoonful of nutritional yeast.

    Can I make it creamier?

    Use a little more plant milk and blend for longer until completely smooth.

    Why is it grainy?

    Cashews need to be soaked well and blended thoroughly. A high-speed blender gives the best finish.

    Serving Suggestions

    • Slice onto crackers or toasted bread
    • Cube for salads or lunch platters
    • Grate over warm pasta dishes
    • Melt into sandwiches or wraps
    • Serve with olives and chutney

    Storage

    Room Temperature

    Keep out for no longer than 2 hours when serving.

    Refrigerator

    Store in an airtight container for up to 5 days. Keep chilled between uses.

    Freezing

    Freeze tightly wrapped for up to 2 months. Defrost overnight in the fridge before serving.

    Nutrition

    • Calories: 165 kcal
    • Carbohydrates: 8g
    • Protein: 5g
    • Fat: 12g
    • Saturated Fat: 2g
    • Sodium: 310mg

    Nutrition values are approximate and may vary depending on ingredients used.

    FAQs

    What is vegan cheese made from?

    Vegan cheese is commonly made from nuts, seeds, soy, coconut, or starch-based ingredients. This version uses cashews for a rich creamy texture.

    Does vegan cheese melt?

    Yes, many homemade vegan cheeses soften and melt gently when heated, especially when used in sauces or toasties.

    Can I make vegan cheese without cashews?

    Yes, sunflower seeds or blanched almonds can be used instead, though the flavour and texture will change slightly.

    How long does homemade vegan cheese last?

    Stored in the refrigerator in an airtight container, it keeps well for up to 5 days.

    How to Make vegan Cheese

    Recipe by Milli RoseCourse: SnackCuisine: Plant-BasedDifficulty: Easy
    Servings

    4

    servings
    Prep time

    30

    minutes
    Cooking time

    40

    minutes
    Calories

    300

    kcal
    Total time

    1

    hour 

    10

    minutes

    Creamy homemade vegan cheese made with cashews, nutritional yeast and agar agar. A simple dairy-free recipe that slices beautifully and tastes rich and savoury.

    Ingredients

    • 150g raw cashews, soaked

    • 250ml water

    • 60ml unsweetened plant milk

    • 3 tbsp nutritional yeast

    • 2 tbsp lemon juice

    • 1 tbsp apple cider vinegar

    • 1 tsp garlic powder

    • 1 tsp onion powder

    • 1 tsp salt

    • 2 tbsp agar agar powder

    • 120ml water

    • Olive oil for greasing

    Directions

    • Grease a mould or small loaf tin lightly with oil.
    • Blend cashews, water, plant milk, nutritional yeast, lemon juice, vinegar and seasonings until smooth.
    • Whisk agar agar with water in a saucepan.
    • Simmer for 2 to 3 minutes until dissolved.
    • Add blended mixture and cook, stirring, until thickened.
    • Pour into mould and smooth the top.
    • Cool, then chill for at least 3 hours until firm.
    • Turn out, slice and serve.

    Notes

    • Blend thoroughly for the smoothest texture.
    • Do not skip simmering the agar agar.
    • Store chilled and use within 5 days.
  • Coppers Hawk Betty’s Potatoes Recipe

    Coppers Hawk Betty’s Potatoes Recipe

    Coppers Hawk Betty’s Potatoes are rich, creamy layered potatoes baked until bubbling and golden on top. Each spoonful is soft, buttery, and full of savoury flavour with a beautifully crisp finish. This is an easy side dish that feels special enough for gatherings yet simple enough for a family dinner. Total time is around 1 hour 20 minutes, including preparation and baking.

    Ingredients

    For the Potatoes

    • 1kg potatoes, peeled
    • 40g butter
    • 150g cheddar cheese, grated
    • 50g Parmesan cheese, grated
    • 1 tbsp chopped parsley

    For the Cream Sauce

    • 300ml double cream
    • 200ml whole milk
    • 2 garlic cloves, crushed
    • 1 tsp salt
    • 1/2 tsp black pepper

    How to Make Coppers Hawk Betty’s Potatoes Recipe

    • Prepare the oven: Preheat the oven to 190°C or 170°C fan. Grease a medium ovenproof dish with butter.
    • Slice the potatoes: Cut the peeled potatoes into thin even slices, about 3mm thick, so they cook evenly.
    • Make the sauce: Add cream, milk, garlic, salt and pepper to a saucepan. Warm gently for 3 minutes without boiling.
    • Layer the dish: Arrange a layer of potatoes in the dish, sprinkle with cheddar, then repeat until all potatoes are used.
    • Add the liquid: Pour the warm cream mixture evenly over the potatoes. Dot the top with butter.
    • Bake covered: Cover with foil and bake for 40 minutes until the potatoes begin to soften.
    • Finish baking: Remove foil, sprinkle with Parmesan and return to the oven for 20 minutes until golden and bubbling.
    • Rest and serve: Leave the dish to stand for 10 minutes, then scatter with parsley and serve.
    How to Make Coppers Hawk Betty's Potatoes Recipe

    Tips

    How do I stop the potatoes turning firm?

    Slice them thinly and evenly so they soften properly during baking.

    Can I make it extra creamy?

    Use all cream instead of part milk for a richer finish.

    Why is the top not golden?

    Bake uncovered for the final stage and place the dish on the upper middle shelf.

    Can I prepare it ahead?

    Yes, assemble the dish earlier in the day and refrigerate until ready to bake.

    Serving Suggestions

    • Serve with roast chicken or turkey
    • Pair with grilled steak
    • Add alongside baked ham
    • Enjoy with a crisp green salad

    Storage

    Room Temperature

    Leave out for no longer than 2 hours after cooking.

    Refrigerator

    Store covered for up to 3 days. Reheat in the oven until hot throughout.

    Freezing

    Freeze in portions for up to 2 months. Thaw overnight in the fridge before reheating.

    Nutrition

    • Calories: 365 kcal
    • Carbohydrates: 29g
    • Protein: 11g
    • Fat: 23g
    • Saturated Fat: 13g
    • Sodium: 510mg

    Nutrition values are estimates and may vary depending on ingredients used.

    FAQs

    Can I make Betty’s potatoes ahead of time?

    Yes, assemble the dish, cover and refrigerate for up to 24 hours before baking.

    What potatoes work best for this recipe?

    Maris Piper, Yukon Gold or other starchy potatoes give the best creamy texture.

    Can I use different cheese?

    Yes, Gruyere, Monterey Jack or Red Leicester all work well.

    Why should I rest the dish before serving?

    Resting helps the sauce thicken slightly and makes portions easier to serve neatly.

    Coppers Hawk Betty’s Potatoes Recipe

    Recipe by Milli RoseCourse: Side DishCuisine: AmericanDifficulty: Easy
    Servings

    6

    people
    Prep time

    20

    minutes
    Cooking time

    1

    hour 
    Total time

    80

    minutes
    Calories

    365

    kcal

    1

    hour 

    20

    minutes

    Creamy layered potatoes baked with cheese, butter and seasoning until tender and golden. A comforting side dish perfect for roast dinners and celebrations.

    Ingredients

    • 1kg Maris Piper or Yukon Gold potatoes, peeled

    • 300ml double cream

    • 200ml whole milk

    • 150g cheddar cheese, grated

    • 50g Parmesan, grated

    • 40g butter

    • 2 garlic cloves, crushed

    • 1 tsp salt

    • 1/2 tsp black pepper

    • 1 tbsp chopped parsley

    Directions

    • Preheat oven to 190°C (170°C fan). Butter a medium baking dish.
    • Slice the potatoes thinly and evenly.
    • Warm cream, milk, garlic, salt and pepper in a saucepan for 3 minutes.
    • Layer potatoes in the dish, adding cheddar between layers.
    • Pour over the warm cream mixture and dot with butter.
    • Cover with foil and bake for 40 minutes.
    • Remove foil, top with Parmesan and bake 20 minutes more until golden.
    • Rest for 10 minutes before serving. Scatter with parsley.

    Notes

    • Use starchy potatoes for the best creamy texture.
    • Slice evenly so they cook at the same rate.
    • Allow to rest before serving for neat portions.
  • Saltgrass Range Rattlers Recipe

    Saltgrass Range Rattlers Recipe

    Saltgrass Range Rattlers are crisp, golden jalapeños stuffed with creamy cheese, wrapped in bacon, and baked until bubbling and irresistible. They offer a perfect balance of smoky, spicy, savoury flavour with a rich, melty centre. This recipe is simple to prepare and ideal for parties, game days, or casual family gatherings. Total time is around 40 minutes from start to finish.

    Ingredients

    For the Jalapeños

    • 6 large jalapeños
    • 1 tablespoon olive oil

    For the Filling

    • 225g cream cheese, softened
    • 100g grated cheddar cheese
    • 1 spring onion, finely chopped
    • 1/2 teaspoon garlic powder

    For Wrapping and Serving

    • 12 rashers streaky bacon
    • Ranch dip or sour cream, to serve

    How to Make Saltgrass Range Rattlers Recipe

    • Prepare the oven: Preheat the oven to 200°C or 180°C fan. Line a baking tray with baking parchment for easy cleanup.
    • Prepare the jalapeños: Slice each jalapeño in half lengthways. Remove the seeds and white membrane with a spoon for a milder heat.
    • Make the filling: In a bowl, mix the cream cheese, grated cheddar, spring onion and garlic powder until smooth and evenly combined.
    • Fill the peppers: Spoon the cheese mixture into each jalapeño half, pressing it in neatly so it stays in place.
    • Wrap with bacon: Wrap each filled jalapeño with a rasher of bacon. Secure with a cocktail stick if needed.
    • Bake: Arrange on the tray, brush lightly with olive oil, and bake for 18 to 22 minutes until the bacon is crisp and golden.
    • Cool and serve: Leave to cool for 5 minutes before serving warm with ranch dip or sour cream.
    How to Make Saltgrass Range Rattlers Recipe

    Tips

    How do I make them less spicy?

    Remove all seeds and the white membrane inside the jalapeños, as this is where most of the heat sits.

    How do I stop the filling leaking out?

    Do not overfill the jalapeños and press the mixture in firmly before wrapping with bacon.

    What bacon works best?

    Thin streaky bacon crisps nicely and wraps neatly around each piece.

    Can I cook these in an air fryer?

    Yes, cook at 190°C for 10 to 14 minutes, checking halfway through.

    Serving Suggestions

    • Serve with ranch dressing
    • Add to a party platter with wings
    • Pair with burgers or grilled steak
    • Offer with celery and carrot sticks

    Storage

    Room Temperature

    Leave out for no more than 2 hours after cooking.

    Refrigerator

    Store in an airtight container for up to 3 days. Reheat in the oven until hot.

    Freezing

    Freeze cooked rattlers for up to 2 months. Defrost overnight in the fridge and reheat thoroughly.

    Nutrition

    • Calories: 165 kcal
    • Carbohydrates: 3g
    • Protein: 8g
    • Fat: 14g
    • Saturated Fat: 6g
    • Sodium: 410mg

    Nutrition values are estimates and may vary depending on ingredients used.

    FAQs

    Can I make Saltgrass Range Rattlers ahead of time?

    Yes, assemble them up to one day ahead and refrigerate until ready to bake.

    Can I use different cheese?

    Yes, Monterey Jack, mozzarella or pepper jack all work well.

    How do I keep bacon crispy?

    Use thin bacon and bake on a wire rack set over a tray if preferred.

    Are Range Rattlers very spicy?

    They have a medium heat, but removing the seeds makes them much milder.

    Saltgrass Range Rattlers Recipe

    Recipe by Milli RoseCourse: AppetizerCuisine: AmericanDifficulty: Easy
    Servings

    12

    pieces
    Prep time

    20

    minutes
    Cooking time

    20

    minutes
    Total time

    40

    minutes
    Calories

    165

    kcal

    40

    minutes

    Spicy jalapeños filled with cream cheese and cheddar, wrapped in bacon and baked until crisp. A popular appetiser full of smoky flavour.

    Ingredients

    • 6 large jalapeños

    • 225g cream cheese, softened

    • 100g grated cheddar cheese

    • 1 spring onion, finely chopped

    • 1/2 tsp garlic powder

    • 12 rashers streaky bacon

    • 1 tbsp olive oil

    • Ranch dip, for serving

    Directions

    • Preheat oven to 200°C (180°C fan). Line a baking tray with parchment.
    • Halve jalapeños lengthways and remove seeds.
    • Mix cream cheese, cheddar, spring onion and garlic powder.
    • Fill each jalapeño half with cheese mixture.
    • Wrap each filled jalapeño with bacon and secure with a cocktail stick if needed.
    • Brush lightly with oil and place on tray.
    • Bake for 18 to 22 minutes until bacon is crisp and filling is hot.
    • Cool for 5 minutes and serve warm.

    Notes

    • Wear gloves when handling jalapeños.
    • Use thin bacon for the crispiest finish.
    • Serve warm for the best texture.
  • Tropical Smoothie Paradise Point Recipe

    Tropical Smoothie Paradise Point Recipe

    Tropical Smoothie Paradise Point is a bright, refreshing fruit smoothie packed with juicy tropical flavour and a naturally creamy texture. Made with strawberries, banana, pineapple and orange juice, it blends into a thick, icy drink that tastes like sunshine in a glass. This is an easy recipe that takes only minutes to make, making it perfect for breakfast, a quick snack or a cooling afternoon treat. Total time is around 10 minutes from start to finish.

    Ingredients

    For the Smoothie

    • 1 cup frozen strawberries
    • 1 ripe banana
    • 1 cup frozen pineapple chunks
    • 1 cup orange juice
    • 1/2 cup cold water or ice cubes
    • 1 tablespoon honey, optional

    How to Make Tropical Smoothie Paradise Point Recipe

    • Prepare the blender: Make sure the blender jug is clean and dry. Add the liquid ingredients first to help everything blend smoothly.
    • Add the fruit: Tip in the frozen strawberries, banana and pineapple chunks.
    • Blend until smooth: Blend on high speed for 45 to 60 seconds until thick, creamy and fully smooth.
    • Adjust consistency: If the smoothie is too thick, add a splash more orange juice. If it is too thin, add a few extra ice cubes.
    • Finish and serve: Taste and stir in honey if needed. Pour into glasses and serve straight away.
    How to Make Tropical Smoothie Paradise Point Recipe

    Tips

    How do I make it thicker?

    Use fully frozen fruit and reduce the liquid slightly. Adding a few ice cubes also helps create a thicker texture.

    How do I make it sweeter?

    Use a very ripe banana or add honey to taste after blending.

    Can I make it dairy free?

    Yes, this recipe is naturally dairy free as written. Just check any added sweeteners if needed.

    Why is my smoothie watery?

    Too much liquid or thawed fruit can thin the drink. Use frozen fruit and add liquid gradually.

    Serving Suggestions

    • Serve with breakfast granola or toast.
    • Pour into a travel cup for an on-the-go snack.
    • Top with sliced fruit and coconut flakes.
    • Enjoy after exercise for a refreshing boost.

    Storage

    Room Temperature

    Best served immediately. Do not leave out for more than 1 hour.

    Refrigerator

    Store in a sealed jar for up to 24 hours. Shake or stir before drinking as separation is natural.

    Freezing

    Freeze in airtight containers for up to 1 month. Thaw slightly, then blend again before serving.

    Nutrition

    • Calories: 210 kcal
    • Carbohydrates: 48g
    • Protein: 3g
    • Fat: 1g
    • Saturated Fat: 0g
    • Sodium: 15mg

    Nutrition values are estimates and may vary depending on ingredients used.

    FAQs

    Can I use fresh fruit instead of frozen?

    Yes, but add ice cubes to achieve the same cold and thick texture.

    What juice works best in Paradise Point smoothie?

    Orange juice gives the classic flavour, but mango juice also works well.

    Can I make this smoothie ahead of time?

    Yes, store it in the fridge for up to 24 hours and shake well before serving.

    Is Tropical Smoothie Paradise Point healthy?

    It can be a nutritious option made with fruit and no added sugar unless you include honey.

    Tropical Smoothie Paradise Point Recipe

    Recipe by Milli RoseCourse: DrinksCuisine: AmericanDifficulty: Easy
    Servings

    2

    glasses
    Prep time

    10

    minutes
    Cooking timeminutes
    Total time

    10

    minutes
    Calories

    210

    kcal

    A fruity and refreshing tropical smoothie made with strawberries, banana, pineapple and orange juice. Sweet, creamy and ready in minutes.

    Ingredients

    • 1 cup frozen strawberries

    • 1 ripe banana

    • 1 cup frozen pineapple chunks

    • 1 cup orange juice

    • 1/2 cup water or ice

    • 1 tbsp honey, optional

    Directions

    • Add strawberries, banana, pineapple and orange juice to a blender.
    • Pour in water or add ice for a colder smoothie.
    • Blend until smooth and creamy, scraping down the sides if needed.
    • Taste and add honey if you prefer a sweeter drink.
    • Pour into chilled glasses and serve immediately.

    Notes

    • Use frozen fruit for the thickest texture.
    • Add more juice if the smoothie is too thick.
    • Serve immediately for best flavour and texture.
  • Taco Bell Refried Beans Recipe

    Taco Bell Refried Beans Recipe

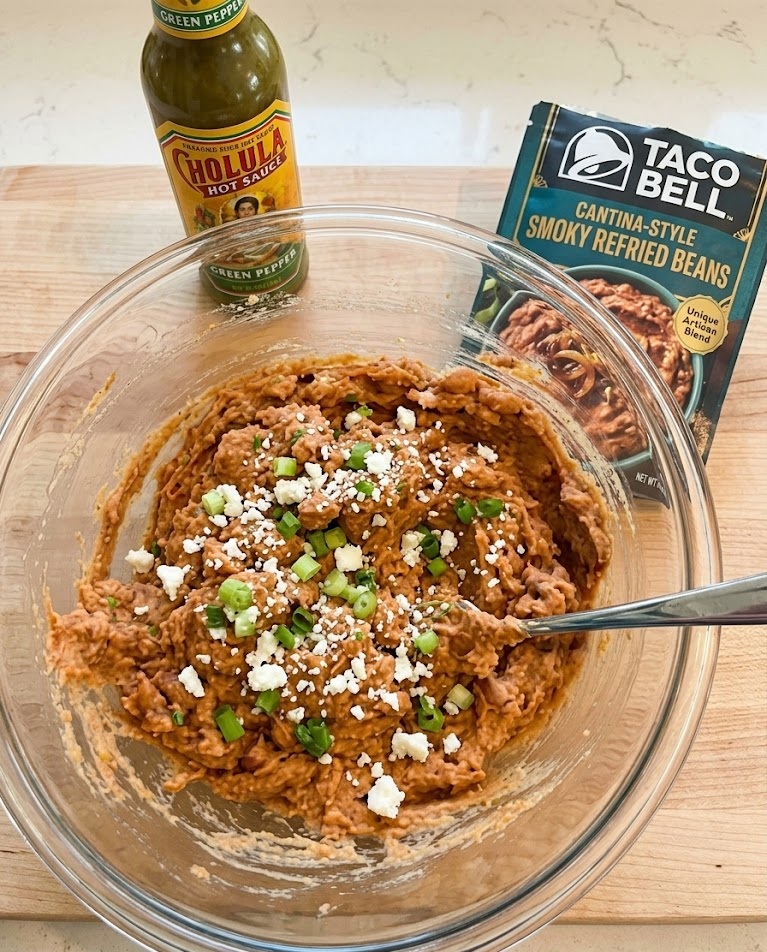
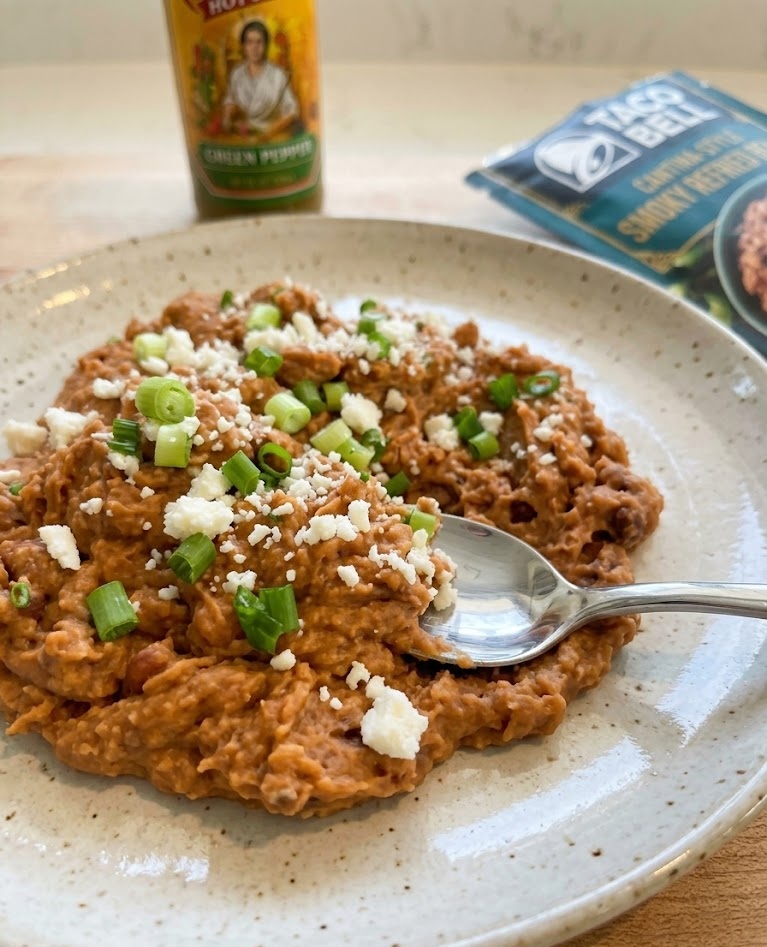
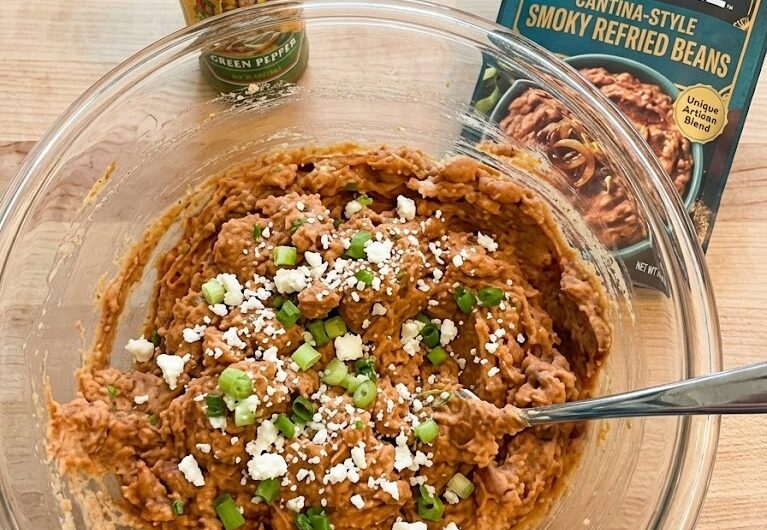
    These Taco Bell style refried beans are smooth, creamy, and packed with the mild savoury flavour that makes them so popular. They are simple to prepare at home using pantry staples and come together with very little effort. The texture is soft and velvety, perfect for spreading, scooping, or serving alongside tacos and burritos. This easy recipe takes around 35 minutes from start to finish.

    Ingredients

    For the Beans

    • 2 x 400g tins pinto beans, drained
    • 250ml water
    • 2 tbsp vegetable oil
    • 1 tsp onion powder
    • 1 tsp garlic powder
    • 1 tsp salt
    • 1/2 tsp sugar
    • 1/2 tsp chilli powder
    • 1/4 tsp ground cumin
    • Extra water if needed

    How to Make Taco Bell Refried Beans Recipe

    • Prepare the pan: Place a medium saucepan over medium heat and add the drained pinto beans, water and vegetable oil.
    • Add seasoning: Stir in the onion powder, garlic powder, salt, sugar, chilli powder and cumin until evenly mixed.
    • Simmer gently: Bring the mixture to a light simmer and cook for 10 minutes, stirring now and then so nothing sticks.
    • Mash or blend: Use a potato masher for a rustic texture or blend carefully for a smooth fast food style finish.
    • Cook until creamy: Return to the heat and cook for another 10 to 15 minutes until thick, soft and creamy.
    • Adjust and serve: Add a little more water if needed, then serve warm.
    How to Make Taco Bell Refried Beans Recipe

    Tips

    How do I make them extra smooth?

    Blend the cooked beans with a hand blender or food processor until silky.

    Why are my beans too thick?

    Stir in warm water a tablespoon at a time until the texture loosens.

    How do I improve the flavour?

    Add a little extra garlic powder or a pinch more salt to taste.

    Can I use dried beans?

    Yes, cook dried pinto beans until tender first, then continue with the recipe.

    Serving Suggestions

    • Spread inside burritos
    • Serve beside tacos and rice
    • Use as a nacho topping
    • Spoon into quesadillas
    • Serve as a warm dip with tortilla chips

    Storage

    Room Temperature

    Do not leave out for more than 2 hours.

    Refrigerator

    Store in an airtight container for up to 4 days. Reheat gently with a splash of water.

    Freezing

    Freeze in portions for up to 3 months. Defrost overnight in the fridge before reheating.

    Nutrition

    • Calories: 170 kcal
    • Carbohydrates: 22g
    • Protein: 7g
    • Fat: 6g
    • Saturated Fat: 1g
    • Sodium: 620mg

    Nutrition values are estimates and may vary depending on ingredients used.

    FAQs

    What beans does Taco Bell use for refried beans?

    Pinto beans are traditionally used and give the closest flavour and texture.

    Can I make Taco Bell refried beans vegan?

    Yes, this recipe is vegan when made with vegetable oil.

    How do I make them thinner for dipping?

    Add warm water gradually while stirring until the beans reach your preferred consistency.

    Can I use black beans instead?

    Yes, though the flavour and colour will be different from the classic version.

    Taco Bell Refried Beans Recipe

    Recipe by Milli RoseCourse: Side DishCuisine: Mexican InspiredDifficulty: Easy
    Servings

    6

    portions
    Prep time

    10

    minutes
    Cooking time

    25

    minutes
    Total time

    35

    minutes
    Calories

    170

    kcal

    35

    minutes

    Creamy homemade Taco Bell style refried beans made with pinto beans, seasonings and a smooth blended texture. Perfect as a side dish, dip or burrito filling.

    Ingredients

    • 2 x 400g tins pinto beans, drained

    • 250ml water

    • 2 tbsp vegetable oil

    • 1 tsp onion powder

    • 1 tsp garlic powder

    • 1 tsp salt

    • 1/2 tsp sugar

    • 1/2 tsp chilli powder

    • 1/4 tsp cumin

    • Extra water as needed

    Directions

    • Add drained beans, water, oil and all seasonings to a saucepan.
    • Bring gently to a simmer over medium heat.
    • Cook for 10 minutes, stirring occasionally.
    • Mash thoroughly with a potato masher or blend until smooth.
    • Cook for another 10 to 15 minutes until thick and creamy.
    • Add a splash of water if the beans become too thick.
    • Serve hot.

    Notes

    • Blend for the smoothest Taco Bell style texture.
    • Add water gradually to control consistency.
    • Freeze cooled beans for up to 3 months.
  • Guacamole Recipe

    Guacamole Recipe

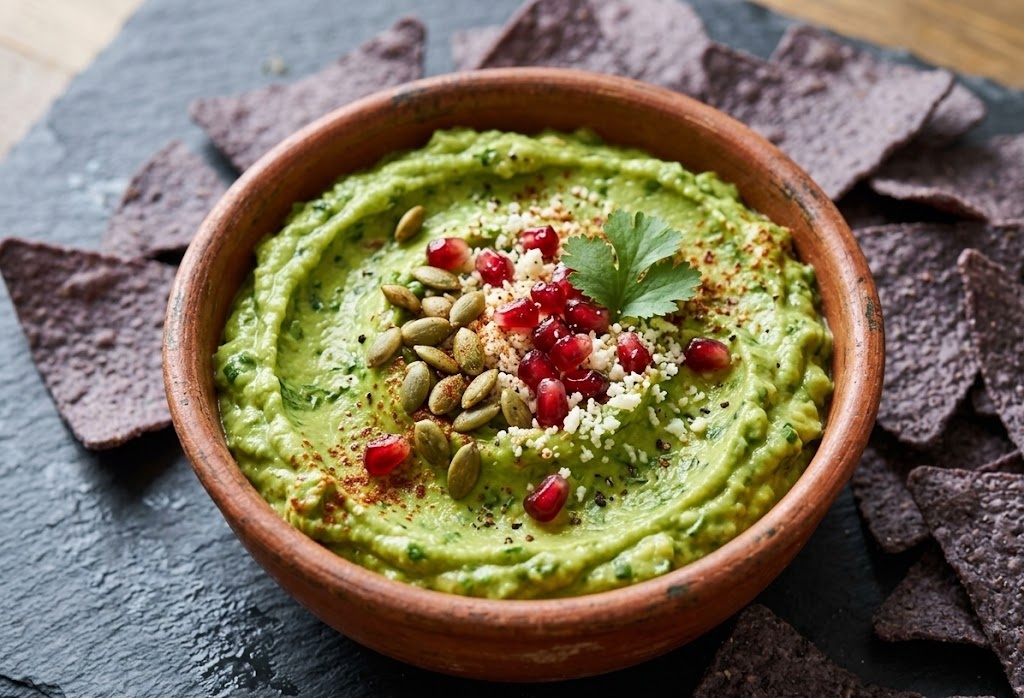
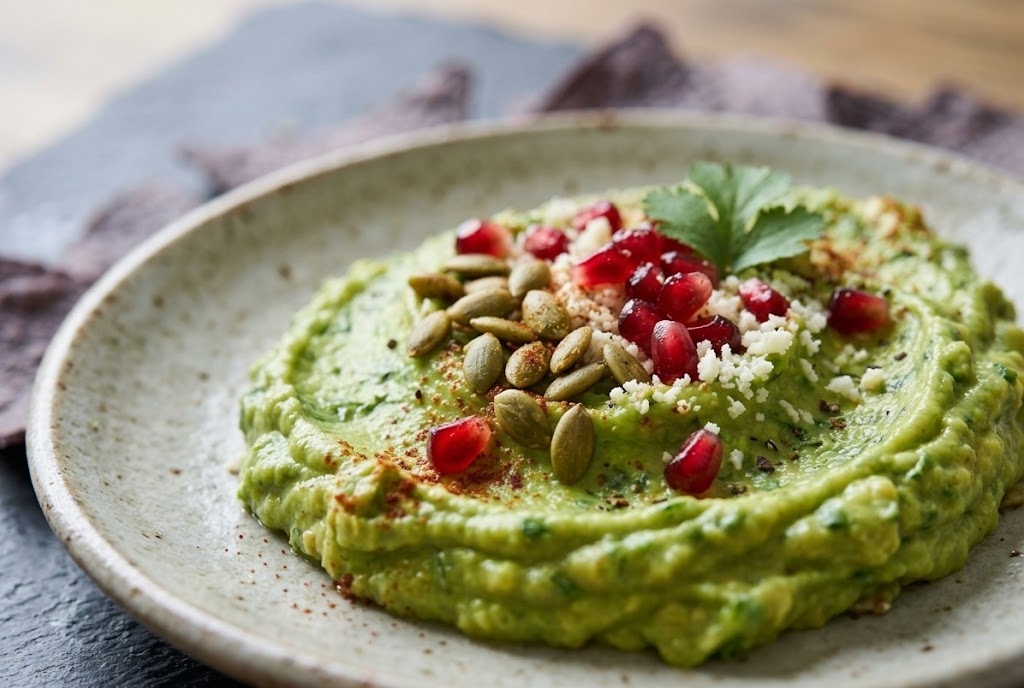
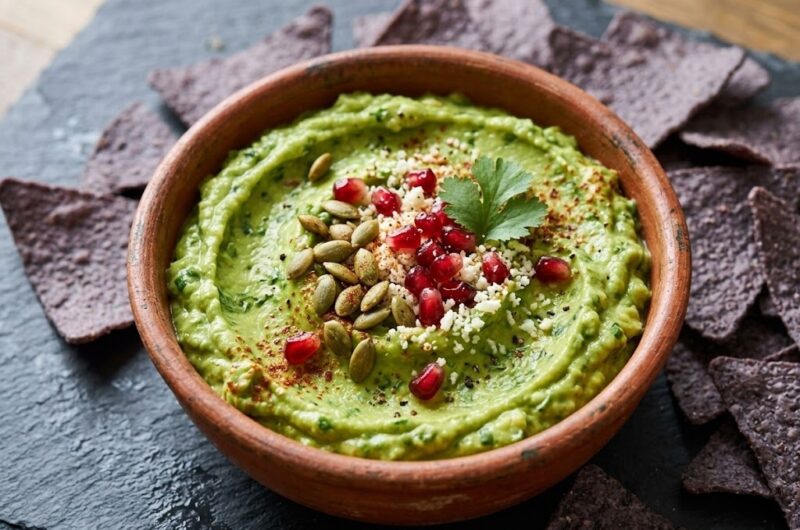
    This fresh guacamole recipe is creamy, vibrant, and packed with bright flavour from ripe avocados, lime, onion, and coriander. It has a smooth yet chunky texture that is perfect for dipping, spreading, or serving alongside your favourite dishes. It is wonderfully easy to make and requires no cooking at all, making it ideal for beginners. Total time is just 15 minutes from start to finish.

    Ingredients

    For the Guacamole

    • 3 ripe avocados
    • 1 small red onion, finely chopped
    • 1 medium tomato, deseeded and diced
    • 1 lime, juiced
    • 2 tbsp fresh coriander, chopped
    • 1 garlic clove, crushed
    • 1/2 tsp sea salt
    • Pinch of black pepper

    How to Make Guacamole Recipe

    • Prepare the avocados: Cut the avocados in half, remove the stones, and scoop the flesh into a medium bowl.
    • Mash the mixture: Use a fork to mash the avocado until mostly smooth with a little texture remaining.
    • Add the fresh ingredients: Stir in the chopped onion, diced tomato, coriander, and crushed garlic.
    • Season well: Add the lime juice, salt, and black pepper. Mix gently until combined.
    • Taste and adjust: Add extra lime juice or salt if needed to suit your preference.
    • Serve: Spoon into a bowl and serve immediately with tortilla chips, wraps, or tacos.
    How to Make Guacamole Recipe

    Tips

    How do I know if avocados are ripe?

    They should yield slightly when gently pressed but not feel mushy.

    How can I stop guacamole turning brown?

    Use plenty of lime juice and press cling film directly onto the surface before chilling.

    Can I make it smoother?

    Yes, mash thoroughly or blend briefly for a silkier texture.

    How do I add extra heat?

    Stir in finely chopped chilli or a pinch of chilli flakes.

    Serving Suggestions

    • Serve with tortilla chips as a dip
    • Spoon into tacos or burritos
    • Spread onto toast
    • Serve beside grilled chicken or fish
    • Add to salads or grain bowls

    Storage

    Room Temperature

    Serve within 1 hour for best freshness and colour.

    Refrigerator

    Store in an airtight container for up to 2 days. Press cling film directly onto the surface.

    Freezing

    Freeze plain guacamole without tomato for up to 1 month. Defrost in the fridge and stir well before serving.

    Nutrition

    • Calories: 180 kcal
    • Carbohydrates: 10g
    • Protein: 2g
    • Fat: 16g
    • Saturated Fat: 2g
    • Sodium: 210mg

    These values are estimates and may vary depending on ingredients used.

    FAQs

    How long does homemade guacamole last?

    Homemade guacamole is best eaten fresh but will keep in the refrigerator for up to 2 days if covered well.

    Can I make guacamole ahead of time?

    Yes, make it a few hours ahead and cover the surface tightly with cling film to reduce browning.

    What can I use instead of coriander?

    You can use fresh parsley or simply leave it out if preferred.

    Can I freeze guacamole?

    Yes, freeze it without tomato for the best texture, then thaw in the fridge before serving.

    Guacamole Recipe

    Recipe by Milli RoseCourse: AppetizerCuisine: MexicanDifficulty: Easy
    Servings

    4

    people
    Prep time

    15

    minutes
    Cooking timeminutes
    Total time

    15

    minutes
    Calories

    180

    kcal

    Creamy homemade guacamole made with ripe avocados, lime juice, onion, tomato, and fresh coriander. Quick, fresh, and perfect for dipping or serving with Mexican dishes.

    Ingredients

    • 3 ripe avocados

    • 1 small red onion, finely chopped

    • 1 medium tomato, deseeded and diced

    • 1 lime, juiced

    • 2 tbsp fresh coriander, chopped

    • 1 garlic clove, crushed

    • 1/2 tsp sea salt

    • Pinch of black pepper

    Directions

    • Cut the avocados in half, remove the stones, and scoop the flesh into a bowl.
    • Mash lightly with a fork until creamy but still slightly chunky.
    • Add the chopped onion, tomato, coriander, and garlic.
    • Pour in the lime juice and season with salt and pepper.
    • Stir gently until evenly combined.
    • Taste and adjust seasoning if needed.
    • Serve immediately for the freshest flavour.

    Notes

    • Use ripe avocados for the best creamy texture.
    • Add extra lime juice to keep the colour bright.
    • Best served fresh on the day it is made.
  • Russian Tea Recipe

    Russian Tea Recipe

    Russian Tea is a fragrant, warming spiced drink made with tea, citrus, and gentle spices. It has a smooth texture with bright orange flavour balanced by cinnamon and cloves, making it especially comforting on chilly days. This is an easy recipe with very little hands-on work, ideal for beginners. Total time is around 15 minutes, with extra time if serving warm in a slow cooker.

    Ingredients

    For the Tea Base

    • 1 litre water
    • 4 black tea bags
    • 250ml orange juice
    • 60ml lemon juice
    • 100g caster sugar or honey

    For the Spiced Flavour

    • 2 cinnamon sticks
    • 6 whole cloves
    • 1 orange, thinly sliced
    • 1 lemon, thinly sliced

    To Serve

    • Extra honey, optional
    • Cinnamon sticks, optional

    How to Make Russian Tea Recipe

    • Prepare the pan: Place a medium saucepan on the hob and pour in the water. Bring it to a gentle boil over medium heat.
    • Brew the tea: Remove the pan from the heat. Add the tea bags and leave to steep for 5 minutes so the flavour becomes rich and balanced.
    • Add the citrus: Remove the tea bags. Stir in the orange juice, lemon juice, and sugar or honey until fully dissolved.
    • Warm with spices: Add the cinnamon sticks, cloves, orange slices, and lemon slices. Return the pan to low heat.
    • Simmer gently: Heat for 8 to 10 minutes. Do not boil, as this can dull the fresh citrus flavour.
    • Serve: Strain if you prefer a clear drink, then pour into mugs. Garnish with fruit slices or cinnamon sticks.
    How to Make Russian Tea Recipe

    Tips

    How do I make it less sweet?

    Reduce the sugar or honey by half, then taste and add more only if needed.

    Can I use different tea?

    Yes, Earl Grey or decaffeinated black tea both work well.

    Why should I avoid boiling after adding juice?

    Boiling can make citrus juices taste flat or slightly bitter. Gentle heat gives the best flavour.

    How do I serve this for guests?

    Transfer the finished tea to a slow cooker on warm so guests can help themselves.

    Serving Suggestions

    • Serve with shortbread biscuits
    • Pair with fruit cake or ginger loaf
    • Offer at festive brunches
    • Enjoy beside a fire on cold evenings

    Storage

    Room Temperature

    Do not leave out for more than 2 hours once prepared.

    Refrigerator

    Cool completely, then store in a covered jug for up to 3 days. Reheat gently before serving.

    Freezing

    Freeze in airtight containers for up to 2 months. Thaw overnight in the fridge and warm slowly on the hob.

    Nutrition

    • Calories: 85 kcal
    • Carbohydrates: 21g
    • Protein: 0g
    • Fat: 0g
    • Saturated Fat: 0g
    • Sodium: 8mg

    Nutrition values are estimates and may vary depending on ingredients used.

    FAQs

    What is Russian Tea made of?

    Russian Tea is usually made with black tea, citrus juice, sugar, and warming spices such as cinnamon and cloves.

    Can I make Russian Tea ahead of time?

    Yes, prepare it up to 3 days ahead and store it chilled in the refrigerator. Reheat gently before serving.

    Can I make it without caffeine?

    Yes, simply use decaffeinated black tea or a caffeine-free herbal tea blend.

    Is Russian Tea served hot or cold?

    It is traditionally served hot, though it can also be chilled and served over ice.

    Russian Tea Recipe

    Recipe by Milli RoseCourse: DrinksCuisine: ClassicDifficulty: Easy
    Servings

    6

    cups
    Prep time

    5

    minutes
    Cooking time

    10

    minutes
    Total time

    15

    minutes
    Calories

    85

    kcal

    15

    minutes

    A warming spiced tea drink made with black tea, orange juice, lemon juice, cinnamon and cloves. Perfect for winter gatherings or a cosy afternoon treat.

    Ingredients

    • 1 litre water

    • 4 black tea bags

    • 250ml orange juice

    • 60ml lemon juice

    • 100g caster sugar or honey

    • 2 cinnamon sticks

    • 6 whole cloves

    • 1 orange, sliced

    • 1 lemon, sliced

    • Extra honey to serve, optional

    Directions

    • Bring the water to a gentle boil in a saucepan.
    • Remove from the heat, add tea bags and steep for 5 minutes.
    • Discard tea bags and stir in orange juice, lemon juice and sugar or honey.
    • Add cinnamon sticks, cloves and sliced fruit.
    • Return to low heat and warm gently for 8 to 10 minutes without boiling.
    • Strain if preferred and ladle into mugs.
    • Garnish with fresh orange slices or cinnamon sticks.

    Notes

    • Do not boil after adding juice to keep the flavour fresh.
    • Adjust sweetness to taste.
    • Keep warm in a slow cooker for parties.
  • Sloppy Joe Recipe

    Sloppy Joe Recipe

    This Sloppy Joe Recipe is a comforting family favourite made with seasoned minced beef simmered in a rich tomato sauce and spooned into soft toasted buns. It is sweet, savoury, slightly tangy, and wonderfully messy in the best possible way. The filling is thick, juicy, and packed with flavour, while the buns stay soft and buttery. It is an easy recipe suitable for beginners, with a total time of around 35 minutes.

    Ingredients

    For the Sloppy Joe Filling

    • 500g lean minced beef
    • 1 medium onion, finely diced
    • 1 green pepper, finely diced
    • 2 garlic cloves, crushed
    • 200ml tomato passata
    • 2 tbsp tomato ketchup
    • 1 tbsp brown sugar
    • 1 tbsp Worcestershire sauce
    • 1 tsp mustard
    • 1 tbsp olive oil
    • 120ml beef stock
    • 1 tsp smoked paprika
    • Salt and black pepper, to taste

    For Serving

    • 6 burger buns
    • Butter for toasting buns
    • Sliced pickles, optional
    • Cheddar cheese slices, optional

    How to Make Sloppy Joe Recipe

    • Prepare the hob: Place a large frying pan over medium heat. Add the olive oil and allow it to warm through before adding the vegetables.
    • Cook the vegetables: Add the diced onion and green pepper. Fry gently for 5 minutes until softened. Stir in the garlic and cook for 30 seconds.
    • Brown the beef: Add the minced beef to the pan. Break it up with a wooden spoon and cook until fully browned with no pink remaining.
    • Mix the sauce: Stir in the passata, ketchup, brown sugar, Worcestershire sauce, mustard, smoked paprika, and stock. Season with salt and pepper.
    • Simmer the filling: Reduce the heat and cook uncovered for 15 to 20 minutes, stirring occasionally, until the sauce thickens and coats the beef well.
    • Toast the buns: Split the buns and lightly butter the cut sides. Toast in a dry frying pan or under the grill until golden.
    • Assemble and serve: Spoon generous amounts of the hot filling onto the toasted buns. Add pickles or cheese if using, then serve immediately.
    How to Make Sloppy Joe Recipe

    Tips

    How do I stop the filling being too runny?

    Simmer the mixture uncovered so excess liquid evaporates. If needed, cook for a few extra minutes until thickened.

    How do I add more flavour?

    A splash of Worcestershire sauce, a little mustard, and smoked paprika all deepen the flavour beautifully.

    Can I make it less sweet?

    Yes, reduce the brown sugar to 1 teaspoon or leave it out entirely if preferred.

    How do I keep buns from going soggy?

    Toast the buns first so they hold the filling better and add a little crunch.

    Serving Suggestions

    • Serve with oven chips or wedges
    • Add coleslaw on the side
    • Pair with a crisp green salad
    • Top with melted cheddar cheese
    • Serve with corn on the cob

    Storage

    Room Temperature

    Do not leave the cooked filling out for more than 2 hours. Serve hot once prepared.

    Refrigerator

    Store cooled filling in an airtight container for up to 3 days. Reheat thoroughly before serving.

    Freezing

    Freeze the cooled filling for up to 3 months. Defrost overnight in the fridge and reheat gently on the hob.

    Nutrition

    • Calories: 430 kcal
    • Carbohydrates: 31g
    • Protein: 28g
    • Fat: 21g
    • Saturated Fat: 8g
    • Sodium: 720mg

    Nutrition values are approximate and may vary depending on ingredients used.

    FAQs

    Can I make Sloppy Joe filling ahead of time?

    Yes, the filling can be made up to 2 days in advance and reheated gently before serving.

    What meat works best for Sloppy Joe Recipe?

    Lean minced beef is traditional, but minced turkey or chicken also works well.

    Can I make this recipe spicy?

    Yes, add chilli flakes, hot sauce, or diced jalapeños to the sauce.

    Can I freeze Sloppy Joe filling?

    Yes, cool completely, freeze in portions, and thaw before reheating.

    Sloppy Joe Recipe

    Recipe by Milli RoseCourse: Main CourseCuisine: AmericanDifficulty: Easy
    Servings

    4

    servings
    Prep time

    30

    minutes
    Cooking time

    40

    minutes
    Calories

    300

    kcal
    Total time

    1

    hour 

    10

    minutes

    Classic Sloppy Joe Recipe made with seasoned minced beef simmered in a rich tomato sauce and served in toasted buns. Easy, hearty and perfect for family meals.

    Ingredients

    • 500g lean minced beef

    • 1 medium onion, diced

    • 1 green pepper, diced

    • 2 garlic cloves, crushed

    • 200ml tomato passata

    • 2 tbsp tomato ketchup

    • 1 tbsp brown sugar

    • 1 tbsp Worcestershire sauce

    • 1 tsp mustard

    • 120ml beef stock

    • 1 tsp smoked paprika

    • 1 tbsp olive oil

    • 6 burger buns

    • Butter for buns

    • Salt and pepper

    Directions

    • Heat oil in a large frying pan over medium heat.
    • Cook onion and pepper until softened, then add garlic.
    • Add minced beef and cook until browned.
    • Stir in passata, ketchup, sugar, Worcestershire sauce, mustard and stock.
    • Simmer uncovered for 15 to 20 minutes until thickened.
    • Toast split buns until golden.
    • Spoon filling into buns and serve hot.

    Notes

    • Toasting buns helps prevent sogginess.
    • The filling freezes very well for quick meals.
    • Add chilli flakes for a spicy version.

slot depo

sicbo online