Author: Rose Melton

  • Sticky Rice Recipe

    Sticky Rice Recipe

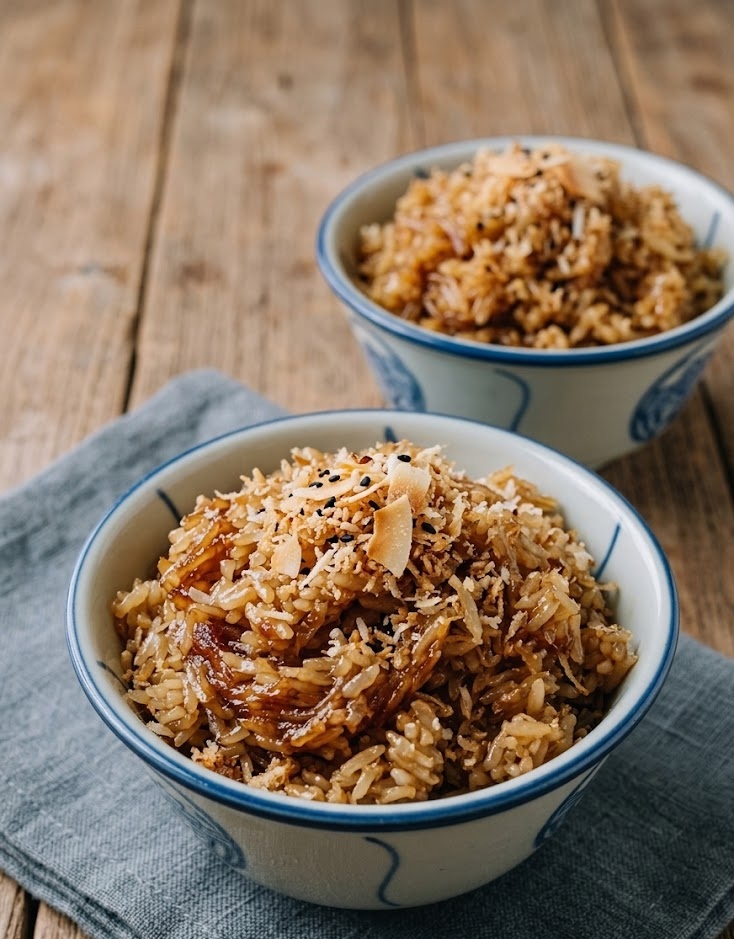
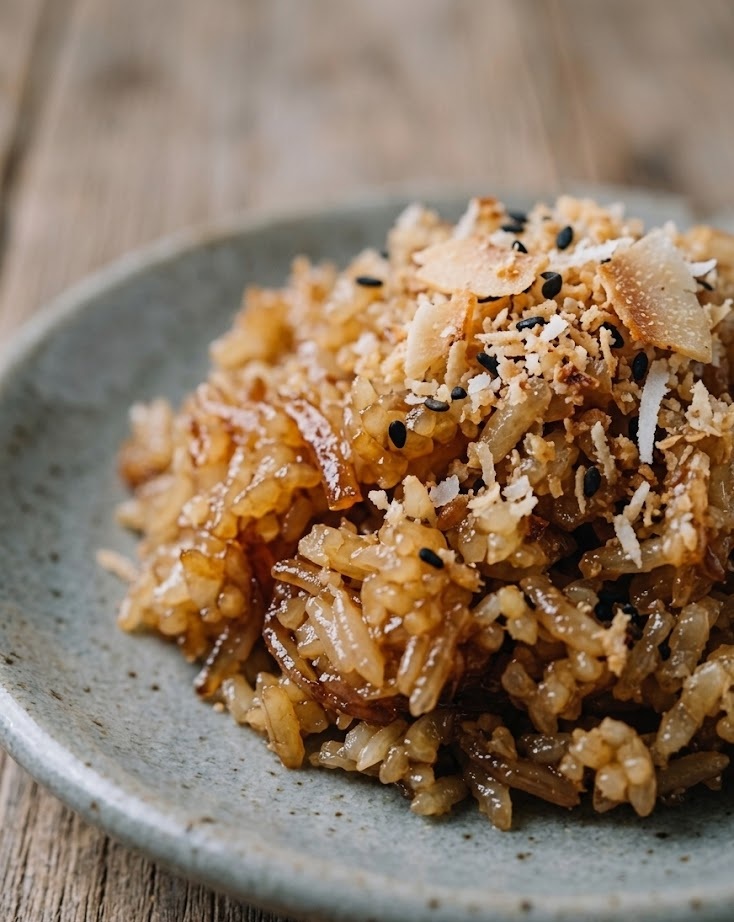
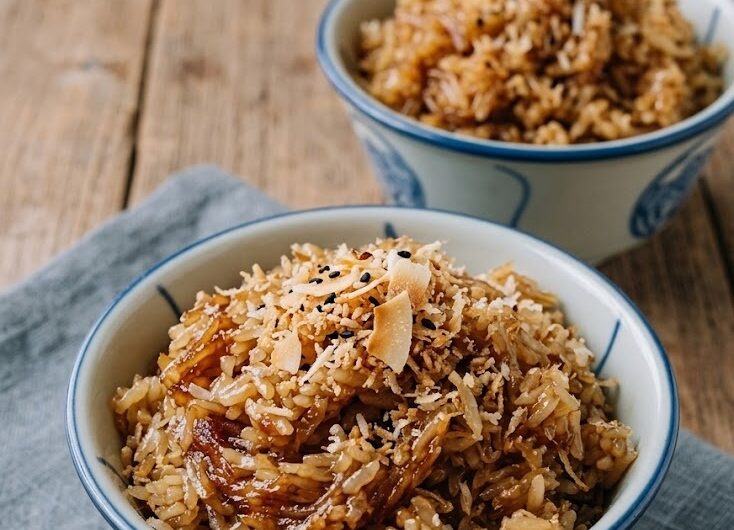
    Sticky rice is soft, slightly chewy, and beautifully glossy with a gentle sweetness that makes it incredibly comforting. This simple recipe produces perfectly tender grains that cling together just enough without becoming heavy. It is easy to prepare, even for beginners, and requires minimal ingredients. From start to finish, the dish takes around 40 minutes and delivers consistently satisfying results.

    Ingredients

    For the Sticky Rice

    • 250g glutinous rice (sticky rice)
    • 400ml water
    • 1/2 tsp salt

    Optional Sweet Topping

    • 200ml coconut milk
    • 2 tbsp caster sugar
    • 1/4 tsp salt

    How to Make Sticky Rice Recipe

    • Prepare the rice: Rinse the glutinous rice under cold water several times until the water runs clear. Soak the rice in fresh water for at least 20 minutes, then drain well.
    • Prepare the cooking setup: Add the drained rice and measured water into a medium saucepan. Stir in the salt and place over medium heat.
    • Cook the rice: Bring to a gentle boil, then reduce the heat to low. Cover with a tight-fitting lid and simmer for 12–15 minutes until the water is absorbed.
    • Steam and rest: Turn off the heat and let the rice sit covered for 10 minutes. This allows it to finish steaming and develop its sticky texture.
    • Prepare the topping (optional): In a small saucepan, gently heat coconut milk, sugar, and salt until dissolved. Do not boil.
    • Assemble and serve: Fluff the rice lightly with a fork. Spoon into bowls and drizzle with the warm coconut mixture if using.
    How to Make Sticky Rice Recipe

    Tips

    Why is my sticky rice too dry?

    This usually means there was not enough water or the heat was too high. Keep the heat low and ensure the lid stays on while cooking.

    How do I get perfectly sticky texture?

    Using glutinous rice is essential. Soaking the rice beforehand also helps achieve the right consistency.

    Can I make it sweeter?

    Yes, increase the sugar in the coconut topping or add a drizzle of honey before serving.

    Why is my rice mushy?

    Too much water or overcooking can cause this. Measure carefully and avoid stirring during cooking.

    Serving Suggestions

    • Serve with fresh mango slices for a classic pairing
    • Enjoy alongside grilled chicken or vegetables
    • Top with toasted sesame seeds for extra texture
    • Drizzle with coconut cream for a richer finish

    Storage

    Room Temperature

    Best enjoyed fresh, but can sit covered for up to 4 hours.

    Refrigerator

    Store in an airtight container for up to 3 days. Reheat gently with a splash of water.

    Freezing

    Freeze in portions for up to 1 month. Defrost overnight and steam lightly to restore texture.

    Nutrition

    • Calories: 220 kcal
    • Carbohydrates: 45g
    • Protein: 4g
    • Fat: 3g
    • Saturated Fat: 2g
    • Sodium: 150mg

    These values are approximate and may vary depending on ingredients used.

    FAQs

    What is the best rice for sticky rice?

    Glutinous rice, also known as sticky rice, is essential for achieving the correct texture. Regular rice will not give the same result.

    Do I need to soak the rice first?

    Yes, soaking helps the grains absorb water evenly and cook to the perfect soft and sticky consistency.

    Can I cook sticky rice without a steamer?

    Yes, this recipe uses a saucepan method which works well and is simple for home cooking.

    How do I reheat sticky rice?

    Add a small splash of water and heat gently in a pan or microwave, covered, to restore moisture.
    Sticky Rice Recipe

    Recipe by Milli RoseCourse: Side DishCuisine: AsianDifficulty: Easy
    Servings

    4

    servings
    Prep time

    30

    minutes
    Cooking time

    40

    minutes
    Calories

    300

    kcal
    Total time

    1

    hour 

    10

    minutes

    Soft, tender sticky rice with a delicate chew and optional coconut sweetness. A simple and comforting dish perfect for both sweet and savoury pairings.

    Ingredients

    • 250g glutinous rice

    • 400ml water

    • 1/2 tsp salt

    • 200ml coconut milk

    • 2 tbsp caster sugar

    • 1/4 tsp salt

    Directions

    • Rinse and soak the glutinous rice, then drain well.
    • Add rice, water and salt to a saucepan.
    • Bring to a boil, then cover and simmer on low heat.
    • Cook until water is absorbed and rice is tender.
    • Rest covered for 10 minutes.
    • Heat coconut milk with sugar and salt if using.
    • Serve rice warm with topping if desired.

    Notes

    • Soaking the rice improves texture.
    • Keep the lid on during cooking for best results.
    • Adjust sweetness to taste.
  • Buttermilk Recipe

    Buttermilk Recipe

    Buttermilk is a simple, versatile kitchen staple with a tangy flavour and smooth, slightly thick texture. It is commonly used in baking to create light, tender cakes, fluffy pancakes, and soft breads. This easy homemade version requires just two ingredients and takes only minutes to prepare. Difficulty is very low, and the total time is under 10 minutes including resting.

    Ingredients

    For the Buttermilk

    • 240ml (1 cup) whole milk
    • 1 tablespoon fresh lemon juice or white vinegar

    How to Make Buttermilk Recipe

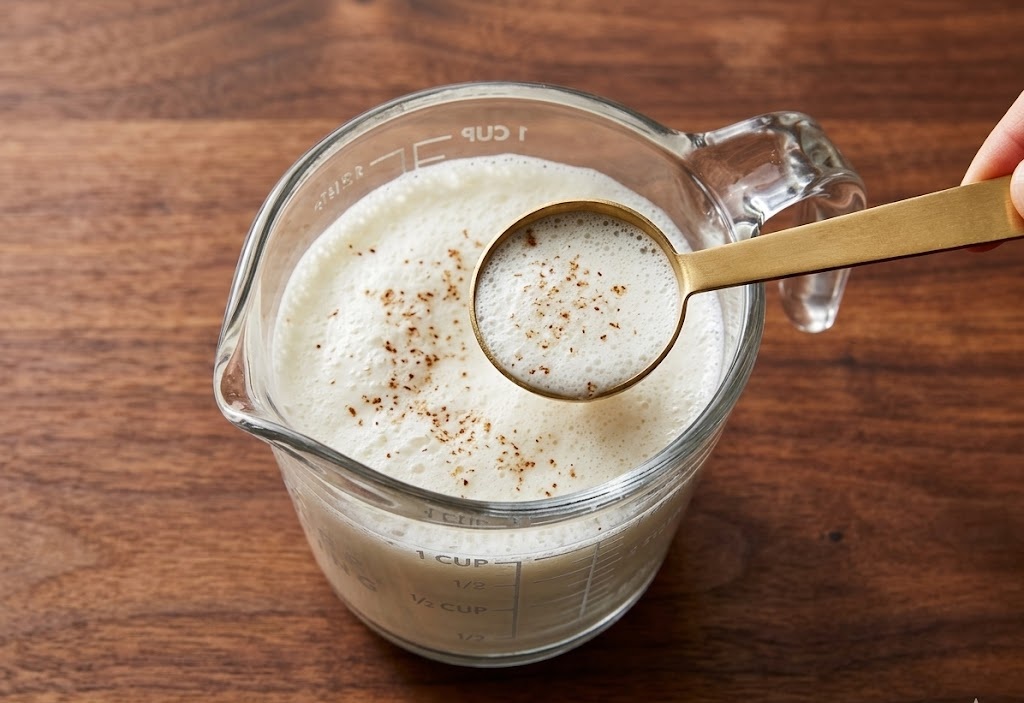
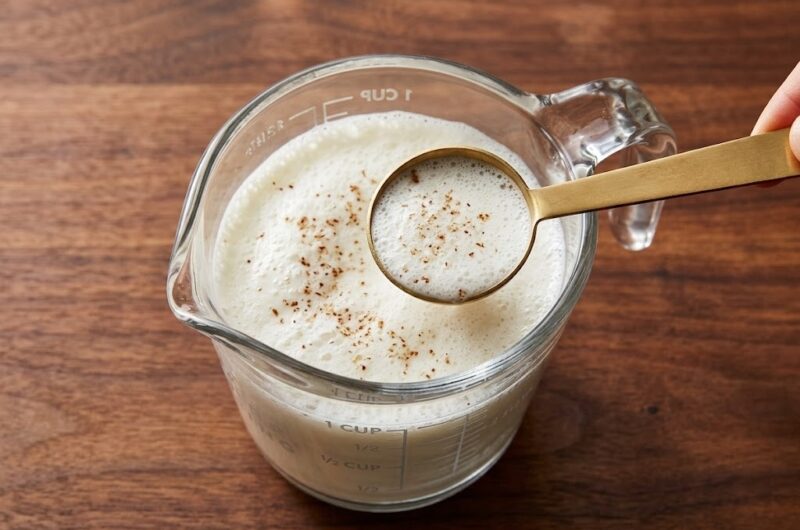
    • Prepare the mixture: Pour the milk into a jug or bowl. Add the lemon juice or vinegar and stir gently to combine.
    • Let it rest: Leave the mixture at room temperature for 5 to 10 minutes. It will begin to curdle slightly and thicken.
    • Check consistency: Once slightly thickened with small curdled bits, your buttermilk is ready to use.
    • Use or store: Use immediately in your recipe or store as needed.
    How to Make Buttermilk Recipe

    Tips

    Why didn’t my buttermilk curdle?

    Make sure your milk is at room temperature and that you use enough acid. Cold milk slows the reaction.

    Can I use other types of milk?

    Yes, but whole milk gives the best texture. Semi-skimmed works, though it will be slightly thinner.

    How do I make thicker buttermilk?

    For a thicker consistency, add an extra teaspoon of lemon juice and allow a longer resting time.

    Can I make a dairy-free version?

    Yes, use unsweetened plant-based milk like soy or almond with lemon juice. Soy milk works best for curdling.

    Serving Suggestions

    • Use in pancakes or waffles for a soft, fluffy texture
    • Add to cake batters for extra moisture
    • Mix into soda bread or scones
    • Use as a marinade for tender chicken

    Storage

    Room Temperature

    Keep at room temperature only while curdling. Do not leave out for extended periods.

    Refrigerator

    Store in a sealed container for up to 3 days. Stir before using.

    Freezing

    Freeze in small portions for up to 2 months. Thaw in the fridge and shake well before use.

    Nutrition

    • Calories: 150 kcal
    • Carbohydrates: 12g
    • Protein: 8g
    • Fat: 8g
    • Saturated Fat: 5g
    • Sodium: 120mg

    These values are approximate and may vary depending on ingredients used.

    FAQs

    What is buttermilk used for?

    Buttermilk is commonly used in baking to create tender textures in cakes, pancakes, and breads. It also works well as a marinade.

    Can I substitute buttermilk in recipes?

    Yes, this homemade version works perfectly as a substitute in most recipes that call for buttermilk.

    How long does homemade buttermilk last?

    It keeps in the refrigerator for up to 3 days when stored in an airtight container.

    Does buttermilk taste sour?

    It has a mild tangy flavour, not overly sour, which enhances both sweet and savoury dishes.

    Buttermilk Recipe

    Recipe by Milli RoseCourse: IngredientCuisine: UniversalDifficulty: Easy
    Servings

    4

    servings
    Prep time

    30

    minutes
    Cooking time

    40

    minutes
    Calories

    300

    kcal
    Total time

    1

    hour 

    10

    minutes

    Quick and easy homemade buttermilk made with just milk and lemon juice or vinegar. Perfect for baking and cooking.

    Ingredients

    • 240ml whole milk

    • 1 tablespoon lemon juice or white vinegar

    Directions

    • Pour milk into a bowl or jug.
    • Stir in lemon juice or vinegar.
    • Leave for 5 to 10 minutes until slightly thickened and curdled.
    • Stir gently and use as needed.

    Notes

    • Use room temperature milk for best results.
    • Stir before using if stored.
    • Best used fresh for baking.
  • Ricotta Cheese Recipe

    Ricotta Cheese Recipe

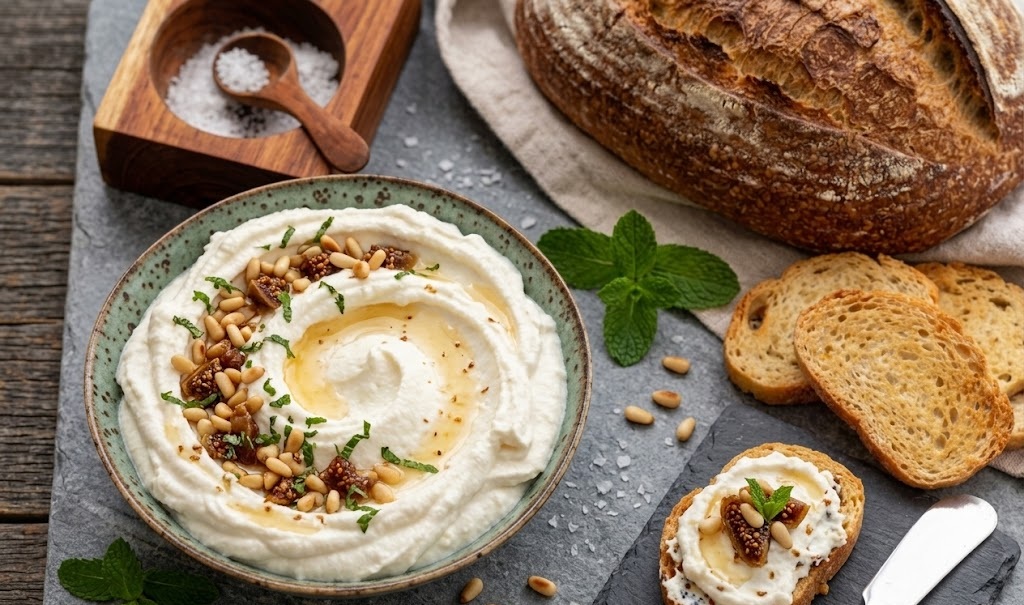
    This homemade ricotta cheese is fresh, creamy, and beautifully light with a delicate, slightly sweet flavour. It has a soft, fluffy texture that works perfectly in both savoury and sweet dishes. The process is simple and surprisingly quick, making it ideal even for beginners. From start to finish, this recipe takes around 30 minutes with minimal effort.

    Ingredients

    For the Ricotta Cheese

    • 2 litres whole milk
    • 300ml double cream
    • 3 tbsp white vinegar or lemon juice
    • 1 tsp fine salt

    How to Make Ricotta Cheese

    • Prepare the equipment: Line a sieve with muslin or cheesecloth and place it over a large bowl to catch the whey.
    • Heat the milk: Pour the milk and cream into a large saucepan. Heat gently over medium heat until it reaches a gentle simmer, stirring occasionally to prevent sticking.
    • Add the acid: Remove the pan from the heat and stir in the vinegar or lemon juice along with the salt. Leave undisturbed for 5 to 10 minutes until curds form and separate from the whey.
    • Strain the curds: Carefully pour the mixture into the prepared sieve. Let it drain naturally for 10 to 20 minutes depending on how firm you want the ricotta.
    • Cool the cheese: Once drained to your liking, transfer the ricotta to a bowl and allow it to cool completely.
    • Serve or store: Use immediately for best flavour or refrigerate for later use.
    How to Make Ricotta Cheese

    Tips

    Why didn’t my milk curdle properly?

    Ensure the milk is hot enough before adding the acid. If needed, add an extra teaspoon of vinegar or lemon juice and stir gently.

    How do I make the ricotta creamier?

    Do not over-drain the curds. Leaving a little moisture gives a softer, creamier texture.

    Can I use low-fat milk?

    Whole milk is best for richness. Low-fat milk will produce less curd and a drier texture.

    How can I make it firmer?

    Let the ricotta drain for longer, up to 30 minutes, for a thicker consistency suitable for baking.

    Serving Suggestions

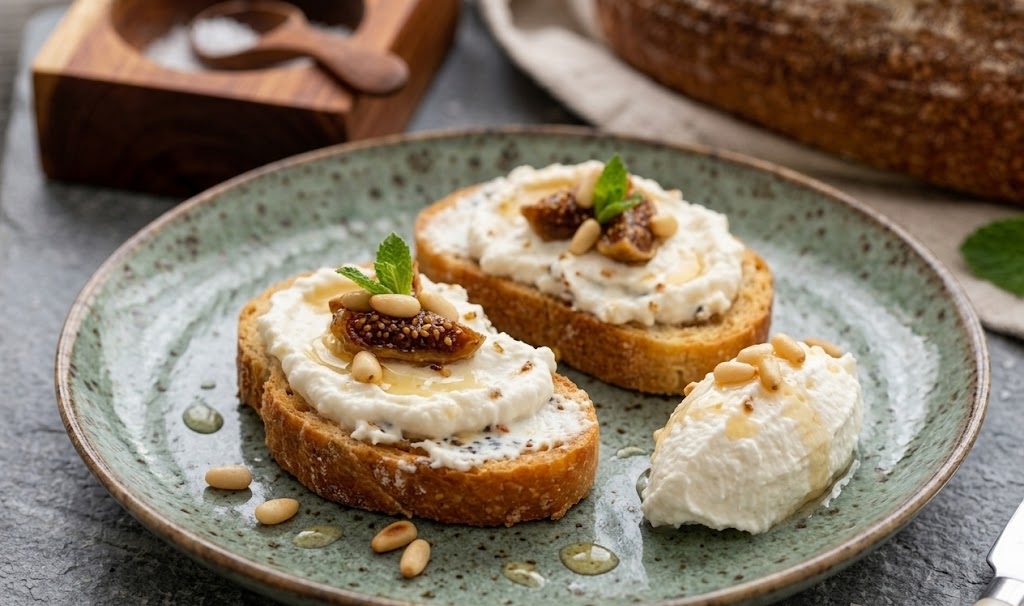
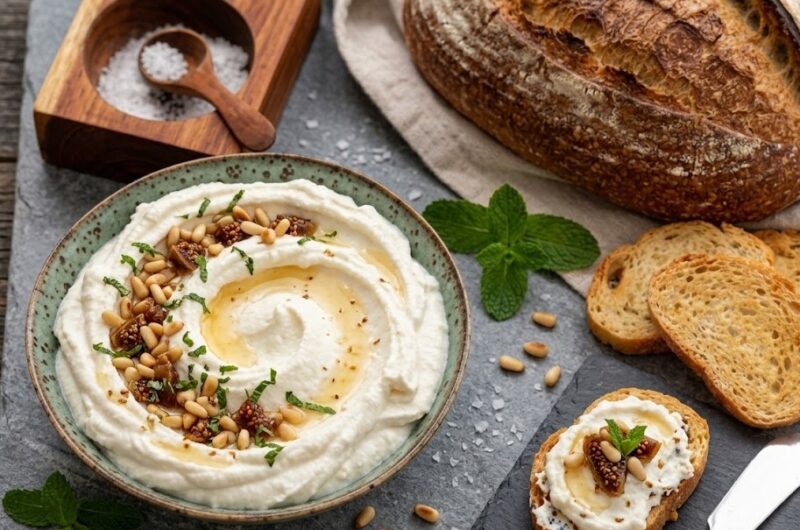
    • Spread on warm toast with honey or fresh fruit
    • Use in pasta dishes like lasagne or stuffed shells
    • Add to salads with herbs and olive oil
    • Serve alongside roasted vegetables

    Storage

    Room Temperature

    Not suitable for keeping at room temperature. Always refrigerate promptly after making.

    Refrigerator

    Store in an airtight container for up to 3 days. Stir gently before using.

    Freezing

    Ricotta can be frozen for up to 1 month, though the texture may become slightly grainy once thawed.

    Nutrition

    • Calories: 180 kcal
    • Carbohydrates: 5g
    • Protein: 9g
    • Fat: 14g
    • Saturated Fat: 9g
    • Sodium: 120mg

    These values are approximate and may vary depending on ingredients used.

    FAQs

    Can I make ricotta without cream?

    Yes, you can use only whole milk, but adding cream gives a richer and softer texture.

    What can I do with leftover whey?

    Whey can be used in baking, soups, or smoothies instead of water for added nutrients.

    Can I use lemon juice instead of vinegar?

    Yes, lemon juice works perfectly and adds a slightly fresher flavour.

    How do I know when the ricotta is ready?

    The curds should be clearly separated from the liquid whey, forming soft white clusters.

    Ricotta Cheese Recipe

    Recipe by Milli RoseCourse: SideCuisine: ItalianDifficulty: Easy
    Servings

    4

    servings
    Prep time

    30

    minutes
    Cooking time

    40

    minutes
    Calories

    300

    kcal
    Total time

    1

    hour 

    10

    minutes

    Fresh homemade ricotta cheese with a soft, creamy texture and delicate flavour. Perfect for both sweet and savoury dishes.

    Ingredients

    • 2 litres whole milk

    • 300ml double cream

    • 3 tbsp white vinegar or lemon juice

    • 1 tsp fine salt

    Directions

    • Line a sieve with cheesecloth and place over a bowl.
    • Heat milk and cream in a saucepan until just simmering.
    • Remove from heat and stir in vinegar or lemon juice and salt.
    • Leave for 5–10 minutes until curds form.
    • Pour into sieve and allow to drain for 10–20 minutes.
    • Transfer to a bowl and cool before serving.

    Notes

    • Use whole milk for best results.
    • Do not boil the milk.
    • Adjust draining time for desired texture.
  • Lemon Rice Soup Recipe

    Lemon Rice Soup Recipe

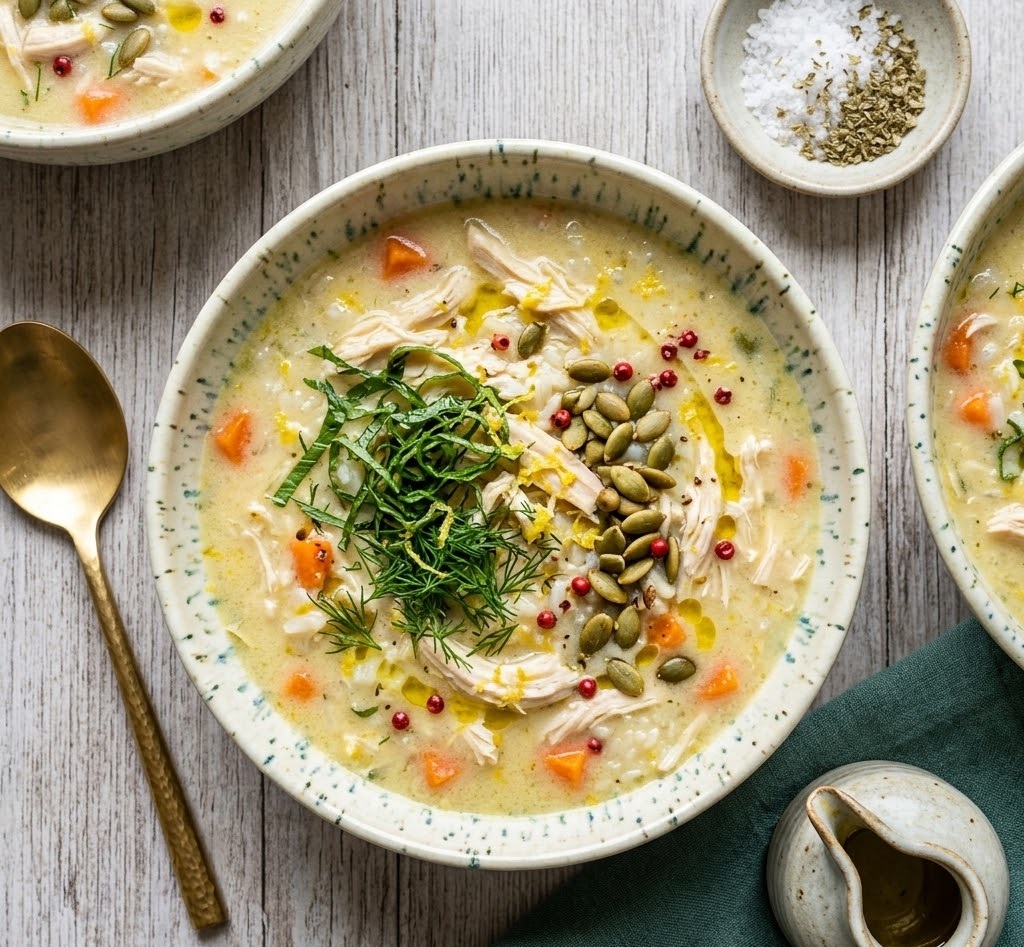
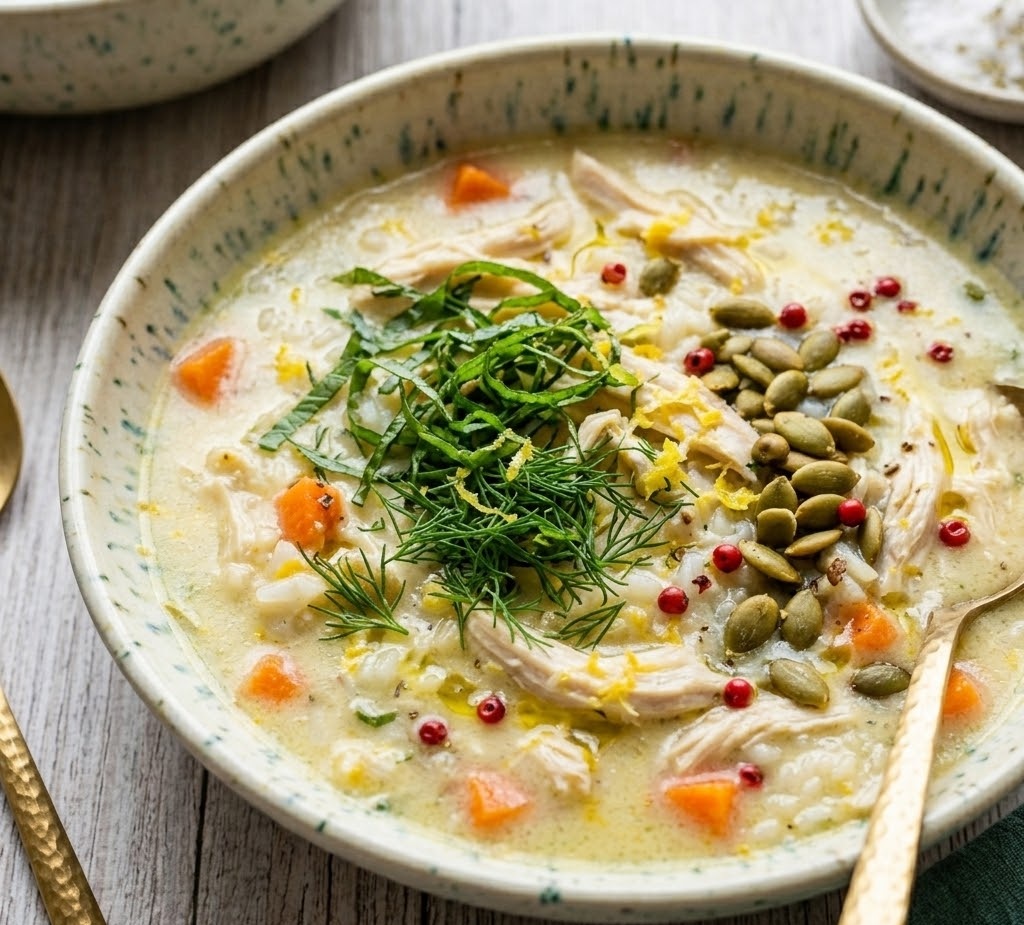
    This lemon rice soup is a comforting, silky bowl of warmth with a bright citrus finish. The texture is creamy without being heavy, thanks to gently cooked rice and a delicate egg-lemon blend. It is simple enough for beginners yet elegant in flavour, making it ideal for both everyday meals and light dinners. The total time is around 35 minutes from start to finish.

    Ingredients

    For the Soup Base

    • 1 litre chicken or vegetable stock
    • 120g long-grain rice
    • 1 small onion, finely chopped
    • 2 cloves garlic, minced
    • 1 tbsp olive oil
    • Salt and black pepper, to taste

    For the Lemon Mixture

    • 2 large eggs
    • Juice of 2 lemons
    • Zest of 1 lemon

    To Finish

    • Fresh parsley or dill, chopped
    • Extra lemon wedges, to serve

    How to Make Lemon Rice Soup

    • Prepare the base: Heat the olive oil in a large saucepan over medium heat. Add the chopped onion and cook for 5 minutes until soft. Stir in the garlic and cook for another minute until fragrant.
    • Add the stock and rice: Pour in the stock and bring to a gentle boil. Add the rice, reduce the heat, and simmer for 15–18 minutes until the rice is tender.
    • Mix the lemon base: In a bowl, whisk together the eggs, lemon juice, and zest until smooth and slightly frothy.
    • Temper the eggs: Slowly ladle a cup of hot soup into the lemon mixture, whisking constantly. This prevents the eggs from curdling.
    • Combine gently: Pour the tempered mixture back into the saucepan. Stir gently over low heat for 2–3 minutes until the soup thickens slightly. Do not boil.
    • Finish and serve: Season with salt and pepper, sprinkle with fresh herbs, and serve hot with lemon wedges on the side.
    How to Make Lemon Rice Soup

    Tips

    How do I stop the eggs from curdling?

    Always temper the eggs by slowly adding hot soup while whisking. Keep the heat low once combined.

    Can I make this soup vegetarian?

    Yes, simply use a good-quality vegetable stock instead of chicken stock.

    What rice works best?

    Long-grain rice keeps the texture light, but you can use basmati or jasmine for extra fragrance.

    How do I get a creamier texture?

    Add a little extra egg mixture or cook the rice slightly longer so it releases more starch.

    Serving Suggestions

    • Serve with warm crusty bread
    • Pair with a simple green salad
    • Add shredded chicken for a heartier meal
    • Top with extra fresh herbs for brightness

    Storage

    At Room Temperature

    Best served fresh. Do not leave out for more than 2 hours.

    In the Refrigerator

    Store in an airtight container for up to 3 days. Reheat gently over low heat without boiling.

    Freezing

    Not ideal for freezing as the egg mixture may separate, but it can be frozen without the lemon mixture and finished fresh.

    Nutrition

    • Calories: 220 kcal
    • Carbohydrates: 28g
    • Protein: 10g
    • Fat: 8g
    • Saturated Fat: 2g
    • Sodium: 680mg

    Values are estimates and may vary depending on ingredients used.

    FAQs

    Can I make lemon rice soup without eggs?

    Yes, you can skip the eggs for a lighter broth-style soup. It will still have a fresh lemon flavour but less creaminess.

    Can I use leftover rice?

    Yes, add cooked rice towards the end and simmer briefly. This reduces cooking time significantly.

    Why is my soup too thick?

    The rice can absorb liquid as it sits. Add a splash of hot stock or water when reheating to loosen the texture.

    Can I add chicken to this recipe?

    Absolutely. Shredded cooked chicken works beautifully and turns this into a more filling meal.

    Lemon Rice Soup

    Recipe by Milli RoseCourse: SoupCuisine: MediterraneanDifficulty: Easy
    Servings

    4

    servings
    Prep time

    30

    minutes
    Cooking time

    40

    minutes
    Calories

    300

    kcal
    Total time

    1

    hour 

    10

    minutes

    A light, creamy lemon rice soup with a silky texture and fresh citrus flavour. Perfect for a comforting and quick meal.

    Ingredients

    • 1 litre chicken or vegetable stock

    • 120g long-grain rice

    • 1 small onion, finely chopped

    • 2 cloves garlic, minced

    • 1 tbsp olive oil

    • 2 large eggs

    • Juice of 2 lemons

    • Zest of 1 lemon

    • Salt and black pepper, to taste

    • Fresh herbs, to serve

    Directions

    • Heat oil and cook onion until soft. Add garlic and cook briefly.
    • Add stock and rice. Simmer until rice is tender.
    • Whisk eggs with lemon juice and zest.
    • Temper with hot soup, then return to pan.
    • Heat gently without boiling until slightly thickened.
    • Season, garnish, and serve warm.

    Notes

    • Do not boil after adding eggs.
    • Adjust lemon to taste.
    • Best served fresh.
  • Osso Buco with Gremolata Potatoes Recipe

    Osso Buco with Gremolata Potatoes Recipe

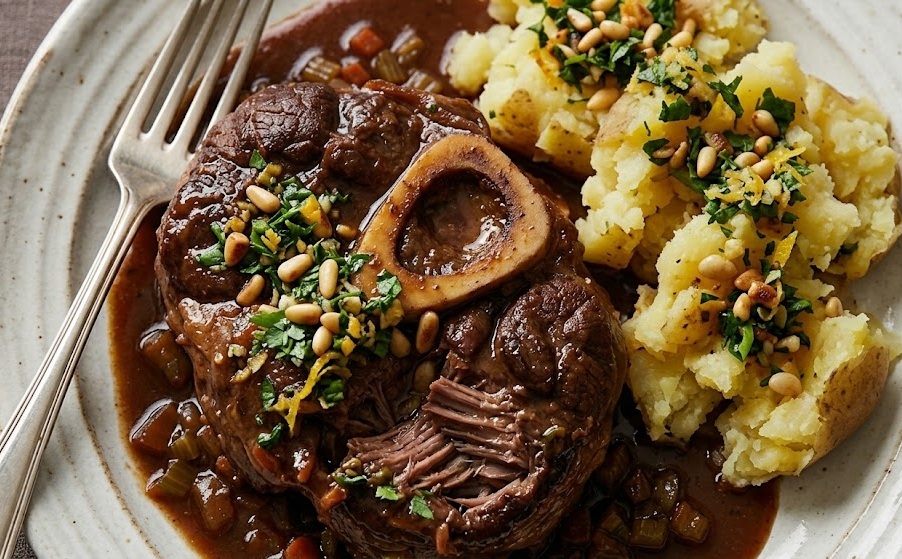
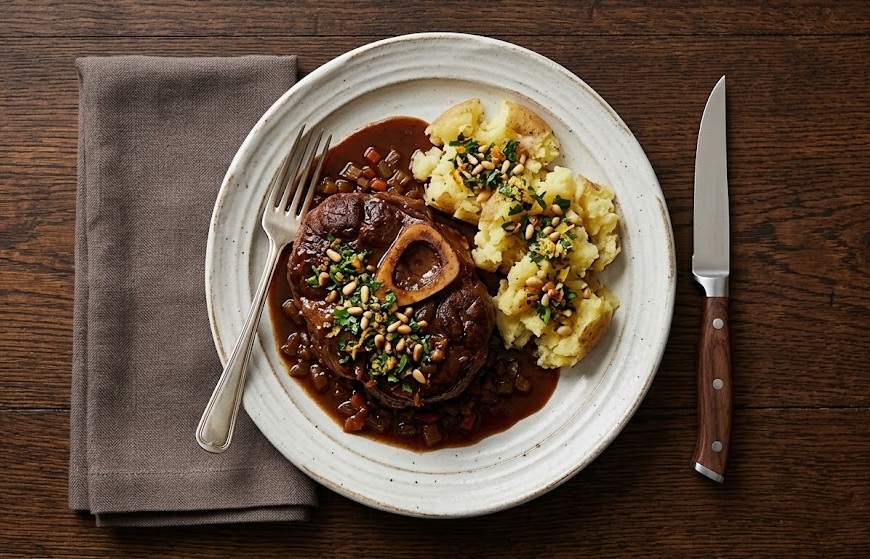
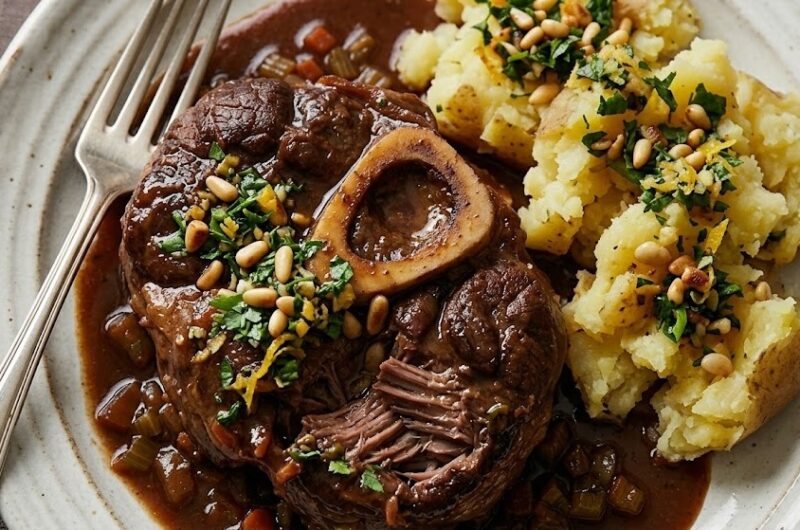
    Osso buco with gremolata potatoes is a rich and comforting Italian-inspired dish made with slow-cooked veal or beef shanks, tender vegetables, and a glossy tomato and wine sauce. The meat becomes meltingly soft, while the potatoes are crisp outside, fluffy inside, and brightened with fresh lemon, parsley, and garlic. It looks impressive but is wonderfully straightforward to make at home. Allow around 3 hours total time for the best texture and flavour.

    Ingredients

    For the Osso Buco

    • 4 veal or beef shanks
    • 2 tbsp plain flour
    • 2 tbsp olive oil
    • 1 onion, finely diced
    • 2 carrots, diced
    • 2 celery sticks, diced
    • 3 garlic cloves, crushed
    • 150ml white wine
    • 400g tin chopped tomatoes
    • 500ml beef stock
    • 1 bay leaf
    • Salt and black pepper

    For the Gremolata Potatoes

    • 700g potatoes, cut into chunks
    • 1 tbsp olive oil
    • Zest of 1 lemon
    • 2 tbsp chopped parsley
    • 1 garlic clove, finely grated

    How to Make Osso Buco with Gremolata Potatoes

    • Prepare the oven: Preheat the oven to 160°C fan. Place a shelf in the middle of the oven for even cooking.
    • Brown the meat: Season the shanks, dust with flour, then brown in hot oil until richly coloured on both sides. Remove to a plate.
    • Cook the vegetables: Add onion, carrot and celery to the pan. Cook until softened, then stir in the garlic.
    • Build the sauce: Pour in the wine and let it bubble for 2 minutes. Add tomatoes, stock and bay leaf.
    • Slow cook: Return the shanks to the casserole, cover, and cook for 2 to 2½ hours until very tender.
    • Roast the potatoes: Increase oven to 200°C. Toss potatoes with oil and roast for 40 to 45 minutes until crisp and golden.
    • Finish the potatoes: Mix lemon zest, parsley and garlic, then toss through the hot roasted potatoes.
    • Serve: Spoon the rich sauce over the osso buco and serve with the gremolata potatoes.
    How to Make Osso Buco with Gremolata Potatoes

    Tips

    How do I keep the meat tender?

    Cook it slowly at a low temperature until it yields easily to a fork.

    Why flour the shanks first?

    The flour helps create a better crust and lightly thickens the sauce.

    Can I make it ahead?

    Yes, the flavour improves overnight, making it ideal for preparing a day early.

    Serving Suggestions

    • Serve with steamed greens.
    • Add crusty bread for the sauce.
    • Pair with a crisp green salad.
    • Finish with extra parsley and lemon zest.

    Storage

    Room Temperature

    Do not leave out for more than 2 hours.

    Refrigerator

    Store in an airtight container for up to 3 days.

    Freezing

    Freeze the osso buco for up to 3 months. Freeze potatoes separately for best texture.

    Nutrition

    • Calories: 620 kcal
    • Carbohydrates: 32g
    • Protein: 42g
    • Fat: 34g
    • Saturated Fat: 11g
    • Sodium: 690mg

    Nutrition values are approximate and may vary depending on ingredients used.

    FAQs

    Can I use beef instead of veal?

    Yes, beef shanks work beautifully and are widely available.

    What does gremolata taste like?

    It is fresh, zesty and garlicky, which balances the richness of the braise.

    Can I cook this on the hob only?

    Yes, simmer very gently with the lid on for around 2 hours.

    What can I serve instead of potatoes?

    Creamy polenta, mash or buttered pasta are all excellent choices.

    Osso Buco with Gremolata Potatoes Recipe

    Recipe by Milli RoseCourse: Main CourseCuisine: ItalianDifficulty: Medium
    Servings

    4

    people
    Prep time

    25

    minutes
    Cooking time

    2

    hours 

    30

    minutes
    Total time

    175

    minutes
    Calories

    620

    kcal

    2

    hours 

    55

    minutes

    Slow-cooked osso buco with tender meat in a rich tomato sauce, served with crispy roasted potatoes finished with fresh gremolata.

    Ingredients

    • 4 veal or beef shanks

    • 2 tbsp plain flour

    • 2 tbsp olive oil

    • 1 onion, diced

    • 2 carrots, diced

    • 2 celery sticks, diced

    • 3 garlic cloves, crushed

    • 150ml white wine

    • 400g chopped tomatoes

    • 500ml beef stock

    • 1 bay leaf

    • 700g potatoes, cut into chunks

    • 1 tbsp olive oil

    • 1 lemon, zest only

    • 2 tbsp parsley, chopped

    • 1 garlic clove, finely grated

    • Salt and black pepper

    • Butter for finishing (optional)

    Directions

    • Preheat oven to 160°C fan. Season the shanks and dust lightly with flour.
    • Heat oil in a casserole dish and brown the shanks well on both sides. Remove and set aside.
    • Add onion, carrot and celery. Cook for 8 minutes until softened.
    • Stir in garlic, then pour in wine and simmer for 2 minutes.
    • Add tomatoes, stock and bay leaf. Return the shanks to the pan.
    • Cover and cook in the oven for 2 to 2½ hours until the meat is tender.
    • Meanwhile roast potatoes at 200°C for 45 minutes with olive oil until golden.
    • Mix lemon zest, parsley and grated garlic, then toss through the hot potatoes.
    • Serve the osso buco with sauce spooned over and potatoes alongside.

    Notes

    • Brown the meat well for deeper flavour.
    • Cook gently until the meat is fork tender.
    • The dish tastes even better the next day.
  • Rice Paper Recipe

    Rice Paper Recipe

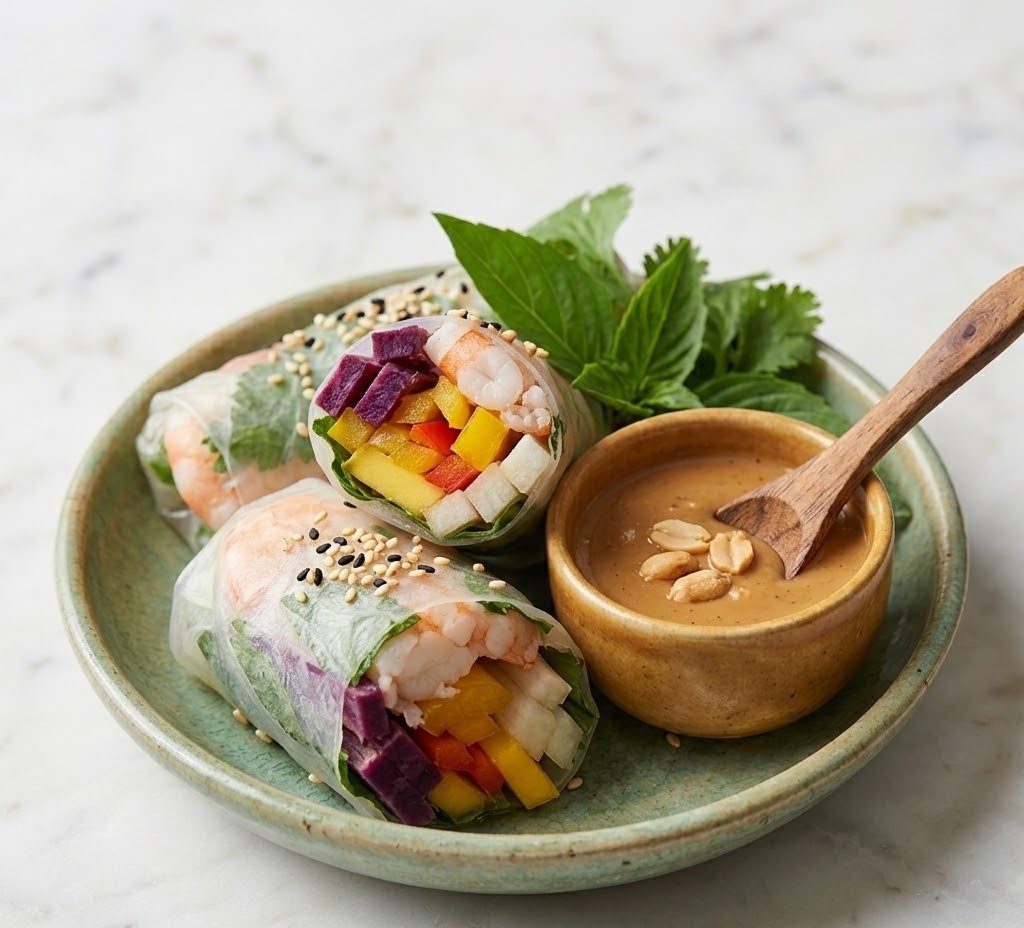
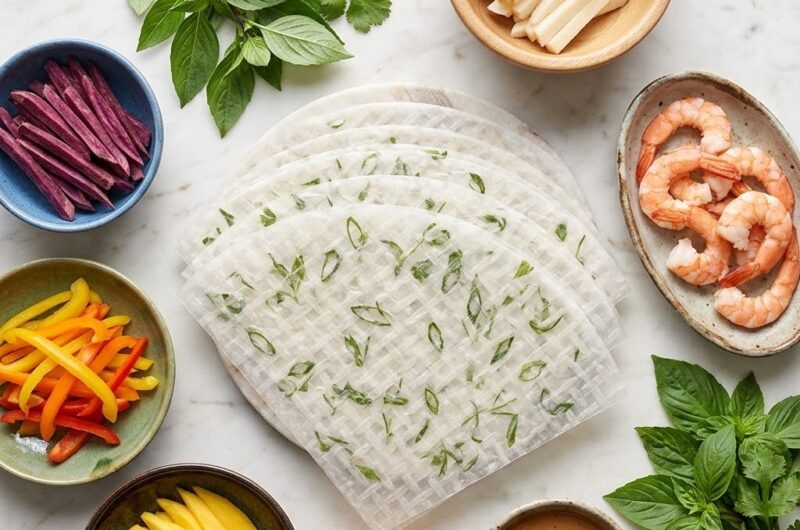
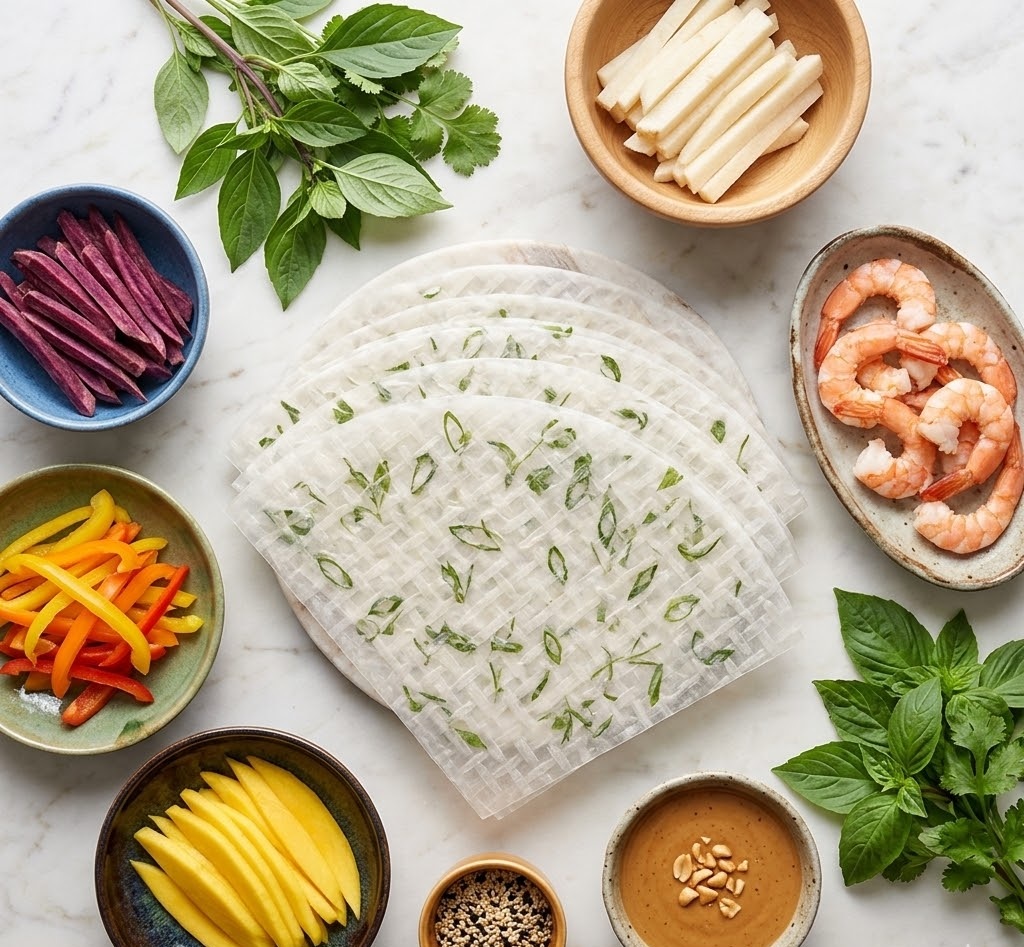
    Rice paper is a wonderfully light and versatile ingredient used to make fresh rolls, crispy snacks, and delicate wraps. Once softened in warm water, the sheets become smooth, flexible, and easy to fill with vegetables, herbs, noodles, or cooked meat. This recipe shows you how to make classic fresh rice paper rolls at home with crisp vegetables and a simple dipping sauce. It is beginner-friendly, refreshing, and ready in around 30 minutes.

    Ingredients

    For the Rice Paper Rolls

    • 8 rice paper sheets
    • 100g rice noodles, cooked and cooled
    • 1 carrot, peeled and cut into matchsticks
    • 1 cucumber, cut into thin strips
    • 1 red pepper, thinly sliced
    • 1 avocado, sliced
    • Small handful fresh mint leaves
    • Small handful fresh coriander leaves

    For the Dipping Sauce

    • 2 tablespoons soy sauce
    • 1 tablespoon lime juice
    • 1 teaspoon honey
    • 1 teaspoon sesame oil

    How to Make Rice Paper Recipe

    • Prepare the filling: Cook the rice noodles according to the packet instructions. Drain well, rinse under cold water, and set aside. Slice the vegetables into thin strips and gather the herbs.
    • Make the dipping sauce: In a small bowl, stir together the soy sauce, lime juice, honey, and sesame oil until blended.
    • Soften the rice paper: Fill a shallow dish with warm water. Dip one rice paper sheet into the water for about 10 seconds until just soft.
    • Add the filling: Place the softened sheet on a clean damp surface. Add a small amount of noodles, vegetables, avocado, mint, and coriander in the centre.
    • Roll neatly: Fold in both sides, then roll from the bottom upward into a firm cylinder. Keep the filling compact so the roll stays tight.
    • Repeat and serve: Continue with the remaining sheets. Arrange on a plate and serve straight away with the dipping sauce.
    How to Make Rice Paper Recipe

    Tips

    Why is my rice paper tearing?

    It has likely been soaked too long. Dip it briefly, as it continues softening after removal from the water.

    How do I stop rolls sticking together?

    Leave a little space between each roll on the plate or line the plate with lettuce leaves.

    Can I make them tighter?

    Use less filling and tuck the first fold in firmly before rolling forward.

    How do I keep them fresh?

    Cover with a lightly damp cloth until serving so the wrappers stay soft.

    Serving Suggestions

    • Serve with peanut dipping sauce or sweet chilli sauce
    • Pair with miso soup for a light lunch
    • Add grilled chicken or prawns for a fuller meal
    • Enjoy with iced green tea

    Storage

    Room Temperature

    Best eaten within 2 hours of making for the freshest texture.

    Refrigerator

    Store in an airtight container for up to 1 day. Separate rolls with damp parchment paper.

    Freezing

    Not recommended, as rice paper becomes tough and watery once thawed.

    Nutrition

    • Calories: 120 kcal
    • Carbohydrates: 21g
    • Protein: 3g
    • Fat: 3g
    • Saturated Fat: 0.5g
    • Sodium: 310mg

    Nutrition values are approximate and may vary depending on ingredients used.

    FAQs

    How long do rice paper rolls last?

    They are best eaten fresh but can be stored in the refrigerator for up to 1 day in an airtight container.

    Can I make rice paper rolls ahead of time?

    Yes, make them a few hours ahead and keep covered with a damp cloth in the fridge.

    What can I use as filling?

    Vegetables, noodles, herbs, tofu, prawns, chicken, or avocado all work beautifully.

    Do I need to cook rice paper sheets?

    No, they only need a brief soak in warm water to soften before rolling.

    Rice Paper Recipe

    Recipe by Milli RoseCourse: LunchCuisine: AsianDifficulty: Easy
    Servings

    8

    rolls
    Prep time

    25

    minutes
    Cooking time

    5

    minutes
    Total time

    30

    minutes
    Calories

    120

    kcal

    30

    minutes

    Fresh rice paper rolls filled with crisp vegetables, noodles, herbs, and served with a flavourful dipping sauce. Light, healthy, and easy to prepare.

    Ingredients

    • 8 rice paper sheets

    • 100g rice noodles, cooked

    • 1 carrot, julienned

    • 1 cucumber, julienned

    • 1 red pepper, sliced thinly

    • 1 avocado, sliced

    • Fresh mint leaves

    • Fresh coriander leaves

    • 2 tbsp soy sauce

    • 1 tbsp lime juice

    • 1 tsp honey

    • 1 tsp sesame oil

    Directions

    • Cook the rice noodles according to the packet instructions, then drain and cool.
    • Slice all vegetables into thin strips and arrange on a plate with herbs.
    • Mix soy sauce, lime juice, honey and sesame oil in a small bowl.
    • Fill a shallow dish with warm water. Dip one rice paper sheet for 10 seconds until soft.
    • Lay the sheet on a damp board and add noodles, vegetables and herbs in the centre.
    • Fold the sides inward, then roll tightly from the bottom upward.
    • Repeat with remaining sheets and filling.
    • Serve fresh with the dipping sauce.

    Notes

    • Do not soak the rice paper too long or it may tear.
    • Keep finished rolls covered with a damp cloth so they stay soft.
    • Add cooked prawns or chicken for extra protein.
  • Chilies Citrus Balsamic Vinaigerrte Recipe

    Chilies Citrus Balsamic Vinaigerrte Recipe

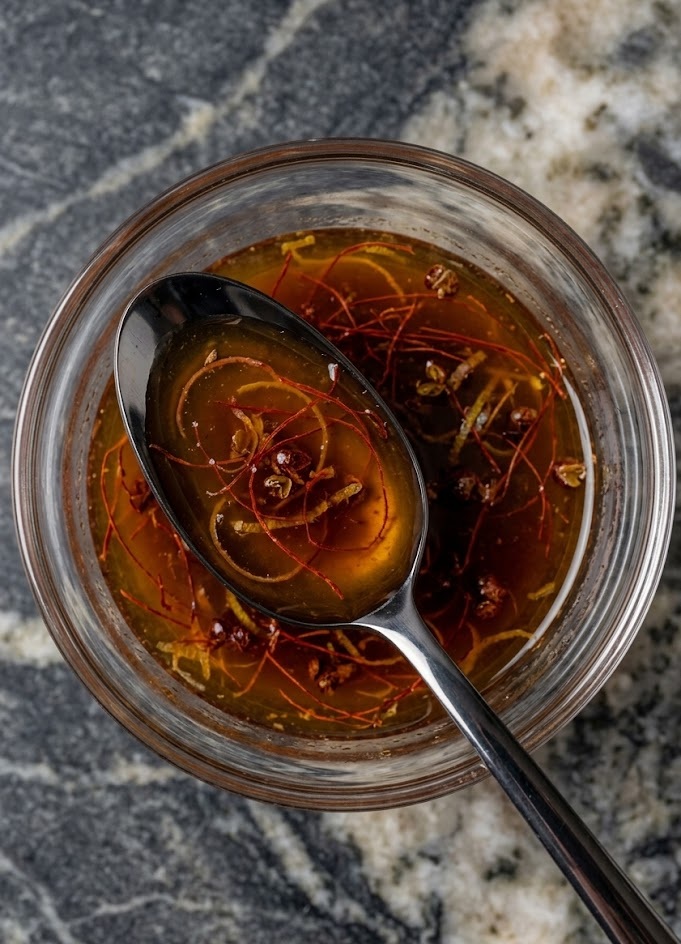
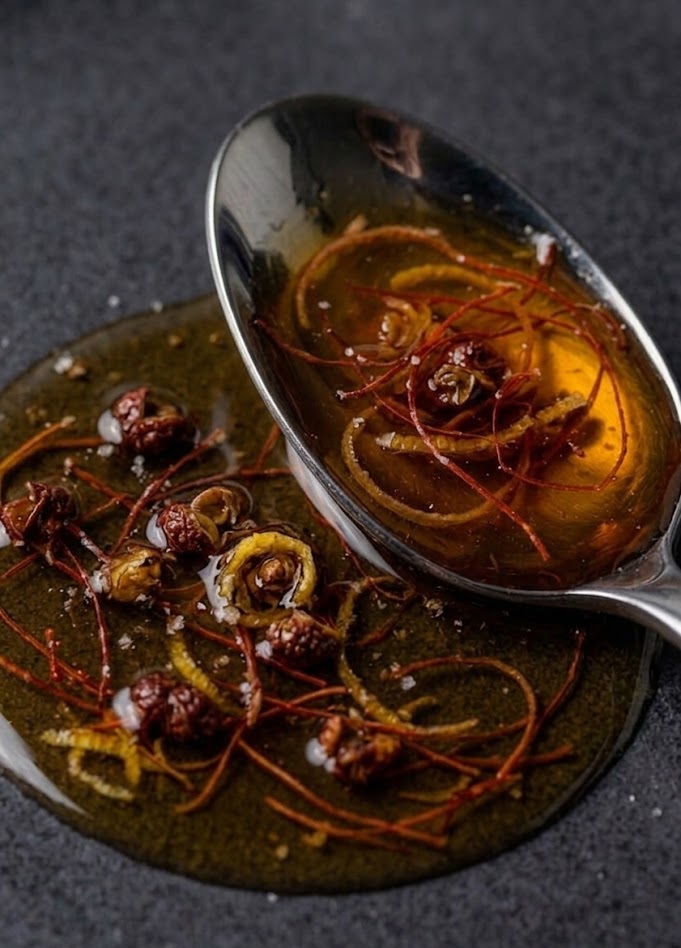
    This Chilies Citrus Balsamic Vinaigerrte Recipe is a bright, fresh salad dressing with the perfect balance of sweet citrus, tangy balsamic, and smooth olive oil. It has a silky texture that coats greens beautifully while adding bold flavour to vegetables, chicken, or grain bowls. It is quick and beginner-friendly, with no cooking required. From start to finish, the recipe takes around 10 minutes.

    Ingredients

    For the Vinaigrette

    • 60ml fresh orange juice
    • 2 tbsp fresh lemon juice
    • 3 tbsp balsamic vinegar
    • 120ml extra virgin olive oil
    • 1 tbsp honey
    • 1 tsp Dijon mustard
    • 1 garlic clove, finely minced
    • 1/2 tsp salt
    • 1/4 tsp black pepper

    How to Make Chilies Citrus Balsamic Vinaigerrte Recipe

    • Prepare the ingredients: Squeeze the citrus juice fresh and finely mince the garlic for the best flavour and texture.
    • Mix the base: Add the orange juice, lemon juice, balsamic vinegar, honey, mustard, garlic, salt, and pepper to a bowl or jar.
    • Whisk well: Stir briskly until the honey has dissolved and the mixture looks smooth.
    • Add the oil: Slowly pour in the olive oil while whisking constantly so the dressing thickens slightly and combines properly.
    • Taste and adjust: Add a little extra honey for sweetness or lemon juice for extra sharpness if desired.
    • Serve: Drizzle over salads, roasted vegetables, or grilled meats straight away.
    How to Make Chilies Citrus Balsamic Vinaigerrte Recipe

    Tips

    How do I stop the dressing separating?

    Whisk slowly while adding the oil, or shake everything in a sealed jar for 30 seconds.

    Can I make it sweeter?

    Add an extra teaspoon of honey or a splash of orange juice.

    How do I make it sharper?

    Increase the lemon juice slightly or add an extra teaspoon of balsamic vinegar.

    Can I make it smoother?

    Blend the dressing for a few seconds using a hand blender for a silky finish.

    Serving Suggestions

    • Toss with mixed green salad leaves
    • Drizzle over grilled chicken
    • Serve with roasted vegetables
    • Spoon over grain bowls
    • Use as a marinade for salmon

    Storage

    Room Temperature

    Keep at room temperature for up to 2 hours while serving.

    Refrigerator

    Store in a sealed jar for up to 7 days. Shake well before using.

    Freezing

    Freezing is not recommended, as the emulsion may split and affect texture.

    Nutrition

    • Calories: 95 kcal
    • Carbohydrates: 3g
    • Protein: 0g
    • Fat: 10g
    • Saturated Fat: 1.5g
    • Sodium: 145mg

    Nutrition values are estimates and may vary depending on ingredients used.

    FAQs

    Can I make this dressing ahead of time?

    Yes, prepare it up to 7 days in advance and store in the fridge. Shake well before serving.

    Can I use bottled citrus juice?

    Fresh juice gives the best flavour, but bottled juice can be used if needed.

    What salads pair best with this vinaigrette?

    It works beautifully with leafy greens, spinach, rocket, avocado, and nut-based salads.

    Can I make it vegan?

    Yes, replace the honey with maple syrup or agave syrup.

    Chilies Citrus Balsamic Vinaigerrte Recipe

    Recipe by Milli RoseCourse: DressingCuisine: AmericanDifficulty: Easy
    Servings

    8

    portions
    Prep time

    10

    minutes
    Cooking timeminutes
    Total time

    10

    minutes
    Calories

    95

    kcal

    A fresh and zesty homemade vinaigrette made with citrus juice, balsamic vinegar, olive oil, and simple seasonings. Perfect for salads, grilled vegetables, and marinades.

    Ingredients

    • 60ml fresh orange juice

    • 2 tbsp fresh lemon juice

    • 3 tbsp balsamic vinegar

    • 120ml extra virgin olive oil

    • 1 tbsp honey

    • 1 tsp Dijon mustard

    • 1 garlic clove, minced

    • 1/2 tsp salt

    • 1/4 tsp black pepper

    Directions

    • Gather all ingredients and measure everything accurately.
    • Add orange juice, lemon juice, balsamic vinegar, honey, mustard, garlic, salt, and pepper to a bowl or jar.
    • Whisk well until the honey dissolves and the mixture looks smooth.
    • Slowly drizzle in olive oil while whisking continuously until emulsified.
    • Taste and adjust seasoning if needed.
    • Serve immediately or chill until ready to use.

    Notes

    • Shake well before each use.
    • Fresh citrus juice gives the best flavour.
    • Use as a marinade for chicken or vegetables.
  • Yard House Deviled Eggs Recipe

    Yard House Deviled Eggs Recipe

    These Yard House Deviled Eggs are creamy, rich, and packed with bold flavour. The smooth yolk filling is balanced with tangy mustard, mayonnaise, and a touch of seasoning, then topped for that signature restaurant-style finish. They are simple to make, beginner-friendly, and perfect for parties, brunch, or snacks. Total time is around 30 minutes, including chilling.

    Ingredients

    For the Eggs

    • 6 large eggs
    • Ice water, for cooling

    For the Filling

    • 3 tbsp mayonnaise
    • 1 tsp Dijon mustard
    • 1 tsp white vinegar
    • 1/4 tsp salt
    • 1/8 tsp black pepper

    For the Topping

    • 2 slices cooked bacon, crumbled
    • 1 tbsp finely chopped chives
    • Paprika, for garnish

    How to Make Yard House Deviled Eggs Recipe

    • Prepare the eggs: Place the eggs in a saucepan and cover with cold water. Bring to a gentle boil over medium-high heat.
    • Cook the eggs: Once boiling, cover the pan, remove from the heat, and leave for 10 minutes so the yolks cook fully.
    • Cool completely: Transfer the eggs to a bowl of ice water and leave until cold. This helps stop cooking and makes peeling easier.
    • Peel and halve: Remove shells carefully, slice each egg in half lengthways, and lift out the yolks into a bowl.
    • Mix the filling: Mash the yolks with mayonnaise, mustard, vinegar, salt, and pepper until very smooth and creamy.
    • Fill the eggs: Spoon or pipe the mixture neatly back into the egg white halves.
    • Add toppings: Sprinkle with paprika, bacon crumbs, and chopped chives for the classic Yard House style.
    • Chill and serve: Refrigerate for 10 minutes before serving for the best texture and flavour.
    How to Make Yard House Deviled Eggs Recipe

    Tips

    How do I peel boiled eggs easily?

    Cool them immediately in ice water and gently crack the shell all over before peeling.

    How do I get a smooth filling?

    Mash the yolks thoroughly or pass them through a sieve before mixing.

    Can I make them look neater?

    Use a piping bag or food bag with the corner snipped off for tidy swirls.

    How do I stop them drying out?

    Keep covered in the fridge until ready to serve.

    Serving Suggestions

    • Serve as a party appetiser platter
    • Pair with grilled meats or burgers
    • Add to a brunch spread
    • Serve with crisp salad leaves

    Storage

    Room Temperature

    Do not leave out for more than 2 hours.

    Refrigerator

    Store in an airtight container for up to 2 days. Keep chilled until serving.

    Freezing

    Freezing is not recommended, as the egg whites become rubbery and watery once thawed.

    Nutrition

    • Calories: 78 kcal
    • Carbohydrates: 1g
    • Protein: 4g
    • Fat: 6g
    • Saturated Fat: 1.5g
    • Sodium: 120mg

    Nutrition values are estimates and may vary depending on ingredients used.

    FAQs

    Can I make deviled eggs the day before?

    Yes, boil and peel the eggs a day ahead. Fill them shortly before serving for best freshness.

    Why are my yolks green around the edges?

    This happens when eggs are overcooked. Use the timed resting method for perfect yellow yolks.

    Can I use Greek yogurt instead of mayonnaise?

    Yes, replace some or all of the mayonnaise for a lighter filling with extra tang.

    How long can deviled eggs sit out at a party?

    For food safety, keep them out no longer than 2 hours.

    Yard House Deviled Eggs Recipe

    Recipe by Milli RoseCourse: AppetizerCuisine: AmericanDifficulty: Easy
    Servings

    12

    halves
    Prep time

    20

    minutes
    Cooking time

    10

    minutes
    Total time

    30

    minutes
    Calories

    78

    kcal

    30

    minutes

    Creamy, tangy Yard House Deviled Eggs with a smooth seasoned yolk filling and savoury toppings. A crowd-pleasing appetiser perfect for gatherings.

    Ingredients

    • 6 large eggs

    • 3 tbsp mayonnaise

    • 1 tsp Dijon mustard

    • 1 tsp white vinegar

    • 1/4 tsp salt

    • 1/8 tsp black pepper

    • 1 tbsp finely chopped chives

    • Paprika, for garnish

    • 2 slices cooked bacon, crumbled

    • Ice water, for cooling

    Directions

    • Place eggs in a saucepan, cover with cold water, and bring to a boil.
    • Once boiling, cover, remove from heat, and let stand for 10 minutes.
    • Transfer eggs to ice water and cool completely before peeling.
    • Slice eggs in half lengthways and remove yolks carefully.
    • Mash yolks with mayonnaise, mustard, vinegar, salt, and pepper until smooth.
    • Pipe or spoon filling into egg whites.
    • Top with paprika, bacon crumbs, and chopped chives.
    • Chill for 10 minutes before serving.

    Notes

    • Use slightly older eggs for easier peeling.
    • Pipe the filling for a neat restaurant-style finish.
    • Keep chilled until ready to serve.
  • Mary Berry Victoria Sponge with Buttercream Recipe

    Mary Berry Victoria Sponge with Buttercream Recipe

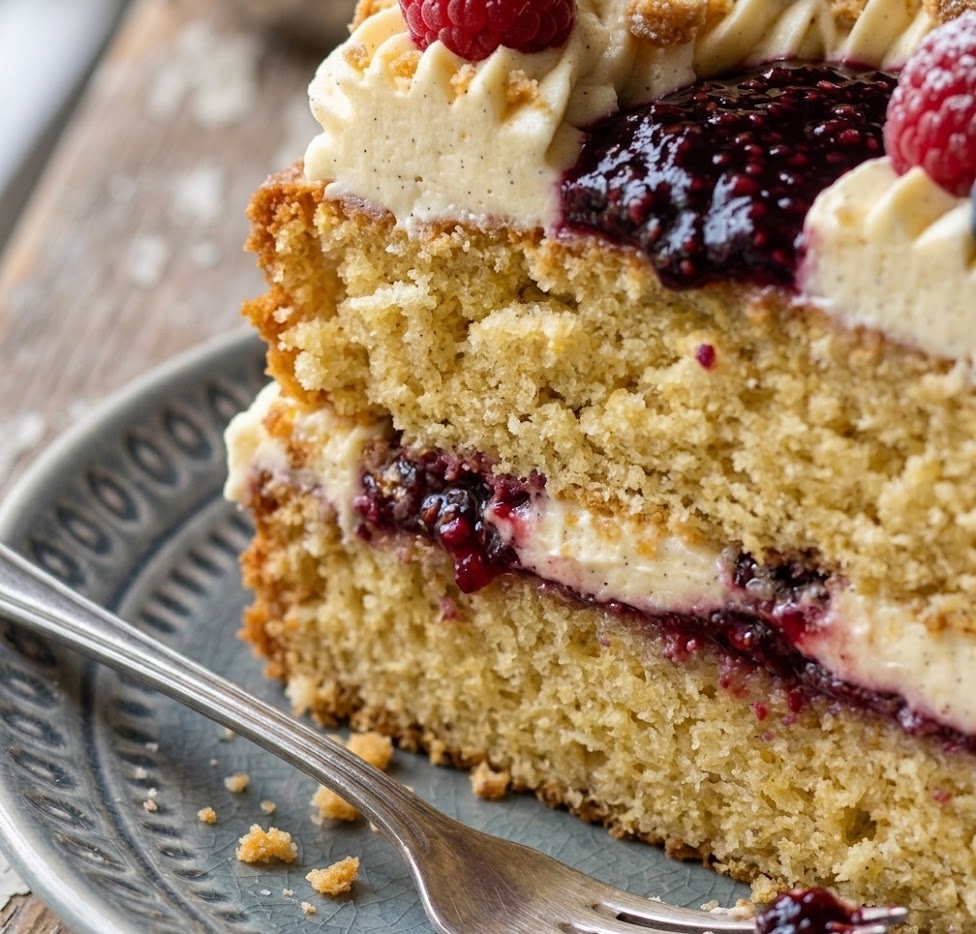
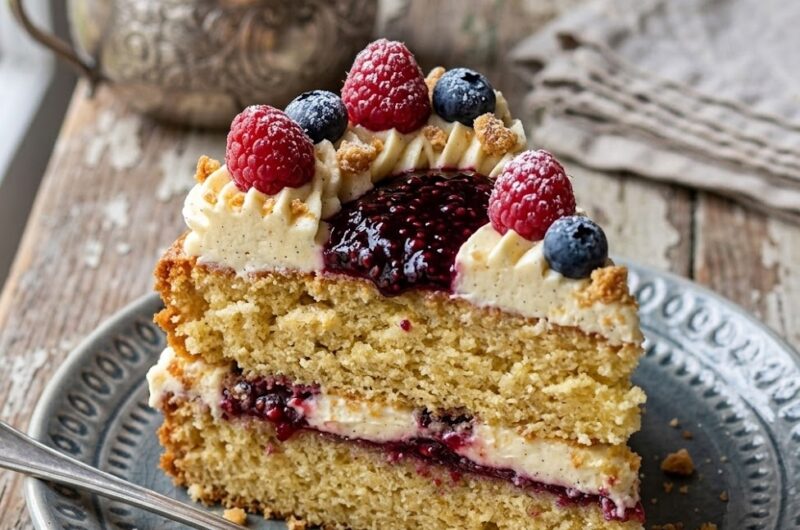
    Mary Berry Victoria Sponge with Buttercream Recipe is a classic British celebration cake made with two light vanilla sponge layers sandwiched together with smooth buttercream and fruity jam. The sponge is soft, airy, and buttery, while the filling adds sweetness and richness in every slice. It is an easy to moderate bake, ideal for birthdays, afternoon tea, or weekend baking. Total time is around 1 hour 20 minutes including cooling and decorating.

    Ingredients

    For the Sponge

    • 225g unsalted butter, softened
    • 225g caster sugar
    • 4 large eggs
    • 225g self-raising flour
    • 2 tsp baking powder
    • 2 tbsp milk

    For the Buttercream Filling

    • 150g unsalted butter, softened
    • 300g icing sugar
    • 1 tbsp milk
    • 1 tsp vanilla extract

    For Finishing

    • 4 tbsp strawberry jam
    • Icing sugar for dusting

    How to Make Mary Berry Victoria Sponge with Buttercream Recipe

    • Prepare the oven: Preheat the oven to 180°C or 160°C fan. Grease and line two 20cm sandwich tins with baking parchment.
    • Make the cake batter: Add the butter, caster sugar, eggs, flour, baking powder and milk to a large bowl. Beat until pale, smooth and fully combined.
    • Fill the tins: Divide the batter evenly between the prepared tins. Smooth the tops with a spatula for even baking.
    • Bake the sponges: Bake for 22 to 25 minutes until golden, springy to the touch and shrinking slightly from the sides.
    • Cool completely: Leave in the tins for 5 minutes, then turn out onto a wire rack and cool fully before filling.
    • Make the buttercream: Beat the softened butter until smooth. Gradually add icing sugar and milk, then beat until light and fluffy.
    • Assemble the cake: Spread jam over one sponge layer. Spoon or pipe over the buttercream, then place the second sponge on top.
    • Finish and serve: Dust the top lightly with icing sugar, slice and serve.
    How to Make Mary Berry Victoria Sponge with Buttercream Recipe

    Tips

    Why did my sponge sink in the middle?

    Avoid opening the oven door too early and make sure the cake is fully baked before removing it.

    How do I get an extra light sponge?

    Use room temperature butter and eggs, and beat the mixture until fluffy.

    How can I stop buttercream from being grainy?

    Sift the icing sugar before mixing and beat for several minutes until smooth.

    Can I make it look neater?

    Pipe the buttercream instead of spreading it for a cleaner finish.

    Serving Suggestions

    • Serve with tea or coffee
    • Add fresh strawberries on the side
    • Enjoy as a birthday cake
    • Slice for afternoon tea platters

    Storage

    Room Temperature

    Keep in an airtight container for up to 2 days in a cool room.

    Refrigerator

    Store chilled for up to 4 days. Bring to room temperature before serving.

    Freezing

    Freeze unfrosted sponge layers for up to 3 months. Wrap well and thaw before assembling.

    Nutrition

    • Calories: 465 kcal
    • Carbohydrates: 52g
    • Protein: 5g
    • Fat: 27g
    • Saturated Fat: 16g
    • Sodium: 210mg

    Nutrition values are estimates and may vary depending on ingredients used.

    FAQs

    Can I use raspberry jam instead?

    Yes, raspberry jam is a traditional and delicious alternative to strawberry jam.

    Can I make this cake in advance?

    Yes, bake the sponge layers a day ahead and fill before serving.

    Why is my sponge dry?

    It may have been overbaked. Check a few minutes early and remove once springy.

    Can I freeze the finished cake?

    Yes, freeze in slices or whole if well wrapped for up to 2 months.

    Mary Berry Victoria Sponge with Buttercream Recipe

    Recipe by Milli RoseCourse: DessertCuisine: BritishDifficulty: Easy
    Servings

    10

    slices
    Prep time

    25

    minutes
    Cooking time

    25

    minutes
    Total time

    80

    minutes
    Calories

    465

    kcal

    50

    minutes

    Light and fluffy Victoria sponge cake filled with silky buttercream and strawberry jam. A timeless British favourite perfect for tea time and celebrations.

    Ingredients

    • 225g unsalted butter, softened

    • 225g caster sugar

    • 4 large eggs

    • 225g self-raising flour

    • 2 tsp baking powder

    • 2 tbsp milk

    • 150g unsalted butter

    • 300g icing sugar

    • 1 tbsp milk

    • 4 tbsp strawberry jam

    • Icing sugar for dusting

    • Baking parchment

    Directions

    • Preheat oven to 180°C (160°C fan). Grease and line two 8-inch sandwich tins.
    • Add butter, sugar, eggs, flour, baking powder and milk to a bowl.
    • Beat until smooth, pale and fluffy.
    • Divide mixture evenly between tins and level the tops.
    • Bake for 22 to 25 minutes until golden and springy.
    • Cool in tins briefly, then transfer to a wire rack.
    • Beat butter, icing sugar and milk until light and creamy.
    • Spread jam over one sponge and top with buttercream.
    • Place second sponge on top and dust with icing sugar.

    Notes

    • Use room temperature eggs for the best sponge texture.
    • Do not overmix once smooth.
    • Store in a cool place for best freshness.
  • Mary Berry Banana Bread Recipe

    Mary Berry Banana Bread Recipe

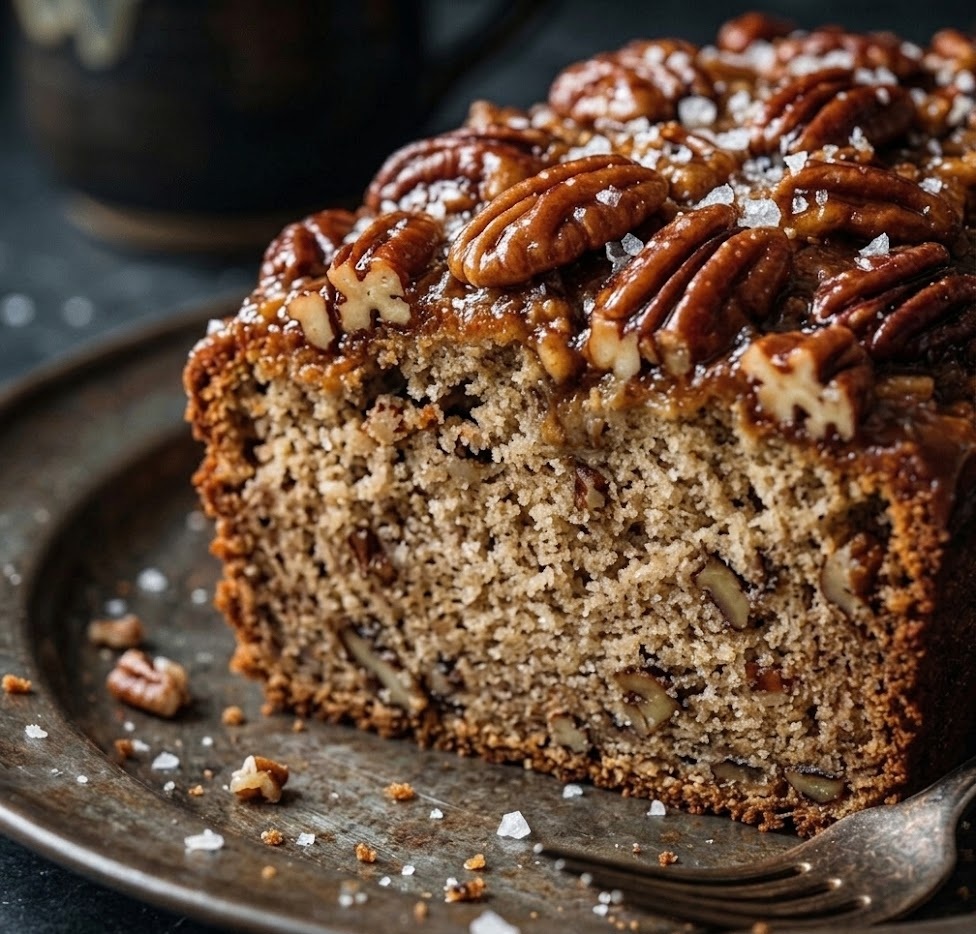
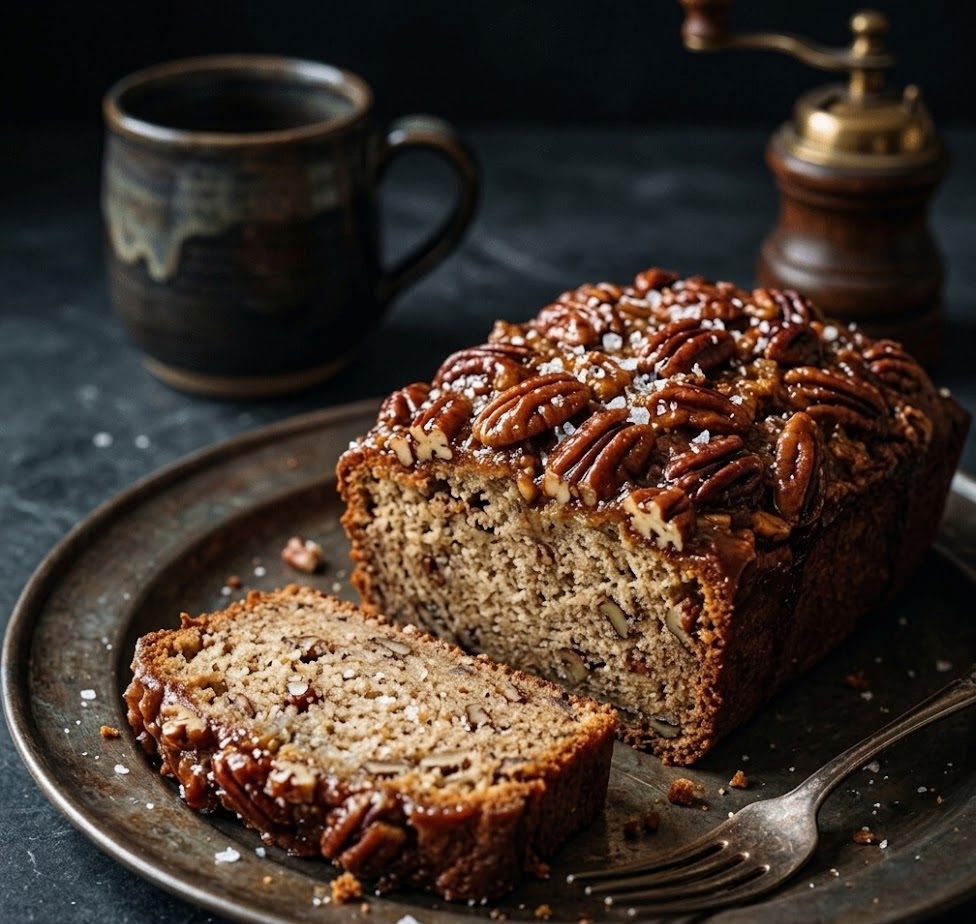
    Mary Berry Banana Bread is a wonderfully moist and tender loaf made with ripe bananas, warm vanilla, and a soft buttery crumb. It has a rich banana flavour with a light sweetness that makes it perfect for breakfast, afternoon tea, or an easy homemade treat. This is a simple beginner-friendly bake that uses everyday ingredients and comes together with very little effort. Total time is around 1 hour 20 minutes, including preparation and baking.

    Ingredients

    For the Banana Bread

    • 225g self-raising flour
    • 1 tsp baking powder
    • 100g butter, softened
    • 175g caster sugar
    • 2 large eggs
    • 3 ripe bananas, mashed
    • 2 tbsp milk
    • 1 tsp vanilla extract

    For Preparing the Tin

    • Butter for greasing
    • Baking parchment

    How to Make Mary Berry Banana Bread Recipe

    • Prepare the oven: Preheat the oven to 180°C or 160°C fan. Grease and line a 2lb loaf tin with baking parchment.
    • Mix the base batter: Place the flour, baking powder, softened butter, sugar, and eggs into a large bowl. Beat until smooth and creamy.
    • Add the bananas: Fold in the mashed bananas, milk, and vanilla extract until evenly combined. Do not overmix.
    • Fill the tin: Spoon the mixture into the prepared loaf tin and smooth the top with a spatula.
    • Bake the loaf: Bake for 55 to 60 minutes until risen, golden, and a skewer inserted into the centre comes out clean.
    • Cool the bread: Leave in the tin for 10 minutes, then transfer to a wire rack to cool fully.
    • Serve: Slice thickly and enjoy plain, buttered, or lightly toasted.
    How to Make Mary Berry Banana Bread Recipe

    Tips

    How do I make banana bread extra moist?

    Use very ripe bananas with dark skins, as they contain more moisture and sweetness.

    Why did my loaf sink in the middle?

    This usually happens if the loaf is underbaked or the oven door was opened too early.

    Can I add nuts or chocolate chips?

    Yes, fold in 75g chopped walnuts or chocolate chips for extra texture and flavour.

    How do I know when it is ready?

    A skewer inserted into the centre should come out clean or with a few dry crumbs.

    Serving Suggestions

    • Serve warm with butter
    • Enjoy with tea or coffee
    • Top with sliced banana and honey
    • Toast lightly for breakfast

    Storage

    Room Temperature

    Keep in an airtight container for up to 3 days.

    Refrigerator

    Store for up to 1 week. Bring to room temperature before serving for the best texture.

    Freezing

    Wrap slices individually and freeze for up to 3 months. Defrost at room temperature.

    Nutrition

    • Calories: 295 kcal
    • Carbohydrates: 42g
    • Protein: 4g
    • Fat: 12g
    • Saturated Fat: 7g
    • Sodium: 180mg

    Nutrition values are approximate and may vary depending on ingredients used.

    FAQs

    Can I use frozen bananas for banana bread?

    Yes, thaw them fully and drain any excess liquid before mashing and adding to the mixture.

    What size loaf tin works best?

    A standard 2lb loaf tin gives the best shape and even baking.

    Can I make this recipe with wholemeal flour?

    Yes, replace up to half the flour with wholemeal flour for a heartier loaf.

    Can I freeze banana bread slices?

    Yes, wrap slices well and freeze for up to 3 months.

    Mary Berry Banana Bread Recipe

    Recipe by Milli RoseCourse: DessertCuisine: BritishDifficulty: Easy
    Servings

    10

    slices
    Prep time

    15

    minutes
    Cooking time

    1

    hour 
    Total time

    75

    minutes
    Calories

    295

    kcal

    1

    hour 

    15

    minutes

    Moist and flavourful Mary Berry Banana Bread made with ripe bananas and a soft buttery crumb. A classic easy loaf perfect for breakfast or tea time.

    Ingredients

    • 225g self-raising flour

    • 1 tsp baking powder

    • 100g butter, softened

    • 175g caster sugar

    • 2 large eggs

    • 3 ripe bananas, mashed

    • 2 tbsp milk

    • 1 tsp vanilla extract

    • Butter for greasing tin

    • Baking parchment

    Directions

    • Preheat oven to 180°C (160°C fan). Grease and line a 2lb loaf tin.
    • Place butter, sugar, eggs, flour and baking powder into a large bowl.
    • Beat until smooth and well combined.
    • Fold in mashed bananas, milk and vanilla extract gently.
    • Spoon mixture into loaf tin and level the top.
    • Bake for 55 to 60 minutes until golden and a skewer comes out clean.
    • Cool in tin for 10 minutes, then transfer to a wire rack.
    • Slice and serve once fully cooled or slightly warm.

    Notes

    • Use very ripe bananas for the best flavour.
    • Cover loosely with foil if the loaf browns too quickly.
    • Freeze slices individually for quick snacks.

slot depo

sicbo online