Blog

  • Longhorn Steakhouse Cowboy Pork Chop Recipe

    Longhorn Steakhouse Cowboy Pork Chop Recipe

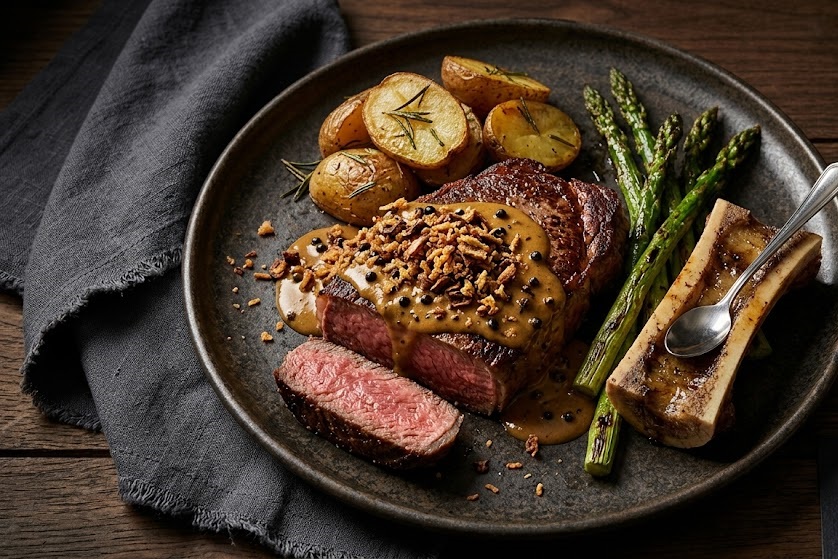
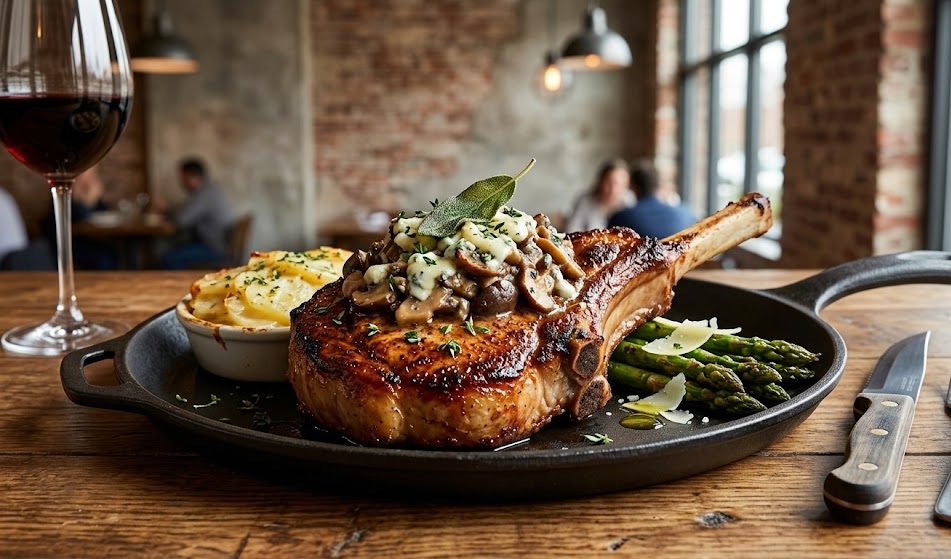
    This Longhorn Steakhouse Cowboy Pork Chop is a bold, hearty dish packed with smoky, savoury flavour and a beautifully juicy texture. The pork is seasoned generously, seared to lock in flavour, then finished in the oven for a tender, restaurant-style result. It is a moderately easy recipe that feels special enough for a weekend dinner. From start to finish, it takes around 45 minutes to prepare and cook.

    Ingredients

    For the Pork Chops

    • 2 thick-cut bone-in pork chops (about 2.5cm thick)
    • 1 tbsp olive oil
    • 1 tbsp unsalted butter

    For the Seasoning

    • 1 tsp smoked paprika
    • 1 tsp garlic powder
    • 1 tsp onion powder
    • ½ tsp dried thyme
    • ½ tsp black pepper
    • 1 tsp salt
    • ½ tsp chilli flakes (optional)

    For the Garlic Butter Finish

    • 2 tbsp unsalted butter, softened
    • 2 cloves garlic, minced
    • 1 tsp fresh parsley, finely chopped

    How to Make Longhorn Steakhouse Cowboy Pork Chop Recipe

    • Prepare the oven: Preheat the oven to 200°C or 180°C fan. Place a shelf in the middle of the oven so the pork chops cook evenly and stay juicy.
    • Season the pork: Pat the pork chops dry with kitchen paper. In a small bowl, mix all the seasoning ingredients, then rub evenly over both sides of the chops.
    • Sear the chops: Heat olive oil in a heavy frying pan over medium-high heat. Add the pork chops and sear for 3–4 minutes on each side until golden and slightly crisp.
    • Add butter: Reduce heat slightly, add butter to the pan, and spoon the melted butter over the chops for extra flavour.
    • Finish in the oven: Transfer the pan to the oven and cook for 10–15 minutes until the pork is fully cooked and tender.
    • Prepare garlic butter: Mix softened butter with garlic and parsley in a small bowl.
    • Rest and serve: Remove pork from the oven and let it rest for 5 minutes. Top with garlic butter before serving.
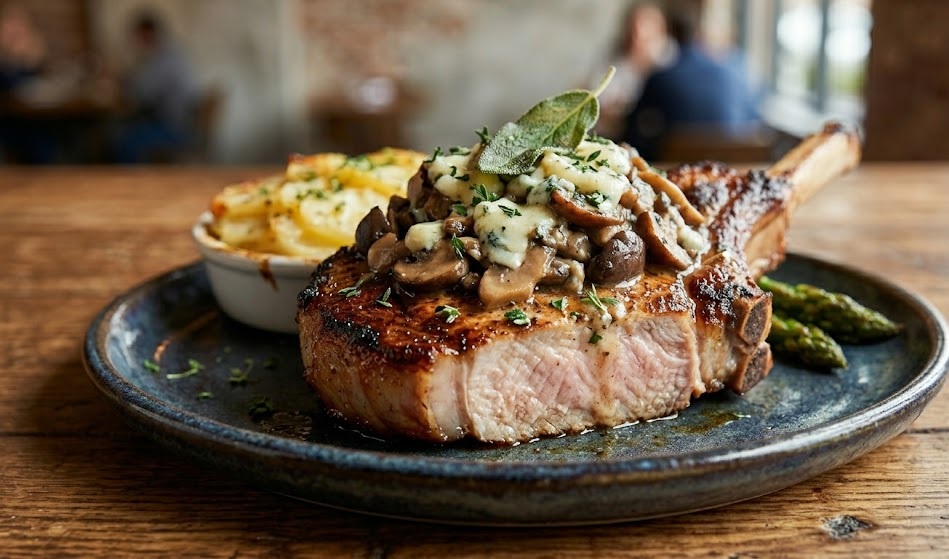
    How to Make Longhorn Steakhouse Cowboy Pork Chop Recipe

    Tips

    How do I keep pork chops from drying out?

    Use thick-cut chops and avoid overcooking. Searing first helps lock in moisture before oven finishing.

    Can I use boneless pork chops?

    Yes, but reduce the cooking time slightly as boneless cuts cook faster and can dry out more easily.

    What pan works best for this recipe?

    A heavy, oven-safe pan such as cast iron gives the best sear and even cooking.

    How do I know when the pork is done?

    The internal temperature should reach 63°C, and the juices should run clear when rested.

    Serving Suggestions

    • Serve with mashed potatoes or buttered corn
    • Add a side of roasted vegetables
    • Pair with a fresh green salad
    • Enjoy with warm crusty bread

    Storage

    Room Temperature

    Leave at room temperature for up to 2 hours before refrigerating.

    Refrigerator

    Store in an airtight container for up to 3 days. Reheat gently to avoid drying out.

    Freezing

    Freeze cooked pork chops for up to 2 months. Thaw overnight in the fridge before reheating.

    Nutrition

    • Calories: 420 kcal
    • Carbohydrates: 2g
    • Protein: 36g
    • Fat: 30g
    • Saturated Fat: 12g
    • Sodium: 620mg

    These values are approximate and may vary depending on ingredients used.

    FAQs

    Can I grill the pork chops instead of baking?

    Yes, after seasoning, grill over medium heat for 5 to 7 minutes per side until fully cooked.

    What cut of pork works best for this recipe?

    Bone-in rib or loin chops work best as they stay juicy and flavourful during cooking.

    Can I make this recipe ahead of time?

    You can cook the pork chops in advance and reheat gently, but they are best served fresh for maximum juiciness.

    How do I get a restaurant-style crust?

    Make sure the pan is hot before adding the pork and avoid moving it too much while searing.
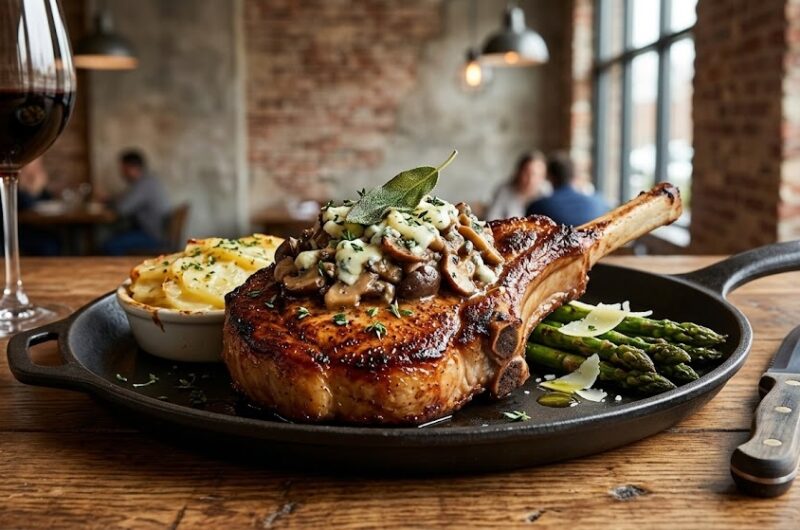
    Longhorn Steakhouse Cowboy Pork Chop Recipe

    Recipe by Milli RoseCourse: Main CourseCuisine: AmericanDifficulty: Medium
    Servings

    4

    servings
    Prep time

    30

    minutes
    Cooking time

    40

    minutes
    Calories

    300

    kcal
    Total time

    1

    hour 

    10

    minutes

    Juicy, thick-cut pork chops seasoned with bold spices, seared to perfection and finished in the oven with a rich garlic butter topping.

    Ingredients

    • 2 thick-cut bone-in pork chops

    • 1 tbsp olive oil

    • 1 tbsp butter

    • 1 tsp smoked paprika

    • 1 tsp garlic powder

    • 1 tsp onion powder

    • 1/2 tsp dried thyme

    • 1 tsp salt

    • 1/2 tsp black pepper

    • 2 tbsp butter, softened

    • 2 cloves garlic, minced

    • 1 tsp parsley, chopped

    Directions

    • Preheat oven to 200°C (180°C fan).
    • Season pork chops evenly with spice mix.
    • Sear pork chops in hot oil until golden on both sides.
    • Add butter and baste chops.
    • Transfer to oven and cook until tender.
    • Mix garlic butter ingredients.
    • Rest pork and top with garlic butter before serving.

    Notes

    • Use thick-cut pork chops for best results.
    • Let the meat rest before serving to retain juices.
    • A cast iron pan gives the best sear.

  • Jersey Mike’s Hot Chopped Pepper Relish Recipe

    Jersey Mike’s Hot Chopped Pepper Relish Recipe

    This Jersey Mike’s inspired hot chopped pepper relish is a bold, tangy condiment packed with finely chopped peppers, vinegar, and a touch of sweetness. It has a slightly chunky texture with a vibrant kick that lifts sandwiches, burgers, and wraps. The recipe is simple and beginner-friendly, requiring minimal cooking and just a bit of chopping. You can have it ready in around 30 minutes, making it perfect for quick meal prep.

    Ingredients

    For the Pepper Relish

    • 2 cups green bell peppers, finely chopped
    • 1 cup red bell peppers, finely chopped
    • 1/2 cup jalapeños, finely chopped (seeds removed for less heat)
    • 1/4 cup banana peppers, finely chopped
    • 3 cloves garlic, minced
    • 1 cup white vinegar
    • 2 tablespoons sugar
    • 1 teaspoon salt
    • 1/2 teaspoon black pepper
    • 1 teaspoon dried oregano
    • 1 tablespoon olive oil

    How to Make jersey mikes hot chopped pepper relish recipe

    • Prepare the vegetables: Wash and finely chop all the peppers into small, even pieces. This ensures the relish has the classic texture and blends well.
    • Heat the pan: Place a medium saucepan over medium heat and add the olive oil. Allow it to warm gently without smoking.
    • Cook the aromatics: Add the minced garlic and sauté for about 30 seconds until fragrant, being careful not to brown it.
    • Add the peppers: Stir in all the chopped peppers and cook for 5–7 minutes until slightly softened but still vibrant in colour.
    • Mix the seasoning: Pour in the vinegar, then add sugar, salt, black pepper, and oregano. Stir well to combine everything evenly.
    • Simmer gently: Reduce the heat and let the mixture simmer for 10–15 minutes until slightly thickened and well blended.
    • Cool the relish: Remove from heat and allow it to cool completely. The flavour deepens as it cools.
    • Store or serve: Transfer to a clean jar and refrigerate. Use on sandwiches, wraps, or grilled meats.
    How to Make jersey mikes hot chopped pepper relish recipe

    Tips

    How do I control the heat level?

    Remove the seeds from jalapeños for a milder relish or add extra chillies if you prefer more heat.

    Can I make the texture finer?

    Yes, pulse the mixture briefly in a food processor after cooking for a smoother consistency.

    Why does my relish taste too sharp?

    Add a little extra sugar to balance the acidity of the vinegar.

    How do I get the best flavour?

    Let the relish sit in the fridge overnight. The flavours develop and improve significantly.

    Serving Suggestions

    • Spoon into subs and sandwiches
    • Serve alongside grilled chicken or steak
    • Add to burgers for extra zing
    • Mix into pasta salads or wraps

    Storage

    Room Temperature

    Not recommended due to vinegar content. Always cool and store properly.

    Refrigerator

    Keep in an airtight container for up to 2 weeks. The flavour improves over time.

    Freezing

    Freeze in small portions for up to 2 months. Thaw in the fridge before use.

    Nutrition

    • Calories: 45 kcal
    • Carbohydrates: 8g
    • Protein: 1g
    • Fat: 1g
    • Saturated Fat: 0.2g
    • Sodium: 220mg

    These values are approximate and may vary depending on ingredients used.

    FAQs

    How spicy is this pepper relish?

    It has a medium heat level, but you can easily adjust it by reducing or increasing the jalapeños.

    Can I use different peppers?

    Yes, you can swap in serrano or chilli peppers depending on your heat preference.

    How long does homemade pepper relish last?

    When stored in the fridge in a sealed jar, it can last up to two weeks.

    Can I make this without cooking?

    You can, but cooking helps blend the flavours and soften the peppers for a better texture.

    Jersey Mike’s Hot Chopped Pepper Relish Recipe

    Recipe by Milli RoseCourse: CondimentCuisine: AmericanDifficulty: Easy
    Servings

    4

    servings
    Prep time

    30

    minutes
    Cooking time

    40

    minutes
    Calories

    300

    kcal
    Total time

    1

    hour 

    10

    minutes

    A tangy, spicy chopped pepper relish inspired by Jersey Mike’s, perfect for sandwiches, burgers, and wraps.

    Ingredients

    • 2 cups green bell peppers, finely chopped

    • 1 cup red bell peppers, finely chopped

    • 1/2 cup jalapeños, finely chopped

    • 1/4 cup banana peppers, finely chopped

    • 3 cloves garlic, minced

    • 1 cup white vinegar

    • 2 tablespoons sugar

    • 1 teaspoon salt

    • 1/2 teaspoon black pepper

    • 1 teaspoon dried oregano

    Directions

    • Finely chop all peppers.
    • Heat olive oil and sauté garlic briefly.
    • Add chopped peppers and cook until softened.
    • Add vinegar, sugar, and seasoning.
    • Simmer for 10–15 minutes.
    • Cool completely and store in a jar.

    Notes

    • Adjust spice by changing chilli quantity.
    • Flavour improves after chilling overnight.
    • Store in airtight container for freshness.
  • Air Fryer Sweet potato fries

    Air Fryer Sweet potato fries

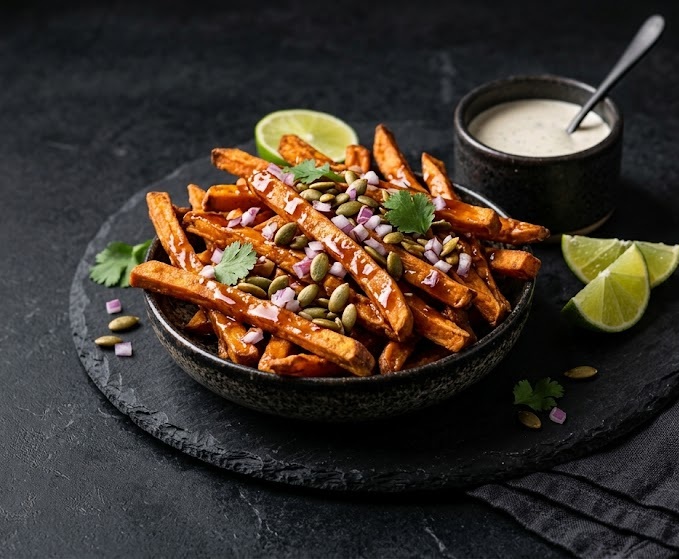
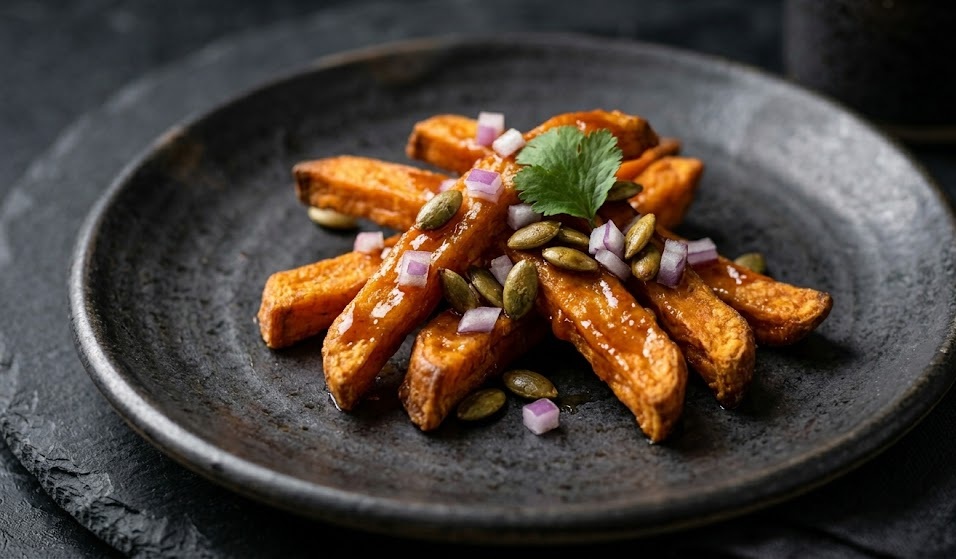
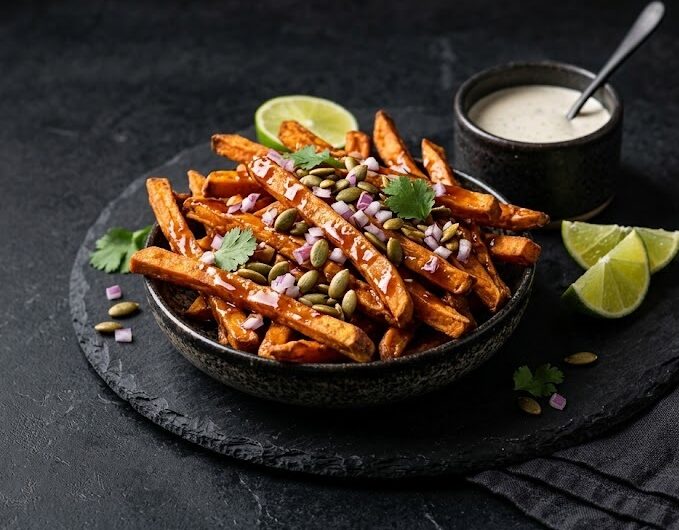
    These air fryer sweet potato fries are crisp on the outside, soft and fluffy in the middle, and naturally sweet with a light savoury edge. They are quick to prepare and far lighter than deep-fried versions, making them a reliable everyday side. With just a handful of ingredients, they come together easily and are ideal for beginners. From start to finish, the recipe takes around 25 minutes.

    Ingredients

    For the fries

    • 2 large sweet potatoes (about 500g), peeled and cut into thin fries
    • 1 tablespoon cornflour
    • 1½ tablespoons olive oil
    • ½ teaspoon paprika
    • ½ teaspoon garlic powder
    • ½ teaspoon fine sea salt
    • ¼ teaspoon black pepper

    Optional seasoning

    • ½ teaspoon chilli flakes for heat
    • ½ teaspoon dried herbs such as thyme or oregano

    How to Make Air Fryer Sweet potato fries

    • Prepare the air fryer: Preheat the air fryer to 200°C for 3 to 5 minutes so the fries start cooking immediately and crisp evenly.
    • Prepare the potatoes: Peel and cut the sweet potatoes into evenly sized thin fries. Rinse under cold water and pat completely dry with kitchen paper to remove excess starch.
    • Coat the fries: Place the fries in a large bowl. Sprinkle over the cornflour and toss well to coat lightly. Add the olive oil, paprika, garlic powder, salt and pepper, then mix until evenly coated.
    • Cook the fries: Arrange the fries in a single layer in the air fryer basket. Cook at 200°C for 12 to 15 minutes, shaking the basket halfway through so they cook evenly.
    • Finish and crisp: Continue cooking for a further 3 to 5 minutes if needed until the fries are golden and crisp at the edges.
    • Serve: Remove from the basket and serve immediately while hot and crisp.
    How to Make Air Fryer Sweet potato fries

    Tips

    Why are my sweet potato fries not crispy?

    Make sure the fries are completely dry before coating and do not overcrowd the basket. Cooking in batches helps achieve a crisp finish.

    Do I need to soak the sweet potatoes?

    Rinsing helps remove surface starch, but soaking is optional. Drying them well is more important for crispiness.

    Can I make them without cornflour?

    Yes, but cornflour helps create a light crisp coating. Without it, the fries will be softer.

    How do I cut even fries?

    Cut the sweet potatoes into uniform thin strips so they cook at the same rate and avoid uneven texture.

    Serving Suggestions

    • Serve with burgers or grilled chicken
    • Pair with a garlic mayonnaise or yoghurt dip
    • Add to wraps or bowls for extra texture
    • Sprinkle with fresh herbs and a squeeze of lemon

    Storage

    Room temperature

    Best enjoyed fresh. Leave at room temperature for no more than 2 hours after cooking.

    Refrigerator

    Store in an airtight container for up to 3 days. Reheat in the air fryer to restore crispness.

    Freezing

    Freeze cooked fries in a single layer, then transfer to a bag for up to 2 months. Reheat from frozen in the air fryer until hot and crisp.

    Nutrition

    • Calories: 180 kcal
    • Carbohydrates: 28g
    • Protein: 2g
    • Fat: 7g
    • Saturated Fat: 1g
    • Sodium: 320mg

    These values are approximate and may vary depending on ingredients and portion size.

    FAQs

    Can I make sweet potato fries without oil?

    Yes, but a small amount of oil helps achieve a crisp texture. Without it, the fries may be softer.

    Why are my fries soggy in the air fryer?

    This usually happens if the basket is overcrowded or the fries were not dried properly before cooking.

    Can I use frozen sweet potato fries?

    Yes, cook them directly from frozen and increase the cooking time slightly, shaking halfway through.

    What temperature is best for air frying sweet potato fries?

    Cooking at 200°C gives the best balance of crisp edges and soft centres.

    Air Fryer Sweet potato fries

    Recipe by Milli RoseCourse: Side DishCuisine: InternationalDifficulty: Easy
    Servings

    4

    servings
    Prep time

    30

    minutes
    Cooking time

    40

    minutes
    Calories

    300

    kcal
    Total time

    1

    hour 

    10

    minutes

    Crispy air fryer sweet potato fries with a soft centre and lightly seasoned coating. A quick and easy side dish ready in minutes.

    Ingredients

    • 2 large sweet potatoes, peeled and cut into fries

    • 1 tablespoon cornflour

    • 1½ tablespoons olive oil

    • ½ teaspoon paprika

    • ½ teaspoon garlic powder

    • ½ teaspoon salt

    • ¼ teaspoon black pepper

    • Optional chilli flakes or herbs

    Directions

    • Preheat air fryer to 200°C.
    • Cut and dry sweet potatoes thoroughly.
    • Coat with cornflour, oil and seasonings.
    • Arrange in basket in a single layer.
    • Cook for 12 to 15 minutes, shaking halfway.
    • Cook a few minutes longer until crisp and golden.
    • Serve immediately.

    Notes

    • Do not overcrowd the basket.
    • Dry potatoes well for best texture.
    • Serve immediately for maximum crispness.
  • Cream Cheese Frosting Recipe

    Cream Cheese Frosting Recipe

    This cream cheese frosting is wonderfully smooth, rich, and lightly tangy, making it the perfect finish for cakes, cupcakes, and tray bakes. It has a soft, spreadable texture that holds its shape beautifully while remaining silky on the palate. This is a simple, beginner-friendly recipe that comes together in minutes. From start to finish, it takes just 10 minutes to prepare.

    Ingredients

    For the Cream Cheese Frosting

    • 200g full-fat cream cheese, softened
    • 100g unsalted butter, softened
    • 400g icing sugar, sifted
    • 1 tsp vanilla extract
    • Pinch of salt (optional)

    How to Make Cream Cheese Frosting

    • Prepare the ingredients: Ensure the cream cheese and butter are both softened to room temperature for a smooth, lump-free frosting.
    • Mix the butter: In a large bowl, beat the softened butter until pale and creamy using an electric mixer.
    • Add the cream cheese: Add the cream cheese and beat gently until just combined. Avoid overmixing as it can loosen the texture.
    • Incorporate the sugar: Gradually sift in the icing sugar, mixing on low speed until fully incorporated and smooth.
    • Add flavouring: Stir in the vanilla extract and a pinch of salt if using. Beat briefly until the frosting is smooth and creamy.
    • Ready to use: Use immediately for spreading or piping, or chill slightly if you prefer a firmer consistency.
    How to Make Cream Cheese Frosting

    Tips

    Why is my frosting too runny?

    This usually happens if the cream cheese is too soft or overmixed. Chill the frosting for 20 to 30 minutes to firm it up.

    How can I make the frosting thicker?

    Add a little more sifted icing sugar, a tablespoon at a time, until the desired consistency is reached.

    Can I pipe this frosting?

    Yes, but for best results, chill it slightly first so it holds its shape when piped.

    How do I avoid lumps?

    Make sure both butter and cream cheese are fully softened and always sift the icing sugar before adding.

    Serving Suggestions

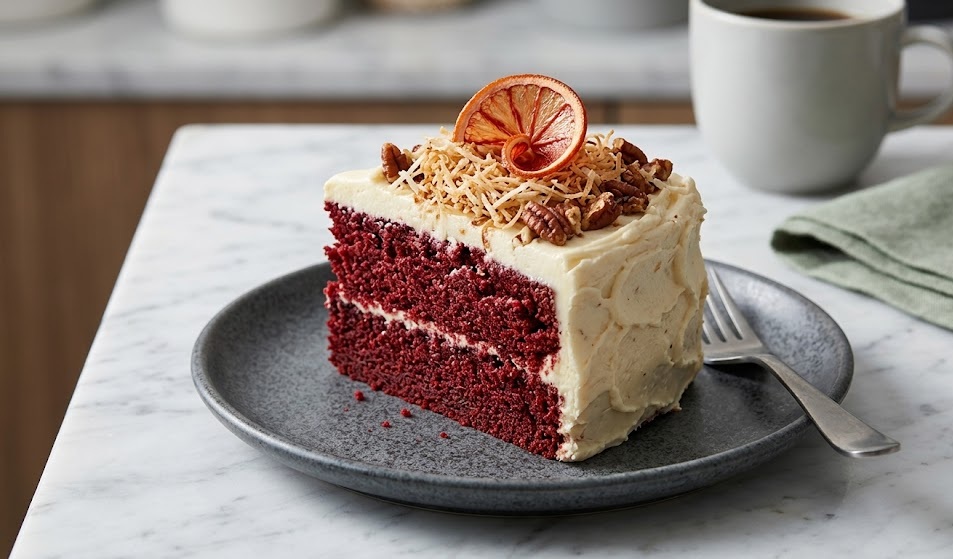
    • Spread over carrot cake or red velvet cake
    • Pipe onto cupcakes for a decorative finish
    • Use as a filling for sandwich cakes
    • Top cinnamon rolls or tray bakes

    Storage

    Room Temperature

    Keep in a cool room for up to 4 hours. Avoid warm environments as the frosting will soften quickly.

    Refrigerator

    Store in an airtight container in the fridge for up to 3 days. Allow it to soften slightly and re-whip before use.

    Freezing

    Freeze for up to 1 month. Thaw overnight in the refrigerator and beat again before using.

    Nutrition

    • Calories: 220 kcal
    • Carbohydrates: 28g
    • Protein: 2g
    • Fat: 12g
    • Saturated Fat: 7g
    • Sodium: 120mg

    These values are approximate and may vary depending on ingredients used.

    FAQs

    Can I use low-fat cream cheese?

    Full-fat cream cheese is recommended for the best texture and flavour. Low-fat versions can make the frosting runnier.

    Can I make this frosting ahead of time?

    Yes, it can be made up to 3 days in advance and stored in the refrigerator. Re-whip before using.

    Can I colour cream cheese frosting?

    Yes, use gel food colouring for best results as it will not affect the consistency.

    What cakes pair best with this frosting?

    It pairs beautifully with carrot cake, red velvet, chocolate cake, and banana bread.

    Cream Cheese Frosting Recipe

    Recipe by Milli RoseCourse: DessertCuisine: InternationalDifficulty: Easy
    Servings

    12

    servings
    Prep time

    10

    minutes
    Cooking timeminutes
    Total time

    10

    minutes
    Calories

    220

    kcal

    Smooth, creamy and lightly tangy cream cheese frosting perfect for cakes, cupcakes and tray bakes.

    Ingredients

    • 200g full-fat cream cheese, softened

    • 100g unsalted butter, softened

    • 400g icing sugar, sifted

    • 1 tsp vanilla extract

    • Pinch of salt (optional)

    Directions

    • Beat softened butter until pale and creamy.
    • Add cream cheese and mix gently until combined.
    • Gradually mix in sifted icing sugar.
    • Stir in vanilla extract and salt.
    • Beat briefly until smooth and ready to use.

    Notes

    • Do not overmix as it can loosen the frosting.
    • Chill slightly before piping for best results.
    • Always use full-fat cream cheese for stability.
  • 7 James Martin Lemon Desserts Recipes

    7 James Martin Lemon Desserts Recipes

    Lemon desserts have a way of bringing brightness and balance to any table. The sharp, zesty flavour cuts through sweetness beautifully, making each bite feel fresh and satisfying. Inspired by the elegant yet approachable style of James Martin, these seven lemon dessert recipes are perfect for home bakers who want reliable, crowd-pleasing results.

    Each recipe below includes clear ingredients and simple step-by-step instructions so you can bake with confidence.


    1. Lemon Drizzle Cake

    Ingredients

    • 225g unsalted butter, softened
    • 225g caster sugar
    • 4 eggs
    • 225g self-raising flour
    • Zest of 2 lemons

    For the drizzle:

    • Juice of 2 lemons
    • 150g caster sugar

    Method

    1. Preheat the oven to 180°C and line a loaf tin.
    2. Cream the butter and sugar until light and fluffy.
    3. Beat in the eggs one at a time.
    4. Fold in the flour and lemon zest.
    5. Pour into the tin and bake for 45–50 minutes.
    6. Mix lemon juice and sugar, then pour over the warm cake.
    7. Allow to cool completely before slicing.

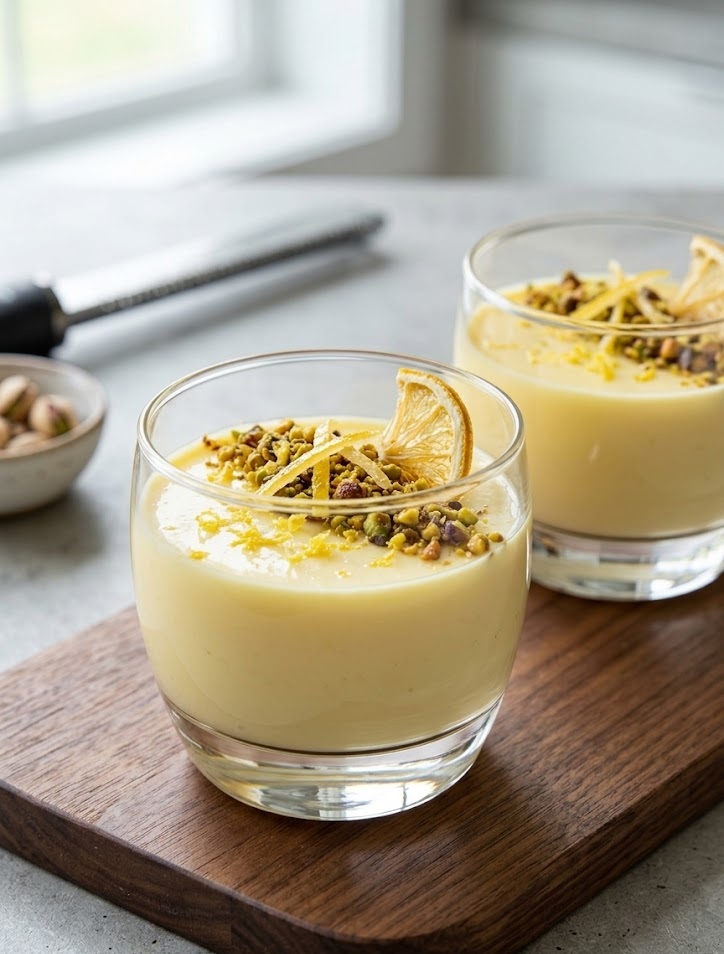
    2. Lemon Posset

    Lemon Posset

    Ingredients

    • 600ml double cream
    • 150g caster sugar
    • Juice of 2 lemons

    Method

    1. Heat the cream and sugar in a saucepan until gently boiling.
    2. Simmer for 3 minutes, stirring.
    3. Remove from heat and stir in lemon juice.
    4. Pour into serving glasses.
    5. Chill for at least 4 hours until set.

    3. Lemon Tart

    Ingredients

    For the pastry:

    • 200g plain flour
    • 100g butter
    • 2 tbsp cold water

    For the filling:

    • 4 eggs
    • 150g caster sugar
    • 150ml double cream
    • Juice and zest of 2 lemons

    Method

    1. Rub butter into flour, add water, and form dough. Chill 30 minutes.
    2. Roll out and line a tart tin. Blind bake for 15 minutes.
    3. Whisk filling ingredients together.
    4. Pour into the case and bake at 160°C for 30–35 minutes.
    5. Cool before serving.

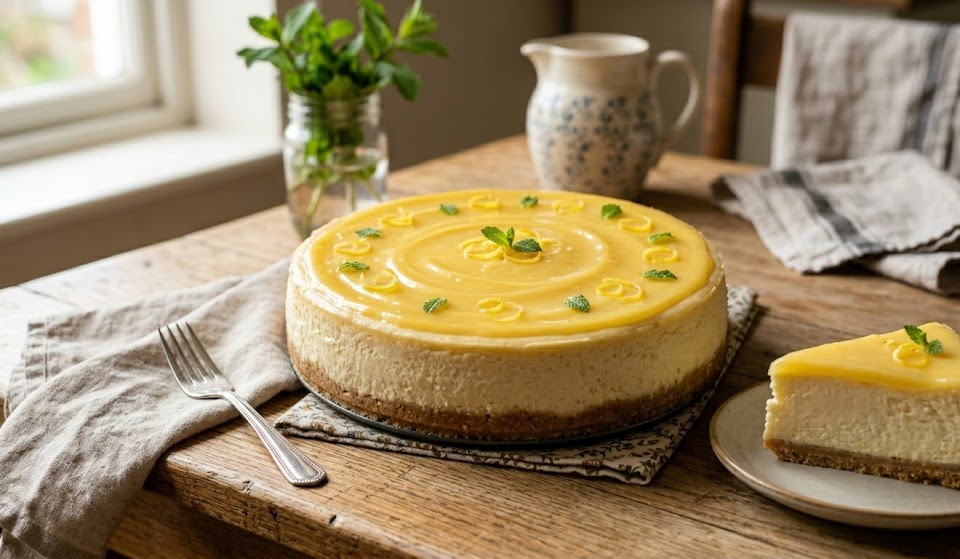
    4. Lemon Cheesecake

    Lemon Cheesecake

    Ingredients

    • 200g digestive biscuits
    • 100g melted butter
    • 400g cream cheese
    • 100g icing sugar
    • Zest and juice of 2 lemons
    • 300ml double cream

    Method

    1. Crush biscuits and mix with melted butter. Press into a tin.
    2. Beat cream cheese, icing sugar, and lemon.
    3. Whip cream and fold into mixture.
    4. Spoon over base and smooth.
    5. Chill for at least 6 hours before serving.

    5. Lemon Soufflé

    Ingredients

    • 3 eggs, separated
    • 75g caster sugar
    • Zest and juice of 1 lemon
    • 25g flour
    • 150ml milk

    Method

    1. Preheat oven to 190°C and grease ramekins.
    2. Heat milk with lemon zest.
    3. Mix egg yolks, sugar, and flour, then add milk.
    4. Cook until thickened, then cool slightly.
    5. Whisk egg whites to stiff peaks and fold in.
    6. Spoon into ramekins and bake 12–15 minutes.
    7. Serve immediately.

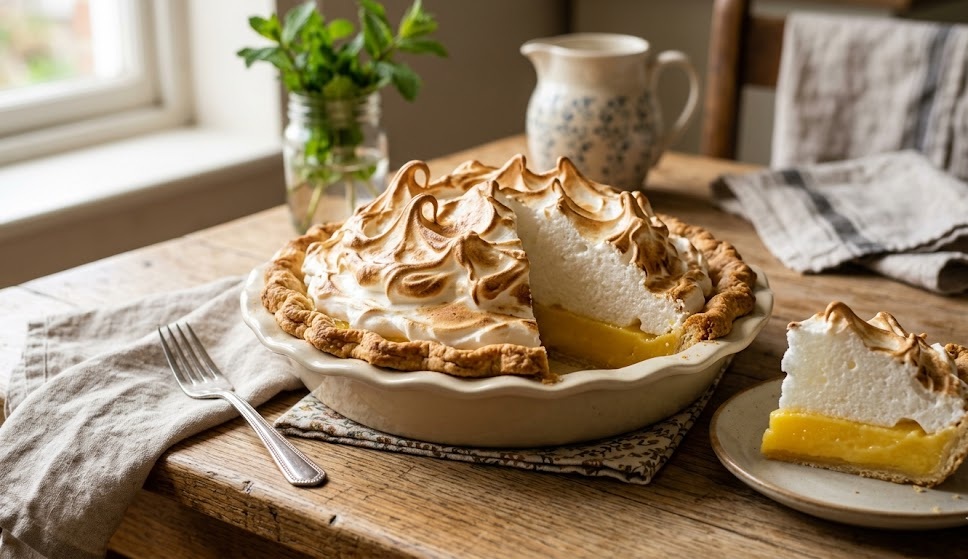
    6. Lemon Meringue Pie

    Lemon Meringue Pie

    Ingredients

    Base:

    • 200g digestive biscuits
    • 100g butter

    Filling:

    • 3 egg yolks
    • 100g sugar
    • Juice and zest of 2 lemons
    • 50g butter

    Meringue:

    • 3 egg whites
    • 150g sugar

    Method

    1. Mix crushed biscuits with butter and press into a tin. Chill.
    2. Cook yolks, sugar, lemon, and butter until thick. Cool slightly.
    3. Pour onto base.
    4. Whisk egg whites, add sugar, and beat until glossy.
    5. Spread over filling and bake at 180°C for 15 minutes.

    7. Lemon Sponge Pudding

    Ingredients

    • 100g butter
    • 100g sugar
    • 2 eggs
    • 100g self-raising flour
    • Zest of 1 lemon
    • 2 tbsp lemon curd

    Method

    1. Preheat oven to 180°C. Grease a pudding dish.
    2. Cream butter and sugar together.
    3. Add eggs and mix well.
    4. Fold in flour and lemon zest.
    5. Spoon lemon curd into the base of the dish.
    6. Add sponge mixture on top.
    7. Bake for 30–35 minutes until golden.

    Final Thoughts

    These seven lemon desserts showcase just how versatile this citrus fruit can be. From light and creamy possets to comforting sponge puddings, each recipe offers a different texture and flavour experience while staying true to the simple, reliable cooking style that makes James Martin’s recipes so popular. If you want, I can also turn this into a fully formatted blog post with meta description, FAQs, an

  • 6 James Martin Muffins Recipes

    6 James Martin Muffins Recipes

    If you love soft, fluffy muffins with rich flavour and simple ingredients, these recipes inspired by James Martin are perfect for your kitchen. Known for his classic British approach and indulgent bakes, these muffins are easy to follow and deliver consistently delicious results.

    Below, you’ll find six SEO-optimized muffin recipes with clear ingredients and step-by-step methods you can trust.


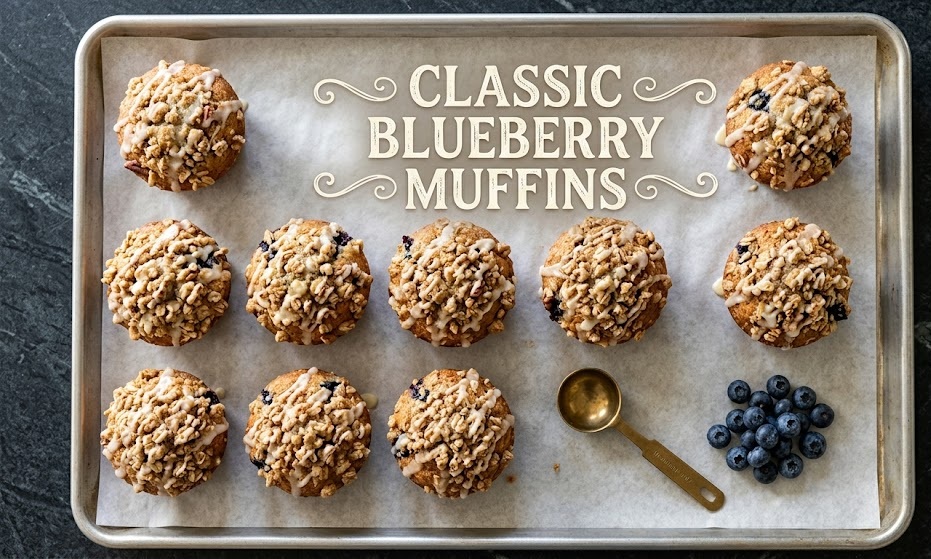
    1. Classic Blueberry Muffins

    Classic Blueberry Muffins

    Ingredients

    • 250g plain flour
    • 2 tsp baking powder
    • 125g caster sugar
    • 2 eggs
    • 100ml milk
    • 100g melted butter
    • 150g fresh blueberries
    • 1 tsp vanilla extract

    Method

    1. Preheat your oven to 180°C (160°C fan) and line a muffin tin.
    2. In a bowl, mix flour, baking powder, and sugar.
    3. In another bowl, whisk eggs, milk, melted butter, and vanilla.
    4. Combine wet and dry ingredients gently.
    5. Fold in blueberries carefully.
    6. Spoon into cases and bake for 20–25 minutes until golden.

    2. Chocolate Chip Muffins

    Ingredients

    • 225g self-raising flour
    • 100g caster sugar
    • 2 eggs
    • 150ml milk
    • 75g melted butter
    • 150g chocolate chips
    • 1 tsp vanilla extract

    Method

    1. Preheat oven to 180°C and prepare muffin cases.
    2. Mix flour and sugar in a bowl.
    3. Whisk eggs, milk, butter, and vanilla separately.
    4. Combine mixtures without overmixing.
    5. Fold in chocolate chips.
    6. Bake for 18–22 minutes until risen and firm.

    3. Lemon Drizzle Muffins

    Ingredients

    • 250g self-raising flour
    • 150g caster sugar
    • 2 eggs
    • 125g butter (melted)
    • 100ml milk
    • Zest of 2 lemons
    • Juice of 1 lemon

    For drizzle:

    • Juice of 1 lemon
    • 50g icing sugar

    Method

    1. Preheat oven to 180°C and line tin.
    2. Mix flour and sugar together.
    3. Combine eggs, butter, milk, lemon zest, and juice.
    4. Fold wet into dry ingredients.
    5. Bake for 20 minutes.
    6. Mix drizzle and pour over warm muffins.

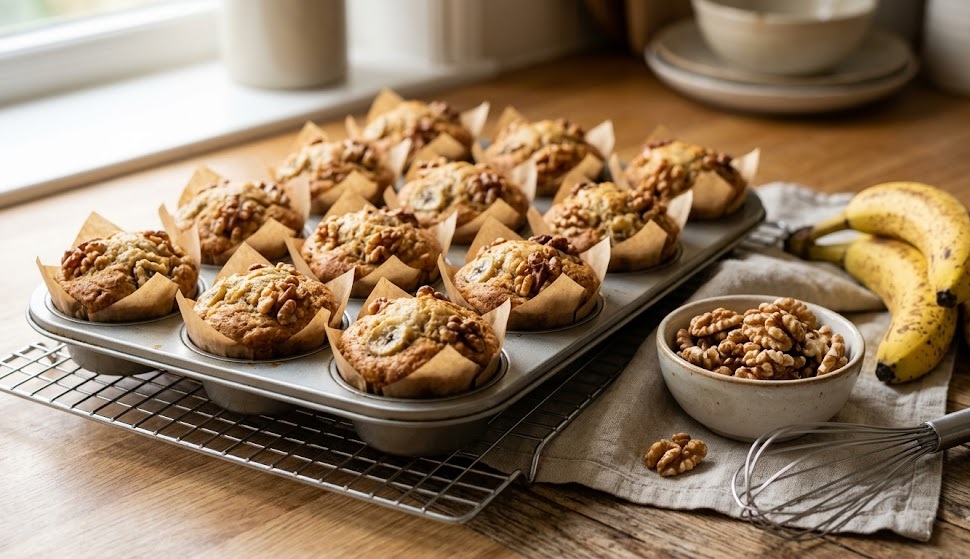
    4. Banana and Walnut Muffins

    Banana and Walnut Muffins

    Ingredients

    • 3 ripe bananas (mashed)
    • 250g plain flour
    • 1 tsp baking powder
    • 125g brown sugar
    • 2 eggs
    • 100g butter (melted)
    • 75g chopped walnuts

    Method

    1. Preheat oven to 180°C.
    2. Mix flour, baking powder, and sugar.
    3. In another bowl, mix bananas, eggs, and butter.
    4. Combine both mixtures.
    5. Fold in walnuts.
    6. Bake for 22–25 minutes until golden.

    5. Apple Cinnamon Muffins

    Ingredients

    • 250g self-raising flour
    • 150g caster sugar
    • 2 apples (peeled and diced)
    • 2 eggs
    • 100ml milk
    • 100g melted butter
    • 1 tsp ground cinnamon

    Method

    1. Preheat oven to 180°C.
    2. Mix flour, sugar, and cinnamon.
    3. Whisk eggs, milk, and butter together.
    4. Combine mixtures gently.
    5. Fold in diced apples.
    6. Bake for 20–25 minutes until risen and golden.

    6. Raspberry and White Chocolate Muffins

    Ingredients

    • 225g self-raising flour
    • 125g caster sugar
    • 2 eggs
    • 150ml milk
    • 75g melted butter
    • 100g white chocolate chunks
    • 125g fresh raspberries

    Method

    1. Preheat oven to 180°C and prepare cases.
    2. Mix flour and sugar in a bowl.
    3. Combine eggs, milk, and butter.
    4. Fold wet ingredients into dry.
    5. Add chocolate and raspberries gently.
    6. Bake for 20 minutes until lightly golden.

    Final Tips for Perfect Muffins

    • Do not overmix the batter; keep it slightly lumpy.
    • Always preheat the oven for even baking.
    • Use fresh ingredients for the best flavour.
    • Let muffins cool slightly before serving for perfect texture.
  • 12 James Martin Fish & Seafood Recipes You’ll Love

    12 James Martin Fish & Seafood Recipes You’ll Love

    If you’re looking for elegant yet approachable seafood dishes, recipes inspired by James Martin are a brilliant place to start. Known for his bold flavours, classic techniques, and no-fuss approach, James Martin brings out the very best in fish and seafood.

    In this guide, you’ll discover 12 delicious fish and seafood recipes, all inspired by his signature cooking style. Whether you’re planning a quick midweek dinner or an impressive weekend feast, there’s something here for everyone.


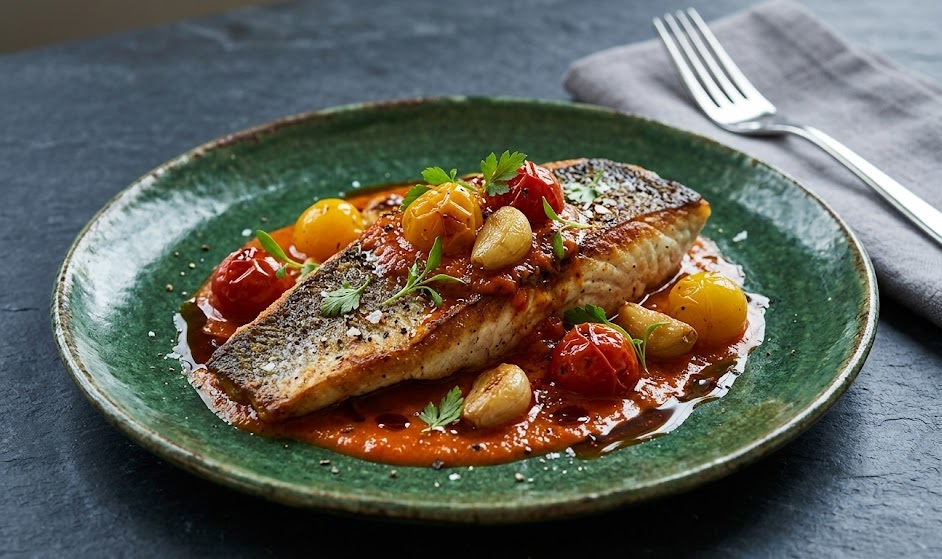
    1. Pan-Fried Sea Bass with Lemon Butter

    Pan-Fried Sea Bass with Lemon Butter

    A classic dish that showcases crispy skin and delicate flesh. The lemon butter sauce adds richness while keeping the dish fresh and light.

    Why you’ll love it:

    • Quick and easy to prepare
    • Perfect balance of crisp and tender
    • Restaurant-quality results at home

    2. Salmon with Dill Sauce

    This comforting salmon dish pairs perfectly with a creamy dill sauce that enhances the natural flavour of the fish.

    Top tip: Use fresh dill for the best aroma and taste.


    3. Classic Fish Pie

    A hearty British favourite featuring chunks of fish in a creamy sauce, topped with fluffy mashed potatoes.

    Perfect for: Family dinners and batch cooking.


    4.

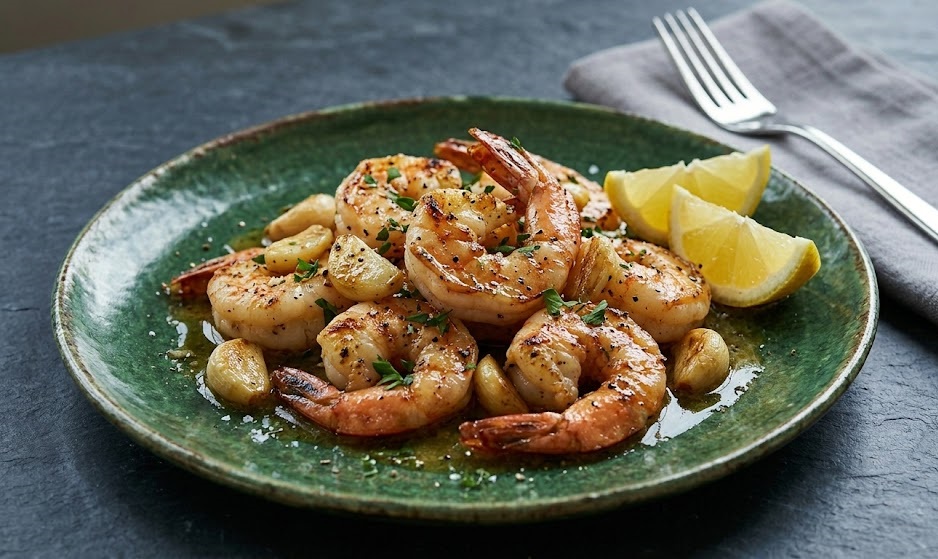
    Garlic Butter Prawns

    Juicy prawns cooked in garlic butter make for a simple yet luxurious dish.

    Serve with: Crusty bread to soak up the sauce.


    5. Grilled Tuna Steak with Salsa Verde

    This vibrant recipe features perfectly grilled tuna paired with a zesty herb sauce.

    Cooking tip: Keep tuna slightly rare for the best texture.


    6. Cod with Chorizo and Butter Beans

    A Spanish-inspired dish combining flaky cod with smoky chorizo and creamy beans.

    Why it works: The richness of chorizo complements the mild cod beautifully.


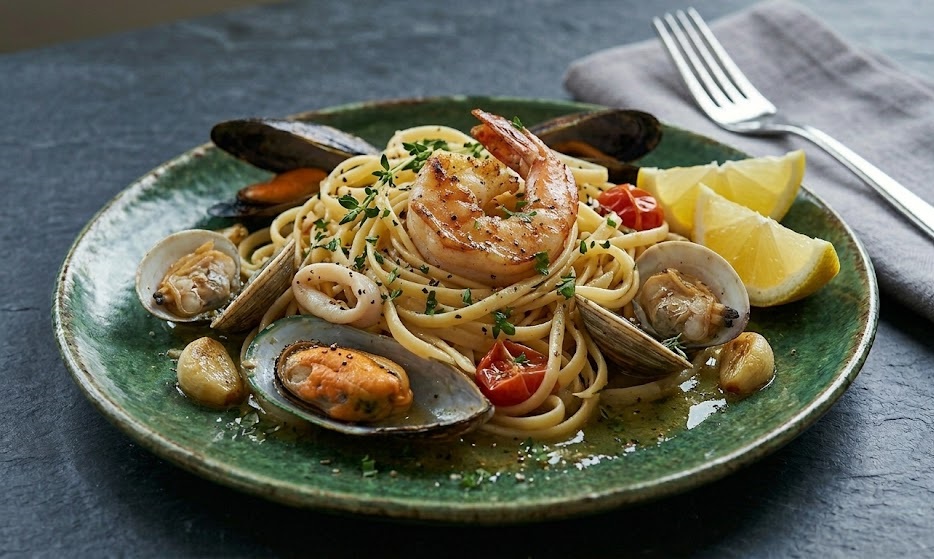
    7. Seafood Linguine

    Seafood Linguine

    Packed with prawns, mussels, and squid, this pasta dish is bursting with flavour.

    Best for: Date nights or special occasions.


    8. Baked Haddock with Parmesan Crust

    A simple oven-baked dish with a crispy, cheesy topping.

    Pro tip: Add a squeeze of lemon before serving for freshness.


    9. Crab Cakes with Lemon Aioli

    Crispy on the outside and tender inside, these crab cakes are packed with flavour.

    Serving idea: Pair with a light salad for balance.


    10. Moules Marinière

    A French classic featuring mussels cooked in white wine, garlic, and herbs.

    Quick fact: Ready in under 20 minutes.


    11. Smoked Mackerel Pâté

    A rich and smoky spread that’s perfect as a starter or snack.

    Serve with: Toasted bread or crackers.


    12. Fish and Chips with Tartare Sauce

    No seafood list is complete without this iconic British dish.

    Chef’s secret: Use cold batter for extra crispiness.


    Final Thoughts

    These 12 fish and seafood recipes inspired by James Martin showcase how versatile and exciting seafood can be. From quick skillet dishes to comforting classics, each recipe highlights simple ingredients cooked to perfection.

  • 5 James Martin Sauces Recipes You’ll Use Again and Again

    5 James Martin Sauces Recipes You’ll Use Again and Again

    When it comes to reliable, flavour-packed cooking, James Martin never disappoints. His sauces are especially worth mastering because they turn simple ingredients into restaurant-quality dishes with very little fuss.

    In this guide, you’ll find five of his most popular sauce recipes, written in a clear, practical style so you can recreate them confidently at home. Each one is rich, balanced, and versatile enough to elevate everything from meat and fish to vegetables and pasta.

    1. Creamy Peppercorn Sauce

    Creamy Peppercorn Sauce

    A classic steakhouse favourite, this sauce is rich, peppery, and beautifully smooth.

    Ingredients

    • 1 tbsp butter
    • 1 shallot, finely chopped
    • 2 tsp crushed black peppercorns
    • 50ml brandy
    • 150ml beef stock
    • 100ml double cream
    • Salt to taste

    Method

    1. Melt the butter in a pan over medium heat and gently cook the shallots until soft.
    2. Stir in the crushed peppercorns and cook for 1 minute.
    3. Carefully add the brandy and let it bubble until reduced by half.
    4. Pour in the beef stock and simmer for 3–4 minutes.
    5. Stir in the cream and cook until thickened.
    6. Season to taste and serve over steak or grilled chicken.

    Best with: Ribeye steak, grilled lamb, or mushrooms.


    2. Classic Red Wine Reduction

    This elegant sauce is perfect for dinner parties and pairs beautifully with red meats.

    Ingredients

    • 1 tbsp olive oil
    • 1 shallot, finely chopped
    • 200ml red wine
    • 200ml beef stock
    • 1 tsp fresh thyme
    • 1 tbsp butter

    Method

    1. Heat olive oil and cook the shallots until soft.
    2. Add red wine and simmer until reduced by half.
    3. Pour in the beef stock and thyme, then reduce again until slightly thickened.
    4. Remove from heat and whisk in the butter for a glossy finish.

    Best with: Roast beef, duck, or venison.


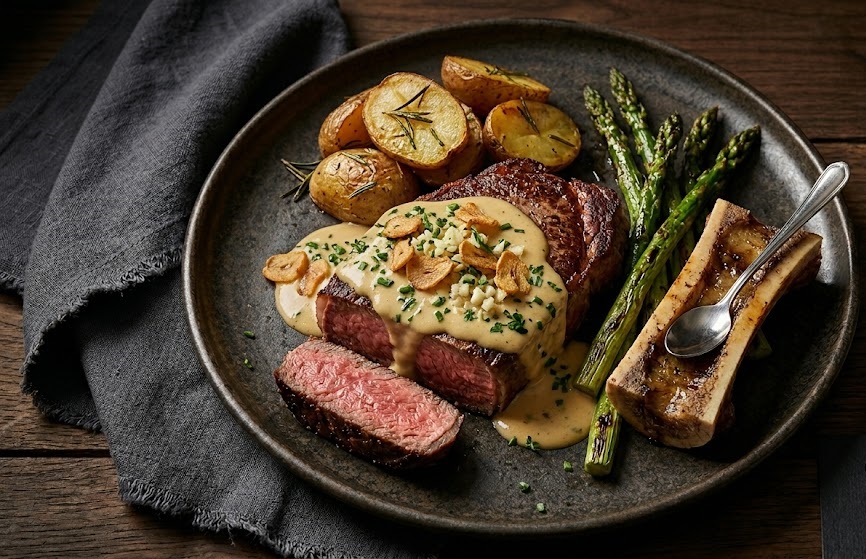
    3. Creamy Garlic Sauce

    Simple but incredibly satisfying, this sauce works with almost anything.

    Ingredients

    • 2 tbsp butter
    • 3 garlic cloves, crushed
    • 200ml double cream
    • 50ml chicken stock
    • Salt and pepper

    Method

    1. Melt butter and gently cook the garlic until fragrant.
    2. Add chicken stock and simmer briefly.
    3. Pour in the cream and cook until thick and silky.
    4. Season well and serve immediately.

    Best with: Chicken, pasta, or roasted vegetables.


    4. Lemon Butter Sauce

    Light, fresh, and zesty, this sauce is ideal for fish dishes.

    Ingredients

    • 100g butter
    • Juice of 1 lemon
    • 1 tbsp chopped parsley
    • Salt and pepper

    Method

    1. Melt butter gently in a pan without browning it.
    2. Stir in the lemon juice and mix well.
    3. Add parsley and seasoning.
    4. Serve warm over fish or seafood.

    Best with: Salmon, cod, prawns, or asparagus.


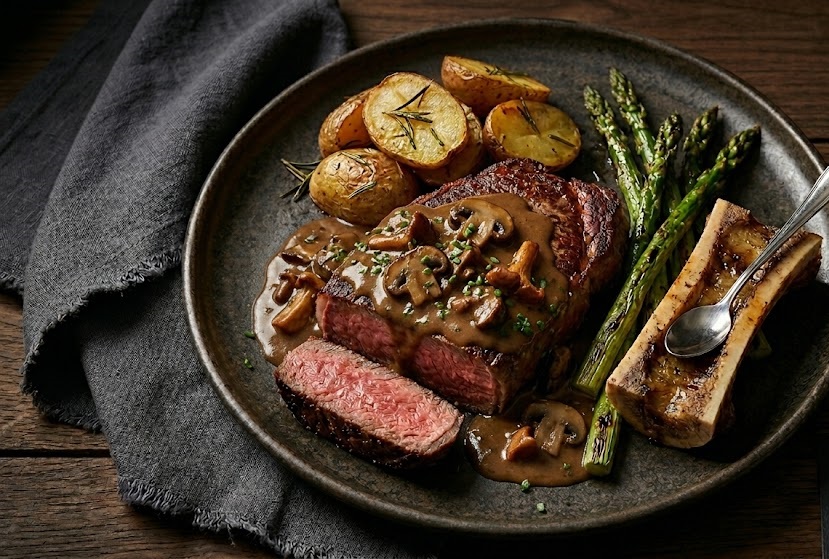
    5. Mushroom Sauce

    Mushroom Sauce

    A rich and earthy sauce that adds depth to any dish.

    Ingredients

    • 1 tbsp butter
    • 200g mushrooms, sliced
    • 1 garlic clove, crushed
    • 100ml white wine
    • 150ml cream
    • Salt and pepper

    Method

    1. Melt butter and cook mushrooms until golden.
    2. Add garlic and cook briefly.
    3. Pour in white wine and reduce by half.
    4. Stir in cream and simmer until thickened.
    5. Season and serve hot.

    Best with: Chicken, steak, or pasta.


    Tips for Perfect Sauces Every Time

    • Use good-quality stock for deeper flavour
    • Don’t rush reductions — this is where flavour develops
    • Finish with butter for a glossy, restaurant-style texture
    • Season gradually to avoid overpowering the dish

    Final Thoughts

    Mastering these five sauces from James Martin will instantly upgrade your cooking. They’re simple enough for everyday meals yet impressive enough for special occasions. Once you’ve tried them, you’ll find yourself coming back to them again and again.

  • James Martin Fudge Cake

    James Martin Fudge Cake

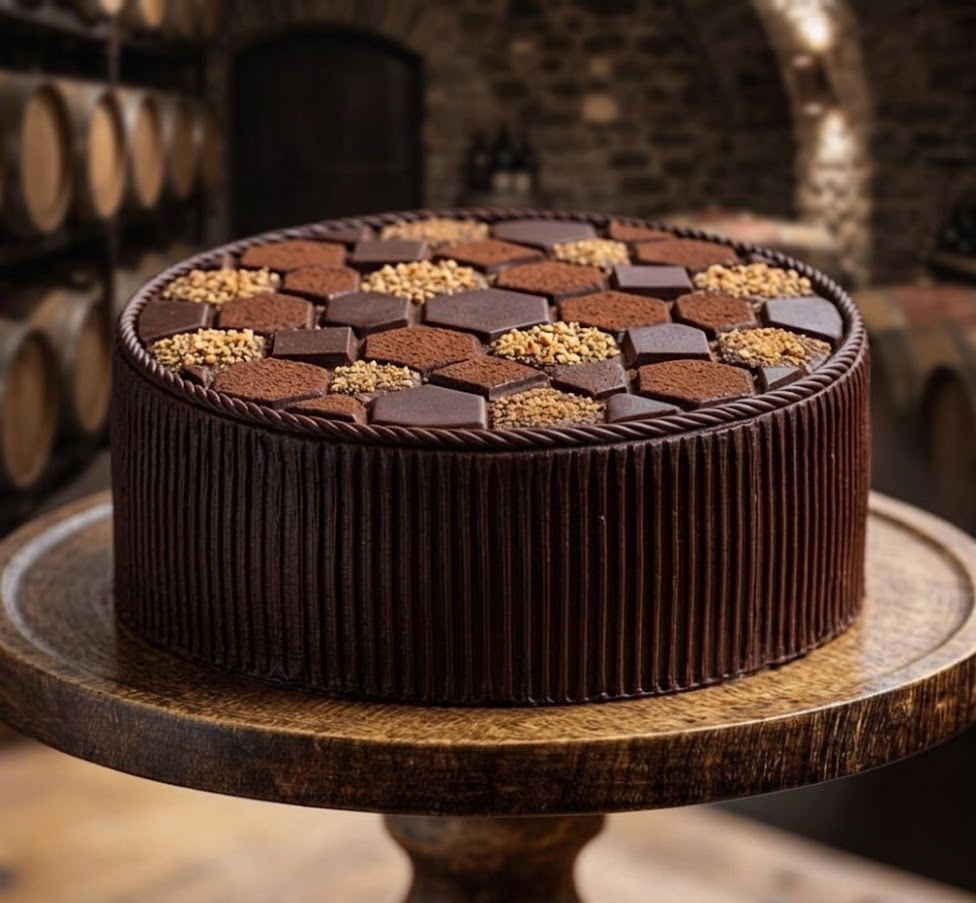
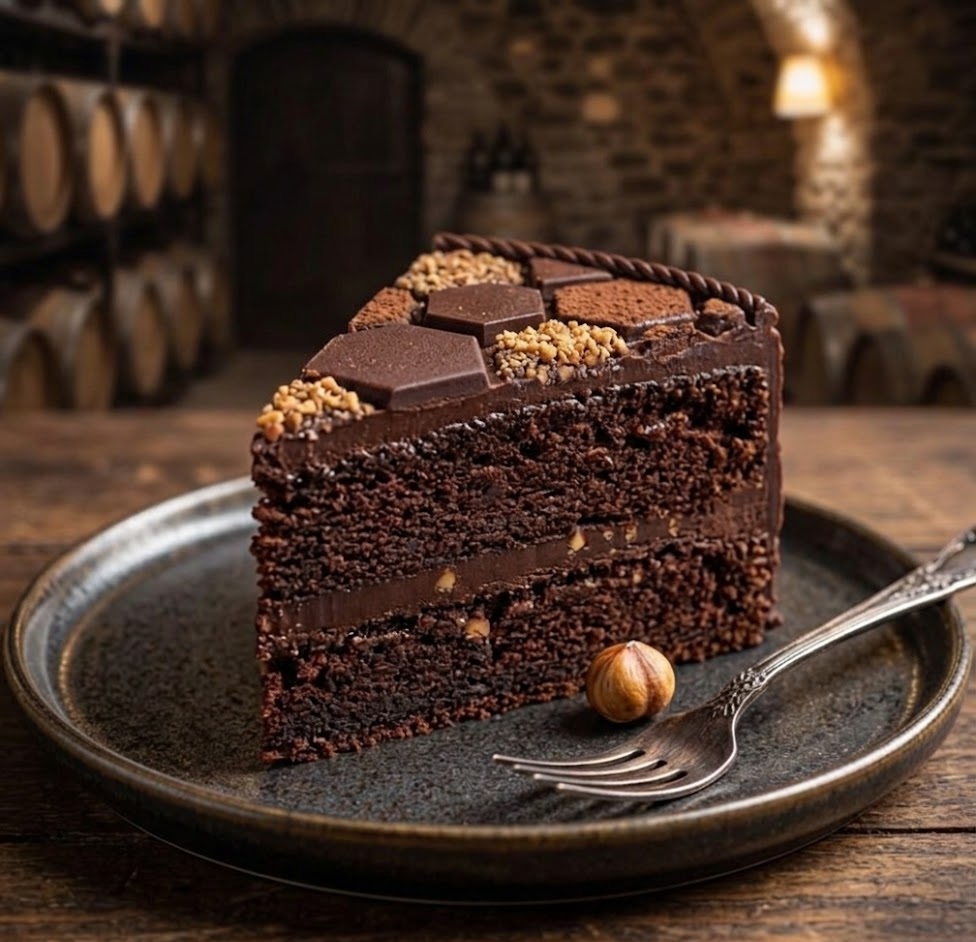
    This rich and indulgent fudge cake inspired by James Martin is everything a chocolate lover could wish for. It has a deep cocoa flavour, a soft, moist crumb, and a silky smooth fudge frosting that melts in the mouth. Despite its impressive finish, it is straightforward to make and suitable for confident beginners. From start to finish, it takes around 1 hour and 30 minutes, making it perfect for special occasions or a weekend bake.

    Ingredients

    For the Cake

    • 200g plain flour
    • 50g cocoa powder
    • 2 tsp baking powder
    • 1 tsp bicarbonate of soda
    • 250g caster sugar
    • 3 large eggs
    • 200ml whole milk
    • 150ml vegetable oil
    • 1 tsp vanilla extract
    • 150ml boiling water

    For the Fudge Frosting

    • 200g dark chocolate, chopped
    • 150ml double cream
    • 50g butter

    For Preparation

    • Butter for greasing
    • Baking parchment

    How to Make James Martin Fudge Cake

    • Prepare the oven: Preheat the oven to 180°C or 160°C fan. Grease and line two 20cm round cake tins and place a shelf in the centre of the oven.
    • Mix the dry ingredients: Sift the flour, cocoa powder, baking powder and bicarbonate of soda into a large bowl.
    • Combine the batter: Add the sugar, eggs, milk, oil and vanilla extract. Whisk until smooth and lump free.
    • Add hot water: Carefully pour in the boiling water and mix gently. The batter will be quite thin.
    • Bake the cakes: Divide the mixture evenly between the tins. Bake for 25 to 30 minutes until the cakes are risen and a skewer comes out clean.
    • Cool completely: Leave the cakes to cool in the tins for 10 minutes, then turn out onto a wire rack.
    • Make the frosting: Heat the cream and butter until just warm, then pour over the chopped chocolate. Stir until smooth and glossy.
    • Assemble the cake: Spread frosting between the layers and over the top. Allow it to set slightly before slicing.
    How to Make James Martin Fudge Cake

    Tips

    Why is my cake dry?

    This usually means it has been overbaked. Check a few minutes early and remove once a skewer comes out clean.

    How do I get a deeper chocolate flavour?

    Use high quality cocoa powder and dark chocolate with at least 60 percent cocoa solids.

    Why is my frosting too runny?

    Let it cool for a little longer. It thickens naturally as it sets.

    Can I make it extra moist?

    Adding a tablespoon of sour cream or yoghurt to the batter can enhance moisture.

    Serving Suggestions

    • Serve with a scoop of vanilla ice cream
    • Pair with fresh berries for balance
    • Enjoy with a cup of tea or coffee
    • Dust lightly with icing sugar for a simple finish

    Storage

    Room Temperature

    Store in an airtight container for up to 2 days in a cool place.

    Refrigerator

    Keeps well for up to 5 days. Bring to room temperature before serving for best texture.

    Freezing

    Freeze unfrosted sponge layers for up to 3 months. Wrap well and thaw before assembling.

    Nutrition

    • Calories: 450 kcal
    • Carbohydrates: 55g
    • Protein: 6g
    • Fat: 24g
    • Saturated Fat: 10g
    • Sodium: 280mg

    These values are approximate and may vary depending on ingredients used.

    FAQs

    Can I make this cake ahead of time?

    Yes, the sponge can be baked a day in advance and stored well wrapped before frosting.

    Can I use milk chocolate instead of dark chocolate?

    You can, but the frosting will be sweeter and less rich in flavour.

    Can I bake this in one tin?

    Yes, but increase the baking time and ensure the centre is fully cooked before removing.

    How do I know when the cake is done?

    Insert a skewer into the centre. If it comes out clean, the cake is ready.

    James Martin Fudge Cake

    Recipe by Milli RoseCourse: DessertCuisine: BritishDifficulty: Easy
    Servings

    10

    slices
    Prep time

    20

    minutes
    Cooking time

    30

    minutes
    Total time

    90

    minutes
    Calories

    450

    kcal

    50

    minutes

    A rich and moist chocolate fudge cake with a deep cocoa flavour and smooth, indulgent frosting. Perfect for celebrations or an everyday chocolate treat.

    Ingredients

    • 200g plain flour

    • 50g cocoa powder

    • 2 tsp baking powder

    • 1 tsp bicarbonate of soda

    • 250g caster sugar

    • 3 large eggs

    • 200ml whole milk

    • 150ml vegetable oil

    • 1 tsp vanilla extract

    • 150ml boiling water

    • 200g dark chocolate

    • 150ml double cream

    • 50g butter

    • Butter and parchment for tins

    Directions

    • Preheat oven to 180°C (160°C Fan). Grease and line two 20cm round cake tins.
    • Sift flour, cocoa powder, baking powder and bicarbonate of soda into a large bowl.
    • Add sugar, eggs, milk, oil and vanilla extract, then whisk until smooth.
    • Carefully mix in boiling water to loosen the batter.
    • Divide between tins and bake for 25–30 minutes until risen and set.
    • Cool in tins briefly, then transfer to a wire rack to cool completely.
    • Heat cream and butter, then pour over chopped chocolate and stir until smooth.
    • Spread frosting between layers and over the top of the cake.

    Notes

    • Use good quality cocoa powder for a richer flavour.
    • Do not overbake to keep the sponge moist.
    • The frosting will thicken as it cools, making it easier to spread.
  • James Martin Chocolate Brownies

    James Martin Chocolate Brownies

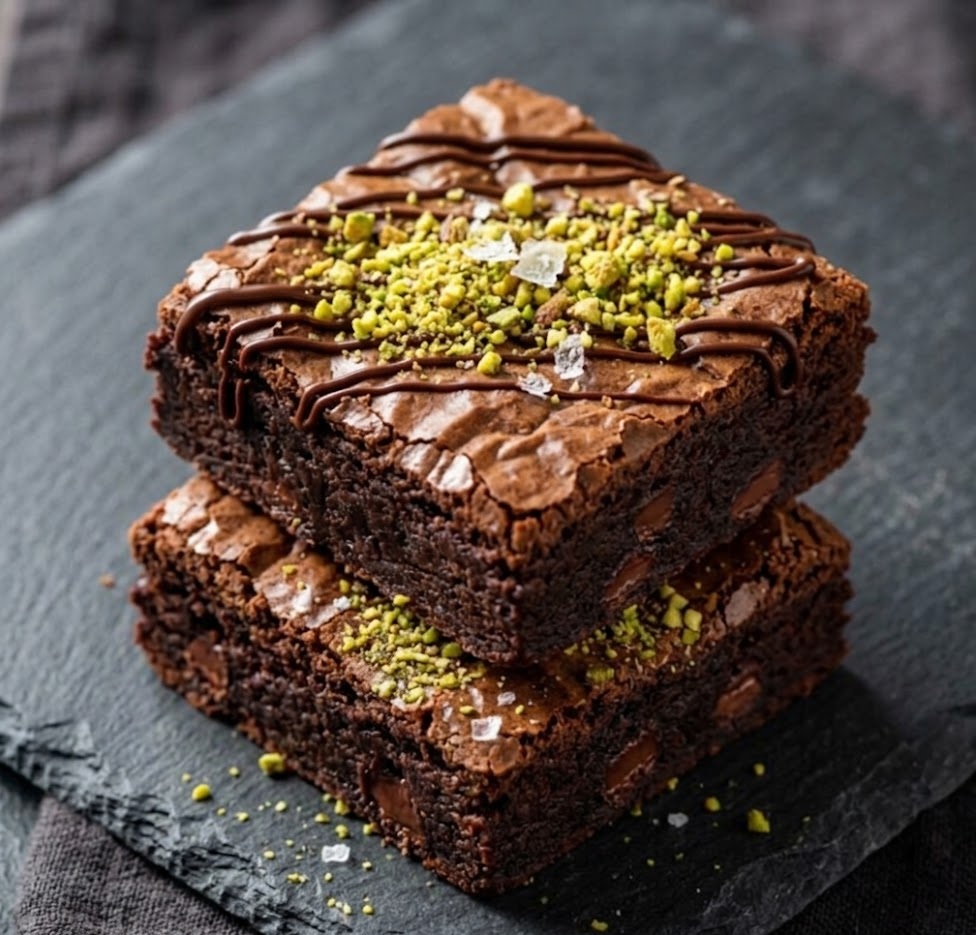
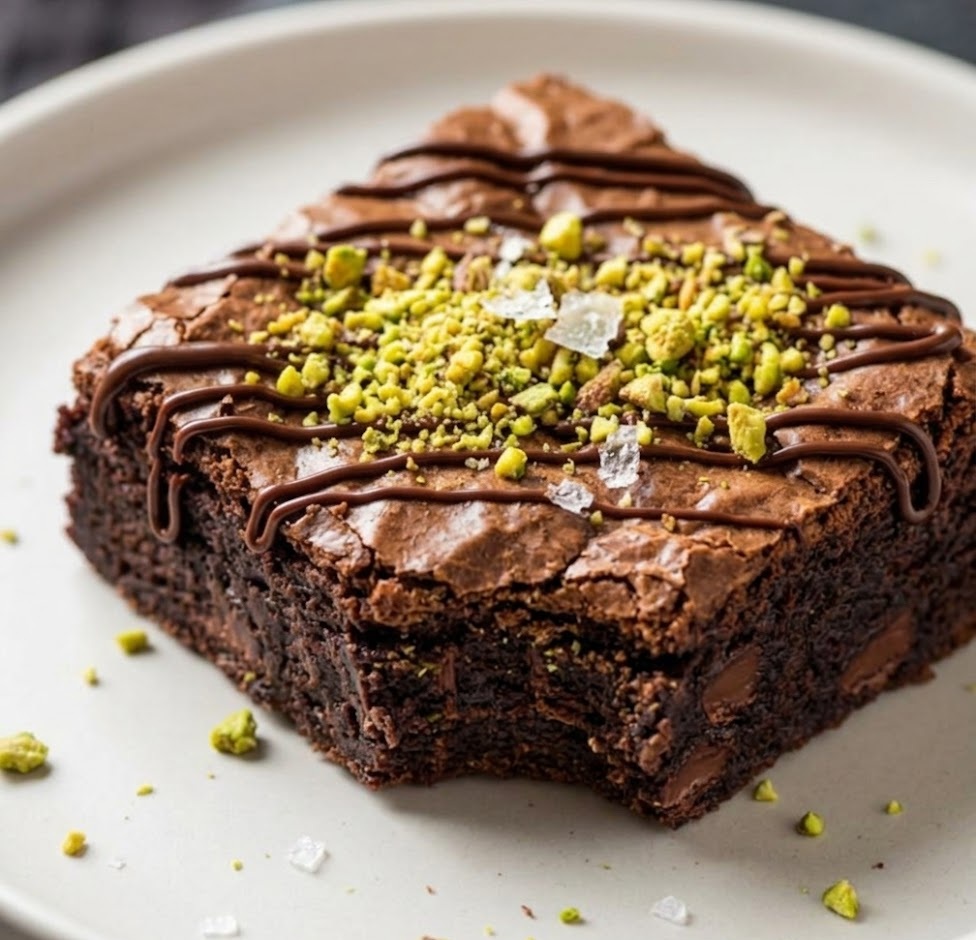
    These James Martin Chocolate Brownies are rich, indulgent, and beautifully fudgy in the centre with a delicate crackly top. They deliver deep chocolate flavour with just the right balance of sweetness and texture. This is a straightforward bake, perfect for both beginners and confident home bakers. From start to finish, you can have these brownies ready in under an hour.

    Ingredients

    For the Brownie Batter

    • 200g dark chocolate (70% cocoa), broken into pieces
    • 200g unsalted butter
    • 250g caster sugar
    • 3 large eggs
    • 1 tsp vanilla extract
    • 125g plain flour
    • 30g cocoa powder
    • ½ tsp salt
    • 100g chocolate chips or chunks (optional)

    For the Tin

    • Butter, for greasing
    • Baking parchment

    How to Make James Martin Chocolate Brownies

    • Prepare the oven: Preheat the oven to 180°C or 160°C fan. Grease and line a 20cm square baking tin with parchment, leaving an overhang for easy removal.
    • Melt the chocolate and butter: Place the dark chocolate and butter in a heatproof bowl over a pan of gently simmering water. Stir until smooth and melted, then remove from the heat and allow to cool slightly.
    • Mix the wet ingredients: In a large bowl, whisk the sugar and eggs together until pale and slightly thickened. Stir in the vanilla extract.
    • Combine mixtures: Pour the melted chocolate mixture into the egg mixture and fold together gently until smooth and glossy.
    • Add the dry ingredients: Sift in the flour, cocoa powder, and salt. Fold carefully until just combined, then stir in the chocolate chips if using.
    • Bake the brownies: Pour the mixture into the prepared tin and level the top. Bake for 25–30 minutes until the top is set but the centre still has a slight wobble.
    • Cool completely: Leave the brownies to cool in the tin before lifting out and cutting into squares. This helps achieve a fudgy texture.
    How to Make James Martin Chocolate Brownies

    Tips

    How do I get fudgy brownies instead of cakey ones?

    Do not overbake. Remove the brownies when the centre still looks slightly soft. Overbaking leads to a drier, cakier texture.

    Can I use milk chocolate instead of dark chocolate?

    You can, but the brownies will be much sweeter and less intense in flavour. Dark chocolate gives the best balance.

    Why did my brownies sink in the middle?

    This usually happens if they are underbaked or cooled too quickly. Allow them to cool gradually in the tin.

    How do I cut brownies neatly?

    Use a sharp knife and wipe it clean between cuts. Chilling the brownies slightly also helps achieve clean edges.

    Serving Suggestions

    • Serve warm with vanilla ice cream
    • Dust lightly with icing sugar
    • Pair with fresh berries
    • Drizzle with chocolate or caramel sauce

    Storage

    Room Temperature

    Store in an airtight container for up to 3 days. Keep in a cool, dry place.

    Refrigerator

    Refrigerate for up to 1 week. Allow to come to room temperature before serving for best texture.

    Freezing

    Freeze individually wrapped brownies for up to 3 months. Thaw at room temperature when ready to enjoy.

    Nutrition

    • Calories: 320 kcal
    • Carbohydrates: 35g
    • Protein: 4g
    • Fat: 18g
    • Saturated Fat: 10g
    • Sodium: 120mg

    Values are estimates and may vary depending on ingredients used.

    FAQs

    How do I know when brownies are done?

    The top should be set and slightly crackly, while the centre remains soft. A skewer inserted should come out with a few moist crumbs.

    Can I add nuts to this recipe?

    Yes, chopped walnuts or pecans work very well. Stir them into the batter before baking.

    Why are my brownies too dry?

    This is usually due to overbaking. Check them a few minutes before the recommended time.

    Can I double the recipe?

    Yes, simply double the ingredients and bake in a larger tin. Adjust baking time slightly and check for doneness.

    James Martin Chocolate Brownies

    Recipe by Milli RoseCourse: DessertCuisine: BritishDifficulty: Easy
    Servings

    12

    pieces
    Prep time

    15

    minutes
    Cooking time

    30

    minutes
    Total time

    45

    minutes
    Calories

    320

    kcal

    45

    minutes

    Rich and fudgy chocolate brownies with a crackly top and deep chocolate flavour. Easy to make and perfect for any occasion.

    Ingredients

    • 200g dark chocolate

    • 200g unsalted butter

    • 250g caster sugar

    • 3 large eggs

    • 1 tsp vanilla extract

    • 125g plain flour

    • 30g cocoa powder

    • 1/2 tsp salt

    • 100g chocolate chips

    • Baking parchment

    Directions

    • Preheat oven to 180°C (160°C fan) and line a square tin.
    • Melt chocolate and butter together until smooth.
    • Whisk sugar and eggs until pale, then add vanilla.
    • Fold in melted chocolate mixture.
    • Add flour, cocoa and salt, then mix gently.
    • Pour into tin and bake for 25–30 minutes.
    • Cool completely before slicing.

    Notes

    • Do not overbake for a fudgy texture.
    • Cool completely before cutting for neat slices.
    • Store in an airtight container to maintain freshness.

slot depo

sicbo online